TYPO3 CMS Certified Integrator (TCCI)
TYPO3 CMS Certified Integrator exam questions
Select Chapters
Who invented TYPO3?
Answers
-
The TYPO3 Association
-
Robert Lemke
-
Kasper Skårhøj
-
The TYPO3 GmbH
-
The Open Source Business Alliance
Number of correct answers: 1
Explanation
The answer to this question is quite clear for many TYPO3 enthusiasts. However, conversations with people new to the TYPO3 world repeatedly show that this is not the case for everyone. There is a widespread belief that this CMS was invented by the TYPO3 Association, but this is in fact a misconception. The Association was founded in 2004, while the TYPO3 CMS foundation was developed in 1998. Answer 1 can’t be correct.
Robert Lemke was an active member of the TYPO3 community for many years. He was the head of development for Flow and Neos (previously known as TYPO3 Flow and TYPO3 Neos). Robert and his team developed Neos, which was intended to be the successor of TYPO3 but is a discrete product today, independent from TYPO3. He did not develop TYPO3, which makes the second answer also wrong.
The TYPO3 GmbH is a fully-owned service company that takes care of commercial services around the TYPO3 ecosystem. This includes extended support plans, service level agreements, and partnerships with agencies. The company was founded by the TYPO3 Association in 2016 as an executive branch. This makes answer 4 wrong.
The Open Source Business Alliance (in short OSB Alliance) unites several European companies and organizations developing, building, and using open-source software. It is Europe’s biggest network to promote open-source in Germany and Europe. However, the OSB Alliance has nothing to do with TYPO3 and therefore, answer 5 is also wrong.
The correct answer is 3. The Danish developer Kasper Skårhøj realised in 1997 that his clients needed a tool to maintain their website contents. The term “content management system” was still widely unknown back then. In the 90s, websites were predominantly made of static HTML files, images, some JavaScript, etc. The idea of separating content from design was an emerging trend and Kasper started creating such a system. He called his application “TYPO3” and continuously improved it over the following months and years before he launched the first public beta version in August 2000.
The correct answer is 3.
What does the abbreviation ECM stand for?
Answers
-
Extended Content Management
-
Enterprise Content Module
-
European Content Management
-
Enterprise Content Management
-
Edition of Contemporary Management
-
Enhanced Content Management
Number of correct answers: 1
Explanation
We are not going to ask you to know many abbreviations in the TCCI exam. However, some terms are important when you deal with TYPO3 and talk to clients. ECM (sometimes also named EMCS) is definitely one of them.
The abbreviation CMS (content management system) does not require any explanation. If a system such as TYPO3 is especially designed for the use by large companies and organisations, an “E” is added to the term. This letter stands for enterprise and indicates that the system is suitable for use cases with complex requirements.
Wikipedia defines an ECM as follows:
This is based on a definition by the Association for Information and Image Management (AIIM) International from early 2010.
The correct answer is 4.
What are valid spellings of the word “TYPO3”?
Answers
-
“TYPO3”
-
“Typo3”
-
“typo3” (in URLs)
-
“TyPo3”
-
“TYPO 3”
Number of correct answers: 2
Explanation
Communication related to TYPO3 has increased as the CMS has become more successful. The project and product are mentioned in web pages, press releases, articles, blogs, tweets, and more.
In mid-2006, the TYPO3 Design Team decided to create a style guide to define a corporate design for the TYPO3 project. The team specified the possible uses of the logo as well as the fonts, colours, and the spelling of TYPO3. The aim is to preserve a homogeneous appearance in public and to establish TYPO3 as a brand.
The style guide specifies, that TYPO3 must be spelled uppercase without a space before the number. There is only one exception: when using the word “typo3” in an URL, for example typo3.org, only lowercase letters must be used.
To learn more the correct spelling of the word “TYPO3”, and examples on how to spell it correctly and incorrectly, go to https://typo3.org/project/brand/spelling-typo3.
The correct answers are 1 and 3.
Which open-source license is used by TYPO3 CMS?
Answers
-
TYPO3 is open-source software and does not need a license
-
The MIT License
-
The Apache License
-
The GNU General Public License
-
The Creative Commons Attribution-ShareAlike 4.0 International License
Number of correct answers: 1
Explanation
Although the first answer rightly points out that the TYPO3 software is open-source, this does not mean that TYPO3 does not use a license. Licenses are important as they regulate under which circumstances someone may use, modify, and share the software.
The second and third answers are simply wrong. Neither the MIT License nor the Apache License are used in the TYPO3 project.
When you open a file of the TYPO3 package in a text editor and look at the source code you will find the following copyright notice at the top of almost every PHP file:
You also find the file LICENSE.txt in the package when you download the TYPO3 software. This file contains the full copyright and license information of the GNU General Public License Version 2.
Having said that, at the top of this file you also find a note that some icons used in the TYPO3 project are taken from the “Silk” icon set by the creator Mark James. His work is distributed under a Creative Commons Attribution 2.5 License. Nevertheless, TYPO3 CMS uses the GNU General Public License as outlined above. To learn more about TYPO3 licenses, go to https://typo3.org/project/licenses.
The correct answer is 4.
What does the license used by TYPO3 CMS imply?
Answers
-
You are allowed to modify and distribute the TYPO3 logo
-
You are allowed to make copies of the source code
-
You are allowed to sell a modified version of the source code
-
You are allowed to run the software on Linux systems only
-
You are allowed to run, study, share, and modify the software
Number of correct answers: 3
Explanation
We already clarified in another question that TYPO3 CMS uses the GNU General Public License (GPL). The TYPO3 source code is free software and you can redistribute and/or modify it under the terms of the GPL version 2 or later. But what exactly does this imply? Let’s go through each answer in detail.
The beliefs surrounding open-source software can be pretty strange. The truth is that the use of the TYPO3 logo is unambiguously defined by law and the license. The logo is licensed under the Attribution-No Derivative Works 2.5 Generic license of the Creative Commons License. This means that the logo may be distributed but not modified in any way1. This makes the first answer wrong.
Answer 2 claims that you are allowed to make copies of the source code – and this is correct of course. The GPL explicitly encourages users to download, copy, and share the software. It may confuse some but the GPL also allows users to sell the original software as modified versions. Answer 3 is therefore correct. However, you still have to meet all of the requirements of the license. This means that you have to make the modified code available to the public.
TYPO3 runs well on various operating systems, including Linux, Windows, and macOS – and the GPL does not limit you to run the software on specific platforms. Answer 4 is wrong.
Answer 5 claims that you can run, study, share, and modify software that is licensed under GPL – and this is absolutely right. The GNU General Public License, originally written by Richard Stallman, guarantees users the freedom to do so.
The correct answers are 2, 3, and 5.
What are the current products of the TYPO3 project?
Answers
-
The PHP dependency manager “Composer”
-
The content management system “TYPO3”
-
The content application framework “Neos CMS”
-
The web templating engine “Fluid”
-
The deployment tool “Surf”
Number of correct answers: 3
Explanation
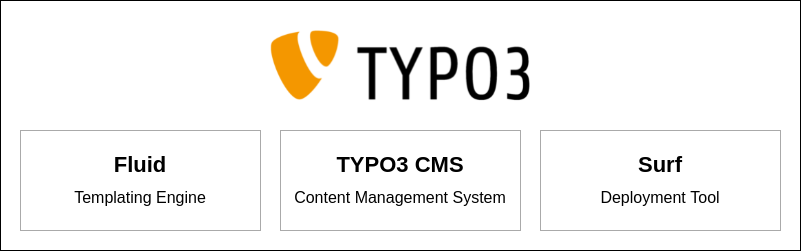
The TYPO3 project currently fosters three software products. They all use the PHP programming language and are licensed under the GNU General Public License. Looking at the five possible answers for this question, you likely picked the most obvious answer without hesitation. The content management system TYPO3 (as suggested in answer 2) is clearly the flagship of the TYPO3 project. However, there are two further products you should know.
The dependency management tool Composer allows you to declare the libraries your project depends on and manages dependencies of packages for you. Although Composer is used by TYPO3, it is not a product by the TYPO3 project. This makes the first answer wrong. Certified TYPO3 integrators are required to know the basics of Composer though. You will encounter a few more Composer-related questions in this study guide.
If you have been in the TYPO3 community long enough, you possibly heard about “Neos CMS”. In 2006, a decision was made to redevelop the content management system TYPO3 from scratch. In the following years, a new framework and CMS was planned and developed. The CMS was named TYPO3 Phoenix and later renamed to TYPO3 Neos. However, the TYPO3 Association announced the split between TYPO3 CMS and TYPO3 Neos in 2015. TYPO3 Neos was renamed to Neos, and since then, the Neos project is not part of the Association and TYPO3 project any more. TYPO3 certification candidates are not tested for any Neos-related knowledge, but if you want to learn more about this application, go to https://www.neos.io. Answer 3 is therefore wrong.
Let’s turn to answer 4. Fluid is a web templating engine and quickly became the de facto standard for TYPO3. It is an essential part of every TYPO3 instance and is indeed a product of the TYPO3 family. Your knowledge of Fluid will definitely be tested in the TCCI exam. I will go into more details about Fluid and provide several example questions in chapter “Templating”.
Have you ever used “Surf” before? Don’t worry if you have not (see the exam tips below). Surf is a complete automated deployment tool that can be used to deploy TYPO3 and other applications. It is in fact a TYPO3 product but we don’t expect TYPO3 integrators to be familiar with this tool. If you’re interested, read the documentation at https://docs.typo3.org/surf/.
The correct answers are 2, 4, and 5.
Which of the following TYPO3 teams exist?
Answers
-
The Documentation Team
-
The Debt Collector Team
-
The Security Team
-
The Server Team
-
The End-user Support Team
Number of correct answers: 3
Explanation
As a TYPO3 integrator, you configure and maintain systems, install and update extensions, possibly train backend users, and you know how to create templates. Why do you need to know which teams exist? Although the official TCCI question pool does not contain any questions that ask candidates about teams and committees directly, it might be useful to know which teams exist. You can possibly draw a conclusion from the information and answer related questions. Let me give you a quick overview.
Teams and committees of the TYPO3 community take care of specific tasks within their area. The Accessibility Team, for example, continuously improves and maintains the accessibility in TYPO3.
The Documentation Team creates and maintains the official documentation for a range of TYPO3 products. This includes manuals, guides, tutorials, and also the comprehensive TYPO3 Core documentation and API reference for developers.
The TYPO3 Security Team takes care of all security-related topics around TYPO3. You will learn more about this team and their activities in the chapter “Security and Privacy”.
The smooth, robust, and stable operation of the server infrastructure is in the responsibility of the Server Team. The infrastructure does not only contain servers, but also a great number of software tools and services.
The Education and Certification Committee is responsible for the TYPO3 education strategy, access to learning materials, and official TYPO3 certifications. Further active teams are the Marketing Team, the Core Development Team, the Design Team, and the Content Group for example.
Go to https://typo3.org/community/teams to learn more about TYPO3 teams and committees.
As TYPO3 is a community-driven open-source project, neither a Debt Collector Team nor an End-user Support Team exist.
The correct answers are 1, 3, and 4.
What is a (strategic) TYPO3 initiative?
Answers
-
If someone takes the initiative to submit a bug report
-
The annual newsletter campaign by the TYPO3 Marketing Team
-
A task force to collect membership fees from TYPO3 Association members
-
A community-driven development outside of the TYPO3 Core roadmap
Number of correct answers: 1
Explanation
Everyone who works with open-source software (and potentially earns money by using it) should contribute and continuously improve the system. Submitting bug reports is one way to do this. But this is not what we call a TYPO3 initiative. So the first answer is wrong.
The TYPO3 Marketing Team does a fantastic job. The members are passionate about spreading the word about TYPO3. They create and publish sales and marketing resources to help other people to understand what TYPO3 is. However, their marketing campaigns have nothing to do with (strategic) TYPO3 initiatives either, which makes answer 2 also wrong.
Answer 3 is made up. Memberships are an important income for the TYPO3 Association but the Association doesn’t have a task force to collect the fees. Even if they would have, this is not a TYPO3 initiative.
In fact, TYPO3 initiatives are a place where new concepts are evaluated, discussed, and developed. Initiatives are independent, community-driven, and they have their own roadmap and timeline. Initiatives aim for a clear, specific, and strategic goal, and once they are finished there is a good chance that they are merged into the TYPO3 Core. Some examples of initiatives that made it into TYPO3 v10 LTS are:
- The Dashboard in the TYPO3 backend.
- The new translation server and the integration with Crowdin.
Previous TYPO3 initiatives are for example:
- The system extensions “SEO” and “Forms” (also known as the Form Framework).
- The GDPR initiative.
The correct answer is 4.
Which statement about the TYPO3 Association is correct?
Answers
-
The TYPO3 Association is a for-profit company that finances the TYPO3 project
-
TYPO3 Association is the name of the company that Kasper Skårhøj founded to support the project
-
The TYPO3 Association is an association registered in Switzerland
-
TYPO3 Association is the name of the association of all TYPO3 user groups in Europe
-
The TYPO3 Association was replaced by the TYPO3 GmbH in 2016
Number of correct answers: 1
Explanation
If you proceed systematically, you can exclude most of the answers fairly quickly. First and most importantly, the TYPO3 Association is a non-profit organization with the following goals:
- Increase number of people involved in TYPO3
- Keep good vibes and values
- Increase market share
- Increase confidence in products
- Provide CMS insights/research
As mentioned before, the TYPO3 Association is not a commercial institution, so the first two answers are wrong. User groups are not directly connected to the TYPO3 Association but are organized independently and on users’ own initiative. This makes answer 4 also wrong.
The TYPO3 GmbH was founded by the TYPO3 Association to take care of commercial services around the TYPO3 ecosystem. It was not founded to replace the Association. Therefore, the last answer is also wrong.
This means that answer 3 is the only correct answer. The TYPO3 Association is in fact an association registered in Switzerland. Those who suspect that this is for tax reasons are wrong (associations do not need to pay taxes if they do not operate commercially). The location seemed appropriate as the approximate geographical center of Europe, and many of the founding members were based in Switzerland anyway. In addition, the members of an association have not any priority voting rights according to Swiss association legislation, which makes organization and management noticeably simpler. By the way, the TYPO3 Association was founded in 2004.
The correct answer is 3.
What are some tasks of the TYPO3 Association?
Answers
-
Organizing TYPO3 community events
-
Financing full-time programmers
-
Specifying the colours used in the TYPO3 logo
-
Collecting membership fees
-
Running security checks against competitive products
Number of correct answers: 3
Explanation
This question follows on from the previous one, so the correct answers are fairly simple to determine in this context. Naturally, this context will not be given in the certification exam, so you should familiarize yourself with the tasks and events of the Association in detail.
All of the answers sound plausible. The TYPO3 Association organizes and manages several events. This includes the T3BOARD, the T3DD (TYPO3 Developer Days) and, of course, T3CON, the main TYPO3 conference. Other events, such as TYPO3 camps, are organized independently of the Association. Therefore, the first answer is undeniably correct.
As to the other answers: the TYPO3 Association does not pay developers on a full-time basis. Instead, the preferred method is to finance projects and code sprints. This means that answer 2 is wrong. The Association is, however, responsible for the TYPO3 brand and public communication, which includes the design and colour of the logo. Like most other associations, the TYPO3 Association collects membership fees. The income from memberships, donations, and events is used to fund the core development, community projects, etc.
Competitive systems exist but we believe in an open collaboration. Running security checks against other products and systems is definitely not a task of the TYPO3 Association, which makes the last answer wrong.
The correct answers are 1, 3, and 4.
What are the requirements for a membership in the TYPO3 Association?
Answers
-
A registered company and tax file number
-
A residency in an European country
-
Payment of a one-off fee (except for the “Community Membership”)
-
Payment of an annual membership fee
-
An invitation by an existing member of the TYPO3 Association
-
Proof that you developed at least one website using TYPO3
Number of correct answers: 2
Explanation
You don’t need a company or tax file number to become a member of the TYPO3 Association. You are also welcome if you’re a freelancer or if you want to support the TYPO3 project with a small financial contribution. It also does not matter where you are located and if you have ever worked with TYPO3 before. Your membership supports the Association in its work to make TYPO3 even better and more successful. This means that you can scratch answer 1, answer 2, and answer 6 off the list. They are all clearly wrong.
Now you are left with three answers and two of them must be correct.
TYPO3 Association memberships are open for everbody. You don’t need an invitation and you can sign-up to become a member on the website.
A range of membership options are available, varying in price and entitlements. In addition to the annual membership fee, there is a one-time registration fee, except for the Community Membership.
The correct answers are 3 and 4.
Which TYPO3 Association memberships exist?
Answers
-
TYPO3 Freelancer membership
-
TYPO3 Community membership
-
TYPO3 Silver membership
-
TYPO3 Premium membership
-
TYPO3 Gold membership
-
TYPO3 Active Contributer membership
Number of correct answers: 3
Explanation
TYPO3 Association members support the development of TYPO3 and participate in shaping the future of the open-source content management system. The TYPO3 Association offers a range of membership options, varying in price and entitlements.
The costs for the Community Membership is under € 10.- per year. This option is predominantly to show your support for TYPO3. Freelancers and agencies should consider one of the standard memberships (see below). For universities, research institutes, and colleges, one of the Academic Memberships are likely a good fit.
The annual membership fee depends on the membership level. At the time of writing, these are € 7.92 for the Community, € 125.- for the Bronze, € 1,000.- for the Silver, € 2,750.- for the Gold, and € 12,500.- for the Platinum membership. In addition there is a one-time registration fee, except for the Community membership.
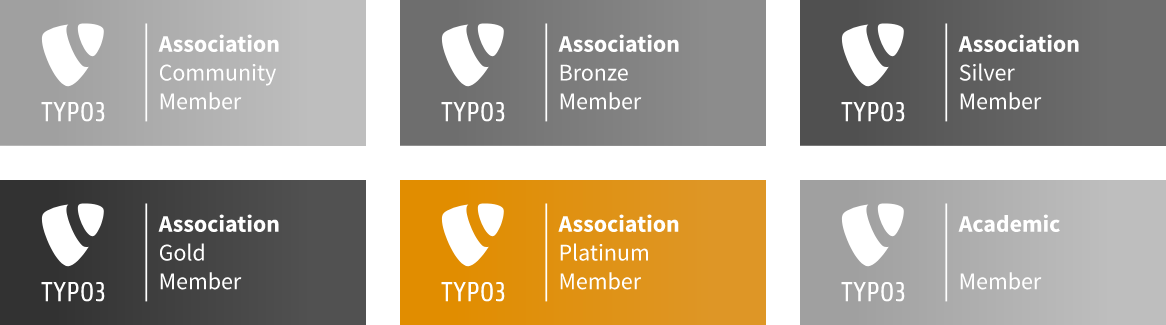
To learn more about the available memberships of TYPO3 Association, have a look at https://typo3.org/project/association/membership/.
The correct answers are 2, 3, and 5.
What is a TYPO3 user group?
Answers
-
A group of TYPO3 Association members who are working on a task
-
A commercial support network organized by TYPO3 agencies
-
A casual meeting (physical or virtual) of TYPO3 enthusiasts
-
A chat channel
Number of correct answers: 1
Explanation
Let’s keep the explanation short. TYPO3 user groups are casual, usually regular, meetings of TYPO3 enthusiasts. These meetings don’t follow a specific agenda necessarily and are organized by their members in many cities across the world. The main ideas behind a user group are to share knowledge and experience, learn from subject matter experts, and hold other related activities.
TYPO3 Association members often join TYPO3 user group meetups, but this is not what user groups are about. Although answer 2 sounds plausible – and TYPO3 agencies sometimes support or organize them – TYPO3 user groups are not a commercial support network.
The last answer is also wrong. A few chat channels exist, for example #TYPO3 on IRC, but these are channels and not groups.
You can find more information about TYPO3 user groups at https://typo3.org/community/meet/user-groups. Check the list if a user group exists in your area that you can join, or start your own group.
The correct answer is 3.
What does the TYPO3 Code of Conduct say?
Answers
-
Treat all community members with respect
-
Be nice and hug everyone you meet at official TYPO3 events
-
Convince others that TYPO3 is the best system on the market no matter what
-
Harassment, personal attacks, and demeaning behavior are not tolerated
-
Be aware that language can be difficult: sarcasm and irony is not understood by everyone
-
Never use your real name for privacy reasons
Number of correct answers: 3
Explanation
Almost every mid to large size open-source project has (or should have) some rules on how members should collaborate. If hundreds of people worldwide participate in a project in one way or another, it may happen that sometimes not everyone agrees with decisions, opinions, or statements by someone else. The TYPO3 project is not different. Having said that, the TYPO3 community is mainly a nice place. The vision “inspiring people to share” is central to the way the TYPO3 community collaborates.
Many years ago, Ben van ‘t Ende formally developed a “TYPO3 Code of Conduct” that was based on the Ubuntu Code of Conduct. A new code of conduct was developed by the Ombudsperson Group in 2021. The proposed new guidelines came into effect after the community voted in favor of them in March 2022.
You don’t need to know every single word of the code of conduct for your TCCI exam. However, as a certified TYPO3 integrator and member of the TYPO3 community, you should read the rules and understand where and when they apply: https://typo3.org/community/values/code-of-conduct.
The TYPO3 Code of Conduct contains two sections: the basic rules and the general advice.
It is self-evident that you should treat all community members with respect, regardless of race, gender identity, age, sexual orientation, disability, physical appearance, national origin, ethnicity, beliefs, religion, etc. The first answer is therefore correct.
Hugs and kisses are seen as a nice gesture by many people but are not accepted in every case as some people find them a breach of their personal integrity. Don’t hug everyone you meet at TYPO3 events! Answer 2 is wrong.
The rule to convince others that TYPO3 is the best system on the market (answer 3) is not part of the code of conduct. In fact, the rules say that you must not start, continue, or encourage personal attacks, flame wars, and trolling, which is often a result of imposing your opinion or beliefs on others. This makes answer 3 also wrong.
Answer 4 is, of course, correct. The TYPO3 Code of Conduct states that harassment, personal attacks, or demeaning behavior are not tolarated. This includes intrusive photography or recording, unwanted sexual attention, and deliberate stalking or following.
The next answer is also correct. Others possibly misunderstand language, especially if it is a foreign language. Keep in mind that the TYPO3 project has a strong international focus. Be careful with sarcasm and irony.
Now, let’s check the last answer. On the one hand, real names are an essential part of our identity that many of us want to protect. On the other hand, it makes sense to use valid contact information in forums, mailing lists, on Slack, at public meeting, etc. to which direct responses can be made. The TYPO3 Code of Conduct does not force you to use your real name or any sensitive personal information. You can even anonymously contribute to the project. However, the moment you voice an opinion or respond to others, we require you to be able to receive responses from others. Answer 6 suggests that the TYPO3 Code of Conduct states that you must never use your real name. This is obviously wrong.
The correct answers are 1, 4, and 5.
What can you do if you feel that someone violates the TYPO3 Code of Conduct, for example, at a TYPO3 conference?
Answers
-
Do nothing as the TYPO3 Code of Conduct forbids you to speak up
-
Submit a complain to the TYPO3 Security Team
-
Contact the event staff or a TYPO3 Association ombudsperson
-
Jump on the stage, interrupt the speaker, and blame the person publicly
Number of correct answers: 1
Explanation
This question and the answers don’t require a lot of explanations. Of course, you do not jump on the stage and interrupt the speaker. This is against the basic rule, stated in the TYPO3 Code of Conduct, that you should not disrupt talks and other organized events.
If you feel that someone violates the TYPO3 Code of Conduct, you should consider to speak up – but you don’t have to. Sometimes it might be more wise to just walk away. There is a difference between the basic rule number 3 and 4. If someone, for example, deliberately provokes emotional reactions or tries to derail a conversation by using insulting, hostile language or offensive words (also known as trolling), simply not reacting can be the solution. Rule number 3 of the TYPO3 Code of Conduct states: Do not start, continue, or encourage personal attacks, flame wars, and trolling. If you witness harassment, personal attacks, or demeaning behavior, the TYPO3 Code of Conduct encourages you to speak up, as this behavior is unacceptable (rule number 4). This means that the first answer is clearly wrong.
But how do you speak up and file a complain if you feel that someone violates the TYPO3 Code of Conduct? The TYPO3 Security Team is not the right point of contact. You will learn more about the team and their responsibilities in the chapter “Security and Privacy”. Answer 2 is therefore wrong.
You can report a violation of the TYPO3 Code of Conduct by submitting the details to the TYPO3 Ombudsperson Group2: https://typo3.org/community/teams/ombudsperson/report
If the incident happens at a TYPO3 event, for example a TYPO3 conference, you can also contact the event staff.
The correct answer is 3.
Which events are organized by the TYPO3 Association?
Answers
-
TYPO3 User Days
-
T3BOARD
-
TYPO3 Conference
-
t3marathon
-
TYPO3camp
-
T3DD
-
TYPO3 Academy
Number of correct answers: 3
Explanation
Since TYPO3 has become more and more popular, and its importance continues to grow, more and more events have been organized around this software. These events are intended to promote social interaction and communication outside the electronic media to promote TYPO3 and attract new interested parties to the CMS.
Although the organization of events is one of the main tasks of the TYPO3 Association, it is not responsible for all the events listed above. None of them are fictitious, by the way, except “t3marathon”. This means that answer 4 is wrong.
The TYPO3 User Days, for example, have been organized by agencies or by TYPO3 user groups in various parts of the world. The TYPO3 camp, founded and managed by the TYPO3camp GbR, is also hosted independently of the Association and usually provides three days of sessions on TYPO3 and related topics. Finally, the TYPO3 academy is also independent, organized independently by an agency, and therefore not an official event of the TYPO3 Association.
T3BOARD, however, has been organized by Association on an anual basis for many years. This event is a snowboard tour and took place in countries such as Switzerland, Austria, Italy, and even Canada once. The official TYPO3 conferences, as well as the T3DD (TYPO3 Developer Days), are also organized by the TYPO3 Association.
The correct answers are 2, 3, and 6.
Which statements about major, minor, and bugfix versions in TYPO3’s version schema are correct?
Answers
-
The first number is called the major version (e.g. “11” in version 11.5.2)
-
The second number is called the minor version (e.g. “5” in version 11.5.2)
-
The third number is called the minor version (e.g. “2” in version 11.5.2)
-
The last number is only increased between releases if the new version is a security update
-
The last number is called the bugfix or patch version (e.g. “2” in version 11.5.2)
-
Security releases always show four numbers as the version string (e.g. 11.5.2.1)
Number of correct answers: 3
Explanation
Now let’s dive a little more into the technical aspects of TYPO3. TYPO3 strictly follows semantic versioning. Some questions in the TCCI exam require you to know what this is and what impact a version upgrade could have. You find all the details in the semantic versioning specification which is authored by Tom Preston-Werner (inventor of Gravatar and co-founder of GitHub) and published under the Creative Commons CC-BY-3.0 license. The chapter “Installation” contains more in-depth questions about semantic versioning.
First of all, versions are managed by using the major-dot-minor-dot-patch scheme, for example 11.5.2. There are exactly three numbers, not more and not less. This makes answer 6 wrong straight away.
Every new TYPO3 release receives a new version number and it depends on the change(s) which of the three numbers are increased.
- major
If the first number changes between versions, this is called a “major” version update. This change indicates incompatible API changes and that TYPO3 integrators likely have to migrate some components, for example the database schema.
- minor
If the second number changes between versions, this is called a “minor” version update. The new version adds new functionality in a backwards-compatible manner.
- bugfix/patch
If the third number (which is also the last number) changes between versions, this is called a backwards-compatible bugfix or patch release. It is possibly a security update but not necessarily.
With these explanations in mind, let’s turn to the possible answers. Clearly, answer 1 and answer 2 are correct. Answer 3 can’t be correct as it contradicts answer 2. As outlined above, bugfixes can be security updates, but you also increase the third (last) number of a version string for releases that are not security-related. This makes answer 4 wrong. The last number of a version string is called the bugfix or patch version, which makes answer 5 correct. Finally, semantic versioning only allows for three numbers3, so the last answer can’t be correct.
The correct answers are 1, 2, and 5.
What does “LTS” mean in TYPO3 v11 LTS?
Answers
-
Language Translation Service
-
Long Term Scheduling
-
Long Time Support
-
Long Term Solution
-
Long Term Support
-
Long Time Solution
Number of correct answers: 1
Explanation
Updates between major versions are sometimes a challenge. They introduce architectural changes and remove internal functions due to deprecations. Agencies, developers, and TYPO3 integrators often rely on TYPO3 versions that receive support on a long-term basis. This is where LTS releases come into play. At this juncture, the abbreviation LTS stands for Long Term Support as these versions receive security fixes and important maintenance updates for at least three years.
The LTS concept is a successfully established strategy in many other projects (for example Ubuntu Linux, Drupal, Node.js, etc.). The first version of TYPO3 that was published as a LTS release was version 4.5 in 2011.
New features and modern technologies require extensive tests and are usually not merged into LTS releases straight away to keep the code base stable. That’s one reason why TYPO3 deserves to be called enterprise content management system!
The correct answer is 5.
Which statements about “Sprint Releases” are correct?
Answers
-
Sprint Releases are TYPO3 versions which are released as quickly as possible in order to fix security issues
-
Sprint Releases are maintained for at last 12 months
-
Every Sprint Release is based on a merge window which is then followed by a stabilization phase
-
TYPO3 version 9.2, 10.0, 10.3, and 11.2 are Sprint Releases for example
-
Sprint Releases have scheduled release dates
Number of correct answers: 3
Explanation
New features and modern technologies require extensive testing and are usually not merged into LTS releases (long-term support) in order to keep the code base stable. On the other hand, the sooner a new feature or technology is introduced in a TYPO3 version, and used/tested by agencies and TYPO3 integrators, the sooner issues are discovered.
Sprint Releases aim to tackle exactly this challenge. Sprint Releases are versions between LTS versions, which are published in relatively short intervals (usually some weeks or a few months). They may contain significant changes such as new features or new technologies. This concept ensures that problems can be identified in a very early stage and fixed before the appropriate component becomes part of a LTS release (which aims to be as stable and robust as possible). The following table shows the TYPO3 release cycle of the v11 series:
| Version: | Release Date: | Release Type: |
|---|---|---|
| TYPO3 v11.0 | 22 December 2020 | Sprint Release |
| TYPO3 v11.1 | 23 February 2021 | Sprint Release |
| TYPO3 v11.2 | 4 May 2021 | Sprint Release |
| TYPO3 v11.3 | 13 July 2021 | Sprint Release |
| TYPO3 v11.4 | 7 September 2021 | Sprint Release |
| TYPO3 v11.5 | 5 October 2021 | LTS-release (long-term support) |
The fact that every Sprint Release replaces its previous sprint release means that answer 2 is wrong. Sprint Releases are published in much shorter intervals. Although the term sprint sounds like a fast and urgent release, answer 1 is made up.
This agile approach of a release cycle does not mean that Sprint Releases are fragile by default. In fact, every release is based on the proven workflow of a merge window which is then followed by a stabilization phase – very much like the normal releases, but scaled down to be quicker.
The last release of a release cycle becomes the LTS-release.
The correct answers are 3, 4, and 5.
Where can you look up changes of a new TYPO3 version?
Answers
-
Changes are summarised at
changes.typo3.org -
You have to contact the TYPO3 Core Team by email
-
All changes are listed in the
ChangeLogfile in the root directory of an installed TYPO3 instance -
All changes are documented as ReST files and included in every release package
-
A summary of changes is available for each release at
get.typo3.org -
Changes are kept secret for security reasons
Number of correct answers: 2
Explanation
Every single change, new feature, and bugfix of the TYPO3 Core goes through a tracking system. This is “forge”, powered by Redmine4. Additionally, every code change goes through a review system, powered by Gerrit Code Review and must be committed to a version control system (git.typo3.org). All these systems enforce developers to provide detailed information on what they changed and why. All these systems are publicly accessible which means everyone can look up the data. This makes answer 6 clearly wrong.
Whenever the TYPO3 developers build a new TYPO3 version, they carefully select which changes5 become part of it. Since every change contains a description, a so-called ChangeLog can be generated (almost) automatically.
In early versions of TYPO3, a text file ChangeLog indeed existed in the root directory of an installed TYPO3 instance – as suggested in answer 3. However, this file became huge over the years and was removed some time ago. The release notes that are available at get.typo3.org provide more details. You can look up every single change in short form, for example for TYPO3 version 11.5.2, at https://get.typo3.org/release-notes/11.5.2.
If a change is a breaking change, a deprecation, a new feature, or is classified as especially important, developers add further details as ReST6 files to official TYPO3 documentation. You find these files in the directory typo3/sysext/core/Documentation/Changelog/ of your TYPO3 instance (answer 4). Alternatively, you can read these files online docs.typo3.org.
The correct answers are 4 and 5.
Which HTTP response status code indicates that an error occurred at the server side?
Answers
-
The HTTP status code
301 -
The HTTP status code
404 -
Any HTTP status code between
500and599 -
Any HTTP status code below
200
Number of correct answers: 1
Explanation
The specification of the Hypertext Transfer Protocol (HTTP) defines a range of status codes that a web server issues in response to a client’s request. A client is, for example, a web browser that accesses a TYPO3 site. In simplified terms, the web server receives the requests and opens a PHP process that executes the TYPO3 application. The application processes the request and sends a response back to the client. This HTTP response contains a 3-digits response status code that indicates whether the request was successfully completed, could not be processed, or resulted in an error.
The Internet Assigned Numbers Authority (IANA) maintains the official registry of HTTP status codes.
You do not need to know every status code by heart but you should know the five categories that each code belongs to. You should also know the most common status codes. So, let’s look into the details. You can easily determine the group by looking at the first digit of the code:
- 1xx - Informational Responses
Responses with the status codes that start with
1mean that the request was received and understood by the server while the request processing continues. The response instructs the client to wait for a final response. Informational responses are rather rare compared to the other categories.
- 2xx - Successful responses
Responses with the status codes that start with
2mean that the request was successfully received, understood, and accepted by the server. The response body typically (but not always) contains the data that the client requested, This could be, for example, the HTML document of a TYPO3 page.
- 3xx - Redirections
Responses with the status code that starts with
3indicate that further action is required to complete the request. Servers that respond to clients with a3xxstatus code typically instruct the client to follow a redirect and make another request to a different resource (location).
- 4xx - Client Errors
Responses with the status code that starts with
4are intended for situations in which the error seems to have been caused by the client. A4xxerror occurs, for example, when a client accesses a resource that does not exist. It’s not the server’s fault if the request contains bad syntax or cannot be fulfilled, so it’s client error.
- 5xx - Server Errors
In contrast to client errors, responses with the status code that starts with
5mean that an error occurred at the server side. These errors could be caused by a misconfiguration or a PHP programming error, for example.
The question refers to errors that occurred at the server side. The answer 3 is without doubt the correct answer.
Differences between the various HTTP versions (HTTP/1.0, HTTP/1.1, and HTTP/2) exist. However, as pointed out above, the syllabus explicitly states that TYPO3 integrators only need a basic knowledge of HTTP status codes. The next sample question dives a little deeper into specific HTTP response status codes.
The correct answer is 3.
Which HTTP response status code should a web server (or web application) send to inform the client that a resource was moved to a new location?
Answers
-
The HTTP status code
100to instruct the client that further requests are required to complete the request -
The HTTP status code
200to indicate that neither a client nor a server error occurred -
The HTTP status code
301if the resource was moved permanently, or302if the resource was only moved temporarily -
The HTTP status code
404as the original resource was not found -
The HTTP status code
504as the resource has been changed on the server which means that it’s a server error
Number of correct answers: 1
Explanation
If a client (e.g. a web browser) requests a resource from a web server, and this resource does not exist, the server’s typical response is a HTTP status 404 (“not found” error). However, a different server response can be more informative. If the resource, for example a page in TYPO3, has been moved and is now available at a different URL, it makes sense to inform the client about the new address. The client can decide to initiate another request and to use the new location for this action. The chances are high that this leads to a successful request and that the user gets what they initially wanted. This process is commonly known as a redirect.
HTTP status codes starting with 4xx and 5xx indicate errors. Informing the client that a resource was moved is not an error. The last two answers 4 and 5 are therefore wrong.
HTTP status codes in the 2xx category indicate that the client’s request was successful and has been completed. Although the statement given in answer 2 is right (“neither a client nor a server error occurred”), the status code 200 indicates that request was successful and that response contains the resource that the client requested. This is not the case if the resource was moved. Answer 2 is also wrong.
HTTP responses with the status codes starting with 1xx are informational responses. This sounds promising at first but 100 responses indicate that the server has received the request headers and the client should proceed to send the request body. Responses of this type can’t be used to inform the client that a resource was moved to a new location.
The answer 3 is the only correct answer. If clients receive a response with the status code 301, this means that the resource, that they requested, is now available at a different location. The server also sends the new address in the response. The status code 302 has the similar meaning but indicates that the move is only temporarily.
The correct answer is 3.
What is the main difference between the HTTP response status codes 301, 302, 307, and 308, given that they all redirect a client to a new location?
Answers
-
Web servers may only send the status code
307if the client made a request through HTTPS, whereas the code301is valid in HTTP and HTTPS -
The status codes
307and308return the new URI but explicitly instruct the client not to follow the redirect -
The status codes
307and308explicitly instruct the client to use the same method (GETorPOST) when requesting the resource at the new location -
The status code
308explicitly instructs the client to use HTTPS rather than HTTP when requesting the resource at the new location -
The status code
301indicates that the resource has been moved permanently, whereas the code302indicates a temporary change -
The status code
307indicates that the resource has been moved temporarily, whereas the code308indicates a permanent change
Number of correct answers: 3
Explanation
Most TYPO3 integrators know the HTTP response status codes 301 and 302. These are pretty standard. The code 301 indicates a permanent change of the original URI, whereas the code 302 indicates that further changes in the URI might be made in the future. Therefore, the new location is only temporarily. This is what the answer 5 suggests, so this is clearly a correct answer.
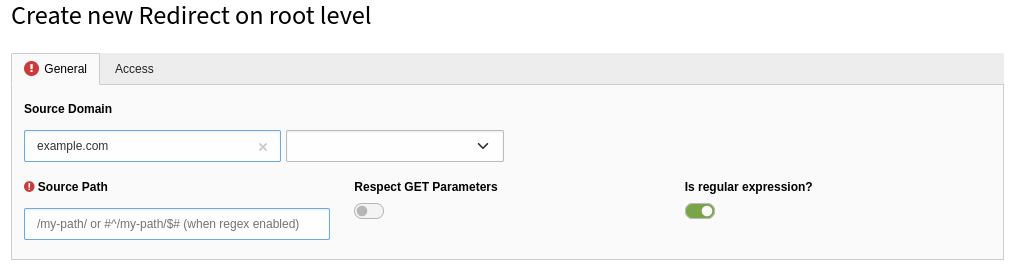
TYPO3’s redirect backend module, for example, also offers to configure HTTP responses with the 307 and 308 status codes. What are the main differences?
First and foremost, the status code 307 has the same semantics as the 302 code (temporary redirect), and the code 308 has the same semantics as the 301 code (permanent redirect) respectively. This might be confusing. Having said that, the last answer provides a valid statement and is, therefore, also correct.
There must be another important difference between the four HTTP response status codes. The answers 1 and 4 suggest that it is related to HTTP and HTTPS requests. This is nonsense. All four codes are valid in the HTTP and HTTPS contexts which makes the first answer wrong. Answer 4 is also wrong as the response codes don’t instruct the client to use HTTP or HTTPS for subsequent requests.
Think about the answer 2 for a moment. Why should a server inform the client about the new URI but instruct the client not to access it? This does not make sense. This answer is also wrong.
In fact, the status code 307 instructs the client not to change the HTTP method used. If the client used the POST method in the first request, this method must also be used if the client follows the redirect. The same applies to the status code 308.
The correct answers are 3, 5, and 6.
What is a regular expression?
Answers
-
A rule that the TYPO3 Association developed for the TYPO3 Code of Conduct
-
An expression that is regularly used in the web technology to securely encrypt passwords
-
A technology that allows users to specify search patterns for texts
-
A configuration language to define virtual hosts in the Apache HTTP server
Number of correct answers: 1
Explanation
TYPO3 uses regular expressions a many places. A prominent backend module that applies this technology is, for example, the Site Management → Redirects module:
Wikipedia defines regular expressions as follows:
Regular expressions (sometimes referred to as regex or regexp) are a powerful technology. However, it is sometimes not easy to understand for new users. At first glance, the expressions look hieroglyphic. Also, numerous flavours and variations exist which makes a quick introduction almost impossible. Many modern tools such as the Apache HTTP server as well as the programming language PHP use PCRE (Perl Compatible Regular Expressions). If not stated otherwise, PCRE is what we use in TYPO3 and, therefore, also in the TCCI exam.
As a certified TYPO3 integrator, you only need to know the basics. You should be able to identify and understand regular expression patterns and build simple pattern based on specific requirements. The most important regex basics are:
- Operators (also known as quantifiers) such as
*,+,?,{n}, and{n,m} - Groups and ranges such as
[a-zA-Z0-9] - Character classes such as
\d,\w, and\s
I will go into more technical details and provide examples in the following questions. In regards to the question about what a regular expression actually is, you can eliminate the first two answers as well as the last answer. They are all made up, of course.
The correct answer is 3.
Which of the following statements about the regular expression /^(cute)*(kitty)+/ are correct?
Answers
-
It matches the input “cute” as the word “kitty” is optional (due to the quantifier
+) -
It matches the input “cutekittycat” as the regex does not feature the
$-character that would define the end of the input -
It matches the input “etucyttik” as the order of characters is arbitrary
-
It does not match the input “fookitty” as the input does neither start with “cute” nor “kitty”
-
It does not match the input “cutekitty” as the input must not start with the word “cute” (due to the quantifier
*) -
It matches the input “kitty” as the word “cute” at the beginning is optional (due to the quantifier
*)
Number of correct answers: 3
Explanation
The regular expression in this question is relatively simple. It mainly tests your knowledge of the so-called quantifiers (see table below). However, the answers are tricky as they require a high level of concentration to identify which statements are right or wrong.
Let’s first focus on the regular expression. It matches all terms that optionally start with the word “cute” (optionally due to the quantifier *), followed by the word “kitty” one or more times (due to the quantifier +). You should also understand that the ^-character matches the beginning of the input and that the $-character matches the end. These are called assertions and define boundaries.
| Characters | Meaning |
|---|---|
? |
Matches the preceding item 0 or 1 times. |
* |
Matches the preceding item 0 or more times. |
+ |
Matches the preceding item 1 or more times. |
The first answer suggests that the regular expression matches the input “cute”. Although an input can start with “cute”, the second word “kitty” is not optional. The quantifier + means that these characters have to occur at least one time (see table).
The second answer suggests that the regular expression matches the input “cutekittycat”. This is obviously correct as the expression does not explicitly ends the input. If the regular expression would read /^(cute)*(kitty)+$/ (note the trailing $-character), it would not match the input “cutekittycat”. However, this is not the case which means that the answer 2 is correct.
The next answer suggests that the order of characters is arbitrary and that the input could also be “etucyttik” (the words “cute” and “kitty” backward). The opening and closing round brackets ( and ) define a group. In this case the words “cute” and “kitty”. The order of characters inside a group are not arbitrary. The answer 3 is wrong.
Does the input “fookitty” match the regular expression? Answer 4 suggests it does not match, as the input does neither start with “cute” nor “kitty”. The assertion character ^ defines the start of the input which means that the term must start with “cute”. However, the quantifier * softens this rule and makes this word optional. If the input does not start with “cute”, it has to start with the “kitty” (which is not optional). Therefore, the input “fookitty” does indeed not match. Answer 4 is correct (note that the answer reads: “It does not match…”).
Watch out: The answer 5 is also negated! It claims that the regular expression does not match the input “cutekitty”. This is nonsense. The input “cutekitty” is a valid match. The quantifier * does not exclude the term “cute”. Answer 5 is clearly wrong.
Answer 6, however, is correct. The regular expression matches the input “kitty” as the word “cute” at the beginning is optional due to the quantifier *.
The correct answers are 2, 4, and 6.
Which of the following terms matches the regular expression /^foo.bar[1-9]?$/?
Answers
-
foobar -
foobar6 -
foo2bar123 -
fooobar1 -
foobar1 -
foo123 -
fffoobarrr -
bar9 -
123foobar123
Number of correct answers: 1
Explanation
The regular expression /^foo.bar[1-9]?$/ matches all strings that have the word “foo” at the beginning, followed by a single character, and the word “bar”, and optionally end in a digit between 1 and 9.
The last three answers don’t start with “foo” which means that you can scratch them straight away. Answer 6 does not contain the “bar” at all. This answer is also wrong. The dot in the regular expression represents a single character. This character is not optional. The answers 1, 2, and 5 are therefore also wrong as there is a missing character between “foo” and “bar”. Only two answers are left: the answers 3 and 4.
Answer 3 can’t be correct as the term shows multiple digits at the end. The question mark “?” in the regular expression, however, indicates zero or one occurrences of an element. The element in this case is a character class that matches a range of digits: 1 to 9.
Only the term in answer 4 matches the regular expression. It starts with “foo”, followed by the single character “o”, then the word “bar”, and the digit “1”.
The correct answer is 4.
Which regular expressions match the term “Image 42”?
Answers
-
/^[A-Za-z0-9][a-z]*\s[0-9]{2,4}$/ -
/^Image[0-9]+$/ -
/^[a-z]{1}[a-z]{1,}[0-9]{1}$/ -
/^\w{1,5}\s\d+$/ -
/^\d[a-zA-Z]*\s42$/
Number of correct answers: 2
Explanation
If you don’t have much experience with regular expressions, an exam question like this possibly scares you off. Keep calm and at least give it a try. You will possibly realize that it’s not as hard as you think if you know some regex basics.
Look at the term first: “Image 42”. The characteristics of this term are the upper-case letter I at the beginning, followed by a few lower-case characters, a space and the number “42” (two digits) at the end. Now check each regular expression answer-by-answer.
The first answer allows the upper-case letter (range A to Z), followed by lower-case letters (range a to z). The quantifier * means that the lower-case letters may occur zero or more times. Therefore, the first part “Image” matches. Next comes the \s which reflects a character class. It matches a single white space character (e.g. space, tab, form feed, line feed, etc.). This follows another range 0 to 9 and the quantifier {2,4} which matches at least two and at most 4 occurrences of the preceding item (a digit 0 to 9). The regular expression suggested in answer 1 is a clear match and therefore, the answer is correct.
The regular expression in the second answer is much shorter and looks promising at first. It matches all terms that start with “Image”. This follows a digit range 0 to 9 which must occur one or more times. This regular expression would work if the term would not contain a space, for example: “Image42”. However, the term in the question has a space, so the regex doesn’t match and answer 2 is wrong.
Now to the regular expression in answer 3. It matches terms that start with a lower-case letter. The quantifier {1} means that this letter must occur exactly one time, not more and not less. This does not match already, as the term in question starts with an upper-case letter I. Nevertheless, let’s decipher the rest of the regular expression as an exercise. The next element is another range: [a-z]{1,}. This means that at least one character of the preceding range must occur. Finally, the regex ends in a third range: [0-9]{1}. This is the same as before: a single digit between 0 and 9 must stand at the end of the term. Answer 3 is clearly wrong.
The next answer also shows a relatively short regular expression: /^\w{1,5}\s\d+$/. For this, you need to know the commonly used character classes1:
| Characters | Meaning |
|---|---|
\d |
Matches any digit (Arabic numeral). Equivalent to [0-9]. |
\D |
Matches any character that is not a digit (Arabic numeral). Equivalent to [^0-9]. |
\w |
Matches any alphanumeric character from the basic Latin alphabet, including the underscore. Equivalent to [A-Za-z0-9_]. |
\W |
Matches any character that is not a word character from the basic Latin alphabet. Equivalent to [^A-Za-z0-9_]. |
\s |
Matches a single white space character, including space, tab, etc. |
\S |
Matches a single character other than white space. |
Therefore, you can read the regular expression suggested in answer 4 as follows. It matches terms that start with an upper-case or lower-case letter and have a length between 1 and 5 characters. This follows a white space and any digit between 0 and 9 that must occur one or more times. The regular expression matches the term “Image 42” which makes this answer also correct.
Although we already identified the two correct answers, let’s also look at the regular expression suggested in the last answer. The regex matches terms that start with a digit (\d), followed by an upper-case or lower-case letter (zero or more times), a space, and the number 42 at the end. We have to admit that this comes close to what the question requires. If the term would start with a digit, for example 6Image 42, this answer would be correct. However, this is not the case, which makes this answer wrong.
The correct answers are 1 and 4.
Which statements about the YAML format are correct?
Answers
-
YAML stands for “Yielded Arbitrary Multi-Language”
-
YAML is a text-based format
-
Comments are not possible in YAML files
-
All lines that start with spaces are ignored
-
YAML files are structured by indentation
-
Tab characters are allowed as indentation
Number of correct answers: 2
Explanation
Although the TCCI syllabus explicitly points out that only basic knowledge of the YAML format is expected, certified TYPO3 integrators should know more than just the basics as TYPO3 uses the YAML format for several configuration files. YAML files are used, for example, for the site configuration and for the form framework (you will find example questions for both components in the chapter Backend Administration). This example question about YAML is only a simple warm-up question.
Clark Evans first proposed the format more than 20 years ago in 2001. It was later given the recursive acronym “YAML Ain’t Markup Language”. The first answer is therefore wrong.
YAML is indeed a text-based format, so the second answer is correct. YAML was designed to be human-friendly and to work well across various programming languages. You find the following statement about the YAML format on Wikipedia:
YAML natively supports data types such as strings, integers, and floats (also known as scalars). You can also store lists and associative arrays in YAML. Comments are also supported which means that answer 3 is wrong.
A common challenge for many users who work with YAML files for the first time is the indentation of lines. This is how YAML denotes nesting. The indentation level can be one or more spaces but never tab characters. This makes the answers 4 and 6 wrong – and the answer 5 correct.
The official website looks rather weird but it’s worth a visit. What you see on the website is actually valid YAML syntax, nicely formatted.
The correct answers are 2 and 5.
What issues make this (simplified) site configuration YAML file invalid?
Answers
-
The line with the single dash is invalid
-
All strings must be quoted in double quotes, e.g.
title="English" -
All lines must end with a semicolon (
;) -
The equal signs in the
languagessection are invalid -
The colon must be followed by a space in the key-value-pairs (lines
base,rootPageId, andwebsiteTitle)
Number of correct answers: 2
Explanation
This question dives a little deeper into the YAML format. If you can’t pick the two correct answers straight away, you should consider studying the YAML syntax a little more before you continue.
The single dash in the third line is valid, and in this instance it is even mandatory. It introduces a list of items (here: the languages of the TYPO3 site). Each list item has sub-attributes (title, locale, etc.). As mentioned in the previous question, the line indentation of YAML files is relevant. In this case, each language is stated in a block. The second language (which does not exist in the example) would also be denoted with a single dash and a block of lines (indented). This means that the first answer is clearly wrong.
The second answer is also wrong. Strings can be represented in YAML format with three different styles: double-quoted, single-quoted, and plain (unquoted). Each style comes with their own pros and cons.
A semicolon is not required to mark the end of a line in YAML files. This makes answer 3 also wrong.
The YAML data structure uses key-value pairs. These are represented using the following syntax:
<key>: <value>
The <key> represents a name and <value> represents the data. The pair is always separated by a colon (:) followed by a space. The equal sign (=) as shown in the example code is indeed invalid.
The following code shows the updated and valid YAML file:
base: 'https://example.com/'
languages:
  -
    title: English
    enabled: true
    base: /
    locale: en_US.utf8
    iso-639-1: en
    navigationTitle: English
rootPageId: 1
websiteTitle: 'TYPO3 Website'
The correct answers are 4 and 5.
Which statements about the following YAML file are correct?
title: 'Hello world'
public: yes
data: |
  Lorem ipsum dolor sit amet, consectetur adipiscing elit,
  sed do eiusmod tempor incididunt ut labore et dolore.
Answers
-
The first line is invalid as double quotes must be used to denote text strings
-
The value “yes” of the key
publicis a boolean -
The value “yes” of the key
publicis a text string -
The value of the key
datais a text string including the newline character -
An additional line
EOFis missing to mark the end of the file
Number of correct answers: 2
Explanation
This is another typical question that assesses your knowledge of the YAML format and is similar to a question that could be part of your TCCI certification exam.
The first answer is wrong straight away. We discussed in the previous question that strings can be quoted in double quotes but this is not mandatory. The question highlights a typical challenge when it comes to the YAML syntax: what are the exact data types of values listed in YAML files?
The value of the key public is the term yes. This value is unquoted which is okay for a simple string. Therefore, the answer 3 seems to be correct. However, the YAML specification defines the unquoted keywords “yes” and “no”, as well as “true” and “false”, as booleans. Consider the following YAML file:
foo: yes
bar: no
lorem: True
ipsum: TRUE
dolor: false
The values of all these keys are interpreted as booleans. This means that answer 2 is correct and answer 3 is wrong.
The second challenge that this question covers are values that span multiple lines. In general, this can be achieved by stating either the literal block scalar (|) or the folded block scalar (>). The code that the question shows uses the former – the literal block scalar. The characteristic of this scalar is that it includes any newlines and trailing spaces. The folded block scalar, on the other hand, folds newlines to spaces. This makes perfect sense when you want to make what would otherwise be a very long line easier to read. Answer 4 is therefore correct. The last answer is, of course, nonsense.
The correct answers are 2 and 4.
Which of the following commands show the contents of the text file foobar.txt in a UNIX/Linux environment?
Answers
-
cat foobar.txt -
list foobar.txt -
print foobar.txt -
less foobar.txt -
text foobar.txt
Number of correct answers: 2
Explanation
You can, of course, customize a UNIX/Linux system to show the content of a file when a user enters any of the listed commands at the command prompt. A simple approach to achieve this would be to use the “alias” function which is part of the Bash2. This example question, and the related TCCI exam questions in general, however, assume that you’re using a standard setup.
Therefore, you should know the default UNIX/Linux commands to list, create, copy, rename, and remove files and directories. Three of the five given answers either don’t exist or can’t be used to show the content of text files.
You can exclude answers 2 and 5 straight away. Neither the command “list” nor the command “text” exist in a standard system. The “print” command (answer 3) sounds promising but is also wrong. If this command is available in your system, it most likely deals with mailcap files which is the metamail capabilities file.
At this point, we are down to only two remaining answers – and those have to be correct (note the number “2” in brackets at the end of the question).
In fact, “cat” is the commonly used command to show the contents of text files in a UNIX/Linux environment. The name originates from its description: “concatenate files and print on the standard output”. A downside of this command is the lack of pagination. If the length of the file is rather long, the first lines scroll out of the viewport quickly. In these cases, it makes sense to use commands such as “less” or “more” instead.
The “more” command is a filter for paging through text one screenful at a time. The “less” command is similar to “more” but it has more features and is often considered as a great replacement for “more” today.
The correct answers are 1 and 4.
Which of the following commands renames the file foobar to loremipsum in a UNIX/Linux environment?
Answers
-
rename foobar loremipsum -
move foobar loremipsum -
mv foobar loremipsum -
mv loremipsum foobar -
rn foobar loremipsum
Number of correct answers: 1
Explanation
In a UNIX/Linux environment, renaming a file is the same as moving a file. If you keep this fact in mind, you can exclude two of the five answers straight away. The command to rename a file is neither “rename” nor “rn”. The first and the last answers are therefore wrong.
Answer 2 is also wrong as the command “move” does not exist in a standard system. The correct spelling of the command to move/rename files is “mv”.
The question asks you to rename the file “foobar” (the source) to “loremipsum” (the destination). Answer 3 states the source first, then the destination, whereas the answer 4 suggests the opposite: the destination first, followed by the source. The correct order is shown in answer 3:
This command renames the file “foobar”, that is stored in the current directory, to “loremipsum”. Let’s look at another example. This time, the command actually moves a file from one directory to another:
The file “AdditionalConfiguration.php” is the source, currently located in the directory typo3conf/, which is moved to its new destination /tmp/. If the file name should remain the same, you don’t need to repeat it. If you want to move the file to a new directory under a new file name (basically, move and rename), you can do this in one go:
You should keep in mind that both, moving and renaming files in a UNIX/Linux environment use the same command, and that you first state the source and the destination second.
The correct answer is 3.
Which of the following commands creates a new directory “images” in a UNIX/Linux environment?
Answers
-
createdir images -
cd images -
newdir images -
mkdir images
Number of correct answers: 1
Explanation
This example question has four possible answers and only one of them is correct. The good thing is that you can eliminate half of the answers straight away as two of the suggested commands don’t exist in a standard UNIX/Linux system. Neither “createdir” nor “newdir” are standard commands to create a new directory. Therefore, the answers 1 and 3 are wrong. The other two commands exist though.
Although the command “cd” sounds like a valid option for creating a directory, this command lets you change to a specific directory. This means that the command suggested in answer 2 would change the current directory to the subdirectory images/ (if the directory exists and is accessible).
Answer 4 shows the correct solution. You can use the command “mkdir” to create a new directory. The following examples are not exactly related to this question but useful to remember.
To create multiple directories at once you can put all directory names on one line:
You can also create a path that consists of multiple directories by using the argument --parents (or just the short form -p). The following example creates a directory assets/ that contains the directory images/ that contains the directory banners/:
If you want to create a directory with a space in its name, for example “foo bar”, you have to wrap the name in double/single-quotes or escape the space by using a backslash3:
All examples listed above show that the command “mkdir” creates new directories in a UNIX/Linux environment.
The correct answer is 4.
The command ls -l shows the following output in a UNIX/Linux environment. Which of the following statements are correct?
Answers
-
The current directory and its sub-directories contain a total of 12 files
-
The user “fred” is the owner of the file “
foobar” and the owner of the directory “kitty” -
The entry “
puppy” is a directory -
The directory “
kitty” contains a total of 4096 sub-entries (e.g. files or directories) -
The file “
foobar” has a file size of 33 bytes
Number of correct answers: 2
Explanation
The “ls” command is a commonly used utility to list directory contents on the UNIX/Linux command line. Without any parameters, the contents of the current directory is shown. The command accepts a wide range of options which can be stated with a single (-) or double dash (--). The argument -l instructs the command to show the output in a long format.
The first line (“total 12”) does not reflect the number of files as suggested in the first answer. It rather tells the number of 1K blocks used by the files in the directory. This answer is therefore wrong.
The remaining three lines list the directory contents and some details about each entry. Technically speaking, every entry is a file. Even directories and links4 are files, but a special type of file. The information shown by the “ls -l” command are as follows: file type, file permissions, number of hard links to the file, owner of the file, file group, file size, date and time, and file name.
I will refrain from describing the output of the “ls” command in great detail at this point, as there is extensive documentation available on the Internet. Let’s focus on the answers instead.
Answer 2 suggests that the user “fred” is the owner of the file “foobar” and the owner of the directory “kitty”. This is obviously correct. The file “foobar” shows “fred” and “admin”, where “fred” represents the owner and “admin” represents the file group. The directory “kitty” shows “fred” as the owner and a file group with the same name. Based on the letter “d” as the first character, you can deduce that “kitty” is a directory. A dash indicates a regular file.
This means that answer 3 is wrong. The entry “puppy” is a regular file rather than a directory. By the way, if you add the option --classify (or the short form -F) to the “ls” command, an indicator is added to each entry. Directories would end in “/”, for example:
The last two answers focus on the column that shows 33, 4096, and 128 for the three entries. Answer 5 is indeed correct as the file “foobar” has a file size of 33 bytes and the “ls” command reports the actual file size.
But what das 4096 mean for the directory “kitty”? This is a little more complicated as the value depends on the file system type. In simplified terms, the number shows the initial size that is required to store the metadata of the files contained in the directory. In file systems such as ext2, ext3, and ext4, this is always 4096 bytes as this is the smallest allocation unit. Other file systems work differently and show other values for directories. Having said all that, answer 4 is wrong as 4096 does not reflect the number of sub-entries.
The correct answers are 2 and 5.
How do you constantly output the contents of the log file typo3_3a57bb40f2.log in real-time in a UNIX/Linux environment?
Answers
-
cat typo3_3a57bb40f2.log -
follow typo3_3a57bb40f2.log -
log typo3_3a57bb40f2.log -
tail --follow typo3_3a57bb40f2.log
Number of correct answers: 1
Explanation
A typical use case is to keep an eye on a log file while an application – for example TYPO3 or the web server – writes events into this file. An example could be an error that pops up in the log file if users access certain pages in TYPO3. To locate a page that causes this error event, you could constantly output the contents of the log file and go through the pages in your web browser at the same time. As soon as you hit that particular page, the error appears in your log output.
The question now is, which of the four commands shown above let you constantly output the log file in real-time? The “cat” command exists in a standard UNIX/Linux environment, and I already provided some details about the command in a previous example question. This command only outputs the given file and then ends. It does not output further changes/additions to the file in real-time.
Although the term follow sounds promising, both commands suggested in the next two answers don’t exist. Neither “follow” nor “log” are typical commands in a standard UNIX/Linux system. The answers 2 and 3 are therefore wrong.
In fact, the command “tail” meets the requirement. Similar to the “cat” command, “tail” also outputs text files, but only the last 10 lines by default. You can control the number of lines by applying the option -n. The following example would only output the last 2 lines of the file typo3_3a57bb40f2.log:
The option --follow (or the short form -f) outputs appended data as the file grows. This is exactly what the question asks for. While TYPO3 writes further lines into the log file, they immediately appear on the screen. To interrupt the process, you have to press the CTRL+C key combination.
If you combine the “tail” command with the “grep” command by using the pipe symbol (|), you can filter the output for specific keywords. The following command constantly outputs the contents of the log file in real-time but only shows lines that contain the term “error”:
This combination can be useful if the log file receives many lines in a short time and you’re only interested in specific lines.
The correct answer is 4.
Which of the following commands let you check the usage and/or remaining disk space in a UNIX/Linux environment?
Answers
-
rs(“remaining space”) -
du(“disk usage”) -
fs(“free space”) -
df(“disk free”) -
ps(“partition size”)
Number of correct answers: 2
Explanation
Each answer to this question shows a command and a description in parenthesis. Don’t let the descriptions distract you! Of course, they all reflect a term that tries to convince you that the answer is correct – and all sound plausible.
Let’s exclude the commands that don’t exist in a standard UNIX/Linux system: “rs” and “fs”. The answers 1 and 3 are wrong. This leaves you with three remaining options and two of them are correct. Therefore, you only need to identify the third wrong command to get to the solution.
Answer 2 suggests that you can use the command “du” to check the disk usage. This is indeed correct. The output of this command is a summary of the disk usage of a set of files, recursively for directories. It makes sense to add the options --summarize and --human-readable to the command (or -sh in short). The first option only displays a total and the second option prints sizes in a human-readable format, for example 4.8M for 4896 kilo bytes.
The following command shows how much data is currently stored in the directorypublic/typo3/sysext/core/:
The output could be, for example, “32M”. Keep in mind that this is only an estimate and not the 100% accurate size.
Answer 4 suggests another command: “df”. This answer is also correct as this command reports the current file system disk space usage. If no file name is given as an argument, the space available on all currently mounted file systems is shown. The “df” command also supports the aforementioned option -h to output sizes in a human-readable format.
Let’s assume you would like to determine how much disk space is left for backend users to upload files into the TYPO3 folder public/fileadmin/. The following command gives you a quick insight5:
The output could be something like the following:
Although the command suggested in answer 5 exists in a standard UNIX/Linux system, it serves a different purpose. The “ps” command outputs some information about the active processes, typically the process ID (PID), the terminal (TTY), and the command itself (CMD). You can extend the output by applying some specific options. The exact syntax, however, heavily depends on the UNIX/Linux system you’re using (e.g. UNIX, BSD, GNU). Keep in mind that the output of the “ps” command is only a snapshot of the current processes. Having all this said, answer 5 is cleary wrong as this command does not let you check the usage and/or remaining disk space.
The correct answers are 2 and 4.
What character makes a file “hidden” in a UNIX/Linux environment?
Answers
-
An asterisk (
*) as the first character of the file name -
A slash (
/) as the last character of the file name -
A single dot (
.) as the first character of the file name -
A dash (
-) as the last character of the file name -
An ampersand (
&) as either the first or last character of the file name
Number of correct answers: 1
Explanation
Hidden files in a UNIX/Linux file system are the files that are not listed by the “ls” command by default. You can not only hide files but also directories, symbolic links, hard links, etc. These directory entries are hidden if their names start with a specific character – but which one?
The asterisk (*) has a special meaning in UNIX/Linux file systems but it is not used to mark a file as hidden. The slash (/) typically reflects a directory path, for example /home/fred/. Therefore, the first two answers are wrong. So is answer 4, as the dash (-) is not used to mark a file as hidden either. Also the last answer can’t be correct. Although you can create file names with ampersand (&) as the first and/or last character, this does not hide the file from listing.
A single dot (.) as the first character of the file name, however, makes the file hidden. Files are hidden in UNIX/Linux systems for many reasons. You typically want to make sure that users don’t accidentally delete or modify these files, for example.
Let’s try a short exercise that deals with hidden files in UNIX/Linux. The first three commands create a new directory foobar/, change into it, and list the contents:
The output of the last command (ls -l) does not show any content yet as the freshly created directory is empty. Now, let’s create a hidden file by writing the date and time into a new file named “.test” (note the single dot in the file name):
If you list the contents of the directory again, you will notice that the “ls” command still does not show any files, even though you just created the file “.test” before:
This is because the file is hidden by its specific file name. To prove that the file exists, enter the following command to output its contents:
The output shows the content of the file as you would expect: the previously stored date and time.
The correct answer is 3.
The command ls -l does not list hidden files/directories in a UNIX/Linux environment. Which alternative methods or commands can you use to show hidden files/directories?
Answers
-
The command “
find” shows hidden files by default -
The argument
-a(or--all) of thelscommand, for example: “ls -la” -
The argument
-h(or--hidden) of thelscommand, for example: “ls -l --hidden” -
The command “
rm -hidden *” removes the hidden-flag of all files in the current directory -
The command “
sh” (“show hidden”) can be used instead to show hidden files
Number of correct answers: 2
Explanation
The previous question provided some details on hidden files in a UNIX/Linux environment, and explained that a single dot (.) as the first character of the file name makes a file hidden. Although in most cases there is a good reason why a file is hidden, you definitely need an option to list them when required.
Let’s start with the obvious wrong answer first. The “rm” command removes a file from the file system. The command suggested in answer 4 is in fact dangerous and can lead to fatal results. Without the invalid argument -hidden, the command “rm *” deletes all non-hidden files from the current directory. Don’t try this in an environment that contains important files!
The last answer is also wrong. If “sh” sounds familiar to you, you possibly came across dash which is a POSIX-compliant command interpreter (shell), similar to the Bash6. Having said that, “sh” is not the abbreviation of “show hidden” and has nothing to do with hidden files/directories as such.
The remaining three answers suggest solutions that use the “find” and “ls” commands, and two of these answers are correct. The purpose of the “find” command is to search for files in a directory hierarchy. In general, this command is a very powerful tool and its manual is quite extensive. If you don’t specify any arguments, options, and expressions, “find” lists all files and directories in the current directory and in all its subdirectories. This can be a long list. Answer 1 is correct as this list contains normal and hidden files/directories.
The answers 2 and 3 suggest to use the “ls” command with the argument -a or -h. In fact, both arguments exist, but -h stands for --human-readable and not for hidden. The following example illustrates the effect of the argument:
The output above shows the exact size of the image file: 3145728 bytes. The additional argument -h outputs the file size in a human-readable format:
As answer 3 is also wrong, the answer 2 must be the second correct answer. The argument -a (or --all) instructs the “ls” command not to ignore directory entries starting with a single dot “.” (hidden files).
The correct answers are 1 and 2.
The command ls -l outputs the following directory content in a UNIX/Linux environment. Which statements are correct?
Answers
-
The first character “
l” in “lrwxrwxrwx” indicates that the entries are marked for deletion -
The two dots in the file name “
../typo3_src-11.5.15” make the file hidden -
The entries “
typo3” and “typo3_src” are symbolic links -
The entry “
typo3” points to a file/directory in the current folder -
The entry “
typo3_src” points to a file/directory in the parent folder
Number of correct answers: 2
Explanation
A previous question already dealt with the “ls” command and highlighted that this command is a commonly used utility to list directory contents on the UNIX/Linux command line. The argument -l instructs the command to show the output in a long format which is shown in the output above.
The first block represents the access permissions7 of the file system entries. The permissions “lrwxrwxrwx” are indeed a special case. The first character “l” does not indicate that the entries are marked for deletion but that the entries are symbolic links. Answer 1 is therefore wrong and the answer 3 is correct.
A symbolic link is a special type of file that points to another file or directory in the file system. The element left of the arrow “->” is the link name. The path or file right of the arrow is the link target:
link
->target
Given the expression “typo3 -> typo3_src/typo3”, this means that the symbolic link “typo3” points to a file or directory under the same name in the subdirectory “typo3_src/”. Answer 4 is wrong as this answer suggests that it points to a file/directory in the current folder.
What’s about the two dots that the second link target shows (“../typo3_src-11.5.15”)? A file name that only consists of a single dot (“.”) or double dots (“..”) is another speciality in UNIX/Linux environments. The single dot represents the current directory8, whereas the double dots always point to the parent directory. This makes the second answer wrong and the last answer correct.
The correct answers are 3 and 5.
Which statements about soft links and hard links in a UNIX/Linux file system are correct?
Answers
-
When the target of a hard link is deleted, the data is lost
-
You can create a symbolic link with the command “
ln -s” -
The target of a hard link must exist when you create the link
-
Each user can only create up to 128 links in the file system
-
Hard links can only be made between files, not directories
-
Only the “root” user can delete symbolic links
Number of correct answers: 3
Explanation
This is definitely a more advanced question about symbolic (soft) links and hard links in a UNIX/Linux file system. It primarily checks if you are familiar with the differences. Let’s test some of the answers to confirm or disprove the statements.
In general, the command “ln” lets you create links. First, write the name “TYPO3” into a new file “target”. Second, create a hard link “foobar” to this file. Third, output the contents of the link (not the link target):
As expected, the output is “TYPO3”. Now, delete the target (not the link) and try to output the contents of the link again:
You will realize that you still get the name “TYPO3” which means that the first answer is wrong. You do not loose the data when you delete the target of a hard link.
Given the current state, try to create two further links. The first link should be a hard link named “lorem” to “target” (which does not exist, because you just deleted the file). The second link should be a soft link (also known as a symbolic link) “ipsum” to the same nonexistent target:
The first command fails as you can’t create hard links to targets that don’t exist. Answer 3 is therefore correct. The argument “-s” (or “--symbolic”) creates a soft link, which makes the second answer correct too. As this commands succeeds nevertheless, you can create soft links to targets that don’t exist (yet).
Now, create a directory named “hello” and try to create a hard link named “world” that points to it:
This also fails, as hard links can only point to files but not to directories. Answer 5 is, without doubt, the third correct answer.
The answers 4 and 6 are just distractors. UNIX/Linux file systems don’t set a limit of the numbers of links users can create, and users don’t have to be “root” to delete soft/hard links either.
The correct answers are 2, 3, and 5.
The user “alice” is only a member of the group “marketing” in a UNIX/Linux system. Given the following output of the ls -l command, which files can “alice” read, assuming she has access to the directory the files are stored in?
Answers
-
The user “alice” can read the file “
beans” -
The user “alice” can read the file “
broccoli” -
The user “alice” can read the file “
chicken” -
The user “alice” can read the file “
honey” -
The user “alice” can read the file “
noodles” -
The user “alice” can read the file “
rice”
Number of correct answers: 3
Explanation
UNIX/Linux systems provide a smart and effective security concept when it comes to access permissions to files and directories. The concept is divided into two levels: ownership and permission. In the first level, every file and directory is assigned three types of owners:
user/owner, group, other
The second level controls the permissions each owner has. The following three permissions exist by default:
read (
r), write (w), execute (x)
Without going into too much details (you find extensive documentation on this topic on the Internet), the characters “-rwxrwxrwx” reflect the permissions. The first character is usually a l (symbolic link), d (directory) or - (file). The next three characters represent the permissions for the user/owner. This follows another set of three characters which represent the group, followed by the last three characters for everone else (other).
The following table provides an overview of the permissions for each group:
| Symbol: | Permission type: |
|---|---|
--- |
no permission |
--x |
execute |
-w- |
write |
-wx |
write and execute |
r-- |
read |
r-x |
read and execute |
rw- |
read and write |
rwx |
read, write and execute (full access) |
Now, let’s turn to the question and answers. The file “beans” is owned by the user “bob” and belongs to the group “bob”. It shows the permissions “-rw-------” which means the owner has read and write permissions (rw-). Neither the members of the group nor everyone else have any permissions at all. This means that the user “alice” can’t read the file. The first answer is wrong.
The user “alice” can’t read the file “broccoli” either. The permissions give the user/owner read and write access (“rw-”) and the group read access (“r--”). Alice is not the owner of the file “broccoli” and not a member of the group “root”. Therefore, she can’t read the file. Answer 2 is also wrong.
The permissions of the file “chicken” show “-rw-rw-rw-” which means that the user/owner, the group, and everyone else have read and write access to this file. This clearly gives the user “alice” the permission to read the file “chicken”. Answer 3 is therefore correct.
Now to the next file: “honey”. The user/owner “frank” has full access (“rwx”), the group has read and write access (“rw-”), and everyone else has no access. The user “alice” would not be able to read the file if she was not a member of the group “marketing”. However, the question explicitly states that this is the case. Therefore, the user “alice” can read the file “honey”, so answer 4 is correct.
The answer 5 claims that the user “alice” can read the file “noodles”, which is owned by the user “bob” and has the group named “bob” assigned to it. The owner “bob” has full read/write/execute (“rwx”) permissions, and all members of the group “bob” can read and execute the file (“r-x”). Alice would be able to read the file if she would be a member of the group “bob”. However, since she is neither the owner nor a member of that group, she has no access to this file. Answer 5 is wrong.
Finally, we have the file “rice” with the permissions “-rw-r--r--”. The user “alice” is not only the owner of the file (who has read and write access), but given that everyone is allowed to read the file anyway (“r--”), the last answer is definitely correct.
The correct answers are 3, 4, and 6.
The command ls -l shows the following output in a UNIX/Linux environment. Which of the following statements are correct?
Answers
-
The user “johnny” can’t read the contents of the file “
wordpress” by default -
All users of the group “admin” can delete the file “
typo3” -
All users of the group “johnny” can delete the file “
drupal” -
The user “rachel” can write data into the existing file “
wordpress” because she is the owner -
The owner of the file “
drupal” is the user “johnny”
Number of correct answers: 2
Explanation
You can tackle this question in various ways. One option is to look at the files and determine if the permission settings match the statements that each answer gives or not. This approach possibly saves you some time but requires you to go through all answers and sort them in your mind. Let’s try it. The answers 1 and 4 deal with the file “wordpress”. The answers 3 and 5 deal with the file “drupal”. The remaining answer 2 deals with the file “typo3”.
Looking at the file “wordpress”, its permissions are set to “-r--------”, and the file is owned by the user “rachel” and has the group “root” assigned to it. This is a pretty restrictive configuration. Answer 1 claims that the user “johnny” can’t read the contents of this file. This is obviously correct. Answer 4 claims that the user “rachel” can write data into the file (“because she is the owner”). Although she’s is indeed the owner, the permissions only allow her to read the file but not to execute write actions. The first answer is therefore correct and answer 4 is wrong.
The second file is named “drupal”. The permissions are set to “-rwxr-xr-x” with the owner “johnny” and the group “johnny”. Answer 3 claims that all users of the group “johnny” can delete this file. This is wrong. Users of this group can read and execute the file but don’t have write permissions. The answer 5 is the second answer that deals with this file. This answers claims that the owner of the file is the user “johnny”, which is obviously correct.
The remaining file is named “typo3” and only the answer 2 deals with this file. The answer claims that all users of the group “admin” can delete the file. Although the file indeed has the group “admin”, the permission settings “-rw-r--r--” do not allow the members of this group to execute write actions on this file. This, of course, includes the deletion.
The correct answers are 1 and 5.
Which command do you use to initialize a new Git repository?
Answers
-
git repo -
git create-project -
git init -
git new
Number of correct answers: 1
Explanation
As Git is the de facto standard of version control systems today, you find hundreds of example questions when you search for “typical Git exam questions” in your favorite search engine. Let me repeat what the TCCI syllabus expects from TYPO3 integrators in regards to their Git knowledge:
Certified TYPO3 integrators are familiar with repositories, tags, and common Git commands such as “clone”, “pull”, “commit”, “push”, and “log”. They know how to initialize a Git repository, create branches, switch branches, and how to merge source code.
The list obviously covers the basics, and how to initialize a new Git repository is, without doubt, an elementary action. The correct answer is 3. The git init command creates an empty Git repository or re-initializes an existing one.
In a Linux environment, create a new directory foobar/ in your home directory (for example /home/michael/foobar/). Add an arbitrary new file and execute the Git command to initialize a Git repository:
cd foobar/
$ git init
Initialized empty Git repository in /home/michael/foobar/.git/
The commands listed in the answers 1, 2, and 4 are made up.
The correct answer is 3.
Which command do you use to list the history of a Git repository that you cloned to your local machine?
Answers
-
git history -
git log -
git list -
git help
Number of correct answers: 1
Explanation
Let’s go through another practical exercise to test which of the four answers is correct. First, we clone the TYPO3 source code from GitHub. This possibly takes some time as the repository consumes more than 470 MB and the following command downloads more than 890,000 objects:
Next, change to the directory typo3/ and check the current status of your local repository:
cd typo3/
$ git status
On branch main
Your branch is up to date with 'origin/main'.
The main branch is the cutting edge development branch of TYPO3. To output the last change that happened in the Git repository, you can execute the following command:
Without the parameter -1, the command git log would output the entire history which goes back to the year 2003 when the TYPO3 project started using Git. If you know the commit ID of a change, you can also output this specific commit, for example:
As many other Git commands, the output of the log command is highly customizable. To output the first line of every commit message (also known as the summary line), you can, for example, add the --pretty parameter:
=oneline
No doubt that you can list the history of a Git repository by using the git log command.
The correct answer is 2.
Which commands are valid Git commands?
Answers
-
git pull -
git destroy -
git install -
git commit -
git push -
git remove
Number of correct answers: 3
Explanation
Git is a powerful command line tool. It has a small set of common commands and you don’t even need to know every of these common commands inside out. The following table shows the most important basic commands (in alphabetic order) and their meaning9:
| Git command | Meaning |
|---|---|
add |
Add file contents to the index. |
branch |
List, create, or delete branches. |
checkout |
Switch branches or restore working tree files. |
clone |
Clone a repository into a new directory. |
commit |
Record changes to the repository. |
diff |
Show changes between commits, commit and working tree, etc. |
fetch |
Download objects and refs from another repository. |
init |
Create an empty Git repository or reinitialize an existing one. |
log |
Show commit logs. |
merge |
Join two or more development histories together. |
mv |
Move or rename a file, a directory, or a symlink. |
pull |
Fetch from and integrate with another repository or a local branch. |
push |
Update remote refs along with associated objects. |
reset |
Reset current HEAD to the specified state. |
rm |
Remove files from the working tree and from the index. |
status |
Show the working tree status. |
switch |
Switch branches. |
tag |
Create, list, delete or verify a tag object signed with GPG. |
The help information (command git help) lists the common commands. If you add the argument --all (or the short form -a) to the command, Git outputs a list of all available commands. As a TYPO3 integrator, you should at least be familiar with the common Git commands.
The commands destroy, install, and remove exist in neither the common nor the full command list.
The correct answers are 1, 4, and 5.
When you pull the latest code changes from a remote repository, Git outputs the following error. What does this error mean?
Answers
-
This is a well-known bug in Git which requires an update to the latest version
-
You don’t have access to the remote Git repository server
-
You haven’t configured a valid email address which results in a conflict
-
You haven’t purchased a Git licence or the licence has expired
-
Git is unable to automatically resolve code differences and manual intervention is required
Number of correct answers: 1
Explanation
This is obviously a merge conflict. Imagine the following. If two or more developers work on the same code base, Git tries to manage the changes of each developer and merges them as required. In most cases, this works well. In simplified terms, if two developers work in different files, Git can take care of code merges without problems. Even if two developers make changes in the same file but on different lines, Git can handle that.
A merge conflict, however, can occur when Git is unable to automatically resolve code differences. For example, if two developers made changes to a file at the same lines, or if one developer deleted a file while another developer was modifying the same file. In this case, Git can’t determine which developer’s change is the relevant one10.
All the answers 1 to 4 are distractors and obviously wrong. A merge conflict is definitely not a bug in Git nor has anything to do with access permissions on a server. Git is free and open-source software and licensed under the GPL version 2.0. You don’t need a license to use the standard Git client. However, several free and proprietary (commercial) third-party tools (such as GUI clients) exist. Although you’re required to configure a name and an email address before you can commit changes to a repository, a missing or invalid email address does not cause a merge conflict.
The correct answer is 5.
How do you resolve a merge conflict in Git?
Answers
-
The Git command “
git --force merge” resolves merge conflicts automatically -
Edit the files that cause the conflict and commit the changes
-
Ask the developer who caused the conflict to undo their changes
-
Delete the local repository and clone it again from the remote server
Number of correct answers: 1
Explanation
The previous question dealt with identifying merge conflicts. This question focuses on how to resolve such a conflict.
As I pointed out before, a merge conflict can occur if you try to merge files that have changes at the same lines, and Git can’t determine which change is relevant. Only a manual action can resolve such a conflict which excludes the first answer. Such a command simply does not exist.
Answer 3 is also wrong. A merge conflict is not the fault of a single developer. In fact, these conflicts are not uncommon when multiple developers work in a project. Imagine that two developers work on two separate tasks and both tasks require to change a specific file. From both developers’ point of view, each of their change is required to complete their task. It’s pointless to blame one of the developers and ask them to undo their changes as both changes are required and legitimate. There must be another approach to resolve a merge conflict in Git, and in fact, there is.
Answer 2 suggests that you should edit the files that cause the conflict. This is the correct solution as only a human can decide how the content of the files should look like after the changes have been merged11.
Look for so-called conflict dividers in the files that Git shows as problematic. The content between “<<<<<<<” and “=======” is content that exists in the current branch. The content between “=======” and “>>>>>>>” is the content from the Git branch you tried to merge. Update the file, resolve the conflict, and commit the changes when you’re done.
The solution suggested in answer 4 is, of course, nonsense. If you delete the local repository, you loose changes you possibly made. In addition, cloning the repository from the remote server again does not address the conflict.
The correct answer is 2.
Which statements about the options of the crontab command for the current user are correct in a UNIX/Linux environment?
Answers
-
The option
-ddisplays the current crontab -
The option
-ddeletes the current crontab -
The option
-rresets the current crontab to the previous state -
The option
-llists the current crontab -
The option
-eopens a text editor to edit the current crontab -
The option
-eexecute all entries in the current crontab, independent from the date/time definition
Number of correct answers: 2
Explanation
You can use the cron service in a UNIX/Linux environment to schedule tasks to run at a specific date, time, and/or on a repetitive basis, such as daily, weekly, monthly, yearly. The TYPO3 Scheduler, for example, requires a task (so-called cronjob) to trigger its execution frequently. A configuration called cron table (short: crontab) contains the instructions for cron which tasks should run when.
The crontab command on the command line lets you manage the configuration. If a configuration already exists, the basic options for this command let you list (look up), remove/delete, and edit the configuration. If no configuration exists (yet), the command to edit the crontab creates a new configuration.
Let’s look at these options:
- The option
-ldisplays the current crontab (list). If no crontab exists, the command outputs “no crontab for <username>”. - The option
-rdeletes the current crontab (remove). If no crontab exists, the command outputs “no crontab for <username>”. - The option
-eis used to edit the current crontab. If no crontab exists, a new crontab is created.
The first two answers are wrong as the option -d does not exist. Answer 3 is wrong as the option -r deletes the current crontab (remove). It does not reset it to the previous state. A reset function does not exist. Answer 6 is wrong as the option -e lets you edit/create the crontab.
The correct answers are 4 and 5.
At what dates/times does the following cron expression run?
Answers
-
Every day at 15:00
-
Every Monday at 15:00
-
Four times every hour on every Monday
-
At 15 minutes past the full hour on every Monday
-
Every minute between 1 to 15 minutes past the full hour on every Monday
Number of correct answers: 1
Explanation
A standard cron expression has five fields to specify the dates/times when the system should execute a command:
| Field | Meaning | Concrete values | Names allowed |
|---|---|---|---|
| 1 | minute (m) |
0 to 59 or *
|
|
| 2 | hour (h) |
0 to 23 or *
|
|
| 3 | day of month (dom) |
1 to 31 or *
|
|
| 4 | month (mon) |
1 to 12 or *
|
yes |
| 5 | day of week (dow) |
0 to 7 or *
|
yes |
You can provide concrete values in these fields or “*” for any. Names can also be used in the month and the day-of-week fields. The first three letters of the particular day or month represent a name (e.g. Mon for Monday). You can also use ranges of numbers (e.g. 8-12) and comma-separated lists (e.g. 2,4,7,10). Steps are also possible, for example */2 in the hour field for “every two hours”.
The cron expression in the question reads “*/15 * * * Mon”. Each field is separated by a space:(m) (h) (dom) (mon) (dow)
This results in the following:
- The 1st field specifies a step (
*/15) which means “every 15 minutes”. - The 2nd field specifies “any” which means “at every hour”.
- The 3rd field specifies “any” which means “on any day of the month”.
- The 4th field specifies “any” which means “on any month of the year”.
- The 5th field specifies “
Mon” for the day of week (Monday).
In other words, the cronjob runs every 15 minutes (at 0, 15, 30, and 45 minutes past the full hour), at every hour, on any day throughout the year, but only on Mondays.
The correct answer is 3.
When does the following cron expression run?
8-10 13 2 12 1,7
Answers
-
On the 13th day of August, September, and October at 2:12
-
On the 2nd of December at 8:13, 9:13, and 10:13 if the day is a Friday
-
On the 12th of February at 8:13, 9:13, and 10:13 if the day is a Tuesday
-
On the 2nd of December at 13:08, 13:09, and 13:10 if the day is a Sunday
-
On the 12th of February at 13:08, 13:09, and 13:10 if the day is a Monday
-
Never, as the syntax is invalid
Number of correct answers: 1
Explanation
Admittedly, you are unlikely to encounter such an expression in real life. This is more of an exam question to test your knowledge. Let’s untangle each field to figure out when the cronjob is triggered.
The first field represents a range of minutes (8-10), the second field represents an hour (13), the third field the day of the month (2), the fourth field the month (12), and the last field a list of two possible days of the week (1,7).
This all looks like a legitimate cron expression, so let’s mark the last answer as wrong.
The “day of the week” statement is a great way to quickly eliminate further wrong answers. All answers that specify a day that is neither Monday (1) nor Sunday (7) can’t be correct. This applies to the answers 2 and 3. Keep in mind that both, 0 and 7 stand for Sunday.
The first answer is also wrong as the dates and times are mixed up. The first field of a cron expression does not represent months. The range 8-10 does not stand for August, September, and October.
At this point we already identified four of the six answers as wrong. We only have the answers 4 and 5 left. They both state a possible day of the week (Sunday and Monday) and show the correct times. The value “8-10” stands for the range between the 8th and the 10th minute, and is inclusive. The value “13” stands for the hour. The resulting times are 13:08, 13:09, and 13:10.
The difference between the answer 4 and the answer 5 is the date. Do you remember which field represents the day of the month and which field represents the month? Is it 2nd of December or 12th of February?
The correct answer is 4.
You want to execute a command on the 23rd of March at 16:30 hrs. Which cron expression is correct?
Answers
-
16:30 23 3 * * -
23 3 * 16 30 * -
3 23 16 30 * -
16 30 3 23 * * -
30 16 23 3 *
Number of correct answers: 1
Explanation
While the previous questions dealt with understanding a given cron expression, this question is the other way round. You’ve to prove that you can actually construct an expression based on a given date and time. This is nothing more than a mapping exercise. Just keep the five fields and their correct order in mind and you should be fine.
The first answer defines the time (16:30 hrs) in one field, with a colon (:) as a separator between the hours and the minutes. This is obviously wrong.
The next two answers show the date in the first and second fields. Answer 2 puts the day first (23) and the month second (3), answer 3 vice versa. As you know from the explanations of the previous questions, the first two fields define the time. Therefore, the answer 2 and the answer 3 are both wrong.
The last two answers both use the time-first and date-second approach. That’s promising! If you convert each field into a more abstract writing, you end up with “(h) (m) (mon) (dom) * *” for the solution suggested in answer 4. Hold on! These are six fields and the order is also wrong. The last answer must be the correct answer: “(m) (h) (dom) (mon) *” (minutes, hours, day of month, month, and any day of the week).
The correct answer is 5.
What is a character set?
Answers
-
The ISO-8859 standard, also known as 8-bit extended ASCII, is a character set
-
An assessment of your character if you’re eligible to become a TYPO3 Association member
-
The characters of a password that TYPO3 checks to determine the password strength level
-
A method for encoding and decoding letters and characters
Number of correct answers: 2
Explanation
As computers deal in numbers and not letters, every character is represented by a number. When computers communicate with each other, it must be ensured that the receiver can interpret the message from the sender, and convert the numbers back to their correct characters. Otherwise the message would become scrambled.
Several translation tables were developed and have become a standard over time12. These tables define what number stands for what character. If both parties, the sender and the receiver, use the same table, a message can be encoded, transmitted, and decoded again.
These tables are also known as character sets and may also be referred to as character maps, charsets or character codes.
Where does this concept apply to in practical terms? Imagine a TYPO3 instance that generates a page of a website. A user accesses the page with their browser. If the browser would use character set that differs from the character set used by TYPO3, letters and characters would possibly come up unreadable. Data stored in the database in a another example. TYPO3 has to use the same character set as the data stored in the database.
A character set is, of course, not an assessment of your character. The second answer is wrong. Although TYPO3 has built-in functions to determine the strength of a password, answer 3 is also wrong. Character sets have nothing to do with security as such.
The correct answers are 1 and 4.
Which character set is the recommended default in TYPO3?
Answers
-
ASCII
-
UTF-8
-
EBCDIC
-
ISO-8859
-
TypoCharset
Number of correct answers: 1
Explanation
All answers provide valid character sets that indeed exist, except for answer 5. This term is made up. Let’s shed some light on each of the remaining four character sets in order of their appearance above.
- ASCII (or US-ASCII)
This is one of the oldest character sets in the information technology13. With just seven bits, ASCII can define all lower case and upper case Latin letters, numerical digits, and commonly used punctuation marks, spaces, tabs, etc. However, the limit of 128 characters means that this character set can’t store German umlauts, Cyrillic letters, Greek characters, etc.
- UTF-8
The abbreviation UTF stands for Universal Character Set Transformation Format. The number eight represents the number of bits. Although other standards exist, e.g. Unicode with 32-bit characters or UTF-16, the UTF-8 character set combines the capability to represent more than 100,000 characters with low bandwidth consumption. It’s also backward compatible with ASCII. UTF-8 is known as a multi-byte and variable-width encoding. Some characters take 1 byte and some up to 4.
- EBCDIC
The EBCDIC character set was developed by IBM separately from the ASCII encoding scheme in the 1960s. The abbreviation stands for Extended Binary Coded Decimal Interchange Code. EBCDIC is an 8-bit basic Latin encoding (non‑ASCII). It lacks the support of umlauted letters and other characters that are deemed standard today.
- ISO-8859
The ISO-8859 standard contains 15 different character sets. The standard was published in the late 1990s and covers alphabets such as Cyrillic, Arabic, Hebrew, Turkish, and Thai. Although at this point in the history we managed to store and process texts in many languages using 8-bit character sets, alphabets with more than 256 characters (e.g. Chinese and Japanese) were left out.
The pros and cons of the character sets described above make it clear which TYPO3’s recommended default is – and why.
The correct answer is 2.
You are tasked to build a TYPO3 site that should support Cyrillic and Chinese characters. Which character set can you use?
Answers
-
TYPO3 does not support non-Latin characters
-
The ASCII character set
-
The ISO-8859-5 character set
-
The UTF-8 character set
Number of correct answers: 1
Explanation
TYPO3’s multi-language capabilities are outstanding and a unique selling point for this enterprise content management system. This fact means that TYPO3 has to support a wide range of characters including non-Latin characters such as Cyrillic, Chinese, Japanese, etc. The first answer is wrong.
As pointed out in the previous question of this study guide, ASCII is a rather simple 7-bit character set that only contains 128 characters. German umlauts, Cyrillic letters, Greek and Chinese characters, etc. can’t be represented in ASCII. The answer 2 is also wrong.
The ISO-8859 standard sounds promising though. The goal for developing this standard was to cover a wide range of international alphabets. In fact, part 5 of the standard (ISO-8859-5) describes the character set for “Latin/Cyrillic” and covers Slavic languages that use a Cyrillic alphabet, including Belarusian, Bulgarian, Macedonian, Russian, Serbian, and Ukrainian (partial).
However, the question unambiguously states that the website should support Cyrillic and Chinese characters. The latter can’t be met with the 8-bit ISO-8859-5 character set. The UTF-8 character set, however, supports both.
The correct answer is 4.
Which server software is suitable to run TYPO3 v11 LTS?
Answers
-
Linux, Apache, MySQL, and PHP v5.6 (LAMP stack)
-
PHP v7.0, PostgreSQL, and Apache web server
-
PHP v7.4, a web server, and MySQL v5.7
-
Java, PHP v7.3, and phpMyAdmin
-
IIS, ASP, SQLite
-
PHP v7.4, Apache or Nginx, and SQLite or MariaDB
Number of correct answers: 2
Explanation
You can install TYPO3 on a wide range of environments. The important point is that the system features a web server (such as Apache httpd, Nginx, Microsoft IIS1, or Caddy Server). The version and type of the web server software are not relevant – TYPO3 runs on most modern web servers that support PHP.
TYPO3 also requires a database engine. I explicitly say database engine, not database server, as a difference between these terms exist. We will discuss this fact in a separate question in more detail. Thanks to the database abstraction layer Doctrine, which was introduced in TYPO3 v8, TYPO3 officially supports a range of database servers and engines.
Finally, you need to know the minimum PHP version that is required for TYPO3 v11 LTS.
One possible approach to determine the two correct answers to this question is to scratch off the answers that contain a component or version that is clearly against the system requirements. This approach removes answer 1 straight away, as PHP v5.6 is too old for TYPO3 v11. The same applies to answer 2. Although this answer correctly lists PostgreSQL and Apache, TYPO3 v11 LTS requires at least PHP v7.4. The PHP version given in answer 2 does not match the minimum system requirements of TYPO3 v11 LTS.
Answer 3, however, looks promising. The PHP version matches, a web server is included, and TYPO3 v11 LTS works perfectly fine with MySQL v5.7.
The next two answers are both nonsenses. PHP v7.3 is too old, and phpMyAdmin is a web-based administration tool for MySQL and MariaDB but neither a database server nor engine. Java and ASP have nothing to do with TYPO3, so both answers 4 and 5 are not an option.
Answer 6 is therefore the last remaining answer that has to be right. The PHP version matches the minimum requirements, both suggested web servers are ok too, and TYPO3 v11 LTS also supports SQLite and MariaDB.
The correct answers are 3 and 6.
PHP version 7.0 is available on your system. Which versions of TYPO3 can you use?
Answers
-
TYPO3 version 6.2 LTS
-
TYPO3 version 7 LTS
-
TYPO3 version 8 LTS
-
TYPO3 version 9 LTS
-
TYPO3 version 10 LTS
-
TYPO3 version 11 LTS
Number of correct answers: 2
Explanation
Although the answers include quite some old versions of TYPO3, this question is reasonable and practical. As a TYPO3 integrator, you work with clients and their infrastructure teams. The question might not be about which environment you need, but more about which TYPO3 version you can use in an existing environment. In most cases, you aim for a modern environment and the latest stable TYPO3 version, but this is not the question here.
The TYPO3 Core developers are caught between the devil and the deep blue sea. On the one hand, TYPO3 should run on standard servers operated by hosting providers across the globe. These servers sometimes don’t feature the latest version of PHP. On the other hand, TYPO3 should use modern technologies to keep up the pace and not fall behind its competitors regarding features, performance, etc.
The PHP development team released PHP version 7.0 in December 2015. This release marked the start of a new major series and came with a new version of the Zend Engine, numerous improvements and new features. You can read more about this version and the main changes at https://php.net/manual/en/migration70.php.
PHP version 7.0 provides a significant performance boost to the overall system, and TYPO3 uses new features such as the cryptographically secure pseudo-random generators. PHP 7.0 is the minimum requirement for TYPO3 v8 but TYPO3 v7 has also been successfully tested with PHP 7.0. Having said that, TYPO3 v9 and v10 require at least PHP version 7.2.
TYPO3 v7, v8, v9, and v10 share the same requirement in regards to the PHP version. TYPO3 v11 requires at least PHP version 7.4 and TYPO3 v12 requires at least PHP version 8.1.
The following compatibility matrix2 shows which version of PHP is supported by which version of TYPO3.
| TYPO3 v6.2 LTS | TYPO3 v7 LTS | TYPO3 v8 LTS | TYPO3 v9 LTS | TYPO3 v10 LTS | TYPO3 v11 LTS | TYPO3 v12 | |
|---|---|---|---|---|---|---|---|
| PHP 5.3 | yes | no | no | no | no | no | no |
| PHP 5.4 | yes | no | no | no | no | no | no |
| PHP 5.5 | yes | yes | no | no | no | no | no |
| PHP 5.6 | yes | yes | no | no | no | no | no |
| PHP 7.0 | no | yes | yes | no | no | no | no |
| PHP 7.1 | no | yes | yes | no | no | no | no |
| PHP 7.2 | no | yes | yes | yes | yes | no | no |
| PHP 7.3 | no | yes | yes | yes | yes | no | no |
| PHP 7.4 | no | yes | yes | yes | yes | yes | no |
| PHP 8.0 | no | no | no | no | no | yes | no |
| PHP 8.1 | no | no | no | no | no | yes | yes |
| PHP 8.2 | no | no | no | no | no | yes | yes |
The correct answers are 2 and 3.
Where in TYPO3 can you find the currently used TYPO3 Core version (in the format x.y.z)?
Answers
-
TYPO3 outputs the exact version as a comment in the HTML source code of the frontend
-
TYPO3 adds a
<meta>-tag that shows the exact version in the HTML source code in the backend -
TYPO3 shows the exact version on the login page before you log-in at the TYPO3 backend
-
The “About TYPO3 CMS” module shows the exact version after logging-in to the backend (if the module is installed/enabled)
-
The page title shows the exact version after logging-in to the backend
Number of correct answers: 2
Explanation
The frontend source code contains a comment by default that shows that the website is powered by TYPO3. However, it does not display the exact version number. The backend login page does not show a version number before you log-in either. In older TYPO3 versions, the following global configuration option existed:
$GLOBALS['TYPO3_CONF_VARS']['SYS']['loginCopyrightShowVersion']
This configuration enabled the display of the TYPO3 version number which was disabled by default. This option was removed in TYPO3 v7 but you could still set it manually in the file AdditionalConfiguration.php if required. This configuration was removed completely in TYPO3 v8. Having said all that, none of the possible answers is related to this configuration.
Let’s take a look at the HTML source code of the backend login page of a modern TYPO3 v11 LTS installation. The code contains a few <meta>-tags but none of them shows the TYPO3 version. The only <meta>-tag that comes close is the meta name generator tag:
<meta name="generator" content="TYPO3 CMS" />
The exact version can only be determined after you logged-in at the backend. You find the version number (for example 11.5.5) in, at least, the following four places:
- the page title
- below the global site name at the top left
- in the “System Information” dropdown at the top right
- in the “About TYPO3 CMS” module
The correct answers are 4 and 5.
Which resource do you consult to find out if a new version of TYPO3 is available?
Explanation
This question naturally refers to a reliable source for this information, and not whether all of the websites mentioned above may contain this information.
For example, a few years ago, www.typo3.de used to offer an extensive range of information (in German) about TYPO3, relating to features, history, etc. The domain now redirects to https://typo3.org. At the time of writing, the website www.typo3blog.org does not exist – and even if someone would register this domain, it is not an official source. Neither is the site http://www.cmsmatrix.org. Therefore, none of these three resources contain official information on the release of a new TYPO3 version which leaves us with only answer 2 remaining.
Everything relating to the TYPO3 project is, of course, published on one central website:
https://typo3.org.
This site is the starting point for developers, integrators, and end-users. It contains news articles about TYPO3, an event listing, and many information about the project, history, brand, community, teams, the TYPO Association, and much more. Over the years, some sections and functions have been moved into their own systems and individual domains. They can be accessed by the links shown in the top bar on typo3.org:

- Product
This link/icon points to the website of the TYPO3 GmbH, https://typo3.com.
- Community
This link/icon points to the website of the TYPO3 project, https://typo3.org.
- Demo
This link/icon points to the interactive demo installation of TYPO3, https://demo.typo3.org.
- Extensions
This link/icon points to the TYPO3 Extension Repository (TER), https://extensions.typo3.org.
- Documentation
This link/icon points to the official TYPO3 Documentation, https://docs.typo3.org.
- Shop
This link/icon points to the official TYPO3 Shop, https://shop.typo3.com.
- My TYPO3
This link/icon points to the central hub for communication, education, products, services, and interaction, https://my.typo3.org
- Get TYPO3
This link/icon points to download resources, including release notes, etc., https://get.typo3.org.
The link listed last (Get TYPO3) is the official resource to find out if a new version of TYPO3 is available. The TYPO3 Release Team also announces new TYPO3 versions at Twitter, Slack, and in the official mailing list “typo3-announce”.
The correct answer is 2.
In which environments can you use the SQLite database engine for TYPO3?
Answers
-
In development and local test environments
-
In high-performance, high-traffic production instances
-
On servers where PHP is not available
-
In simple environments for small TYPO3 sites
Number of correct answers: 2
Explanation
SQLite is a self-contained SQL database engine. In contrast to relational database management systems (RDBMS) such as MySQL, MariaDB, PostgreSQL, etc. it is not a client-server database engine but is embedded into PHP. The main advantages of SQLite is the small footprint of the database and the fact that you don’t need to run and maintain an extra SQL server. The downsides, however, are the lack of multi-user capabilities, lack of granular access controls, and its handling of writes operations. In particular the latter leads to performance issues with large datasets.
As a consequence, SQLite is a good solution when it comes to development and local test environments as well as low traffic websites. It is not suitable for high-performance, high-traffic production instances as suggested in answer 2.
Answer 3 is out of question as TYPO3 does not run without PHP anyway.
The correct answers are 1 and 4.
After installing TYPO3 or a third-party extension you get a blank screen (frontend and backend). What do you do?
Answers
-
Delete all files in the
var/cache/,var/temp/andtypo3conf/ext/directories -
Review the entries of the PHP error log
-
Change TYPO3’s application context to “Development”
-
Log-in to the TYPO3 backend and analyze the error message in the system log
-
Open the Admin Tools and analyze the TYPO3 error log
Number of correct answers: 2
Explanation
Although modern TYPO3 versions catch most errors that can be caused by an incompatible hosting environment, a combination of issues can lead to the above result under rare circumstances. The same can happen with third-party extensions if, for example, the author has not tested the PHP code with various PHP versions, modules, and configurations.
PHP fatal errors typically produce a HTTP status code 5003 (internal server error) that would usually be shown in the web browser of the user. This would give you a hint what went wrong and which component or configuration you should investigate. However, a system administrator or web hoster can configure the environment to supress all errors which then results in a blank screen.
Having said that, from a security perspective it is preferable to show a blank page instead of a detailed error message. Error descriptions on a production system may reveal internal system details that would allow potential attackers to draw conclusions on the server, directory structure, or similar. This is one reason why an environment could be configured this way.
The best way forward in such a situation is to review the entries of the PHP error log as suggested in answer 2. You can also enable TYPO3’s “debug” mode by setting the application context to Development. The TYPO3 documentation provides more details how to configure this.
The first answer is, however, nonsense. Deleting the contents of these directories doesn’t fix the issue and in particular the content of the last directory in the list is important and must not be removed.
The approach suggested in answer 4 is not possible as the question clearly points out that you get a blank page in the frontend and in the backend. The last answer is not an option either as the Admin Tools don’t contain an error log.
The correct answers are 2 and 3.
Which files are absolutely required so that TYPO3 can be accessed in the frontend?
Answers
-
File
typo3conf/LocalConfiguration.php -
File
index.phpin the document root of the web server -
File
typo3/index.php -
File
typo3conf/ENABLE_INSTALL_TOOL
Number of correct answers: 2
Explanation
You do not need to know every single file and directory of your TYPO3 instance. Only some basic knowledge is required. This includes the most important files and directories that are essential for running TYPO3. After all, a certified TYPO3 integrator should know which areas to analyze in order to fix a faulty installation, for example.
The file LocalConfiguration.php located in the typo3conf/ directory is the central configuration file that you will encounter on occasion as an integrator. You are expected to know this file very well, and also the file AdditionalConfiguration.php in the same directory that you can use to override the configuration in LocalConfiguration.php. The first answer is therefore correct. If the file typo3conf/LocalConfiguration.php does not exist, TYPO3 initiates the installation procedure.
The file index.php in the document root of the web server is responsible for processing request to the frontend. Depending on the web server configuration, this file is automatically served when a request comes in. For example example.com (without a file name given). The second answer is also correct.
The next two files (answer 3 and answer 4) are not required to open the frontend. The file typo3/index.php is your gateway to the TYPO3 backend. This is required for TYPO3 to function fully and to allow backend users to edit content but not for displaying the website in the frontend. The file ENABLE_INSTALL_TOOL allows you to access the standalone Install Tool (Admin Tools). Whether the Install Tool is active or not has no effect on the frontend.
The correct answers are 1 and 2.
Which directories are a mandatory requirement so that TYPO3 can be accessed in the frontend?
Answers
-
Directory
typo3conf/ -
Directory
typo3temp/ -
Directory
t3lib/ -
Directory
typo3/ -
Directory
fileadmin/ -
Directory
uploads/
Number of correct answers: 2
Explanation
The rules that apply for files (see previous question) also apply for directories. It is not important for you to know every single directory but it is important to understand the basic processes and connections. When TYPO3 is started, it requires files from the directory typo3/. This means answer 4 is correct in any case. Subsequently, the configuration is loaded which is located in the file typo3conf/LocalConfiguration.php. This means that the directory typo3conf/ must exist as suggsted in answer 1.
After a major restructure of TYPO3 in version 6.2, the directory t3lib/ does not exist anymore. Answer 3 is therefore wrong.
Directories such as uploads/ and in particular fileadmin/ are known as the user space. This means that end users (e.g. editors) are working with them. These directories often contain files which are important for the frontend but they are not essential for users to access TYPO3 in the frontend.
The same applies to files in the directory typo3temp/ where mainly generated static assets are stored (e.g. merged CSS and JavaScript files). If TYPO3 detects that a temporary file is missing, that file is simply created anew at runtime. If the directory itself does not exist, TYPO3 v11 LTS automatically creates it. This was not the case with older TYPO3 versions by the way.
The correct answers are 1 and 4.
What happens if the web server user does not have write access to the directory typo3temp/?
Answers
-
You won’t be able to to login at the Install Tool
-
You won’t be able to to login at the TYPO3 backend
-
The TYPO3 frontend does not come up and shows an error message instead
-
TYPO3 continues to work without problems as the system automatically creates a fallback directory
typo3temp2/
Number of correct answers: 1
Explanation
TYPO3 requires some important directories to work. If TYPO3 (the web server user respectively) can’t write data into these, some functions break. You can review the list of those directories, and check their status, in the Install Tool under Environment → Directory Status. One of these directories is typo3temp/. If the directory exists but TYPO3 can’t write into it, the Install Tool function reports this issue. This means that the first answer is wrong, as you can access the Install Tool directly.
The frontend also continues to work in general. Temporary assets that are missing but typically stored in typo3temp/assets/ will, of course, fail, but the claim in answer 3 is incorrect. The frontend does come up. The last answer is also wrong. TYPO3 does not automatically create a directory typo3temp2/ as a fallback.
The TYPO3 backend, however, won’t work. TYPO3 tries to read from and write temporary assets into the typo3temp/assets/ directory. If this fails, the backend login stops working.
The correct answer is 2.
Certain functions in TYPO3 are not executed correctly. Where do you find the PHP configuration in order to review it?
Answers
-
The only option is to review the php.ini file on the command line
-
The PHP configuration is encrypted for security reasons and can’t be reviewed
-
Open TYPO3’s internal PHP check by accessing
example.com/phpinfo -
Open the Admin Tools and go to the “Environment” section
-
The only option is to create a PHP file on the server that has the following content:
<?php phpinfo(); ?>
Number of correct answers: 1
Explanation
When certain functions in TYPO3 are not executed satisfactorily, the PHP configuration could be to blame. To resolve a problem that relates to the PHP configuration and manifests by producing error messages complaining of a lack of working memory, use the memory_limit parameter in the PHP configuration.
There is another phenomenon that often leads to questions. Under certain circumstances updating the extension list in the Extension Manager fails if the TYPO3 instance was installed using the classic installation method. An error message indicates that TYPO3 is unable to communicate with the main server (can not establish a secure connection to the TYPO3 Extension Repository server for example). In TYPO3 v6 and v7, “curl” has to be enabled for this purpose. You can do this in the curlUse section of the PHP configuration, pressuming the appropriate PHP module is loaded. TYPO3 v8 and newer versions use the well-known “Guzzle” PHP library. Several configuration options for “curl” and “Guzzle” are available under Admin Tools → Settings → Global Configuration (or “All configurations” in TYPO3 versions prior v9). Open the section Connection [HTTP] in TYPO3 v8 and v9, or search for curl or http in older versions of TYPO3.
“curl”, “Guzzle” and many other components are configured in PHP and a TYPO3 integrator must be able to look up the PHP configuration.
You do not need a command line for this, so answer 1 is wrong. The solution suggested in answer 5 is technically possible but is not the only correct option. Although the PHP configuration may contain sensitive information about your TYPO3 setup, the configuration is not encrypted and can be reviewed. The second answer is also wrong. TYPO3 does not feature a PHP check at the URL suggested in answer 3.
The only right approach is described in answer 4. Go to Admin Tools → Environment → PHP Info. This outputs detailed information about your installation of PHP.
The correct answer is 4.
Which file do you have to create manually to allow a TYPO3 installation from scratch?
Answers
-
The file
typo3conf/ENABLE_INSTALL_TOOL -
The file
typo3conf/ENABLE_INSTALL -
The file
config/install.yaml -
The file
FIRST_INSTALL -
The file
INSTALL
Number of correct answers: 1
Explanation
When you install TYPO3 from scratch, a specific file needs to be created in order to activate the installation process. This is regardless of whether you choose the classic installation method or Composer4.
Many, many years ago (before TYPO3 version 4.1), it was possible to install TYPO3 without creating this file. Back then you had to edit a PHP file typo3/install/index.php and remove a die() function call from the source code. To be precise:

In TYPO3 version 4.1, the file ENABLE_INSTALL_TOOL was introduced which you had to store in the typo3conf/ directory. TYPO3 treats this file as “valid” if the creation time is not older than 60 minutes. This behavior was once again adapted further in TYPO3 version 6.2 LTS. Since then a file named FIRST_INSTALL must exist in the root directory of the installation.
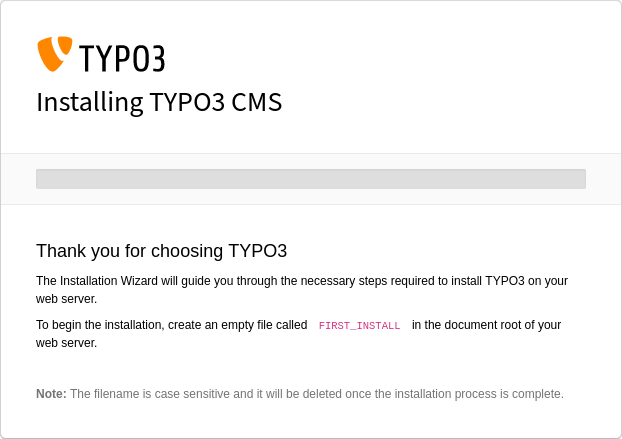
The file typo3conf/ENABLE_INSTALL_TOOL is still required to access the Install Tool (Admin Tools) without logging-in at the backend first. This method is also called the standalone Admin Tools. The file name in answer 2 is misspelled and the files suggested in answer 3 and answer 5 are made up.
The correct answer is 4.
When you directly access the Install Tool in a fresh TYPO3 installation, TYPO3 asks for a password. What is this password if it has not been changed after the installation?
Answers
-
The initial Install Tool password is “
joh316” -
The initial Install Tool password is “
kas315” -
The initial Install Tool password is “
password” -
The password is the same as the password entered for the administrator user during the installation process
Number of correct answers: 1
Explanation
Assuming an administrator set up a standard TYPO3 installation. During the installation process, TYPO3 asks for the initial backend user name and password. Typically, the administrator sends these credentials to the person who maintains the instance, for example you as a TYPO3 integrator. Once you logged-in to the backend, you can access all functions of the Install Tool through the Admin Tools. As an additional security measure, you have to enter your user password or the Install Tool password.
Having said that, the question explicitly asks for a direct access to the Install Tool. This means that you are not logged-in at the backend but you open the Install Tool by accessing the URL example.com/typo3/install.php. Let’s assume that the file typo3conf/ENABLE_INSTALL_TOOL exists and is valid, TYPO3 now asks for a password. What is the password if it has not been changed yet?
As a practicing Christian, Kasper Skårhøj chose a bible verse as the default password for the Install Tool: joh316. This stands for the Gospel of John, Chapter 3, Verse 16. However, this was abandoned in TYPO3 version 6 due to clear security concerns against using default passwords.
The initial password is the same phrase as the password entered for the administrator user during the installation process. It is highly recommended to change this password using the Install Tool (or through Admin Tools → Settings → Change Install Tool Password in the backend) as soon as the instance has been handed over.
The correct answer is 4.
How can you access the Install Tool in TYPO3 v11 LTS?
Answers
-
By accessing
example.com/typo3/install.php -
By accessing
example.com/install -
By opening “System → Install” in the TYPO3 backend
-
By opening “Site Management → Install Tool” in the TYPO3 backend
-
Install Tool functions appear under “Admin Tools” in the backend, if you have appropriate access privileges
Number of correct answers: 2
Explanation
Keep in mind that the Install Tool is an administration tool and the administration area is located in the typo3/ directory of your TYPO3 installation. Therefore, you can deduce that answer 1 is correct and answer 2 must be wrong.
Besides the method mentioned above, a second method exists that let you access Install Tool functions in TYPO3. This is in fact the more common way in particular for backend users with appropriate privileges. The backend module Admin Tools provides access to the Install Tool functions “Maintenance”, “Settings”, “Upgrade”, and “Environment”. However, these items are only visible and accessible if you are either the first administrator user in the system, or if you have system maintainer privileges.
The backend module System → Install exists in TYPO3 v8 but has been removed in more recent TYPO3 versions. So answer 3 is wrong.
The section Site Management contains functions to configure one or multiple sites, e.g. the root page, URL entry points, languages, etc. as well as redirects. You don’t find any Install Tool functions in this backend module.
The correct answers are 1 and 5.
A valid ENABLE_INSTALL_TOOL file is required to open the Install Tool. This file expires 60 minutes after its creation. How can you prevent this from happening?
Answers
-
This cannot be changed, because the lifetime is hard-coded in the TYPO3 Core
-
By setting
keepFileto1in the Install Tool under “All Configuration → BE” -
By entering the string
KEEP_FILEin the fileENABLE_INSTALL_TOOL -
By adding an empty file named
KEEP_FILEto thetypo3conf/directory
Number of correct answers: 1
Explanation
In some scenarios, the validity of 60 minutes (equals to 3,600 seconds or 1 hour) of the file ENABLE_INSTALL_TOOL can be disruptive.
In fact, the file typo3/sysext/install/Classes/Service/EnableFileService.php contains a constant INSTALL_TOOL_ENABLE_FILE_LIFETIME which is set to 3600. This makes perfect sense from a security perspective, as it saves you from remembering to manually delete the file when you want to revoke direct access to the Install Tool again. This is why it’s important that the file “expires” after a certain period of time and TYPO3 deletes this file automatically.
It’s, however, possible that the backend (e.g. direct access to /typo3/) is secured through other methods anyway (e.g. IP protection, the file .htaccess, etc.). This would make an automatic deletion superfluous.
If the file ENABLE_INSTALL_TOOL contains the string KEEP_FILE as suggested in answer 3, TYPO3 ignores the expiry time of the file. The PHP function isInstallToolEnableFilePermanent()5 ensures that the file is not deleted, even if it reaches or exceeds the end of its lifetime.
The correct answer is 3.
You suspect that certain system requirements in your TYPO3 installation are not met. How do you check this?
Answers
-
You execute the script
systemcheck.phpon the command line, which is located in thetypo3/directory -
You review the environment status provided by the Install Tool
-
You install the extension “Core Configuration Check” and run the system checks
-
You review the output of the backend module “System → Reports”
-
You review the PHP settings provided by the Install Tool
-
You generate a status report by executing the function “Site Management → System Reports”
Number of correct answers: 3
Explanation
Neither a file named systemcheck.php exist in a standard TYPO3 installation nor the extension mentioned in answer 3. The standard setup of TYPO3 already provides various methods to check if the system requirements are net and therefore, a third-party extension is not necessary.
Up until TYPO3 version 6.1, if you clicked on “Basic Configuration” in the Install Tool, you would see a detailed list of the results of the system check. This was split in two in TYPO3 v6.2 LTS: one check that is called “System environment” and one “Test setup”.
The Install Tool has been rewritten and seamlessly integrated into the backend user interface visually since TYPO3 v9. The appropriate functions to look up details about the system environment and its status can now be found under Admin Tools → Environment. These include:
- Environment Overview
An overview of the system environment, including its web server, PHP version and selected database.
- Environment Status
An analysis of the system environment to identify any issues that may prevent TYPO3 from running correctly.
- Directory Status
A analysis of the folder structure to check files and directories for correct permissions and to identify any files or directories that may be missing from the installation.
- PHP Info
An output of detailed information about the installation of PHP, including version details and enabled PHP extensions.
- Test Mail Setup
A test of the mail configuration by sending out a dummy email via TYPO3.
- Image Processing
A test of the image processing functionality by creating test images and comparing them against a set of reference images.
This means that answers 2 and 5 are correct, as both, the environment status as well as infos about the PHP settings are useful functions provided by the Install Tool.
TYPO3 also offers reports about the current system which backend users can access if they have the appropriate access privileges. The backend module is located under System → Reports as suggested in answer 4. The “Site Management”, however, does not contain a function “System Reports”, so the last answer is wrong.
The correct answers are 2, 4, and 5.
Every installation directory of TYPO3 seems to contain a directory called fileadmin/. Is this a mandatory requirement?
Answers
-
Yes, the
fileadmin/directory has to exist under exactly this name -
Yes, but the spelling is not case sensitive, so the name could also be
FileAdmin/for example -
Yes, but only on Linux systems as TYPO3 installed on Microsoft Windows does not use the
fileadmin/directory -
No, you can configure the directory name as required
-
No, the directory is optional and does not need to exist
Number of correct answers: 2
Explanation
The directory named fileadmin/ is a typical TYPO3 folder that exists in every TYPO3 version by default. This has been the case since the first TYPO3 version ever.
Let’s say you know that the configuration option $GLOBALS['TYPO3_CONF_VARS']['BE']['fileadminDir'] exists. The inline documentation of this option reads: “Path to the primary directory of files for editors. This is relative to the public web dir. DefaultStorage will be created with that configuration […]”. This option indicates that you can choose a different name for the fileadmin/ directory. Therefore, answer 4 is without doubt correct.
The important point is that this answer is a “No!” answer. All other answers, which are “Yes!” answers are therefore automatically wrong. They simply can’t be correct because they are mutually exclusive to the “No!” answer 4 you already identified as a correct answer. The only remaining answer that is also a “No!” answer is answer 5, as this answer claims that the directory does not need to exist at all. In fact, TYPO3 also works without the fileadmin/ directory. This is an unusual setup but still technically possible.
Although we know that the first three answers are wrong, let’s double-check these options. The configuration option $GLOBALS['TYPO3_CONF_VARS']['BE']['fileadminDir'] discussed above makes answer 1 wrong. So is the second answer. Files and directories are case sensitive. Answer 3 is also wrong as TYPO3 behaves the same between Linux, macOS, and Microsoft Windows systems.
A typical use case for an alternative fileadmin/ directory is an additional File Storage (a local or remote location to let backend users store resources such as images). You can, for example, create a new directory foobar/ at the same level as the fileadmin/ directory, and configure an additional File Storage under Web → List → Root page (ID: 0) → File Storage. Make sure that the driver is set to “Local filesystem” and enter the directory name foobar/ as the base path.
If you forget to create the new directory beforehand, the backend module File → Filelist lists the new storage as “offline”. Don’t worry, you can create the missing directory after you configured the storage.
The correct answers are 4 and 5.
How can you check if TYPO3 is able to send emails?
Answers
-
You have to set up a contact form, add the form to a test page, and submit the form
-
You can send a test email from the Install Tool to an email address of your choice
-
You can send a test email from the Install Tool but only to
@typo3.orgemail addresses -
You can send a test email from the Install Tool but only to email addresses that use the same domain as the TYPO3 instance
-
You have to write a PHP script containing the PHP
mail()function
Number of correct answers: 1
Explanation
This is a typical situation. A system administrator installed TYPO3 for you and the CMS seems to be functioning properly. You can create pages and the website content is shown in the frontend. It is often overlooked that a proper installation of TYPO3 also involves the configuration and test of the mail functionality. There are different reasons that can prevent the TYPO3 server from sending emails, such as firewall and mail server settings.
You should therefore check the email function when you start working with a new TYPO3 instance. How good that the Install Tool provides such a feature. The exact way to access it varies between TYPO3 versions though.
Prior to TYPO3 version 6.2 LTS, your found the function under “Basic configuration”. In TYPO3 v6.2, v7, and v8, the function was moved to the “Test setup” section of the Install Tool. In TYPO3 v9, v10, and v11, you find the option under “Environment” where you can execute the “Test Mail Setup” function.
In all instances, an input field lets you to enter an email address as the recipient of the email. The recipients are neither limited to @typo3.org addresses nor to the same domain as the TYPO3 instance. Answer 2 is therefore correct, and answer 3 and answer 4 are wrong.
This email is (technically speaking) sent in the same way as emails submitted in forms in the frontend for example. If this process is successful, you can assume that the server is configured correctly. If you do not receive the test email, check your spam folder. TYPO3 also supports several settings how to send emails. Check the configuration in the Install Tool (Admin Tools → Settings → Global Configuration) and search for [MAIL][transport].
If you don’t receive an email but you checked all settings in TYPO3 and your spam folder, you possibly want to consider to contact a system administrator or the hosting provider. They should be able to look into server log files and other (not TYPO3-related) components.
The correct answer is 2.
What is the impact if the web server user can’t write into the var/cache/ directory in a Composer-based TYPO3 installation?
Answers
-
The TYPO3 backend continues to work, but no images are shown
-
Backend users can’t login at the TYPO3 backend
-
The frontend does not work anymore (TYPO3 generates an error message)
-
The TYPO3 CLI (TYPO3 Console) continues to work
-
Direct access to the Install Tool works as this is the “emergency access”
-
TYPO3 continues to work, but all Scheduler tasks stop working
Number of correct answers: 2
Explanation
The var/cache/ directory contains at least two importat subdirectories: var/cache/code/ and var/cache/data/. These directories, and the directory var/session/, are important for TYPO3 to operate. You can empty the directories (including all their sub-directories), and TYPO3 will rebuild all required files and directories automatically. That is why these directories can be excluded when creating backups of TYPO3 instances for example.
TYPO3 typically runs in the user context as configured in the web server. If this user can’t read/write from/in the directory, the system generates the following error in the frontend and in the backend:
The directory “var/cache/code/core/” can not be created
TYPO3 becomes unusable which makes answer 1 and answer 6 wrong. If you try to execute commands by using the TYPO3 console on the command line, a similar error occurs:
The directory “var/cache/code/di/” can not be created.
Answer 4 is therefore also wrong. This reason for this is that TYPO3 requires the var/cache/code/ directory to store automatically generated code6, and to read this code in subsequent processes.
What’s about the Install Tool? As you know, most functions are embedded into the TYPO3 backend since TYPO3 v9 (section Admin Tools). If the backend stops working, you can’t access the Admin Tools through the backend. However, answer 5 explicitly suggests to direct access to the Install Tool. Can you still access the Install Tool by entering the address example.com/typo3/install.php in your browser? No, you can’t! Although the Install Tool is decoupled from the TYPO3 Core and continues to work in many situations, you can’t use the Install Tool without read/write access to the var/cache/ directory. Answer 5 is also wrong.
The correct answers are 2 and 3.
Your backend user account has administrator privileges but the backend does not show the “Admin Tools” section. What could cause this?
Answers
-
The
ENABLE_INSTALL_TOOLfile has not been created -
The system was set up using the Composer installation method
-
The system features multiple administrator accounts and your account is not set as a system maintainer
-
Access to the Admin Tool section is only available for the backend user “admin”
Number of correct answers: 1
Explanation
The file ENABLE_INSTALL_TOOL is only required if you want to access the Install Tool directly. This means, you are not logged-in at the backend of TYPO3 but you enter the address example.com/typo3/install.php in your browser. The Admin Tools backend module does not require the ENABLE_INSTALL_TOOL file which means the first answer is wrong.
It also does not matter how you set up TYPO3. Either by using the classic installation method (TYPO3 as a source package) or by using Composer7. There is no difference between these two methods in regards to the Admin Tools section in the backend. So answer 2 is also wrong.
Several conditions must be met, so that the Admin Tools become available for a user in the TYPO3 backend. First and foremost, only backend users with administrator privileges can see this section in the backend – “normal” users don’t. The user names of these users don’t have any significance here, so answer 4 is wrong. The first administrator user always has access to the Admin Tools. If multiple administrators exist in the system, they have to be defined as “system maintainers”. The system maintainer concept was introduced in TYPO3 v9 and became more restrictive in TYPO3 v10.
Further conditions exist which I will explain in a separate question.
The correct answer is 3.
What is required to see and access Install Tool functions in the TYPO3 backend, if multiple administrator backend users exist?
Answers
-
The TYPO3 backend must be locked for all user, except for administrator users
-
Multi-factor authentication (MFA) must be configured, enabled, and used
-
The user must have system maintainer privileges, if the application context is set to “development”
-
The user must have system maintainer privileges, if the application context is set to “production”
-
Only backend users with administrator privileges can see and access Install Tool functions
-
No other administrator users must be logged-in at the backend at the same time
Number of correct answers: 2
Explanation
Assuming that you have worked with TYPO3 instances that contain multiple administrator backend users, you should be able to pick the first correct answer without a problem. Administrator privileges are required to access the section Admin Tools in the TYPO3 backend (which contains the Install Tool functions). This makes answer 5 correct straight away.
The subsequent answer 6 can’t be correct thought. It simply doesn’t make sense and you can’t control if other administrator users are logged-in at the same time in large installations.
To access the Install Tool functions through the TYPO3 backend you also don’t need to lock the backend at all. The first answer is therefore also wrong. So is the second answer. Multi-factor authentication (MFA) is an important and very effective security measure but not required to access Install Tool functions. The chapter “Security and Privacy” contains more questions about MFA.
Now you are left with two possible answers and only one of them is correct. Both answers refer to system maintainers and both suggest the application context as a condition to see and access Install Tool functions. The truth is that if your TYPO3 instance uses the “development” context, all backend users with administrator privileges can see the “Admin Tools” section in the backend. They don’t need to have system maintainer privileges necessarily. This is different in the “production” context. If multiple administrator backend users exist, it is required to add them as system maintainers.
The correct answers are 4 and 5.
You need to access the Install Tool but you don’t know the Install Tool password. What can you do to regain access?
Answers
-
Enter the hashed value of a new password in the file
typo3conf/LocalConfiguration.php -
Reinstall TYPO3 from scratch and set a new password during the installation process
-
If you’re a system maintainer, login at the backend and access the Install Tool from here
-
Overwrite the original value in the file
typo3conf/AdditionalConfiguration.php -
Set a new password in the database table
system -
Enter the hashed value of a new password in the file
config/sites/install.yaml
Number of correct answers: 3
Explanation
The chapter “Security and Privacy” contains more details and example questions about the cryptographic aspects of passwords used in TYPO3. Therefore, I’ll not go into much more details and only focus on the access to the Install at this point. You should know that the Install Tool password is stored in the file typo3conf/LocalConfiguration.php as a hashed value.
If you accesss the Install Tool directly (not through the TYPO3 backend), TYPO3 asks you to enter the Install Tool password. If you don’t know the password, you can enter anything you like8. TYPO3 detects that the password you entered does not match the stored password hash and denies the access. However, TYPO3 shows the hash of your (wrong) text string that the system calculated:
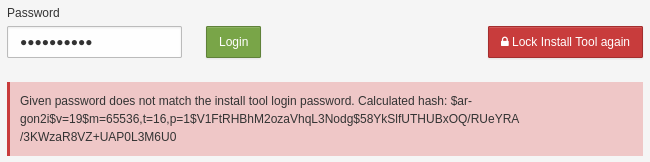
By entering this hashed value in the file typo3conf/LocalConfiguration.php, you reset the old password. From this point on, you can access the Install Tool by entering the new password, so answer 1 is correct. This solution requires access to the file LocalConfiguration.php, of course. As you can override any value in the file LocalConfiguration.php by a configuration in the file AdditionalConfiguration.php in the same folder, answer 4 is also correct:
$GLOBALS['TYPO3_CONF_VARS']['BE']['installToolPassword'] =
  '$argon2i$v=19$m=65536,t=16,p=1$V1FtRHBhM2ozaVhq ... aR8VZ+UAP0L3M6U0';
If you’re a system maintainer or the only administrator backend user in the TYPO3 installation, you can access all Install Tool functions from the backend (module Admin Tools). This makes answer 3 correct too.
Reinstalling TYPO3, as suggested in answer 2, is nonsense as this would destroy all existing data. The answers 5 and 6 are also wrong as the Install Tool password is stored neither in the database, nor on a file such as config/sites/install.yaml.
The correct answers are 1, 3, and 4.
You want to install TYPO3 v11 LTS from scratch into an empty or new directory using Composer. Which commands let you do this?
Answers
-
composer pull "typo3/cms" version=11 -
composer get "typo3:^11" -
composer create-project "typo3/cms-base-distribution:^11" typo3 -
composer install "typo3/cms:^11" -
composer require "typo3/cms:^11" -
composer require "typo3/minimal:^11"
Number of correct answers: 2
Explanation
Composer features a wide range of commands which are all well documented in the official documentation. The most commonly used9 commands are require and remove, as well as update, show, install, and dumpautoload.
You can execute the following command to display a help screen, including all available commands:
Neither a command composer pull nor composer get exist. This means that you don’t even need to scratch your head if the arguments shown in the first two answers make sense as these answers are wrong straight away.
Answer 3, however, looks quite right. As the name suggests, the create-project command creates a new project from a package into a given directory. The second argument defines the namespace of the package (here: typo3/cms-base-distribution:^11) and the last argument the directory name. When you execute this command, Composer resolves all dependencies, downloads, and installs the TYPO3 v11 base distribution into the directory typo3/.
By the way, the official TYPO3 Installation and Upgrade Guide also recommends using this method.
The install command suggested in answer 4 also looks promising. However, if you execute the command you will end up with the following error message:
Invalid argument typo3/cms:
^11. Use “composer require typo3/cms:^11” instead to add packages to your composer.json.
This is a typical trap for new users of Composer. The install command reads the composer.lock file from the current directory (or the composer.json file if the former does not exist) and processes it. Composer then downloads and installs the libraries and dependencies listed in that file. The command does not expect any arguments.
This also means that the install command only works if a composer.lock or a composer.json file exists. The question, however, asks for an installation from scratch into an empty or new directory. Answer 4 does not only show an invalid syntax but it also does not meet the requirement of an empty directory and is therefore wrong.
The last two answers suggest to use the require command which in fact adds required packages to your composer.json file and then installs them. But which of the two namespaces is correct? Or are they both correct and maybe answer 3 is actually wrong? Both arguments, "typo3/cms:^11" in answer 5 and "typo3/minimal:^11" in answer 6 look similar and plausible.
You can not install TYPO3 by using the namespace typo3/cms with the require command since TYPO3 v9. The command suggested in answer 5 does not install TYPO3 but results in the following output:
Installation of typo3/cms is not possible any more for TYPO3 versions 9.0.0 and higher. Please require typo3/minimal instead for minimum required TYPO3 system extensions, and/or require individual system extensions like typo3/cms-extension-name. E.g. composer require typo3/cms-tstemplate
This means that the answer 5 is wrong and answer 6 is correct. The package "typo3/minimal" installs a minimal set of system extensions that are required to run TYPO3. Once your basic TYPO3 setup is set up, you can add individual system extensions, for example composer require "typo3/cms-workspaces", as required.
The correct answers are 3 and 6.
You want to update a Composer package that uses semantic versioning. Which version constraint do you use to get bugfixes only?
Answers
-
=1.2.3 -
^1.2.3 -
~1.2.3 -
1.2.* -
=bugfix
Number of correct answers: 2
Explanation
When installing or updating a software package (e.g. a TYPO3 extension) with Composer, version constraints become very handy. However, they require that developers strictly follow semantic versioning. So the question is not only about how to perform updates but also how to apply versions to software packages correctly. Although we don’t expect from a TYPO3 integrator to build extensions and apply versions, you should be familiar with version constraints in Composer and you should have read and understood the relevant documentation.
The ~ operator10 defines a version range in Composer. The version constraint given in answer 3 reads ~1.2.3 which is equivalent to greater equals version 1.2.3 but less than version 1.3.0. This means that only updates are taken into account where the last number of the version is increased. According to semantic versioning, this applies to bugfixes only.
The same can be achieved by using the wildcard * on the last number as suggested in answer 4.
You find explanations about the other operators (answers 1 and 2) in further questions in this book. Answer 5 is not a valid version constraint.
The correct answers are 3 and 4.
You want to update a Composer package that uses semantic versioning. Which version constraint do you use if you want non-breaking updates only?
Answers
-
=1.2.3 -
^1.2.3 -
~1.2.3 -
*1.2.3
Number of correct answers: 1
Explanation
As outlined in the previous question, you should be familiar with version constraints in Composer and you should have read and understood the relevant documentation.
The usage of the ^ operator11 is recommended for maximum interoperability, as it will only allow non-breaking updates. The version constraint given in answer 2 reads ^1.2.3 which is equivalent to greater equals version 1.2.3 but less than version 2.0.0. This means, only updates are taken into account where the middle or the last number of the version is increased (minor and patch version number). According to semantic versioning, this applies to bugfixes and backwards-compatible changes.
Pre-MVP12 releases (sometimes called “alpha”-releases) are an exception. These releases have a major version 0. If you execute an update by using the caret operator against version 0.2.3 for example, you will only get versions less than 0.3.0.
You find explanations about the other operators (answers 1 and 3) in further questions in this book. Answer 4 does not show a valid version constraint operator.
The correct answer is 2.
What do you have to or should you do when you update to a new bugfix version of TYPO3, e.g. an update from version 11.5.10 to 11.5.11?
Answers
-
You should delete all TYPO3 caches
-
You have to empty all database tables whose names begins with
cache_ -
You have to update the reference index in the “System → DB check” module
-
You have to run the “Update wizard” in the Install Tool
-
You should check if the website (frontend) is still working as expected (functional test)
Number of correct answers: 2
Explanation
We differentiate between bugfix release updates (from 11.5.10 to 11.5.11 for example), minor releases (from 11.4 to 11.5 for example), and major release updates (from v10 LTS to v11 LTS for example). These update types have to be treated very differently.
A major release usually introduces new technologies, architecture, functions, and often breaking changes. Going through the “Upgrade wizard” in the Install Tool is a must, which includes the “Compare current database” function. A minor release update often contains new functions that may affect the database as well as the backend and frontend. You should first delete the cache and then run the Upgrade wizard. Once this is complete, you should also check if the database schema corresponds to the structure defined in the TCA13. Finally, you need to check whether your website is working as expected.
As the name suggests, a bugfix release should only remedy small issues (bugfixes) or fixes security vulnerabilities. The database is usually not affected, and no new functions are introduced into the system. For that reason, you only need to clear the cache and check if the website is working as expected.
The correct answers are 1 and 5.
Which statement about TYPO3 version updates is correct?
Answers
-
TYPO3 bugfix version updates can be executed in the Admin Tools if the instance is not in “Composer” mode
-
The TYPO3 Core can not be updated – you have to install it from scratch and migrate the content
-
The Scheduler contains a task which keeps the TYPO3 Core automatically up-to-date
-
Every version update requires to lock the backend
Number of correct answers: 1
Explanation
There would not be such a success story behind TYPO3 if it would be impossible to update the core from one version to another. Answer 2 is wrong straight away and I hope that none of my readers have chosen this answer (you have updated one of your TYPO3 instances before, right?).
A controversy exists regarding the question if you can skip a version when you upgrade between LTS releases. From a technical perspective, the TYPO3 Core developers keep the Upgrade Wizards in place for two versions. This lets you, for example, upgrade from v9 LTS to v11 LTS and execute all migration steps as TYPO3 v11 LTS contains the Upgrade Wizards that are required for the upgrade from v9 LTS and v10 LTS to v11 LTS.
In practical terms, the success of this approach heavily depends on your individual setup, configuration, and the extensions you use. If you plan an update to TYPO3 v11 LTS for example, your instance should use the latest v10 LTS release (equals version 10.4.x). An upgrade from a version before v10 LTS often results in more work.
TYPO3 does not provide an auto-update function as suggested in answer 3, so this answer is wrong.
Answer 4 is of course nonsense: TYPO3 is an enterprise content management system and used in large organisations, where it is not uncommon that hundreds of backend users use the system. If a bugfix version update (for example from version 11.5.10 to 11.5.12) would require to lock the backend and block all users to work with the system, this would be unacceptable.
This leaves you with answer 1 as the only possible correct answer. In fact, this function was introduced in TYPO3 6.2 LTS. It can be executed through the TYPO3 backend under Admin Tools → Upgrade → Update TYPO3 Core since TYPO3 v9. Older TYPO3 versions (TYPO3 v6, v7, and v8) offered this function in the Install Tool as the menu entry Important actions → Core update.
Please note that you can only execute TYPO3 bugfix versions through the backend if your instance does not use the “Composer” mode.
The correct answer is 1.
What are the requirements to execute a TYPO3 bugfix version update through the backend (Admin Tools) if your instance does not run in the “Composer” mode?
Answers
-
The TYPO3 installation needs access to
get.typo3.orgto check for new versions and download the source package -
No backend users must be logged-in at the backend at the time when the update is executed
-
The entry
typo3_srcin the file system must be a symbolic link and writable (deletable) by the web server user -
The database instance must be manually stopped during the process
-
The
gitcommand must be available for downloading the TYPO3 sources fromgithub.com -
The
tarcommand must be available for extracting the TYPO3 source package after download
Number of correct answers: 3
Explanation
Your TYPO3 instance must meet some requirements in order to successfully execute a TYPO3 bugfix version update through the backend:
- The installation uses the traditional install method (not the “composer” setup).
- The setup uses symbolic links (Unix and MacOS only).
-
typo3_srcmust be a symbolic link. - Symbolic links need to be writable (and deletable) by the web server user.
- The document root directory needs to be writable by the web server user.
- One path above the document root (
../) needs to be writable by the web server user. - The
tarcommand must be available for extracting the TYPO3 source package.
You should also keep in mind that the installation accesses the official TYPO3 API at get.typo3.org to check for new versions and to download the source packages. If TYPO3 can’t establish a connection (for example due to restrictions by a firewall), the process fails. TYPO3 Core updates are also not possible if your instance runs on Microsoft Windows.
The answers 2 and 4 are, of course, nonsense. You don’t need to kick out all users from the backend when you start the update process and stopping the database instance is also a bad idea.
Since TYPO3 downloads the new version as a .tar.gz file, you don’t need the git command on the server necessarily. This makes answer 5 also wrong.
The correct answers are 1, 3, and 6.
The TYPO3 packages are set to "^11.5" in your composer.json file. Which command updates your TYPO3 installation to the latest bugfix version?
Answers
-
git update "typo3/*" --bugfix -
git clone git.typo3.org:^11.5 -
composer update --with-all-dependencies "typo3/*" -
composer require "typo3/*" --update
Number of correct answers: 1
Explanation
Two of the four commands suggest to use the git command to update the TYPO3 installation, the other two suggest to use Composer. If you are not sure which answer is correct, try to exclude the answers which are definitely (or likely) wrong. For that, you could focus on the different parameters.
The git command, for example, does not support a parameter --bugfix. Furthermore, a sub-command update does not exist either. The first answer is clearly wrong.
The command suggested in answer 2 does not show a parameter but the solution is a mix of git and composer syntax anyway and therefore nonsense.
Although the keyword require is a valid sub-command for composer, the parameter --update is not. Composer supports either require or update as a sub-command call but not both keywords as suggested in answer 4 which is also wrong.
The TYPO3 documentation recommends the following approach to update a TYPO3 installation to the latest bugfix version.
- Check the currently used TYPO3 version and if an update is available.
- Create a backup of the site and update the reference index.
- Trigger the update by executing the following command:
"typo3/*"
The parameter --with-all-dependencies instructs Composer to also update any dependencies of TYPO3.
The correct answer is 3.
Which statements about the TYPO3 backend and the frontend are correct?
Answers
-
The TYPO3 frontend is always enabled and always shows a HTML-based website
-
If frontend users are enabled, these user accounts are the same accounts as for the backend users
-
Content creators (e.g. editors) typically use the backend to edit texts and images
-
By default, users can access the TYPO3 backend by appending
/admin/to the site’s root URL -
TYPO3 instances can be “headless” which means that no web-facing user interface (frontend) exists
Number of correct answers: 2
Explanation
Many TYPO3 instances indeed feature a HTML-based website. This is called the frontend user interface that visitors access to view the contents of the website. However, this is not necessarily the case. Not every TYPO3 frontend shows a HTML-based website. TYPO3 instances can also act, for example, as an API1 endpoint and don’t serve nice looking and human-readable content. This technique is often referred to as a headless CMS. Answer 1 is therefore wrong and answer 5 is a correct answer.
Many content management systems feature a shared user pool. In this respect, normal users of the website can be administrators of the system at the same time, provided they have been given the appropriate access rights. TYPO3 strictly differentiates the frontend from the backend, user accounts included. This means that answer 2 is wrong.
The TYPO3 backend is the administrative area of the CMS. It lets you, as an integrator, log-in and manage the system, make configuration changes, and edit records. The TYPO3 backend also lets content creators, for example editors, edit texts and images. Answer 3 is also correct.
Since the frontend represents the publicly accessible interface of your site, it is clear that you can typically access the website by entering a domain name (the site’s root URL). But how do you access the TYPO3 backend? Answer 4 suggests that you append the keyword /admin/ to the URL. However, this is not the way TYPO3 works by default. Instead, the term is /typo3/, of course – for example: example.com/typo3/.
The correct answers are 3 and 5.
What is the purpose of the Admin Panel?
Answers
-
The Admin Panel is the administrator’s control center for user settings
-
The Admin Panel can be used to analyze the frontend output
-
The Admin Panel can be used to configure TYPO3 in the backend
-
The Admin Panel can be used to simulate a website access by a specific frontend user group
-
The Admin Panel monitors data entries and can notify administrators about changes
Number of correct answers: 2
Explanation
The Admin Panel is not a panel for administrators only, so the term is actually misleading. It is possible to enable the Admin Panel for every backend user, and it is used to analyze (“debug”) the output in the frontend and other system related data. It has nothing to do with user settings. This means that the first answer is wrong and the second answer is correct.
The Admin Panel is not used to configure the TYPO3 backend and it does not monitor data entries. This makes the answers 3 and 5 wrong.
However, the Admin Panel can be configured to simulate a frontend user group, which allows users (integrators as well as editors for example) to access the frontend and check the output as a user in a specific group would see it. Answer 4 is therefore correct.
The correct answers are 2 and 4.
Which steps are required to activate the Admin Panel for a backend user without administrator privileges?
Answers
-
By entering
config.admPanel = 1in the TypoScript setup of the root template -
By entering
config.admPanel = 1in the User TSconfig -
By entering
admPanel.enable.all = 1in the TypoScript setup of the root template -
By entering
admPanel.enable.all = 1in the User TSconfig -
By enabling the function in the user’s user settings
Number of correct answers: 2
Explanation
The Admin Panel is not enabled for users by default. You have to explicitly activate it by the following configuration in the TypoScript setup of the root template:
This is all that is required for backend users with administrator privileges to work with the Admin Panel. However, an additional configuration is required for “normal” users. You have to enter the following code in the User TSconfig to allow users without administrator privileges to access the Admin Panel:
This option (“enable.all”) activates all available modules of the Admin Panel2. Alternatively, you can enable/disable specific modules such as “cache”, “debug”, “edit”, “info”, “preview”, “publish”, and “tsdebug”. Even more detailed settings are available with the “override” option.
Answer 2 is wrong as the configuration config.admPanel goes into the TypoScript setup rather than in the User TSconfig. Answer 3 is wrong as the configuration admPanel.enable goes into the User TSconfig rather than the TypoScript setup. The last answer is also wrong as the user settings don’t provide a function to enable, disable, or configuration the Admin Panel.
The correct answers are 1 and 4.
You created a content element that should be visible only between 8:00 and 11:00 in the morning. It is currently 14:00. What is a sensible way to check the output of the content?
Answers
-
You change the time on your desktop computer
-
You change the time on the server
-
You wait until 8:00 the next day
-
You simulate the correct time in the Admin Panel
Number of correct answers: 1
Explanation
Changing the internal clock of your desktop or laptop computer has no effect. The date and time used by TYPO3 to show or hide records (for example content elements) is determined based on the server time. However, changing the server time just to check the content is clearly not a sensible way as this configuration would have an impact on the entire site and all users accessing it. So, the first two answers can be excluded as the correct solution.
Waiting for the date and time to occur is possible in theory but not a practical option. Answer 3 is also wrong.
This leaves us with only one possible answer and given that this question/answer appears in the chapter “TYPO3 Handling” of this book, you likely already guessed that the using “Admin Panel” is the best possible approach.
The Admin Panel features a Preview section that lets you set several options. These options include a date/time and user group.
The correct answer is 4.
Which statements about the TYPO3 Console are correct?
Answers
-
The TYPO3 Console typically requires console access (command line interface)
-
The TYPO3 Console must first be enabled in the Install Tool
-
The TYPO3 Console is only available on Linux servers
-
The TYPO3 Console can be used to execute certain administrative actions
-
Custom commands can be added by TYPO3 developers as required
-
The TYPO3 Console is only available on TYPO3 instances in Composer mode
Number of correct answers: 3
Explanation
The first answer is without doubt correct. The TYPO3 Console is a utility that can be executed on the command line. On Linux servers, the command line (also known as the command line interface, or “CLI”) is usually provided by a “shell”3. The TYPO3 Console, however, is not limited to Linux servers. It is also available on Windows, macOS, and other systems that can serve TYPO3.
The TYPO3 Console is also known as the TYPO3 CLI or TYPO3 command line binary. It is provided by the Composer package typo3/cms-cli and is an integral part of the TYPO3 Core. You do not need to explicitly enable the TYPO3 Console, as this tool is available out of the box. Answers 2 and 3 are therefore wrong.
The location of the TYPO3 Console binary in the file system depends on your individual setup. In many cases you find the executable at vendor/bin/typo3. The argument list gives an overview of all available commands:
If you review the commands, you will realize that most of them are administrative actions to control or configure TYPO3, or to trigger specific (often internal) functions. This makes answer 4 correct.
TYPO3 has an outstanding reputation of being a flexible and extendable enterprise content management. This does not stop at the TYPO3 Console. Based on the well architectured Symfony Console Component developers can build custom commands and add them to the list of commands provided by the TYPO3 Core. This task requires PHP software development knowledge and is therefore out of scope of the TYPO3 integrator certification. As an integrator you should know that TYPO3 extensions can provide additional commands. These commands may appear in the TYPO3 Console list of available commands. Answer 5 is therefore correct.
Let’s check if the last answer is wrong, given that we already identified the three correct answers to this question. The TYPO3 Console is of course not only available if you installed TYPO3 using Composer. The path to the TYPO3 command line binary is likely different though if you install TYPO3 by extracting the source package.
The correct answers are 1, 4, and 5.
Which of the following commands does the TYPO3 Console provide out of the box?
Answers
-
You can lock and unlock access to the TYPO3 backend
-
You can create new backend users with administrator privileges
-
You can output entries from the database table
sys_log -
You can enable and disable the Admin Panel
-
You can destroy the user session of a currently logged-in backend user (forced logout)
-
You can output a list of extensions available in the system
Number of correct answers: 3
Explanation
Review the list of available commands by executing the following command on the command line4:
The section Backend contains commands that let you lock and unlock the TYPO3 backend: backend:lock and backend:unlock. This makes the first answer correct.
However, you will search in vain for a command that creates new backend users. So, answer 2 is wrong5.
A command to output entries from the database table sys_log as suggested in answer 3 indeed exists. The command syslog:list show entries from the database limited to the last 24 hours. Keep in mind, however, that this requires the system extension “Lowlevel6”.
Answer 4, on the other hand, is nonsense. You can not enable or disable the Admin Panel by using the TYPO3 Console. The next answer is also made up. The TYPO3 Console does not feature a command to destroy user sessions and to force backend user to logout.
However, the command extension:list outputs a list of extensions available in the system. The list contains only active extensions by default. If you add the option --all to the command, the list also contains inactive extensions. Further interesting commands in this context are extension:activate and extension:deactivate.
The correct answers are 1, 3, and 6.
What are backend layouts in TYPO3?
Answers
-
Backend layouts let you adjust the visual appearance of the page tree
-
Backend layouts let you change the order of backend modules in the menu on the left-hand side in the TYPO3 backend
-
Backend layouts let you define a combination of rows and columns in the backend and are typically used to visualize the appearance of the frontend
-
As backend layouts are always global, you can’t apply different layouts on different pages within the same TYPO3 installation
Number of correct answers: 1
Explanation
The layouts of websites typically feature certain areas. These areas are logical blocks such as a navigation menu, a content area, a footer, etc. You can divide the content area in further blocks. For example two columns side-by-side or more complex layouts such as a full-width row and two columns in a second row below. To make the life of backend users as easy as possible, the backend should reflect the layout in the frontend. This way editors can immediately recognize where they can enter content in the backend.
Backend layouts aim to achieve exactly this. You can define a combination of rows and columns, specify if a column should span multiple rows, and configure the visual appearance of the module Web → Page to match the layout of the frontend. At least to a certain extend.
Backend layouts impact neither the page tree nor the menu on the left-hand side in the TYPO3 backend. The first two answers are wrong. The last answer is also wrong as you can configure two or more backend layouts and apply one layout to one page and another layout to another page.
The correct answer is 3.
Which statements about page layouts in the TYPO3 backend are correct?
Answers
-
Backend layouts can be configured in “Admin Tools → Settings → Layouts”
-
Backend layouts can be used to map page layouts in the backend
-
The extension “Grid Elements” must be installed to map page layouts in the backend
-
The TYPO3 backend features a four-columns backend layout by default
-
TYPO3 supports up to four different backend layouts
Number of correct answers: 1
Explanation
If you access the module Web → Page in the TYPO3 backend, and select a standard page in the page tree, TYPO3 shows this page in the content area. You can now add, edit, move, and remove content elements – provided that you have the appropriate access rights. The layout of a page in the frontend does not necessarily corresponds to the view in the backend.
A website could have two or three columns, for example, and below these columns there could be an additional area that extends over the entire area, the full width of the page layout. For editors, it is extremely helpful to also find exactly this layout in the TYPO3 backend, so that it is immediately clear which content appears where in the frontend.
Older versions of TYPO3 featured four columns for pages in the backend by default: “Normal”, “Left”, “Right”, and “Border”. These columns could be extended or reduced, and the column names could be configured. However, this limitation is long gone (since TYPO3 v9 to be precise), and answer 4 is therefore wrong.
Today, the TYPO3 backend features only one column by default. The greatest possible flexibility can be achieved with backend layouts. They let you define as many columns and rows as you want. This means that answer 5 is also wrong.
Although third-party extensions such as “Grid Elements” are not required necessarily, they often introduce further features and functions. As this is not mandatory though, answer 3 is wrong. The Admin Tools don’t provide any functions for configuring backend layouts, so the first answer is also wrong.
The correct answer is 2.
What are possible methods to quickly find the pages you edit frequently in the TYPO3 backend?
Answers
-
By bookmarking the deep links of the pages in your browser
-
By installing the third-party extension “Shortcuts”
-
By using the “Bookmarks” function in TYPO3
-
By Using the “Web → Functions → Bookmarks” backend module
-
By using the following TypoScript option:
config.shortcuts = id1,id2,id3,...
Number of correct answers: 2
Explanation
Even large websites only contain a few pages that need to be updated frequently. It is handy if you can access these pages quickly without having to search for them.
We introduced a backend feature called deep linking in TYPO3 version 11.2 (this version was released in May 2021). Deep linking offers users the ability to share a link to a specific target in the backend with other users. The target can be a specific page, a function, and even a record such as a content element. By adding the link as a bookmark in your browser, you can easily and quickly open it directly. If you are not logged in to the backend yet, the login form appears, and you are automatically redirected to the target once successfully authenticated. The following example would open the page ID 123 in the TYPO3 backend:
example.com/typo3/module/web/layout
The first answer is therefore correct. TYPO3 features another function out of the box that let you achieve the goal. You can use the star-shaped icon in the black top bar to open the “Bookmarks” menu. If you don’t have any bookmarks added to the menu yet, TYPO3 shows some basic instructions. To add a bookmark to a page, go to Web → Page and select the page you want to bookmark in the page tree. Locate and click the “Share” icon on the right-hand site in the content area, and select “Create a bookmark to this page”. Once confirmed, TYPO3 shows the link in the Bookmark menu. This means that answer 3 is also correct.
As a side note, the term “shortcuts” was used rather than “bookmarks” in older versions of TYPO3.
The extension mentioned in answer 2 does not exist, so you can scratch this answer straight away. As the backend module Web → Functions was removed in TYPO3 v9, answer 4 can’t be correct either. Finally, the TypoScript option suggested in the last answer is made up.
The correct answers are 1 and 3.
A backend user made errors when editing content elements on a specific page and asks for your help. How can you look up the user’s last changes?
Answers
-
Restore the most recent backup of the TYPO3 instance and look up the previous state
-
Access an overview of the changes on that page under “Web → List” (table “Page”)
-
Access an overview of the changes under “Web → Info”
-
Access an overview of all changes under “Admin Tools” module
-
Access an overview of the user’s last actions under “System → Backend Users”
-
Open “System → Log” and filter the records by the user
Number of correct answers: 3
Explanation
The scenario described in the question surely occurs every now and then. If the errors made by the user simply involves a few typos, it is easy to correct the texts manually. But if long paragraphs have been reworked or images swapped, it is more difficult to restore the previous state. Luckily, TYPO3 records all changes made to content elements and provides a function that allows you to undo changes step by step as required.
Restoring a backup as suggested in the first answer is clearly not the best option. TYPO3 offers ways that are more superior than this approach.
The backend module Web → List offers a function to display the change history: locate the table “Page”, click on the three dots to expand the action items, and select the entry “Display change history/Un-do”. This opens the so-called Changelog. The respective changes are shown in the column “Differences”. TYPO3 shows additions to the content in green colour and removals in red. You can switch back to the previous state by a simple mouse click on the “Rollback” icon. Answer 2 is therefore correct.
The Web → Info module also provides access to a history. Make sure that the “Log” function is selected in the dropdown box at the top. Select a page in the page tree to open the “Administration log”. The list contains every change made on this page, by whom, on which database table, which action was performed, and a description of the change. The button “Show History” at the right opens the “Changelog” that we discussed above. Thus answer 3 is also correct.
If you thought that answer 4 is correct, you have possibly worked with TYPO3 for a long time. The module “Admin Tools” contained a function “System Log” in older TYPO3 versions. However, this function was moved to the “System” module (System → Log) in TYPO3 v6.2 LTS. This makes answer 4 wrong and answer 6 correct.
Answer 5 can’t be correct as the module for managing backend users does not offer a function to look up the user’s last changes.
The correct answers are 2, 3, and 6.
How can you test if the output of a page appears as expected for a certain screen width or height on mobile phones?
Answers
-
This cannot be tested as TYPO3 does not support responsive web design (RWD)
-
Open the page in the frontend and append the argument
width=320to the URL -
Open “Web → Template” and select “Page Preview (mobile)” from the dropdown box at the top
-
Preview the page under “Web → View” and select the preferred screen resolution
Number of correct answers: 1
Explanation
Building responsive websites is part of every web design agency’s portfolio today (or at least should be). Responsive web design (RWD) basically means that web pages render well on a wide range of devices and screen sizes. The page layout often automatically adjusts to display content elements at positions that perfectly fit on the end-user’s device. This often also applies to font sizes, margins, etc.
As responsive web design is a well-known approach today, TYPO3 offers options for integrators and editors to test their work in the backend. This makes answer 1 wrong straight away. The second answer is nonsense too. Passing an argument such as width=320 to TYPO3 does not have any affect by default.
The approach to open the Web → Template module and to select a specific function to preview a page (as suggested in answer 3) sounds realistic. The terms “page preview” basically match what the question asks for. However, the dropdown box at the top does not offer an item “Page Preview (mobile)” and the Web → Template module lets you manage TypoScript templates rather than page layout templates.
In fact, you find a page preview function under Web → View in the backend of TYPO3. You can choose between various standard devices and screen sizes, landscape and portrait view, and you can even resize the width and height manually as required.
The correct answer is 4.
How do you implement a custom width/height for a new device in the page view module in the backend?
Answers
-
Add the custom configuration under “Admin Tools → Settings → Installation-Wide Options”
-
Add the custom configuration under “Web → Templates → Info/Modify”
-
Add the custom configuration as Page TSconfig to a page
-
The TYPO3 Core provides the existing list of screen resolutions which can’t be modified or extended
Number of correct answers: 1
Explanation
The previous question explained that you can preview pages in various screen resolutions by accessing the Web → View backend module. The TYPO3 Core offers a list of standard devices and screen sizes you and your site editors can choose from. But can you extend the list and add a custom width/height?
Of course you can! So, the last answer is wrong. You just need to know where and how you can achieve this. All three remaining answers sound plausible. The function is potentially a global system setting, so a configuration under “Installation-Wide Options” would make sense. However, configuring the backend is nothing you find in the Admin Tools which makes the first answer wrong. So is the answer 2. Under Web → Templates → Info/Modify, you configure the frontend of your website but not the backend.
The correct answer is therefore the answer 3. Open the page properties of a page and access the “Resources” tab. Enter the following code in the text field Page TSconfig:
Save your changes and open the page preview under Web → View. The dropdown box at the top now offers an additional item “My Custom Screen” which resizes the preview area to the width and height as configured.
The correct answer is 3.
How do you remove one, multiple, or all available devices from the dropdown box in the page view module in the backend?
Answers
-
By deactivating or uninstalling the system extension “viewpage”
-
You can only extend the default list but not remove items from it
-
The following Page TSconfig removes all devices from the list:
mod.web_view.previewFrameWidths > -
The following Page TSconfig removes all devices from the list:
mod.web_view.previewFrameWidths.remove = true -
The following Page TSconfig removes all “desktop” devices from the list:
mod.web_view.previewFrameWidths.desktop > -
The following Page TSconfig removes the “ipadpro” device from the list:
mod.web_view.previewFrameWidths.ipadpro >
Number of correct answers: 2
Explanation
Let’s assume that you would like to offer only a few specific screen sizes to your backend users in the page preview. The length of the default list is unnecessary long and you want to shorten it by removing some or all of the items. The previous question explained that you can add custom devices and screen sizes by applying a configuration as Page TSconfig. This question now deals with the challenge of removing existing items from the dropdown box.
You would remove the entire function if you’d deactivate or uninstall the system extension “viewpage”. The solution suggested in answer 1 is therefore not practical. Almost every configuration in the TYPO3 backend is only a default configuration which can be modified. This also includes removing elements and items which makes answer 2 also wrong.
The following PHP file is part of the TYPO3 Core package:
typo3/sysext/core/Configuration/DefaultConfiguration.php
Open this file in your favorite text editor and search for the keyword previewFrameWidths. You will find it at approximately line 1300. The section you’re looking at defines the default configuration of devices and their screen sizes. The first item, for example, reads:
The label is stored in a language file. The type defines a category (e.g. desktop, tablet, or mobile), so that devices in the same category appear grouped in the dropdown box. The values width and height are self-explanatory.
If you want to remove exactly this item, you can apply the following Page TSconfig2:
You also find a configuration ipadpro in the file DefaultConfiguration.php. To remove this device from the list, you only need to apply the Page TSconfig from answer 6. This means that this answer is correct.
You cannot remove all devices based on their category, e.g. desktop or tablet. However, you can remove all devices from the list by applying the following Page TSconfig as suggested in answer 3:
The solution suggested in answer 4 does not work as the property remove does not exist.
The correct answers are 3 and 6.
How can you access a list of arbitrary data records stored against a specific page in the TYPO3 backend?
Answers
-
By selecting the page in the “Web → List” backend module
-
By selecting the page in the “Web → Page” backend module
-
By opening the “Web → View” backend module and selecting the page from the dropdown box at the top
-
By opening the “Web → Info” backend module and selecting the “Pagetree Overview” function
-
By selecting the context menu of the page in the page tree and selecting “More options>List module”
Number of correct answers: 2
Explanation
Data records in TYPO3 are arbitrary records stored in the database. A record can have a relation to a page but this is not mandatory. Dashboards and file mounts are two examples of records that don’t have a page relation. Content elements, on the other hand, are always stored against a page. The Web → List backend module provides the function that lets you access and list these records. The module is one of the most important modules apart from Web → Page. The list view lets you edit database tables and their data sets directly. You can manage and edit TypoScript templates, content elements, and other records through this module.
The easiest and most common way to access the Web → List module is the one described in answer 1, but further options exist. After all, it makes sense if users can access this list view from as many convenient points in the TYPO3 backend as possible.
The Web → Page backend module predominantly lets you work on page content but not with arbitrary data records. The second answer is wrong. You can also exclude answer 3. The purpose of the Web → View backend module is to preview a page in different screen resolutions. In addition, this module doesn’t feature a dropdown box at the top.
The term info in answer 4, however, sounds promising. If you open the Web → Info backend module, you can access a few functions in the dropdown box, and the “Pagetree Overview” function indeed exists. This view gives you an overview of pages and their main characteristics such as basic settings, cache settings, SEO details, etc. However, it does not let you access a list of arbitrary data records stored against the pages. Answer 4 is therefore also wrong.
The method suggested in answer 5 was removed in TYPO3 version 4.5, but re-introduced in TYPO3 version 8.x. You can access the Web → List module by a right-click on a page in the page tree, which opens the context menu. The illustration below shows the menu and how to access the More options → Web>List module.
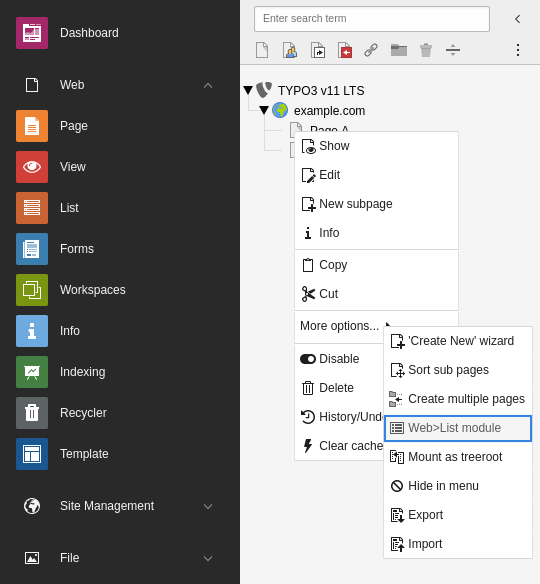
The correct answers are 1 and 5.
How can you add notes to a page in the backend so that other users can access them?
Answers
-
TYPO3 features a tab “Notes” in the page properties for this use case
-
The system extension “Page Notes” provides the function to add notes to pages
-
The function “Page Notes” of the Admin Panel lets backend users add notes to pages
-
The function “Web → View → Notes” lets backend users add notes to pages
Number of correct answers: 1
Explanation
Sometimes it can be useful to add notes to a page that show instructions, advice, or reminders to other backend users – but also to yourself.
TYPO3 offers this feature out of the box since version 9.4. An extension, as suggested in answer 2, is not required. The Admin Panel is shown in the frontend and can used to analyze (debug) the output and other system related data. It does not provide a function to add notes to pages in the backend. Answer 3 is also wrong.
A menu item Web → View → Notes does not exist by default either. The View module can be used to open a page in different views and resolutions in the backend to preview its appearance (e.g. “mobile”, “desktop”, “tablet”, etc.). This makes the last answer also wrong.
If you want to add notes to a page in the backend, you can open the tab “Notes” in the page properties. This tab contains a text input field which lets backend user to enter arbitrary notes. Other users have read and write access to this piece of information.
The correct answer is 1.
Which statement about an “undo” function in the TYPO3 backend is correct?
Answers
-
TYPO3 does not have an undo function
-
Only backend users with administrator privileges can access the undo function
-
You can access the undo function through the Web → List module
-
You can access the undo function through the Web → Versioning module
-
You can access the undo function through the Admin Tools → Maintenance module
Number of correct answers: 1
Explanation
If you create and edit many pages and page contents, you will likely make mistakes occasionally. This is where an undo function can be very useful, in particular if you can revert multiple actions.
Of course, TYPO3 has such a function. You can use it to view the change history and undo individual steps. However, it would not make sense if only administrators can access this function as editors are the users who are responsible for the contents of a TYPO3 site, and should be able to rectify mistakes. The first and the second answers are therefore wrong.
TYPO3 offers many ways to access the undo function. The context menu in the page tree, for example, features an “History/Undo” menu item. The submodules Page, List, and Info of the Web module all show a page icon at the very top right of the content area (after you selected a page from the page tree). You can open the same context menu as the page tree shows by clicking on the icon. This means that answer 3 is the correct answer.
Apart from accessing the function by the two options mentioned above (the page tree and the icon in the top right corner), you can also open more options in the list view of the Web → List module (three vertical dots) and select the item “Display change history / Un-do” as shown in the following screenshot:
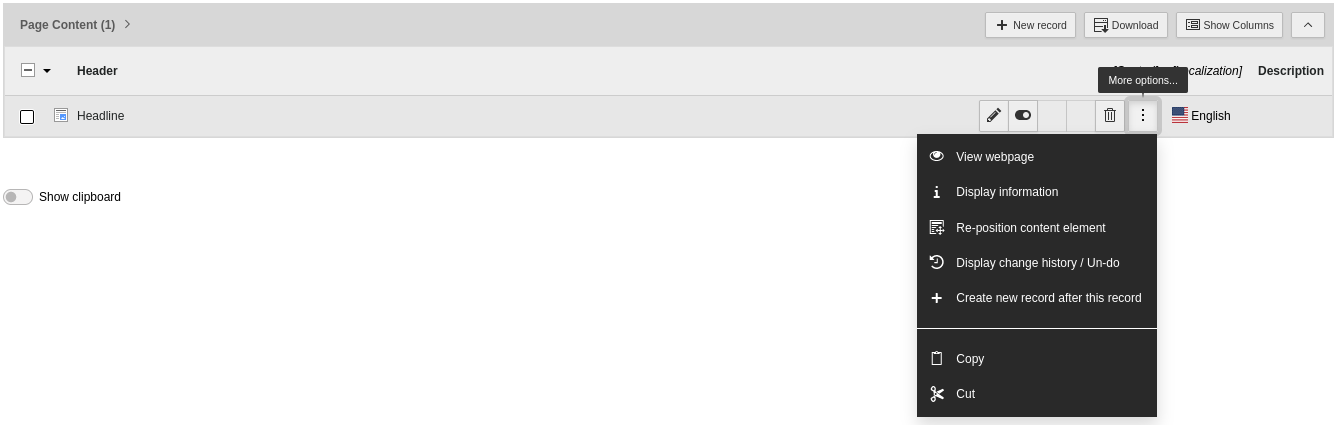
The undo function is also available from the context menu that you can open by clicking the icon of the record at the left-hand side in a table row.
Older TYPO3 versions indeed featured the “Versioning” backend module as suggested in answer 4. You were able to access the function through Web → Versioning if the system extension “version” was installed and activated. However, the functionality was merged into the Workspaces3 module in TYPO3 v9 LTS, and a backend module Web → Versioning does not exist since TYPO3 v10 anymore. This makes the answer 4 wrong.
Although this is not obvious and not suggested in any of the answers listed above, you can also access the undo function through the Web → Info module. Open the module and choose an arbitrary page. Make sure that the dropdown box at the top shows the “Pagetree Overview”. Click on the page icon to open the context menu. You find the undo/history function in this menu.
The last answer is clearly wrong. The Admin Tools are only accessible for backend users with administrator privileges (see explanation above) and the Admin Tools → Maintenance module does not offer an undo function at all.
The correct answer is 3.
As a backend user with administrator privileges, you want to prevent “normal” users from logging-in to the backend while you are performing maintenance on the system. How can you achieve this?
Answers
-
Write an email to all backend users and ask them not to log-in
-
Change the passwords of all backend users and don’t reveal the new passwords for the time being
-
Rename the
typo3/directory, don’t reveal the new URL, and change it back once you’re done -
Enable the “admin-only” mode in the global system configuration
-
Lock the backend by accessing the system with the
&adminOnly=1parameter in the URL
Number of correct answers: 1
Explanation
Some complex tasks in the TYPO3 backend require some time to finish. A typical example for such a task is a restructure of the page tree. During this maintenance work, other backend users could possibly disrupt your process or get confused while you’re in the middle of the restructure.
You could contact all users by email as suggsted in the first answer. However, this is neither quick nor sensible. Also, this does not guarantee that users don’t log-in to the backend.
Changing the passwords or renaming the typo3/ directory are not practical solutions either. If you would rename the directory, you would have to make further changes to the system to keep TYPO3 running, and you would hardly achieve what you are aiming for.
The best practice is to switch the backend to the admin-only mode as suggested in answer 4. You can achieve this by activating the option $GLOBALS['TYPO3_CONF_VARS']['BE']['adminOnly'] in the Admin Tools or by adding this global configuration to the AdditionalConfiguration.php file. The value of the variable controls which restriction applies:
- Value “
-1” locks the backend for all users. - Value “
0” allows all users to log-in (this is the default). - Value “
1” only allows administrators and system maintainers to log-in and disables the TYPO3 CLI. - Value “
2” is the same as “1” but the TYPO3 CLI continues to work.
The last answer is made up and not a practical solution. The parameter has no effect.
The correct answer is 4.
In which backend modules can you enter TypoScript configuration to configure the output in the frontend?
Answers
-
In the “Web → Page” module
-
In the “Web → Template” module
-
In the “Web → List” module
-
In the “System → Install Tool → Templates” module
-
In the “Web → TypoScript” module
Number of correct answers: 2
Explanation
TypoScript configuration is an essential part of every TYPO3 system. You find in-depth questions about this topic in the chapter “TypoScript”. For now, you only need to know where users can enter TypoScript code in the TYPO3 backend.
First and foremost, only backend users with appropriate access permissions can see and use the dedicated backend module Web → Template. This module can be used to review, manage, and edit4 the TypoScript configure for the frontend. The second answer is correct.
As TypoScript configuration entered in the TYPO3 backend is stored in the database, you also find the records in a database table. The table sys_templates contains information about the ID of the page containing the template, title, setup, constants, resources, and flags. As (almost) every database table can be accessed from the Web → List submodule, answer 3 is also correct.
The Web → Page backend module lets backend users edit pages and page content. You can apply TypoScript configuration to the page properties but this does not control the output in the frontend. The first answer is therefore wrong. The options suggested in the answers 4 and 5 don’t exist.
The correct answers are 2 and 3.
Which statements about the TYPO3 backend module “Dashboard” are correct?
Answers
-
The dashboard is only available for administrator and system maintainer users
-
Backend users can have multiple dashboards
-
Only backend users with administrator privileges can rename the default dashboard “My Dashboard”
-
The TYPO3 backend module “Dashboard” is part of the TYPO3 Core and cannot be disabled/removed
-
TYPO3 extensions can provide pre-configured dashboards (“presets”)
Number of correct answers: 2
Explanation
The system extension “Dashboard” was introduced with TYPO3 version 10.3 in February 2019. The backend module provides users (not only administrators and system maintainers) with an overview of important system information and statuses. In a fresh TYPO3 v10 and v11 installation (with the system extension installed and activated of course), the dashboard is the first module that users see when they log-in to the backend. This default dashboard shows the details “About TYPO3”, “Getting Started with TYPO3”, and “TYPO3 news”.
Backend users can add as many dashboards as they want. TYPO3 let them create an empty dashboard, let users enter a name, and allow them to add widgets in a subsequent step. TYPO3 extensions can provide pre-configured dashboards though. These are called presets as pointed out in the last answer.
Users can also rename their existing dashboards including the default dashboard “My Dashboard” which means that the claim in answer 3 is wrong.
Finally, we have to decide if answer 4 is correct or wrong. As most other system extensions, the extension “dashboard” can be removed in a Composer-based TYPO3 installation and disabled/removed in a TYPO3 instance that was installed using the classic installation method.
The correct answers are 2 and 5.
What are dashboard widgets in the TYPO3 backend?
Answers
-
Backend users can add widgets to their dashboards
-
Each dashboard widget can only be used by one backend user
-
TYPO3 developers can build custom dashboard widgets as extensions
-
Dashboard widgets enable non-admin users to install system updates
-
Dashboard widgets output system information in the frontend of a website
-
Backend users can reposition widgets in their dashboards
Number of correct answers: 3
Explanation
The system details, information, and statuses shown in the dashboards are visually organized in boxes. These boxes, and the code that collects and outputs the data, are called widgets. One or multiple widgets can belong to a category. TYPO3 v11 LTS comes with the following widgets out of the box:
- About TYPO3
Description: Some general information about TYPO3 and the version used.
Category: General
- Number of errors in system log
Description: Shows the number of errors in the sys log of the last month, grouped by date.
Category: System Information
- Type of backend users
Description: Shows the amount of normal- and admin-users.
Category: System Information
- Failed backend logins
Description: Information about the number of failed logins during the last 24 hours.
Category: System Information
- TYPO3 news
Description: Add a list of news items from the TYPO3 project.
Category: News
- TYPO3 security advisories
Description: Add a list of security advisories from the TYPO3 project.
Category: News
- Getting Started with TYPO3
Description: Add a shortcut to the TYPO3 Getting Started Tutorial.
Category: Documentation
- TypoScript Template Reference
Description: Add a shortcut to the TYPO3 TypoScript Template Reference.
Category: Documentation
- TSconfig Reference
Description: Add a shortcut to the TYPO3 TSconfig Reference.
Category: Documentation
If each dashboard widget could only be used by one backend user, this would mean that only one user can have the “About TYPO3” or “TYPO3 news” information. This is obviously nonsense and answer 2 is wrong.
The first answer, however, is correct. Backend users can add widgets to their dashboards if they have the appropriate access privileges.
I pointed out before that TYPO3 has a good reputation for being a very flexible and expandable system. This includes the fact that developers can develop and publish their own solutions. Other users can then use these in the form of extensions. This concept also applies to dashboard widgets which means that answer 3 is correct.
The next two answers 4 and 5 refer to the capabilities of dashboard widgets. Integrators and administrators can execute TYPO3 updates on the command line and by using the appropriate functions in the Admin Tools through the backend. The dashboard has nothing to do with such low-level administrative actions. You should also keep in mind that a dashboard widget is only a component in the backend and does not provide any function for the frontend of a website. Both answers are therefore wrong.
What about the last answer? Are backend users able to reposition widgets in their dashboards? Flexibility was an important factor during the development of the backend dashboards. Backend users can not only configure multiple dashboards but also add, remove, and even rearrange widgets to meet their individual needs.
The correct answers are 1, 3, and 6.
Your backend users without administrator privileges cannot add specific widgets to their dashboard. What could cause this issue?
Answers
-
The user or user group does not have the required permissions
-
Widgets possibly reveal sensitive information and must be explicitly enabled by the following Page TSconfig:
mod.dashboard.widget.<id>.enable = 1 -
Reinstall the “dashboard” extension or flush all caches to register all widgets
-
Backend users without administrator privileges only have access to widgets provided by the TYPO3 Core
Number of correct answers: 1
Explanation
Not every backend user should have access to all system information that are provided by dashboard widgets. Depending on the nature of the widgets and the data they show, some possibly reveal sensitive information. For this reason, an access concept is both sensible and necessary.
The first answer makes sense and sounds correct, but can you configure access to single widgets on a user and/or user group basis? Could this cause an issue if backend users should have access but a missing configuration in their permissions prevents them from adding widgets to their dashboard? Let’s have a look at the other options.
The second answer mentions the revelation of sensitive information. However, dashboard widgets are not stored against pages. In fact, they don’t have a relation to any page in the backend at all. Therefore, applying a configuration to enable or disable widgets as Page TSconfig does not make sense.
Reinstalling an extension flushes some caches but this action does not register or re-register dashboard widgets. Answer 3 is clearly wrong.
The last answer claims that non-administrator users don’t have access to custom widgets as a general rule. If this would be true, TYPO3 developers could build custom widgets for administrator users only. As the backend module aims to provide users with a wide range of system information and statuses, and custom widgets can be developed for a variety of users, this answer is obviously also wrong.
The permission concept for TYPO3 backend users is known to be exceptional compared to many other systems. You actually have the option to allow or deny access to each individual widget to a user and/or user group. By the way, administrator backend users always have access to all registered widgets.
The correct answer is 1.
An extension provides a dashboard preset named “foobar”. How do you configure this dashboard as the default dashboard for new backend users?
Answers
-
By adding the following User TSconfig:
options.dashboard.foobar = default -
By adding the following User TSconfig:
options.dashboard.dashboardPresetsForNewUsers = foobar -
By renaming the dashboard preset from “foobar” to “default”
-
By selecting the “foobar” item under “Dashboard → Settings → Default preset”
-
By selecting the “foobar” item under “Workspaces → Settings → Default dashboard preset”
Number of correct answers: 1
Explanation
When you set up a new TYPO3 instance from scratch and new backend users log in, TYPO3 shows a few default widgets. This is known as the default dashboard preset. Although you can create your own presets and control which preset TYPO3 should use for new users, the customization requires a few lines of PHP code. The code that implements a dashboard preset (in this case a preset named “foobar”) typically goes into a TYPO3 extension. Therefore, a PHP developer will certainly come to your aid. Once you installed and activated the extension in your system, you have to configure TYPO3 so that new users get the custom dashboard preset.
The first two answers both sound plausible. User TSconfig is usually the right place to configure user-based settings. However, let’s make sure that the remaining three answers are wrong. The name of the preset should play absolutely no role and renaming the preset to “default” does not make a difference. The name is also just a label stored in a language file to allow translations. In addition, the preset’s name is defined in the extension and therefore not in the scope of an integrator’s job. Answer 3 is undoubtedly wrong.
The backend module Dashboard does not have any submodules. It is always positioned at the top of the module list on the left-hand side in the TYPO3 backend. Although TYPO3 shows a “Settings” icon5 when you open a dashboard, the settings only let you rename the title of the current dashboard. Answer 4 is also wrong.
The Workspaces backend module (which we will discuss later in this chapter) has nothing to do with the dashboard. So, the last answer can’t be correct either. This now gives us the certainty that one of the first two answers must be correct – but which one?
If you look closely, the only difference between answer 1 and 2 is the part after options.dashboard. You can look up the correct syntax in the documentation of the system extension “Dashboard”:
The correct answer is 2.
How can you move a page in the TYPO3 backend?
Answers
-
This is not possible; you have to delete the page and then create it in a different place
-
By using drag and drop in the page tree
-
By right-clicking on a page in the page tree and then selecting “Cut” and “Paste after” or “Paste into”
-
By right-clicking on a page in the page tree and then selecting “Page actions → Cut” and “Page actions → Paste…”
-
By using the “Move up” and “Move down” in list buttons in the List module
-
By using the clipboard
Number of correct answers: 4
Explanation
Even if you create your pages in the page tree with the utmost care, sooner or later you likely have to reshuffle some of them. This may be necessary, for example, if the information on a website is to be restructured or if the general information architecture changes. As part of this process you usually have to move pages in the page tree.
You can achieve this in TYPO3 in several different ways. Answer 1 is wrong straight away. All other methods mentioned are or were possible in one TYPO3 version or another. This is the tricky part of this question as you need to know which ways are possible in TYPO3 in the current TYPO3 release.
The drag and drop approach suggested in answer 2 is valid in all modern TYPO3 versions, so this is one of the correct four answers. The same applies to the last answer. Go the Web → List and make sure that the clipboard is enabled. You can now copy or move a page to the clipboard and paste the content from the clipboard into another location.
The list view offers another method for moving pages. When you access a page in the page tree, all its subpages are listed in the table “Pages” in the content area. The up/down arrows let you move pages:
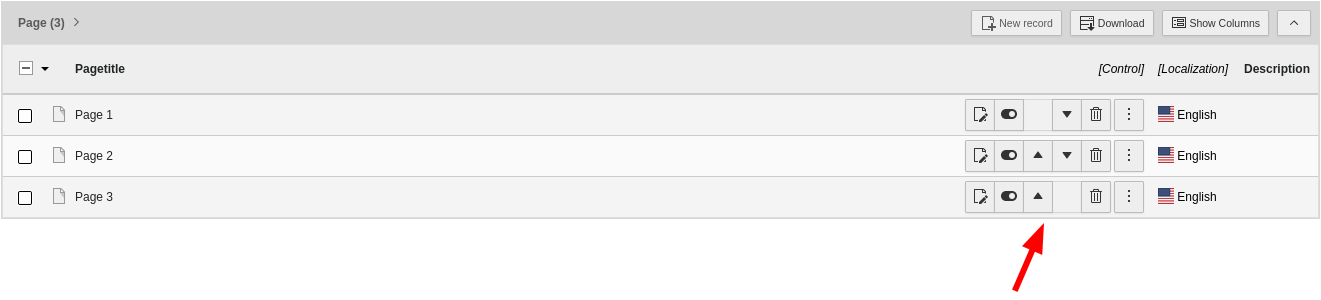
In TYPO3 v7, the required steps to copy and paste pages in the page tree could be found under “Page actions” (answer 4). However, this was changed in TYPO3 v8: the items “Cut” and “Paste after/into” are now located in the first level of the context menu (answer 3) and the menu does not show “Page actions” anymore.
The correct answers are 2, 3, 5, and 6.
How can you change the name of the root page (ID: 0) at the top of the page tree?
Answers
-
By updating the site name in the “Installation-Wide Options” (Admin Tools)
-
By double-clicking on the page name in the page tree
-
By setting the environment variable
TYPO3_SITENAME -
By accessing the page properties and updating the page title in tab “General”
-
By setting the following variable in the file
typo3conf/AdditionalConfiguration.php:$GLOBALS['TYPO3_CONF_VARS']['SYS']['sitename']
Number of correct answers: 2
Explanation
The first page in the page tree is called the root page and this is a special page. It features the ID 0 and has some distinctive characteristics.
First of all, the name of the root page reflects the global site name rather than a page name. This means that you can’t just rename this page like other pages. A double-click on the page name in the page tree has no effect, so answer 2 is obviously wrong.
If you don’t explicitly set the site name during the installation, the default title reads “New TYPO3 site”. The site name can be configured in the Admin Tools. Go to Admin Tools → Settings and open the “Installation-Wide Options”. Search for the keyword sitename. You find the relevant configuration under [SYS][sitename]. You can change the site name, which is also the name of the root page, by editing this configuration. This means that the first answer is correct.
TYPO3 writes the new configuration to the file typo3conf/LocalConfiguration.php. Since you can override almost any configuration by adding the appropriate option to the file AdditionalConfiguration.php, answer 5 is also a valid option. The following line of PHP code would, for example, set the site name to “TYPO3 Test Site”:
$GLOBALS['TYPO3_CONF_VARS']['SYS']['sitename'] = 'TYPO3 Test Site';
As the root page does not have page properties as such, answer 4 can’t be correct. The same applies to answer 3. An environment variable TYPO3_SITENAME has no effect either.
The correct answers are 1 and 5.
How can you limit the page tree view to display only a specific page branch?
Answers
-
This is not possible as TYPO3 always shows the full page tree with all pages in the system
-
By selecting the “Mount as tree root” option in the page properties of the page
-
By selecting “More options → Mount as tree root” from the context menu of the page
-
By using the following Page TSconfig setting:
options.mountAsTreeRoot = 1
Number of correct answers: 1
Explanation
The TYPO3 Core developers constantly improve the user interface and have made the interaction with the page tree much smoother compared to older versions of TYPO3. Nevertheless, page trees sometimes become very confusing especially in large installations with hundreds or thousands of pages. Backend users often only need to work in a specific area of the site. Limiting the page tree view to this area is a useful setting.
The term that describes this feature is called mounting. To mount something means to connect a storage area (often a file system) but in our case this is a section of the page tree. You can set up a mount in the context menu of the appropriate page (“More options → Mount as tree root”) but not in the page properties. Answer 3 is therefore correct and answer 1 and answer 2 are both wrong.
The keyword mountAsTreeRoot as suggested in answer 4 indeed exists. However, it is used in the User TSconfig rather than in the Page TSconfig. It also has a different syntax and a different meaning which means that the last answer is clearly wrong. You can use mountAsTreeRoot as a value in the following configuration to remove (disable) the appropriate item from the context menu:
The correct answer is 3.
How can you recursively delete pages (a page and its subpages) in one go?
Answers
-
To delete pages with subpages, you have to enable recursive page deletion in the “User Settings”
-
The context menu in the page tree features a “Delete” entry to delete a page and its subpages
-
Open the page properties, select tab “Resources”, and execute “Delete page with subpages”
-
The backend module “Web → List” lets users delete pages and their subpages in one go
-
The “Site Management” module lets users recursively delete pages in one go
-
Click on the parent page in the page tree and drag’n drop the page into the “Delete” area on the right-hand side
Number of correct answers: 3
Explanation
Deleting pages recursively in one go can be risky. If you accidentally delete a page that has several subpages and each of these subpages has further subpages, deleting the top page may affect hundreds of pages. In TYPO3 versions prior v11 LTS, backend users had to explicitly disable a safety switch in their user settings to be able to delete pages recursively. Without the checkbox “Recursive Delete(!)” enabled under “Edit and Advanced functions” TYPO3 rejected a page deletion attempt and showed the error “Attempt to delete page which has subpages” instead. This function was removed in TYPO3 v11 LTS (in TYPO3 version 11.0 released in December 2020 to be precise), which means that the first answer is wrong.
The context menu that you can open by clicking on a page icon in the page tree indeed contains a “Delete” function as suggested in answer 2. If you execute the function, TYPO3 shows a dialog to let you confirm your intention. This deletes the page and all subpages of this page recursively. Answer 2 is correct.
You can execute the same function by dragging a page into the Delete area in the page tree. If the page contains subpages, the function also deletes these pages. Answer 6 is also a correct answer.
Although the page properties feature a tab “Resources”, a function “Delete page with subpages” as suggested in answer 3 does not exist. Answer 5 is also wrong. The “Site Management” module lets you configure sites, languages, error handling, and static routes. The module also contains a submodule to add and manage redirects. However, a function to delete pages is not available in the “Site Management” module.
The list view is a commonly used area for working with data records, including pages. Open the backend module Web → List and select the parent page of the page you want to get rid off in the pag tree (note: this is one level above the page you want to delete). Although the table “Pages” contains the page you want to delete, the subpages that are also deleted by this action are not displayed in this view. If you click on the delete icon of the appropriate table row, TYPO3 deletes the page and all its subpages. Answer 4 is correct.
The correct answers are 2, 4, and 6.
How can you create multiple pages in one go?
Answers
-
This is not possible in TYPO3; you have to create one page at a time
-
By highlighting the parent page in the page tree, followed by executing the “page generator” function at the top right
-
By right-clicking the page icon in the page tree, followed by selecting the item “More options → Create multiple pages” from the context menu
-
By accessing the “Web → Functions” module, and then executing the “Multiple Page Creation” function
Number of correct answers: 1
Explanation
Sometimes you want to create several pages in one go, for example when you start working on a new website and you are about to create the initial page tree. TYPO3 provides a function that allows you to create multiple pages in one single step (which makes answer 1 wrong). However, the way to access this function has changed between TYPO3 versions.
In TYPO3 v8, backend users could indeed access the function from the Web → Functions module. This function was technically implemented in the wizard_crpages system extension, which you needed to activate in the Extension Manager first. However, the backend module was removed in TYPO3 v9 and a function “Multiple Page Creation” never existed, so answer 4 is wrong. A “page generator” function never existed which makes answer 2 wrong and leaves us with answer 3 as the only valid answer left.
The context menu in the page tree features the “More options → Create multiple pages” function. When you execute this function, TYPO3 shows a page with five rows initially. You can add further rows as required. You can also select if the new pages should be created as subpages of the current page, or after the current page. TYPO3 also lets you create the new pages as hidden and/or hidden in menu.
The correct answer is 3.
How can you sort pages by their page title in the backend of TYPO3?
Answers
-
By using the “advanced page functions” under “Admin Tools → Environment”
-
By right-clicking on the parent page in the page tree and selecting the item “More options → Sort sub pages” from the context menu
-
By opening the “Web → Functions” module and selecting the item “Page sorting” from the dropdown box at the top
-
By executing the “Sort pages” function in the page tree, in the additional actions menu (icon with three dots)
Number of correct answers: 1
Explanation
TYPO3 offers a function to sort pages in the backend. However, the function is a little hidden and not immediately noticeable. Do you know which of the four answers is correct?
In older versions of TYPO3, the Web → Functions module offered a Sort pages function that let backend users sort pages based on criteria such as the page title. Although the Web → Functions submodule was removed in TYPO3 v9 (which means that answer 3 is wrong), the option to sort pages still exists.
The Admin Tools, however, don’t feature “advanced page functions” as suggested in answer 1. The module name Admin Tools → Environment already indicates that this function shows details about the hosting environment such as the environment and directory status, PHP info, results of image processing checks, etc.
You also don’t find a “Sort pages” function behind the icon that shows three vertical dots and is positioned at the top of the page tree. The current functions in this menu let you reload the page tree and collapse all tree items. Answer 4 is therefore also wrong.
The right solution is described in answer 2. Open the context menu in the page tree and navigate to “More options → Sort sub pages”. Make sure that the page has subpages. The function that comes up lets you sort pages by page title, subtitle, navigation title, change-time, or create-time. You can also revert the current order.
The correct answer is 2.
What is the purpose of the toggle switch “Hide child pages in page tree” in the page properties?
Answers
-
If enabled, only backend users with administrator privileges can access subpages of this page in the backend
-
If enabled, subpages of this page are excluded in menus in the frontend
-
If enabled, this page and its subpages are excluded in menus in the frontend
-
If enabled, this option excludes subpages from this page to be rendered in the page tree
-
A red plus sign lets backend users open the subpages in the page tree
Number of correct answers: 2
Explanation
Several backend modules let backend users interact with pages of the website. These modules are grouped under the Web module and they usually show the page tree when they are opened. This includes the Web → Page module but also Web → List, Web → Info, and Web → Template among others.
In large TYPO3 installations with hundreds or thousands of pages, the page tree often becomes complex and not easy to handle. If the page tree features many levels (pages with subpages inside subpages, etc.), working with the page tree gets even more confusing. In these cases, the toggle switch “Hide child pages in page tree” in the page properties becomes handy. In older versions of TYPO3, this switch was labeled stop page tree.
If you enable this switch, the page tree does not show subpages of this page. Instead, a red plus signs indicates that the subpages are hidden. You can click on the plus sign to show the part of the page tree that is hidden by default.
The option “Hide child pages in page tree” has no effect on menus in the frontend as suggested in answer 2 and answer 3. It does not control access permissions either, which makes the first answer also wrong.
The correct answers are 4 and 5.
What are your options to determine the ID of a page in the TYPO3 backend?
Answers
-
Enable the global configuration “Show page IDs” in the Admin Tools
-
Moving the mouse pointed over the page icon in the page tree shows the page ID as a tool tip
-
The “Pagetree Overview” in the “Web → Info” module contains a column that shows the page IDs
-
Enter the following User TSconfig to display the page ID in the page tree:
options.pageTree.showPageIdWithTitle = 1 -
Install and activate the extension “Advanced file metadata” to show the page IDs in the Filelist module
Number of correct answers: 2
Explanation
TYPO3 integrators often deal with the numeric representation of pages in their daily work: the page ID. You often need the ID when you configure TYPO3 by means of TypoScript for example (see chapter “TypoScript”). How can you quickly look up the ID of pages?
The Admin Tools don’t offer a global configuration to show or hide page IDs. This makes the first answer wrong.
If you hover the mouse pointer over the page icon in the page tree, the ID of the page is shown as a tool tip (for example: id=42). The approach suggested in answer 2 is often the easiest and fastest way to determine the ID of a page but there are further options.
You can access a list of pages by opening the Web → Info backend module, then clicking on a page, and choosing the “Pagetree Overview” entry from the dropdown menu. The list that appears shows some information about the selected page. In older TYPO3 versions, the page ID was also listed in one of the columns but this was removed in TYPO3 v9 and is not longer available. This makes answer 3 wrong.
The next answer, however, is correct. You can configure TYPO3 to display the page ID of every page in the page tree to the left of the page title in square brackets. This way the IDs are always visible. Enter the TypoScript line shown in answer 4 as User TSconfig to enable this feature, and reload the page tree.
The last answer aims to distract you and is nonsense. Although a system extension “Advanced file metadata” exists, files are independent from pages. You don’t find any pages or page IDs in the module File → Filelist.
The correct answers are 2 and 4.
Which statements about the RTE are correct?
Answers
-
RTE stands for “Random Text Encryption” and is a security feature
-
RTE stands for “Rich Text Editor”
-
The RTE is a system extension that can be replaced as required
-
Only backend users with administrator privileges can use the RTE
-
The RTE can be configured using a YAML file
-
Non-administrator backend users can disable the RTE by applying the following User TSconfig:
mod.rte.enabled = 0
Number of correct answers: 3
Explanation
The abbreviation RTE stands for “Rich Text Editor” of course, and is definitely not a security feature. The first answer is clearly wrong and most readers likely considered this answer to be wrong instantly. The second answer, however, is absolutely right.
Like many other functionalities in TYPO3, the RTE is set up as a system extension that you can remove in a Composer-based TYPO3 installation and disable/remove in a TYPO3 instance that was installed using the classic installation method. This flexibility also allows you to replace the RTE by a different extension if required. This makes answers 3 correct.
TYPO3 used a range of RTEs in older versions, for example rtehtmlarea. The well known “CKEditor” replaced rtehtmlarea in TYPO3 v8 LTS. The CKEditor (extension key: rte_ckeditor) provides a wide range of modern features and plugins. One major feature is the fact that the RTE can be configured using YAML6, a human-readable data serialization language. Answer 5 is therefore also correct.
Rich Text Editors are mainly used by editors to enter content, so it wouldn’t make any sense to restrict the access to administrator users only. Answer 4 is wrong.
Although backend users can disable the RTE if they want to, this is done in the User Settings (tab “Edit and Advanced functions”) and not through User TSconfig as suggested in the last answer.
The correct answers are 2, 3, and 5.
Which steps are required to add a CKEditor plugin from the ckeditor.com website to your TYPO3 instance?
Answers
-
Enable the add-on in the TYPO3 backend under the “Admin Tools”
-
Download the add-on as a ZIP file from ckeditor.com
-
Add the path to the extracted file(s) to the YAML configuration file as “externalPlugins”
-
If the add-on requires any configuration, update your YAML configuration file accordingly
-
Configure the permissions to allow backend users to use the additional plugin
-
Execute the following Composer command to clear caches:
composer dumpautoload
Number of correct answers: 3
Explanation
Older TYPO3 versions used the open-source WYSIWYG7 editor: “HtmlArea” (extension key: rtehtmlarea). Since TYPO3 v8 LTS, the well-known “CKEditor” version 4 is used as the default Rich Text Editor (RTE) in TYPO3.
CKEditor was published in 2012, has a wide browser support (including legacy browsers), and is fully customizable. This includes the option for TYPO3 integrators to install add-ons that provide functionality not available by default.
In general, only a few steps are required. Go to https://ckeditor.com and follow the link to CKEditor 4. Find the add-ons repository and choose any add-on, for example the “Word Count & Char Count Plugin”. Open the details page and click the Download button to download the add-on as a ZIP file. The archive contains a folder wordcount/. Extract this folder and store it in a directory on the server, for example:
typo3conf/ckeditor/wordcount/
Create the following YAML file and store it as typo3conf/ckeditor/wordcount.yaml:
imports:
 - { resource: "EXT:rte_ckeditor/Configuration/RTE/Default.yaml" }
editor:
  externalPlugins:
    wordcount:
      resource: "typo3conf/ckeditor/wordcount/"
The first two lines import the default configuration of the CKEditor. The last four lines enable the “wordcount” add-on as an external plugin. If the add-on offers any configuration options, you can also add them to the YAML file. Now, add the following line to the file typo3conf/AdditionalConfiguration.php:
$wordcount = 'typo3conf/ckeditor/wordcount.yaml';
$GLOBALS['TYPO3_CONF_VARS']['RTE']['Presets']['wordcount'] = $wordcount;
Finally, open a page in the TYPO3 backend, edit the page properties, and add the following Page TSconfig:
When you open the RTE (e.g. by creating a new “Text & Images” content element), you find the statistics in the footer of the editor (paragraphs, words, and characters).
I should point out that the add-on and its YAML configuration file are better stored in an extension rather than in the typo3conf/ckeditor/ directory. Also, the “Word Count” plugin is included in the system extension EXT:rte_ckeditor and therefore you don’t necessarily need to download and extract a ZIP file. However, the process described above is to be understood as an example of the steps that are generally required to install a custom plugin.
These steps are: download the ZIP file (answer 2), add the path to the YAML configuration (answer 3), and add further configuration as required (answer 4). The Admin Tools don’t contain a function to enable/disable CKEditor add-ons and clearing caches by executing a Composer command is not required either. You also don’t have the option to configure CKEditor plugin access to certain backend users or backend user groups.
The correct answers are 2, 3, and 4.
Which CKEditor configuration preset(s) does TYPO3 provide by default?
Answers
-
The preset “ckeditor-core”
-
The presets “minimal”, “default”, “full”, and “sys_news”
-
The presets “alpha”, “beta”, and “stable”
-
The presets “classic” and “advanced”
-
TYPO3 does not provide any configuration presets by default
Number of correct answers: 1
Explanation
The TYPO3 Core provides configuration presets for the CKEditor. This makes it easy for website owners and TYPO3 integrators to use the RTE without the need to configure it first. A preset is a set of configuration options. You can override (e.g. extend) existing presets and you can also add custom presets to the system.
A very basic setup of the RTE can be achieved by using the preset “minimal”. This only enables the fundamental features of the CKEditor. Many integrators use this preset as a foundation and extend the configuration to customize the RTE to fulfill a specific purpose. The preset “full”, at the other end of the scale, enables all features. These settings make the CKEditor rather complex and often confusing for backend users. Therefore, use this preset with caution. The middle ground between a minimalistic configuration and a fully-fledged setup is the preset “default”.
You can look up the existing presets in the backend under System → Configuration”. Select the item “$GLOBALS[‘TYPO3_CONF_VARS’] (Global Configuration)” from the dropdown box and open “RTE” followed by “Presets”. TYPO3 offers the three presets “minimal”, “default”, and “full” by default, plus a fourth preset named “sys_news”. This preset was introduced in TYPO3 version 11.4 (released in September 2021) to provide a simplified RTE experience to manage system news that are displayed on the backend login screen.
The correct answer is 2.
You created a new configuration preset for the CKEditor using a custom YAML file but the preset isn’t available. What could cause this issue?
Answers
-
The preset’s name does not start with “ckeditor”
-
The old CKEditor configuration is still cached and must be cleared by deleting the content of the following folder:
var/cache/data/ckeditor/ -
The preset hasn’t been activated in the “Admin Tools”
-
The preset’s file path hasn’t been added to the following global configuration:
$GLOBALS['TYPO3_CONF_VARS']['RTE']['Presets']
Number of correct answers: 1
Explanation
In a previous question in this chapter, I suggested that you go through the process of configuring an add-on for the CKEditor to prepare for the TCCI exam. One of the steps reflects the correct answer of this question. If you skip this step, TYPO3 does not process your custom YAML file and your configuration has no effect.
Answer 1 is incorrect as the preset’s name does not need to start with “ckeditor” necessarily. CKEditor configurations are not cached in a directory var/cache/data/ckeditor/, so the second answer is also wrong. Assuming that you configured a CKEditor add-on or a preset, you should know that there is nothing to activate in the Admin Tools.
The correct answer is, of course, answer 4. You have to define the path to your custom YAML file as a global configuration, for example:
$wordcount = 'typo3conf/ckeditor/wordcount.yaml';
$GLOBALS['TYPO3_CONF_VARS']['RTE']['Presets']['wordcount'] = $wordcount;
The correct answer is 4.
How can you remove or disable the button “underline” in the CKEditor?
Answers
-
By editing the file
Configuration/RTE/Buttons.yamlin the system extension directory directly -
By deleting the file
Configuration/RTE/Buttons/Underline.yamlfrom the system extension directory -
By executing the following Composer command:
composer remove typo3/cms-ckeditor-underline -
By Overriding the default configuration with a custom YAML file, defined in the following global configuration:
$GLOBALS['TYPO3_CONF_VARS']['RTE']['Presets']['default'] -
By adding the following Page TSconfig:
RTE.editor.config.removeButtons = underline
Number of correct answers: 1
Explanation
The number of possible answers and the length of each answer may scare you a little at first glance. It looks difficult for some exam candidates to answer this question correctly. However, you can quickly eliminate two or three wrong answers.
Editing, renaming, and removing files from the TYPO3 Core is never a good and professional approach. Whenever you update your instance and deploy a new TYPO3 version, core files may be replaced or restored, which means your changes would be lost. As system extensions are part of the TYPO3 Core, answer 1 and 2 are without doubt wrong.
Many components, buttons, and functions of the CKEditor can be configured. If all these elements were single Composer packages, you would end up with hundreds of additional packages in your system. In fact, only one package provides the default CKEditor: typo3/cms-rte-ckeditor. This package contains a handful of PHP files, all configuration presets as YAML files, and a lot of JavaScript files. These are the CKEditor main files and optional add-ons (plugins). A Composer package typo3/cms-ckeditor-underline does not exist, which makes answer 3 wrong.
At this point, we reduced the number of possible correct answers from five to only two. As only one answer is correct, you have a 50 percent chance to guess the right one if you don’t know if answer 4 or answer 5 is correct.
Have a look at the TYPO3 documentation of the system extension EXT:rte_ckeditor. The configuration options you can do with TypoScript are very limited. Keep in mind that one of the super-powers of the CKEditor is the configuration by YAML files. To keep the configuration flexible and extendable, TYPO3 uses presets. You have to add every preset to the global configuration before TYPO3 can use it.
The following example shows how to remove the buttons “anchor”, “superscript”, “subscript”, “underline”, and “strike”.
# Load default processing options
imports:
    - { resource: "EXT:rte_ckeditor/Configuration/RTE/Processing.yaml" }
    - { resource: "EXT:rte_ckeditor/Configuration/RTE/Editor/Base.yaml" }

# Minimal configuration for the editor
editor:
  config:
    toolbarGroups:
      - { name: basicstyles, groups: [ basicstyles] }
      - { name: clipboard, groups: [clipboard, undo] }
    removeButtons:
      - Anchor
      - Superscript
      - Subscript
      - Underline
      - Strike
The correct answer is 4.
Which of the following are best practices for configuring the CKEditor in TYPO3?
Answers
-
Edit the configuration files in the system extension’s path directly
-
Use the configuration file
Full.yamlprovided by the TYPO3 Core as an example only, as it is not intended for production use -
Use the XML format for custom configuration presets
-
Encrypt your custom configuration presets for security reasons
-
Store custom configuration presets in the path
fileadmin/ckeditor/presets/ -
Store custom configuration presets in a Site Package extension
Number of correct answers: 2
Explanation
Although the TYPO3 documentation of the system extension EXT:rte_ckeditor provides some hints about best practices for configuring the CKEditor, most of the wrong answers listed above can be easily determined.
Editing files from the TYPO3 Core is out of question and, therefore, the first answer can’t be correct.
The file Full.yaml configures the preset “full”, which enables all features of the CKEditor. The documentation explicitly advices that this configuration is for test and demo purposes only, and not intended for production use. Answer 2 is the first correct answer.
The format of the CKEditor configuration files is YAML and not XML. Don’t waste any more time thinking about whether answer 3 might be right. This answer is nonsense.
Security is an important topic in the TYPO3 universe. However, configuration presets don’t contain any sensitive information that are worth protecting by using encryption. Also, TYPO3 does not offer any functionality for this at all. Answer 4 is also wrong.
The last two answers are mutually exclusive. Therefore, it’s relatively easy to select the right answer if you are able to either exclude one from being best practice, or if you’re sure that one is the best practice. The directory fileadmin/ is known as the user space. This means that end users (e.g. editors) work with them. It is best practice not to store any system related data (for example configuration files) in this space. It is best practise to store custom configuration presets in a Site Package extension.
The correct answers are 2 and 6.
How can you disable the RTE for a specific page in the TYPO3 backend?
Answers
-
This is not possible as the CKEditor is part of the TYPO3 Core
-
By activating the “Disable Rich Text Editor” checkbox in the page properties
-
By adding the following global configuration to the file
typo3conf/AdditionalConfiguration.php:$GLOBALS['TYPO3_CONF_VARS']['BE']['richTextEditor'] = 0 -
By adding the following TypoScript code to the Page TSconfig:
RTE.default.disabled = 1
Number of correct answers: 1
Explanation
Since TYPO3 v8 LTS, the well known “CKEditor” is used as the default Rich Text Editor (RTE) in TYPO3. This editor is state-of-the-art and supports a wide range of browsers and devices. However, under some rare circumstances, you possibly want to deactivate the RTE on some specific pages of your TYPO3 installation.
A switch to disable the RTE as suggested in answer 2 would be useful. In fact, a checkbox labelled “Disable Rich Text Editor” existed in TYPO3 versions prior version 7. However, this checkbox was implemented in the edit content area and not in the page properties. The purpose of this switch was to disable the RTE temporarily in case it causes any issues. As this switch does not exist anymore, answer 2 is wrong. Having said that, TYPO3 still offers an option to disable the RTE. Therefore, the first answer is also wrong.
A configuration that you could add to the file AdditionalConfiguration.php does not exist. If you think about it: Such a configuration would be applied globally across the entire TYPO3 instance. This would also be against what the question expects – a configuration for a specific page. Answer 3 is also wrong.
This means that answer 4 must be correct, as this is the last remaining answer. Test the solution for yourself by adding the following line to the Page TSconfig of a page:
This disables the RTE on that page but leaves it intact on all other pages.
The correct answer is 4.
What is the most efficient and recommended approach to implement forms in TYPO3?
Answers
-
As the TYPO3 Core does not provide any form functionality, you have to use a third-party extension
-
By adding HTML code such as
<form>...</form>to an HTML content element -
By using the Form Framework that can be installed/activated as a system extension
-
By using an external service such as Google Forms, Microsoft Forms, or Cognito Forms
Number of correct answers: 1
Explanation
This question is undoubtedly a warm-up question. Although a few third-party extensions are available in the TYPO3 Extension Repository (TER) (“Powermail” is probably the most popular), TYPO3 of course comes with form functionality out of the box. This is definitely not the HTML content element. The first two answers are therefore wrong.
In theory you could integrate an external service such as Google Forms, Microsoft Forms, Cognito Forms, or many others in TYPO3, but this is not the most efficient and recommended approach. The last answer is also wrong.
The Form Framework was introduced in TYPO3 v8. It’s shipped with the TYPO3 Core as a system extension (EXT:form). The TYPO3 developers had three main groups in mind when they designed the Form Framework:
- Editors
Backend users can easily create sophisticated forms with just a few simple mouse clicks. No programming knowledge is required and the steps to build a form are clear and straight forward. The user interface in the TYPO3 backend is very intuitive.
- Integrators
Experienced integrator can build complex forms and store the configuration as YAML files. These files can be exported, shared, and optionally managed and maintained in a Git repository for example.
- Developers
The Form Framework in TYPO3 features an API that allows developers to create custom form elements, validators, and finishers for example. Several hooks are available that let developers customize the forms generation and manipulate the data.
The correct answer is 3.
What are “finishers” in TYPO3’s Form Framework?
Answers
-
Finishers validate the data entered and submitted by users
-
Finishers are the first step in a form workflow as they build the HTML output of a form in the frontend
-
Finishers are the last step in a form workflow to process the form data submitted by a user
-
Only one finisher per form can be configured by backend users
-
A typical finisher could be a redirect to a specific page in the system
Number of correct answers: 2
Explanation
As a certified TYPO3 integrator, you have to be familiar with the terminology used for the Form Framework. One of the terms is the “finisher”. A typical, simple, and successful form workflow has the following five steps:
- Step 1: TYPO3 renders the form accessed by a user in the frontend
- Step 2: A user enters the data into form fields, ticks checkboxes, etc.
- Step 3: A user sends the data to TYPO3 by submitting the form
- Step 4: TYPO3 validates the data on the server-side
- Step 5: TYPO3 processes the data and ends the workflow (for example by storing the received data in the database)
A finisher marks the end of the process (step 5). It processes the data and informs the user whether the process was successful or not. A successful result could be a redirect to a confirmation page for example.
With the five steps in mind, let’s go through the possible answers. Finishers don’t validate the data sent by users which makes answer 1 wrong. So is answer 2, as finishers are not the first step in the workflow but the last. This statement is given in answer 3 which means this answer is correct. Answer 4 claims that only one finisher per form can be configured. This is not true, as you can have multiple finishers. For example one finisher to store the data in the database, a second finisher to post the data to another system, and a third finisher to redirect the user to a confirmation page. This example also means that the last answer is correct.
The correct answers are 3 and 5.
What are “validators” in TYPO3’s Form Framework?
Answers
-
Validators check the data entered and submitted by users
-
Validators are the last step in a form workflow to store the data in the database
-
Validators make sure that a translation of the form labels exists in multi-language websites
-
Not all validators are available for every form element
-
Each form element can only have one validator to check the input data
Number of correct answers: 2
Explanation
I described the five steps of a typical and simple form workflow in the previous question. Can you apply the logic to derive the correct answers to this question as well?
The term “validators” already says a lot about the meaning and purpose of this component. Validators validate the data entered and submitted by users. In other words: validators check and make sure that the data is valid. The first answer is therefore correct.
Validators are definitely not the last step in the workflow, so answer 2 is wrong. They also don’t make sure that translations exist, which makes answer 3 also wrong. Answer 4 and answer 5, on the other hand, may require a little more brainpower.
At first glance, you may doubt that not all validators are available for every form element. However, the TYPO3 documentation reads:
[…] Be aware that not all of the existing validators are available for each form element, e.g. the “Date range validator” is only available for the “Date” element. Furthermore, some form elements (like “Email”) already contain reasonable validators.
This makes sense and as you can of course configure multiple validators for one form element, you can also rule out the last answer as a correct option.
The correct answers are 1 and 4.
How do you customize the frontend templates of a form implemented by the Form Framework in TYPO3?
Answers
-
By editing the Fluid template files of the system extension:
typo3/sysext/form/Resources/Private/Frontend/* -
By overriding the default paths to the template files using TypoScript:
plugin.tx_form.view.templateRootPaths.10 = ... -
By setting the path to the template files for each form in the backend module:
“Web → Forms → Settings → Templates”
-
By creating a custom configuration file in YAML and setting the template root path as rendering options
Number of correct answers: 1
Explanation
Editing files of the TYPO3 Core and of system extensions is not an option. The first answer can’t be correct.
The solution suggested in answer 2 is the typical approach to customize frontend templates provided by extensions. You will encounter further questions that deal with this topic in more detail in later chapters. Let’s lock-in answer 2 as the correct answer and check out the remaining two.
You can use the backend module Web → Forms to create new forms and to edit, clone, and remove existing forms. Although each form has a function “Settings”, this is the general form and its field configuration. An option “Settings → Templates” does not exist. This makes answer 3 wrong.
The last answer may confuse you a little. The YAML format is indeed the format used to configure forms in TYPO3. But does this contain rendering options? And can you configure the template root path in YAML files?
You might be surprised if you haven’t customised frontend templates of the Form Framework yet. The question “How do I override the frontend templates?” is actually a frequently asked question about the Form Framework and therefore also included in the FAQ.
In the first step, you create your own configuration file in the YAML format (note the keyword renderingOptions) and store it in an appropriate place, typically a site package extension:
TYPO3:
  CMS:
    Form:
      prototypes:
        standard:
          formElementsDefinition:
            Form:
              renderingOptions:
                templateRootPaths:
                  20: 'EXT:site_package/Resources/Private/Form/Frontend/Templates/'
                partialRootPaths:
                  20: 'EXT:site_package/Resources/Private/Form/Frontend/Partials/'
                layoutRootPaths:
                  20: 'EXT:site_package/Resources/Private/Form/Frontend/Layouts/'
A suitable path and file name of the YAML file is Configuration/Form/FormSetup.yaml within the site package extension (for example EXT:site_package). Note the last few lines that point to your custom template files. You should also store these directories and files in the site package (at least these templates that you want to customize). The only file that you can not override is Resources/Private/Frontend/Templates/Render.html. In a second step, you register your custom configuration using TypoScript:
Once you include the TypoScript as a template on a page in the backend, the form is shown using your custom frontend templates. Although the solution suggested in answer 2 is the typical approach for frontend plugins, this solution is not correct for the Form Framework.
The correct answer is 4.
What is the recommended format and location of configuration files for forms of the Form Framework?
Answers
-
As PHP files in the file system under
fileadmin/forms/ -
As PHP files in the file system under
typo3/sysext/form/Configuration/Form/ -
As YAML files in a site package extension in the path
Configuration/Form/ -
As YAML files in the file system under
config/forms/ -
As YAML files in the file system under
fileadmin/Configuration/Forms/ -
As XLIFF/XML files in a site package extension in the path
Resources/Private/
Number of correct answers: 1
Explanation
Don’t be overwhelmed by the number of possible answers to this (relatively simple) question. Only one answer is correct and you can quickly eliminate the wrong options.
Files and folders under fileadmin/ are user space. This location should be reserved for editors. System-relevant configuration files do not belong here. This means that answer 1 and 5 can’t be correct. Answer 2 is also wrong. Folders of system extensions (and the TYPO3 Core of course) are not a good location for custom configuration files. Besides, you can eliminate the first two answers as forms of the Form Framework are configured by using the YAML format rather than PHP.
Although answer 6 suggests to use a site package to store the configuration files – which seems to be a brilliant idea – XLIFF files are special XML files that represent labels in various languages (translations). The two remaining answers 3 and 4 both deal with YAML files.
Answer 3 suggests a site package extension as the storage location for configuration files. Answer 4 points to the path config/forms/ in the file system. This is technically possible but not the recommended location. The recommend solution is a site package extension with the following directory structure:
- Custom form configuration:
Path
Configuration/Form/, for exampleConfiguration/Form/CustomFormSetup.yaml.- Form definitions:
Path
Resources/Private/Forms/, for exampleResources/Private/Forms/ContactForm.yaml.- Translations:
Path
Resources/Private/Language/Form/.
The correct answer is 3.
Which statements about custom templates for forms of the Form Framework are correct?
Answers
-
Only frontend templates can be customized by configuring a custom path
-
Only backend templates can be customized by configuring a custom path
-
Custom layouts, templates, and partials for the backend and frontend can be configured by overriding the default paths
-
All layouts, templates, and partials can be overridden by editing the TYPO3 Core files
-
You enable templates that are compatible and accessible with Bootstrap v5 if required
-
Custom templates should be stored in a site package extension
Number of correct answers: 3
Explanation
This question aims to check whether you are familiar with the storage location of custom form template files. Be careful with the first two answers. Many candidates tend to choose either one or the other option, as both answers seem mutually exclusive at first glance (“frontend” vs. “backend”). However, it’s also possible that both answers are wrong due to the keyword only in both answers.
Backend users can preview forms before they save and use them on a page. Although the preview in the backend uses the same templates that are defined for the frontend by default, you can also customize the backend templates independently from the frontend by registering the path(s) as follows.
This means that neither answer 1 nor answer 2 are correct. You can customize frontend and backend templates by configuring a custom path. Answer 3 contains this fact but that’s only one part of the answer. The second part of answer 3 refers to layouts, templates, and partials.
As templates of TYPO3’s Form Framework are standard Fluid files, answer 3 is indeed correct. Your TCCI exam will likely contain some questions about the templating engine “Fluid” which I will cover in the chapter “Templating and Other Outputs” in more detail.
Answer 4 also deals with layouts, templates, and partials. However, the answer suggests to edit TYPO3 Core files. This should ring an alarm bell. This answer is clearly wrong.
If your project requires templates that are compatible with Bootstrap v5, you can change the configuration renderingOptions.templateVariant from the default value version1 to version2. Answer 5 is correct.
The last answer has to be right, as we already identified two correct answers (answers 3 and 5) and three wrong answers (answers 1, 2, and 4). The recommended approach is indeed to store custom templates in a site package extension.
The correct answers are 3, 5, and 6.
Where should you store Fluid template files to override the default paths of form templates?
Answers
-
Template files for the frontend in the path
Resources/Private/Templates/Form/Frontend/ -
Template files for the frontend in the path
Resources/Forms/Frontend/ -
Partial files for the backend in the path
Resources/Public/Partial/Form/Backend/ -
Partial files for the backend in the path
Resources/Private/Templates/ -
Layout files for the backend in the path
Resources/Private/Layouts/Form/Backend/ -
Layout files for the frontend in the path
Configuration/forms/
Number of correct answers: 2
Explanation
All answers deal with templates, partials, or layouts. These are Fluid files which always belong into a Resources/ directory, no matter what. This makes answer 6 wrong, as the path Configuration/forms/ can’t be correct. The determination which of the other answers are right or wrong is a little more difficult.
As the Form Framework features template files for the frontend, as well as for the backend, it makes sense to store them in different folders which reflect the purpose of the templates. In fact, this is the officially recommended approach. Template files for the frontend should go into Frontend/, and backend templates should go into a folder named Backend/. Four of the five remaining answers follow this rule, so you can eliminate answer 4. This answer also wrongly claims that partials should be stored in a folder named Templates/ which confirms that this answer is wrong.
In general, an important distinction is made between the Resources/Private/ and Resources/Public/ directories. Private resources are files, which are not delivered to the user directly but need post-processing. These are typically template files with variables. The templating engine Fluid replaces these variables with values at run time, before sending the generated files to the user. In contrast to private resources, files in the folder Resources/Public/ are files that can be loaded/shown without further processing. These are for example CSS files, JavaScript files, images, icons, etc.
Now consider template files of the Form Framework. These naturally contain dynamic content such as input fields, labels, confirmation messages, etc. You can rule out answer 3 (folder Public/), as template files are not sent directly to the user. You can also exclude answer 2 as this answer contains neither a Private/ nor a Public/ folder.
The path suggested in answer 1 reads Resources/Private/Templates/Form/Frontend/. It refers to private template files for the frontend. That’s correct. Answer 5 suggests to store layout files for the backend in the path Resources/Private/Layouts/Form/Backend/. No objection can be raised to this suggestion either.
The correct answers are 1 and 5.
Which statements about the backend module “Workspaces” are correct?
Answers
-
The “Workspaces” module builds the user interface for the versioning concept in TYPO3
-
A single workspace is a specific state in the TYPO3 backend
-
If the “Workspaces” module is disabled or deleted, backend users can’t publish any content changes
-
Administrator privileges are required for backend users to access any workspaces
-
The “Workspaces” module allows multiple backend users to edit content elements at the same time
-
Changes made in a workspace can be published automatically through a Scheduler task
Number of correct answers: 3
Explanation
Let’s look at another important TYPO3 component that could be part of your TCCI exam. The following questions deal with the backend module “Workspaces”.
It is true that TYPO3 offers versioning of almost all database records managed by the system. This concept allows backend users to work on records, for example content elements, that are copies of the “live” version. As a result of this, changes can be made without affecting the content that is currently visible in the frontend. This builds the foundation for the workspace functionality which is basically the management of these changes, including a visual interface. We can therefore consider the first answer to be correct.
The same applies to the second answer. Each workspace represents a specific state (or version) of the site.
Workspaces are an optional component. Many TYPO3 instances don’t use this function and don’t have the system extension EXT:workspaces installed. This does not mean that backend users can’t publish any content changes. TYPO3 works well without workspaces. Put simply, this means that TYPO3 only features the “live” workspace. Content changes are visible in the frontend straight away. Answer 3 is therefore wrong.
If only backend users with administrator privileges could access workspaces (as suggested in answer 4), the entire functionality would be pointless. A typical TYPO3 system consists of one or multiple administrator users, plus several editors. Editors are responsible for the content of the website. If they can’t use workspaces, they aren’t able to edit, update, and delete content. Answer 4 is also wrong.
As soon as a backend user starts editing a content element on a page in the backend, other backend users get a warning message that someone is currently working on this element. The “Workspaces” module does not change this. It does not allow multiple users to edit content elements at the same time, which makes answer 5 also wrong.
Now we are left with only one remaining answer. Can you configure workspaces in TYPO3 to automatically publish changes at a specific date and time? The answer is “yes”. When you create your workspaces in the backend, open the tab Publishing/Access. An option at the bottom of the page lets you define an auto-publish timestamp. Keep in mind that you also have to configure the Scheduler task “workspace:autopublish” under System → Scheduler → Scheduled tasks. You find the task under “Execute console commands”. Alternatively, you can run the command by executing the TYPO3 Console.
The correct answers are 1, 2, and 6.
What is the name of the default workspace once you installed and activated the workspace module the first time?
Answers
-
“Draft”
-
“Live”
-
“Standard”
-
“Default”
-
“Test”
-
“Demo”
Number of correct answers: 1
Explanation
Let’s assume that you have a fresh installation of a standard TYPO3 instance. As part of the project, your company offered TYPO3’s workspace functionality to the client. As you realize that the backend of the new instance does not show the module “Workspaces”, you install and/or activate the system extension.
Nothing has changed in the backend apart from the additional module item Web → Workspaces (you possibly have to reload the backend). You have to create at least one custom workspace to use the workspace functionality. But before you do this, you’re actually in a special workspace already. Every page or content you add, and every change you make, is visible in the frontend straight away. It’s basically the same environment as in a system without the “Workspaces” module.
So, which term describes the default workspace before you create any custom workspaces? The last two options don’t make any sense. A standard workspace that is used to enter content that is the visible to all users in the frontend shouldn’t be called “Test” or “Demo”. The answers 5 and 6 are wrong.
All remaining four options sound plausible though. If you don’t know the answer, go to System → Backend Users and open (or create) a backend user without administrator privileges. The tab “Mounts and Workspaces” might reveal the correct answer. You find a toggle switch labeled “Workspace permissions” at the top. This option lets you configure if the backend user is allowed to edit the “Live” workspace.
The workspace that contains the published contents of your TYPO3 instance is called the “Live” workspace.
The correct answer is 2.
How can you show changes made in a workspace to your client before publishing them?
Answers
-
Ask the client to access the website with the argument
?preview=true -
Create a backend user for the client and ask the client to log-in
-
Create a frontend user for the client and ask the client to log-in
-
Generate a preview link and share the link with the client
Number of correct answers: 1
Explanation
The following situation occurs quite often when you use workspaces in your projects. You made changes in a specific workspace. You created pages, for example, updated content, removed images, etc. Now you need your client’s approval of these changes before you can publish them.
The argument ?preview=true doesn’t do anything in TYPO3 by default, so the first answer is wrong.
In theory you could create a backend user account for your client, configure appropriate access permissions, and provide the client with the access details. Then, ask your client to log-in, switch to the workspace, and review the draft version. However, if several stakeholders are required to review and approve your changes, every one of them would require an account. This is not only complicated but also unnecessary. You can also consider the second answer wrong.
TYPO3 offers a much simpler solution. You (and your editors) can generate a workspace preview link. This link is valid for a certain period of time. Your client can follow this link and access the new version of the website before the changes are actually published. The “normal” appearance of the website (without following the preview link) remains unchanged.
The solution suggested in answer 3 does not work at all: Frontend users don’t have anything to do with the preview function of workspaces.
The correct answer is 4.
How many custom workspaces can you create?
Answers
-
TYPO3 features exactly 4 workspaces and you can’t add more
-
You can create up to 2 custom workspaces
-
You can create up to 8 custom workspaces
-
You can create up to 16 custom workspaces
-
The number of custom workspaces is not limited
Number of correct answers: 1
Explanation
In most cases there will be at least one additional workspace besides the LIVE workspace (which always exists and cannot be removed). In older TYPO3 versions a draft workspace was automatically created by default. This workspace had limited options in regards to its members, mountpoints, and restrictions.
Workspaces are not created automatically in newer versions of TYPO3. You have to create every additional workspace manually. One advantage of this concept is that no specific limitations apply to these custom workspaces. Thus, integrators have full control and flexibility in the configuration. TYPO3 does not limit the number of custom workspaces.
The correct answer is 5.
Which of the following workspace stages exist by default?
Answers
-
Stage “Editing”
-
Stage “Review”
-
Stage “Updating”
-
Stage “Deleted”
-
Stage “Ready to publish”
-
Stage “Rejected”
Number of correct answers: 2
Explanation
Workspaces have several stages. A change – for example a content update – travels through these stages until the change is published. Besides TYPO3’s three internal stages, integrators can add custom stages. The question explicitly refers to the default stages, which are the internal stages.
Initially, a change is made in the Editing stage which typically indicates that the content is still being written or edited. Once this work has been completed, the user moves the element to the next stage. In principle, integrators can define as many custom stages as they like. However, there is only one further stage in a default setup: Ready to publish.
You could argue that backend users can also select the Publish to LIVE action from the dropdown box of available stages. However, this is technically not a stage and also not an answer option to the example question. It is, however, worth to point out that users can also move a change back to previous stages. A typical example for such an event is if a reviewer is not satisfied with the change.
The correct answers are 1 and 5.
Which statements are correct if a change has been moved between workspace stages?
Answers
-
Reviewers have to be online at the same time to be able to see the changes that require a review
-
When opening the “Workspaces” module on the next log-in, TYPO3 shows an overview of the changes to reviewers
-
TYPO3 sends out email reminders every 24 hours when changes require a review
-
Content editors have to inform reviewers manually when changes require a review
-
Backend users can be notified via email if a change requires a review
-
Backend user groups can be notified via email if a change requires a review
-
Changes which are not approved within 48 hours automatically fall back to the previous stage
Number of correct answers: 3
Explanation
A typical workflow of changes in a TYPO3 workspace looks as follows. A specific backend user has only access to a workspace stage that does not allow them to make changes in production. They open the workspace and makes content changes, for example text updates. By navigating to Web → Workspaces, they can access an overview of the changes they made. They mark the changes they want to send to the next stage for a review and chooses the action “Send to stage XYZ” (where XYZ reflects the name of the next stage).
It does not make sense if the reviewer has to be online at the same time when the editor moves changes between workspace stages. As an enterprise content management system, TYPO3 often serves several teams located in different time zones. Backend users – for example editors and reviewers – are sometimes not online at the same time. This makes the statement given in answer 1 wrong.
In fact, TYPO3 sends out an email to the users who are responsible for the new stage. This requires, however, that the email notifications are configured appropriately and that the user records contain valid email addresses. This means that answer 4 is also wrong. Content editors do not have to inform reviewers manually.
When setting up workspaces and workspace stages, integrators can configure a wide range of notification options. First and foremost, every workspace can have one or multiple owners and members. Secondly, stages can have recipients of notification. All these roles can be backend users or backend user groups. Therefore, the answer 5 as well as the answer 6 are correct.
What happens if a backend user received a notification email but does not act? Will they get a reminder every 24 hours as suggested in answer 3? The simple answer is “no”. TYPO3 does not send out email reminders by default.
Answer 7 also deals with lazy reviewers. Does it make sense if changes fall back to their previous stage if nobody reviews/approves them within 48 hours? Of course not! Think about weekends or public holidays. 48 hours are the equivalent of 2 days. It’s not unusual for someone not to respond to emails within this time period. If TYPO3 would move changes back to their previous stages, there would be a lot of backwards and forwards. Answer 7 is therefore wrong.
The last remaining answer is number 2, and this answer must be right as a total of three answers are correct. Once a reviewer received a notification, they opens the TYPO3 backend. The “Workspaces” module provides an overview of all changes they should review. Additionally, the appropriate pages are highlighted in the page tree.
The correct answers are 2, 5, and 6.
For how long are preview links generated in the “Workspaces” module valid?
Answers
-
Preview links don’t have an expiry time (but they can be deactivated if required)
-
Preview links are always valid for 24 hours (one day)
-
Preview links are always valid for 48 hours (two days)
-
The life time of preview links can be configured globally
-
The life time of preview links can be configured per workspace
-
The life time of preview links can be configured per workspace stage
Number of correct answers: 1
Explanation
Backend users can generate a workspace preview link to share a draft version of the website with other stakeholders, for example a client. This link is valid for a certain period of time, and once created, the link can’t be revoked, deleted, or deactivated. This makes the first answer wrong.
This explanation indicates that either answer 2 or answer 3 could be correct. In fact, when you create a custom workspace, the expiry time is 48 hours by default. However, you can adjust this value, which means that both answers are incorrect.
Answer 4 can’t be correct either, as you can choose a different expiry time for each workspace. This is not a global configuration.
As you configure how long preview links are valid when you create or edit custom workspaces, answer 6 is also wrong. The expiry time of preview links can’t be configured on a stage-by-stage basis.
The correct answer is 5.
You are using workspaces and you are working in the backend as an administrator user. Some functions are missing. What could cause this issue?
Answers
-
Workspaces automatically deactivate some system extensions in the system
-
Some modules are only visible in the “Live” workspace
-
Some parts of the module “Workspace” haven’t been developed yet
-
You haven’t enabled the missing modules in the Extension Manager
Number of correct answers: 1
Explanation
The situation outlined above probably happened to everyone who experimented with workspaces for the first time. Some important backend modules and functions such as Site Management, System → DB Check, and System → Configuration are suddenly missing.
The reason behind this system behaviour is that some modules allow changes to the TYPO3 system which can’t be versioned or processed using workspaces. A site configuration is a good example.
As long as you are in a workspace other than “Live”, some modules are not visible/accessible. However, they are not deactivated or removed from the system as suggested in the first answer. As soon as you return to the “Live” workspace, all the modules are visible again.
The implementation of workspaces in TYPO3 has a long history and is actively maintained and supported. Therefore, answer 3 is nonsense.
So is the last answer. The Extension Manager does not offer any options to enable or disable backend modules.
The correct answer is 2.
Your TYPO3 system has two workspaces: “Live” and “Draft”. How do you delete the “Draft” workspace?
Answers
-
You can not delete this workspace as the “Live” workspace requires at least one other workspace
-
You can not delete this workspace as the “Draft” workspace is system-generated and mandatory
-
Open the “Draft” workspace, then go to “Site Management → Sites”, and select the workspace under “delete”
-
Go to “Web → List”, open the root page (UID=0), and delete the record from the table “Workspaces”
-
Open the “Draft” workspace, then go to “Web → Workspaces”, and click the button “delete workspace”
Number of correct answers: 1
Explanation
This question basically tests if you understand the basic concepts of workspaces in TYPO3, and if you are familiar with the visual appearance of the backend module. Even if you don’t know the right answer straight away, you can eliminate the incorrect options easily by applying some logic.
You should know by now that a standard TYPO3 system comes with only one workspace by default: the “Live” workspace. You explicitly have to create additional workspaces as required. The first answer can’t be correct as TYPO3 works perfectly fine with only the “Live” workspace. This also eliminates the second answer straight away. As a workspace “Draft” does not exist by default, the question indicates that this is a custom workspace.
The remaining three answers focus on the visual appearance of the module in the backend. If you have never used or set up workspaces, you possibly struggle to choose the correct answer now. If you at least played with the function, set up a workspace with stages, members, and notifications, you likely remember the user interface.
When you open a workspace other than the “Live” workspace, some backend modules disappear because changes in these modules can’t be versioned or processed using workspaces. The module Site Management is one of them. This means that the approach suggested in answer 3 can’t work.
Workspaces are stored as records in the database table sys_workspace. If configured (and not explicitly denied), records of all tables can be accessed on the root page of the system by administrator users (page ID: 0). This is definitely also the case for “Workspaces” records. The table in the backend lists all workspaces and lets you edit and delete them. Answer 4 is a good candidate of the correct answer.
When you open the “Draft” workspace (the workspace you want to delete), you can go to Web → Workspaces. So far answer 5 seems to be a valid option. However, you will quickly realize that there is no button “delete workspace” anywhere. This makes the last answer wrong.
The correct answer is 4.
Which components are part of a TYPO3 site configuration?
Answers
-
Base URL configuration (e.g. the domain to access the website)
-
Backend user accounts (e.g. administrators and system maintainers)
-
Language configuration (which languages are supported by the site)
-
Static routes of the site (e.g. the robots.txt directive)
-
Location in the file system (e.g. path to the
htdocs-directory) -
Extensions (e.g. which extensions are available and activated)
Number of correct answers: 3
Explanation
Let’s clarify the basic terminology that we use in this context first. A site configuration is – as the name suggests – the configuration for a specific site. TYPO3 supports multiple sites per installation and therefore you can create multiple site configurations. The backend module Site Management is the user interface to create, edit, update, and delete site configurations. The official TYPO3 documentation covers the topic in the chapter “Site Handling”.
Each site configuration consists of several parts, and that’s the focus of this question.
The first two important (and mandatory) settings are the site identifier and the entry point. The entry point eventually forms the base URL, which is the main URL of the frontend in the default language. This means that answer 1 is correct.
The next configuration are languages. Each site configuration stores one or multiple language configurations. They include locales (to display dates and currencies in the correct formats for example), some frontend-related settings, the icon to visualize the language, etc. Answer 3 is therefore also correct.
How should TYPO3 handle errors? You can configure precisely what should happen when, for example, a requested page doesn’t exist.
Static routes are another component that is part of a TYPO3 site configuration. A typical use case is the robots.txt file which can be configured in a very flexible way. Answer 4 states exactly this and is therefore correct.
Neither backend user accounts nor extensions are part of a site configuration. The answers 2 and 6 are therefore wrong. You also don’t find any settings about the location in the file system in the site configuration. Answer 5 can’t be correct either.
By the way: the site configuration also includes another important component that does not feature a web-interface in the Site Management module. URL routing is the process of mapping an incoming request to a specific target. As this is an important but complex topic, you will find detailed example questions and further explanations in the chapter “Target Group Optimization”.
The correct answers are 1, 3, and 4.
Which statements about the site identifier in the site configuration are correct?
Answers
-
The site identifier must be a numeric value
-
The site identifier is used in the file system path
-
The site identifier is always the domain of the website
-
The site identifier must have a minimum length of 3 characters
-
The identifier
foobaris a valid site identifier -
The site identifier must not contain numbers
Number of correct answers: 2
Explanation
Every site configuration has a unique site identifier. The rules of the format are relatively straight forward and easy to remember:
- Lower-case ASCII characters “
a” to “z” and numbers from0to9 - The only allowed special characters are the underscore (“
_”) and the dash (“-”) - No minimum length (one character or more)
Note the hint that TYPO3 shows when you open Site Management → Sites in the backend and edit or create a site configuration:
This name will be used to create the configuration directory.
With these guidelines in your mind, you can easily determine the two right answers. Answer 1 is wrong, as letters are allowed too. Answer 6 is the opposite and also wrong, as the site identifier may contain numbers. Answer 4 can’t be correct as TYPO3 does not impose a minimum length.
Answer 3 is a little tricky though. A domain name usually consists of a name and a top-level domain (TLD), separated by a dot (e.g. example.com). As the dot is not recommended to be part of a site identifier, the usage of domain names is not a good idea – however, this is technically possible. The key point why answer 3 is wrong is the word “always”. The site identifier is defintely not always the domain of the website.
The example of a site identifier given in answer 5 is perfectly fine and legitimate.
The correct answers are 2 and 5.
Where in the system are site configurations stored?
Answers
-
In the database table
sys_configuration -
In Composer-based installations as part of the file
typo3conf/LocalConfiguration.php -
In non-Composer-based installations in the file system as
typo3/sysext/core/Configuration/sites.php -
In Composer-based installations in the file system as
config/sites/<identifier>/config.yaml -
In non-Composer-based installations in the file system as
typo3conf/sites/<identifier>/config.yaml
Number of correct answers: 2
Explanation
Backend users with appropriate access privileges can create, edit, update, and delete site configurations in the backend module Site Management. Most of the data that TYPO3 integrators manage in the backend are stored in the database. So, the first answer sounds plausible.
However, there are a few exceptions8 and site configurations are one of them. You don’t find a database table named sys_configuration in a standard TYPO3 instance. The first answer is wrong.
All remaining answers 2 to 5 suggest that site configurations are stored as files in the file system. The only differences are the paths and file names, and the claim that it depends on the installation method (Composer vs. non-Composer).
Given that two of the four answers must be correct, there is only one simple fact you need to remember to answer this question correctly: site configurations are always stored in the YAML9 format (a human-readable data serialization language).
Both answers 2 and 3 suggest PHP files to store site configurations. You don’t even need to consider the installation method, as these two answers can be ruled out straight away. Site configurations are indeed stored under the file name config.yaml.
The path to this file contains the site identifier (stated as a placeholder <identifier> in both remaining answers) in Composer-based installations: config/sites/<identifier>/config.yaml. In non-Composer-based installations, the file is stored under typo3conf/sites/<identifier>/config.yaml.
The correct answers are 4 and 5.
What is the best way to output a static text when a request to /robots.txt is being made?
Answers
-
Create a page with the title
robots.txtand add your text in a content element of type “text” -
Store a file named
robots.txtthat contains the text in the file system pathtypo3conf/ -
Add a static route to the site configuration, choose “static text” as the route type, and enter the text in the text field
-
Enter the text under “Admin Tools → Settings → Installation-Wide Options → Robots exclusion”
Number of correct answers: 1
Explanation
Once again, you will probably have already guessed the right answer. As this question appears in the chapter “Site Management” and only answer 3 deals with site configuration, this seems to be the correct option. Or could this be a trick to mislead you? Let’s check the answers in detail.
You could create a page named robots.txt. The auto-generated slug10 would remove the dot by default, so the page would be accessible as example.com/robotstxt by default. Even if you’d be able to adjust this behavior, further configuration would be required. The content type of the page, for example, must be text/plain rather than text/html. This is technically achievable but clearly not the simplest and best way. Therefore, let’s mark the first answer as wrong.
Creating a file named robots.txt, on the other hand, is much easier. If the file exists, the standard web server configuration would read the file in the file system and return its content to the requesting client. Neither PHP nor TYPO3 would be involved in this process at all. So, why is answer 2 wrong? The file must not be located in the typo3conf/ directory. You could of course argue that this can also be achieved with various configurations. However, there is an easier and better way.
Answer 3 describes the correct approach. Open the Site Management → Sites and select the site for which you want to configure the robots.txt response. Switch to the tab “Static Routes” and create a new route. Enter robots.txt as the static route name (or select the item from the dropdown box). Then, select “Static Text” as the route type. You can now simply enter the desired content and save the configuration.
An option “Robots exclusion” does not exist in the Admin Tool, so the last answer is nonsense.
The correct answer is 3.
What do you need to consider if you want to set up multiple domains in TYPO3?
Answers
-
Set up multiple installations of TYPO3, one instance for each domain
-
Create multiple site configurations, one configuration for each domain
-
Multiple domains are possible in TYPO3 but content is always shared across them
-
The workspace functionality must be deactivated to allow multiple domains
-
Create a site configuration with multiple languages and assign each domain to one language
-
Create two entry points in the page tree and use them in the site configurations for each domain
Number of correct answers: 2
Explanation
It goes without saying that TYPO3 supports multiple domains per instance. Although the approach suggested in the first answer is possible, this is not a right answer as you can easily configure one, two, or even hundred domains in the same TYPO3 instance.
This is a function that site configurations offer. You can create multiple configurations and define which domain they should serve. The second answer is therefore correct.
If you could assign multiple domains to the same website only, and visitors would get the same content for every domain they access, this would not be a proper multi-domain setup. You would also risk that search engines rank down the website due to duplicate content, unless you have a well thought-out SEO strategy for this use case11. Answer 3 can be ruled out as a correct option.
The next answer suggests that you can not have multiple domains in combination with workspaces. This claim is of course incorrect and answer 4 is therefore also wrong.
The last two answers, again, deal with site configurations. You can indeed assign languages to site configurations but the language configuration does not offer an option to assign domains to it (answer 5).
The approach described in the last answer sounds practical though. In a multi-domain TYPO3 instance, your page tree usually has two entry points. One for the first domain (page A) and the second for the other domain (page B). You can then create two site configurations, one for every domain, and assign them to each entry point.
The correct answers are 2 and 6.
A TYPO3 developer asks you to configure a specific PHP class to handle 404 errors. How can you do this?
Answers
-
PHP classes can’t be configured as error handlers but the site configuration can use PHP files as error handlers
-
Contact a TYPO3 Core developer as this requires a code merge into the TYPO3 source code
-
Create a new static route in the site configuration and select the PHP class file as the route type
-
Enter the fully qualified class name in the site configuration as an entry point for a language
-
Create a new error handler in the site configuration and enter the fully qualified class name that implements the
PageErrorHandlerInterface
Number of correct answers: 1
Explanation
TYPO3 integrators often work together with other experts. Developers are a typical example. Although a certified TYPO3 integrator doesn’t need to have profound software programming knowledge, a very basic fundamental understanding of PHP is expected.
The question provides an important hint: error handling. Answer 1 claims that PHP classes can’t be configured as error handlers but offers an alternative solution that you could discuss with the TYPO3 developer. If you don’t know if this claim is true, let’s put this answer aside and check the next answer.
Contacting a TYPO3 Core developer as suggested in answer 2 is out of question. Think about the number of TYPO3 installations worldwide. Core developers wouldn’t have time for anything else if they had to process countless requests every day just to get 404 error handlers into the TYPO3 Core as a code merge. Error handling in TYPO3 is of course flexible and configurable by design.
Static routes in the site configuration let you output static content based on a requested URL to your site. This content can be a static text, a file, a page, or an URL. A typical example is a request to /robots.txt. By adding a static route for this request, you can instruct crawlers which pages they should or shouldn’t retrieve from your site. Static routes, however, have nothing to do with error handling. Answer 3 is therefore wrong.
Every class in PHP has a unique name. This can be achieved by using distinctive namespaces. A typical PHP namespace in TYPO3 reads TYPO3\CMS\Core\Utility for example. If the class MailUtility uses this namespace, the fully qualified class name becomes TYPO3\CMS\Core\Utility\MailUtility. This ensures that even if a class name is used multiple times in the system, the fully qualified class name is always unique. By the way, the aforementioned PHP class really exists in the TYPO3 Core. As the name suggests, it provides mail specific functionality.
Now, let’s turn to answer 4 and find out if the solution is correct. It makes sense to configure the fully qualified class name in general. Also, the site configuration is the right area where you would configure error handlers. However, entry points for languages are specified as domains or parts of an URL. Additionally, entry points don’t have anything to do with error handling. Answer 4 originally seemed correct, but on closer scrutiny it is wrong.
As we haven’t excluded the first answer entirely but concluded that answers 2, 3, and 4 are clearly wrong, let’s check out the last answer.
Go to Site Management → Sites and edit a site configuration. Switch to the tab “Error Handling” and click the button “Create new”. You can now define the HTTP error status code, for example 404 (page not found), and how TYPO3 should handle these errors. One of the options listed in the dropdown box is PHP Class (must implement the 'PageErrorHandlerInterface')). If you choose this option, you can enter the fully qualified class name in the next step. This is exactly what answer 5 suggests to do when a TYPO3 developer asks you to configure a specific PHP class to handle 404 errors.
This also makes answer 1 wrong as you can certainly configure PHP classes as error handlers, but not PHP files.
The correct answer is 5.
You operate your TYPO3 instance under the main URL “example.com”. A second domain “development.local” should become active in development environments. How do you configure this properly?
Answers
-
By duplicating the folder
typo3conf/sites/example.com/totypo3conf/sites/development.local/ -
By adding the development domain as a second domain record to the root page under “Web → List”
-
By adding a second site configuration and storing the development domain as the entry point
-
By deleting all site configurations to remove the limit of one domain
-
By configuring a “base variant” for the development domain in the site configuration
Number of correct answers: 1
Explanation
TYPO3 has multi-site and multi-domain capabilities. Of course, this is not exciting news. In simplified terms, this means that you can run several individual sites in one TYPO3 instance. A major benefit of such a setup is that all sites share resources: backend users can be responsible for several sites and maintain content without logging out and in again in a different instance, for example. Furthermore, you only need one TYPO3 Core installation which makes ongoing updates easy.
The multi-domain capability means that you can attach more than one domain to a TYPO3 instance. Either to different sites – or multiple domains to the same site. The latter function is an ideal solution if you want to run the TYPO3 instance in different environments. For example in production and in a local development environment.
If you take a look into the well-known directory typo3conf/, you will quickly notice that there is no subfolder named sites/, at least not in a standard TYPO3 installation. Copying the folder typo3conf/sites/example.com to anything else, as suggested in answer 1, is therefore not an option.
If you have worked with TYPO3 since some years, the second answer possibly sounds familiar. In older versions of TYPO3, you were able to add the domains to the root page (page ID 0) which stored the record in a database table sys_domain. This was deprecated in favor of the site configuration functionality in TYPO3 v9 and the table was removed in TYPO3 v10. Answer 2 is also wrong.
The term site configuration is of course the pointer in the right direction – and the next three answers all deal with this function.
If you create a second site configuration, for example by duplicating the directory and fileconfig/sites/site1/config.yaml to config/sites/site2/config.yaml and adjusting the base entry accordingly, you don’t get two site configurations in the TYPO3 backend as expected. This is because both configuration files point to the same rootPageId. Additionally, this is not the proper configuration for a development/production setup.
Answer 4 is out of question straight away. As soon as you delete all site configurations, TYPO3 produces an error in the frontend:
The page did not exist or was inaccessible. Reason: No site configuration found.
The last answer describes the correct approach. Base variants represent different bases (e.g. domains) for a website that become active depending on a condition. The condition is typically an application context (for example “Development” or “Production”) or an environment variable.
The correct answer is 5.
How can you rename a file in the Filelist module?
Answers
-
By double-clicking on the file name in the list view of the module
-
As renaming files would break the data integrity, you have to delete the file and upload the same file under the new name
-
If the “extended view” is enabled, click on the “rename” icon
-
Right-click on the file icon and select “Rename” from the context menu
-
Select the file in the backend module “Filelist” and press F2
-
Click on the “actions” icon (three vertical dots) and select “Rename” from the context menu
Number of correct answers: 2
Explanation
Every now and then you need to rename a file that you, or another backend users, uploaded to the system earlier.
Many operating systems and applications let users double-click on a file name to rename the file. However, the backend module File → Filelist does not support this action which makes answer 1 wrong. The same applies to answer 5. It is not uncommon that you use the “F2” key on your keyboard to rename a file, but not in TYPO3 by default. Also, renaming files has nothing to do with data integrity, so answer 2 is also wrong.
This does not mean that renaming a file is not possible. The file list indeed showed a “rename” icon in older versions of TYPO3 if the “extended view” was enabled. However, the Filelist module was reworked in TYPO3 v11.4 (released in September 2021) and the extended view was removed as part of this process. You can scratch answer 3 as a correct answer.
Only two answers are left and both remaining options are correct. Backend users can rename a file in the Filelist module by either a right-click on the file icon and then selecting the “Rename” item, or by accessing the additional actions. This menu opens when you click on the icon with the three vertical dots. From there, you can also execute the rename action:
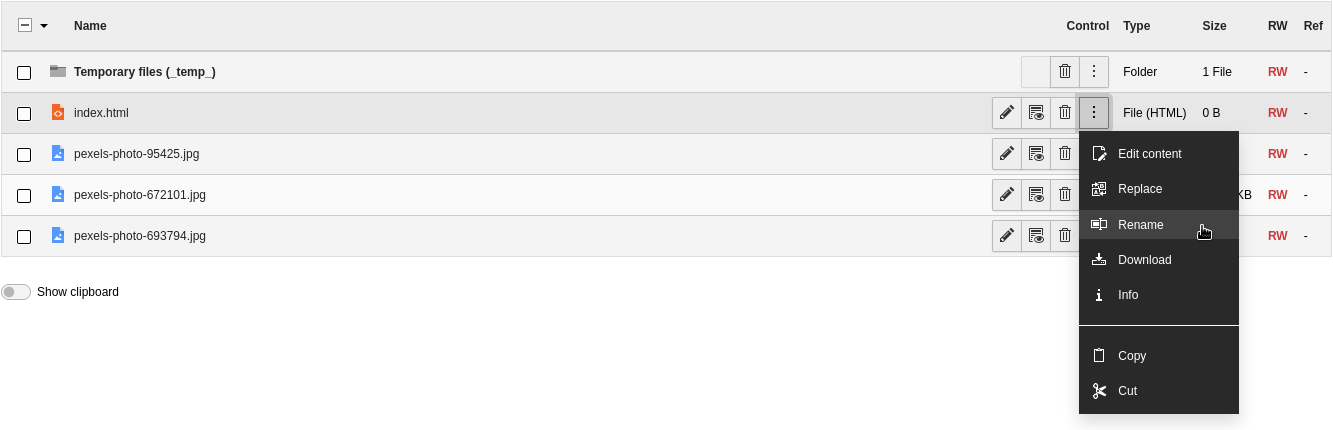
The correct answers are 4 and 6.
How can you use a recycling bin for files?
Answers
-
By activating the system extension “Recycler” that provides this feature
-
By activating the function in the Page TSconfig:
config.file.recycler = true -
By creating a folder
_recycler_/in backend module “File → Filelist” -
By activating the “Use recycler for files” checkbox in the user settings
-
TYPO3 only features a recycling bin for data records (such as pages and content elements) but not for files
Number of correct answers: 1
Explanation
The “Recycler” system extension (EXT:recycler) has been part of TYPO3 since version 4.3. If the extension exists and is activated in your TYPO3 installation, the backend module Web → Recycler shows all data records such as pages and page contents that were deleted anywhere in the page tree. This is possible as TYPO3 does not actually delete records but merely marks them as deleted. The “Recycler” extension allows you to restore records that have been marked this way. However, the recycler only works for deleted records in the database and not for files. This means that the first answer is wrong.
The Page TSconfig setting suggested in answer 2 neither exist nor does it make sense as the file list is independent from any pages. Therefore, this answer is also wrong.
It often surprises TYPO3 integrators, but in fact you only need to create a folder called _recycler_/ in the file list. This folder then appears with a recycling bin symbol in the file/folder list. When backend users delete files in the File → Filelist module, these files are actually moved into this folder rather than removed from the server.
It is also interesting to know that you can create this special folder inside sub-folders. Consider the following directory structure:
If a user deletes a file README.txt from the folder fileadmin/user_upload/documents/, TYPO3 moves this file into the recycling folder fileadmin/user_upload/documents/_recycler_. The same applies for files in the archive/ folder. This is because the recycling folder that exists inside documents/ is on the same level and is the next recycling folder up the tree respectively. Files in folders images/ and whitepapers/ are moved to the recycling folder in the top level (fileadmin/_recycler_/). When a file is deleted and no recycling folder can be found, TYPO3 removes the file from the file system. Answer 3 is obviously the correct answer.
The answers 4 and 5 are wrong. You don’t find a checkbox “Use recycler for files” in the user settings and answer 5 is in contrast to the correct answer 3. TYPO3 features a recycling bin for data records but also offers the option to recycle files and even folders.
The correct answer is 3.
How can you store additional meta data such as the creator, copyright information, and a geo-location against images uploaded through the Filelist module in TYPO3?
Answers
-
By making sure that the additional information is stored as EXIF data in the image file
-
By adding a YAML file
metadata.yamlthat contains the additional meta data information in the same folder as the image -
By leveraging the fields provided by the system extension “Filemetadata”
-
By activating additional file meta data fields under “Admin Tools → Settings → Feature Toggles”
Number of correct answers: 1
Explanation
In a minimal TYPO3 installation, the File Abstraction Layer (FAL) only features a small set of fields:
- Title
- Description
- Alternative Text
- Categories
Backend users can’t use these fields to store extra meta data such as the creator of an image, the geo-location, or any copyright information against images. So what do you do if your client requires these additional data? Does this mean that you cannot deploy TYPO3 as a product in the project? Or can you do anything simple to meet this requirement?
Many well-know image formats allow users to store information about the camera, potentially where the picture was taken (GPS coordinates), creator, publisher, copyright, etc. in the image file as EXIF data. EXIF stands for Exchangeable Image File Format. Having said that, you can’t expect that all users who upload image files into the system make sure that the files are prepared this way. The first answer is therefore incorrect.
TYPO3 does not read and process YAML files that are stored in the same folder as the images to extract any additional meta data information. This makes answer 2 also wrong.
Answer 3 sounds plausible. A system extension called “Filemetadata” indeed exists. However, this extension is not installed/enabled in a minimal TYPO3 installation.
Make sure that the system extension exist (e.g. install the Composer package “typo3/cms-filemetadata”). This adds some additional fields to the database table sys_file_metadata lets backend users enter and edit the additional information assuming that they have the appropriate access permissions.
The “Feature Toggles” offered by the Admin Tools don’t contain any options to enable/disable this function. The last answer is wrong.
The correct answer is 3.
Which statements about TYPO3’s “home directory” feature are correct?
Answers
-
TYPO3 automatically creates a home page for every backend user that shows the user’s profile on the website
-
A global configuration (for example
userHomePath) is required to enable the home directory feature in TYPO3 -
Home directories in the FAL can be configured for backend users and user groups
-
Home directories appear as additional mount points under “Files ➜ Filelist”
-
Backend users can not copy or move files from home directories into any other directory
-
The maximum storage size of home directories is limited to 1 GB
Number of correct answers: 3
Explanation
TYPO3’s home directories for backend users is an interesting feature which, unfortunately, often comes up short. Technically, this is not directly related to the File Abstraction Layer (FAL) as home directories are part of the backend user authentication component. Having said that, the result is mainly visible in the FAL.
Suppose your TYPO3 instance is used by a large company. This company has several departments, including a “marketing” department. All backend users from this department are assigned to a backend group named “Marketing” (group ID 123). Wouldn’t it make sense to give this group its own space in the FAL? This is one use case that you can achieve with home directories. Simply create a new directory under fileadmin/, for example: groups/. Create another directory inside this folder that reflects the ID of the “Marketing” backend group, for example 123:
fileadmin/groups/123/
Now add the following line to your typo3conf/AdditionalConfiguration.php file, assuming that the “fileadmin“-storage has the ID 1:
$GLOBALS['TYPO3_CONF_VARS']['BE']['groupHomePath'] = '1:groups/';
That’s all that is required to enable to enable the feature for backend user groups. When a backend user from the “Marketing” group now opens the Files → Filelist module, the FAL shows a mount named “Marketing” (the same name as the backend group). This means that answer 4 is correct.
The same feature is available for backend users. Create a directory, for example users/, and configure it under the key “userHomePath”:
$GLOBALS['TYPO3_CONF_VARS']['BE']['userHomePath'] = '1:users/';
If a backend user with the user ID 42 logs-in to the backend and a directory named 42/ exists inside the users/ folder, TYPO3 uses this directory as the user’s home directory. The answers 2 and 3 are therefore also correct.
As the home directories are standard file mounts from a technical perspective, backend users can work with them as usual. This includes copying or moving files from home directories into other directories and storages and vice versa. This makes answer 5 wrong.
The first answer is clearly wrong. TYPO3 does not automatically create any pages for backend user that show the user’s profile as siggested in answer 1. As the storage size of home directories is not artifically limited, the last answer is also wrong.
The correct answers are 2, 3, and 4.
What are the main benefits of the File Abstraction Layer (FAL) in TYPO3?
Answers
-
The FAL automatically converts
.docxfiles into content elements out of the box -
Backend users with administrator privileges can use the FAL to install extensions
-
Files uploaded through the FAL are automatically stored in multiple locations to increase data redundancy
-
Meta data such as a title and a description can be added to images for example
-
The FAL abstracts physical file assets stored in the system
Number of correct answers: 2
Explanation
The File Abstraction Layer (FAL) was introduced in TYPO3 version 6 and can be found in the backend under File → Filelist. The concept of the FAL is based on typical Digital Assets Management systems that abstract physical files (the assets) from the rest of the system. This approach introduces some exciting features and possibilities that integrators and developers can leverage.
Automatically converting .docx files into content elements, however, is not a feature that the FAL offers out of the box. This makes the first answer wrong. The FAL is also not intended to bypass any of the other methods of installing or maintaining extensions, e.g. Composer or the Extension Manager. Answer 2 is also wrong. Under some circumstances, data redundancy is important. Does the FAL automatically store files in multiple locations? The answer is no. As a developer you could program an extension that lets you achieve this functionality but it’s not offered out of the box.
Logically, this means that the last two answers must both be correct. Let’s check this.
Once a backend user has uploaded a file through the FAL, for example an image, the user can edit the meta data by clicking on the file name or the pencil icon. On the following page, some meta data such as a title, a description, and an alternative text can be entered. This information is stored in the database against the asset record. When the image is used in content elements – even multiple times across the website – the same meta data can be used by default. Due to the fact that the meta data is stored in a central place, this also means that if someone updates the title or description through the FAL, it automatically takes effect in all places across the website.
The correct answers are 4 and 5.
Your client’s requirements state that files (for example images) uploaded by editors should be stored in a remote storage outside the file system. How can you achieve this in TYPO3?
Answers
-
This is not possible as TYPO3 stores all files uploaded through the FAL under
fileadmin/which must be the local file system -
By installing a third-party extension that acts as a driver for the FAL and connects the remote storage transparently with the system
-
By setting up a cronjob on the server that copies the files from the local file system to the remote storage on an hourly basis
-
By activating one of the available Scheduler tasks named “FAL drivers” that copy the files from the local file system to the remote storage
Number of correct answers: 1
Explanation
This question is a good example of the great flexibility that the File Abstraction Layer (FAL) offers in TYPO3. The concept makes the storage type and location independent from the TYPO3 Core system. In simplified terms, the system only instructs the FAL to store a certain asset in the storage or to fetch it from it. In addition, the identifier of the storage is specified. The TYPO3 Core does neither know nor care what technology is used to operate the storage. It can be the local file system (this is the standard), but also an FTP or NFS server (network file system). It’s also possible to integrate cloud storage in this way. This means that answer 1 can’t be correct.
A periodic copy of files from the local file system to remote storage is not a bad idea for regular backups. However, neither the solution suggested in answer 3 nor answer 4 is an adequate approach in relation to the question. Assets should be available in real-time of course, and TYPO3 does not feature Scheduler tasks named “FAL drivers” out of the box.
Having said that, the term driver points into the right direction. One can summarize the relations as follows:
- Every file belongs to a storage.
- A storage can be the local file system, a remote server, or a cloud-based resource for example.
- The connection between the system and a storage is managed by a driver.
- Each storage relies on a driver (you cannot use a storage without the appropriate driver).
- TYPO3 only features the “local file system” driver by default.
- Additional FAL drivers are available as third-party extensions.
The correct answer is 2.
How can you create a new backend user?
Answers
-
You cannot create additional backend users in TYPO3, only frontend users
-
By right-clicking the page with the TYPO3 logo (ID=0) in the page tree and selecting “New → Backend user”
-
In the “Web → Page” backend module
-
In the “Web → List” backend module
-
In the “Admin Tools → Maintenance” backend module
-
In the “Admin Tools → User admin” backend module
-
In the “System → Backend Users” backend module
Number of correct answers: 2
Explanation
Of course you can create as many backend users in TYPO3 as you like. You can also actually right-click on the page with the TYPO3 logo (ID=0) to open the context menu. However, an item “New → Backend user” does not exist. The first two answers are wrong.
The Web → Page module is only used for managing page characteristics and page contents, while a backend user is represented by a data record in the be_users database table. This makes the third answer also wrong.
Let’s turn to answer 4 now. The suggestion actually makes sense because all types of data records can be maintained using the List module. To create a new backend user, you go to Web → List, then you select the root page (the page with the TYPO3 logo and UID 0). From here, you can click either the icon “+ New record” in the “Backend user” table or the plus symbol at the top of the page. This means that answer 4 is correct.
The Admin Tools, however, don’t offer a function to create backend users. Neither under Admin Tools → Maintenance nor under Admin Tools → User admin. The latter simply does not exist. The answers 5 and 6 are therefore wrong.
You can, however, add and maintain backend users in the System → Backend users module. This makes the last answer correct. Please note that both solutions (answer 4 and answer 7) require administrator privileges.
The correct answers are 4 and 7.
Which areas and modules of the TYPO3 backend let you configure access permissions for backend users?
Answers
-
The “Site Management → Permissions” backend module
-
The “System → Backend Users” backend module to configure backend users
-
The “User Settings” backend module to configure backend users
-
The “System → Access” backend module to configure access to pages
-
The “Admin Tools → User Admin” backend module to configure backend users
-
The “Web → List” backend module to configure backend user groups
Number of correct answers: 3
Explanation
As outlined in the chapter introduction, TYPO3 uses a smart and sophisticated user and group concept to configure backend user privileges. It should not be too difficult for you to answer this question correctly, if you have configured access permissions for users before.
You can use the System → Backend Users module to open the backend user administration (answer 2). This module not only lets you create and maintain user accounts but also configure access permissions. Have a closer look at the tabs “Access Rights” and “Mounts and Workspaces” for example.
The System → Access module (answer 4) lets you configure access permissions for users on a page-by-page basis.
The approach suggested in answer 6 lets you configure backend user groups. Keep in mind that backend users and user groups are stored against the root page (ID: 0) and that the Web → List backend module is a typical entry point to maintain all kind of records stored in the database.
Now, let’s have a look at the wrong answers. A backend module named “Site Management → Permissions” does not exist in a standard TYPO3 installation. Neither a module Admin Tools → User Admin. Therefore, the answers 1 and 5 are wrong. The User Settings module exists but can’t be used to configure permissions for other users. This area of the TYPO3 backend only serves to configure the user you are currently working as. This means that answer 3 is also wrong.
The correct answers are 2, 4, and 6.
How can you quickly and easily look up the permissions that users have in the page tree?
Answers
-
By using the “System → Access” backend module
-
By using the “Info → Access” backend module
-
By using the “Admin Tools → Access” backend module
-
By using the “Site Management → Access” backend module
-
By opening the user settings for each user
Number of correct answers: 1
Explanation
This question is especially aimed at testing whether you are familiar with the backend and know where to find the relevant function.
Focus on the answer that does not match the pattern of the other answers first. In this case, this is answer 5. As the user settings only let you configure the user you are currently working as, and it does not provide a function to generate an overview of permissions, this answer can’t be correct.
Now, let’s turn to the smaller differences between answers 1 to 4. They all refer to backend modules. They also all refer to the submodule Access which indeed exists. You only need to know in which (parent) backend module this submodule is located: System, Info, Admin Tools, or Site Management.
You can exclude “Site Management” (answer 4) and “Info” (answer 2) straight away. The Site Management module only includes two submodules in a default TYPO3 instance (“Sites” and “Redirects”) – and a backend module “Info” (that could include “Access” as a submodule) simply does not exist. “Info” is a submodule of the “Web” backend module (Web → Info).
You have to choose between “System” and “Admin Tools”. The latter lets you maintain the global system, upgrade the instance, check the environment, manage extensions, etc. Admin Tools are independent from pages, which means that answer 3 is wrong.
This leaves you with only one answer. The backend module System → Access provides details of access permissions to all pages in a quick and easy way. By adjusting the Depth, you can control how many levels of pages should be included in the view..
The correct answer is 1.
Where can you configure access permissions for backend users to a page?
Answers
-
In the “Web → List” backend module
-
In the “Admin Tools → Settings” backend module
-
In the “System → Access” backend module
-
In the “System → Permissions” backend module
-
In the tab “Access” of the page properties
Number of correct answers: 2
Explanation
Four of the five possible answers deal with various backend modules. Answer 5, on the other hand, suggests the page properties. Let’s clarify this answer first. The page properties do indeed feature a tab named “Access”. The settings in this tab let you manage the visibility of the page, the publish and expiration dates, usergroup access rights, etc. All these apply to the frontend. The question, however, asks for access permissions for backend users. Answer 5 is therefore wrong. The two correct answers must therefore be about backend modules.
The module System → Access let you configure the access permissions for the page owner, group, and everbody else. Answer 3 is undoubtedly a correct answer. A backend module System → Permissions does not exist which makes the next answer wrong.
Both modules suggested in the answers 1 and 2 exist, so excluding the wrong answer this way is not an option. However, you search in vain for the ability to configure access permissions for backend users to a page under Admin Tools → Settings. But where exactly can you reach the configuration of access permissions under Web → List?
Open the backend module and select a page that has subpages. Now, click on the three horizontal dots to display additional actions. Locate and click the item “Set permissions for page” which takes you directly to the right spot to configure access permissions for backend users for the respective page.
The correct answers are 1 and 3.
Which actions are required to allow a non-admin backend user to edit the contents of a page but not the page itself?
Answers
-
By configuring the permissions in the “User settings” backend module
-
By configuring the “Access Lists” of the user and/or user group
-
By configuring an appropriate file mount
-
By setting the permissions in the “System → Access” backend module
-
By adding the appropriate TypoScript settings in the User TSconfig
-
By adding the appropriate DB Mount
Number of correct answers: 3
Explanation
Managing user permissions in TYPO3 is very powerful but complex. You have to add a DB Mount to the user record and/or user group. This limits the user’s access to certain branches of the page tree and also defines to which branch the user has access to. Non-admin users require at least one DB Mount to be able to access pages, so answer 6 is correct.
The Access Lists of the user and/or user group allow you to configure detailed permissions. This includes the configuration whether a user can view and/or edit specific tables. Answer 2 is therefore also correct.
The backend module System → Access eventually lets you configure five possible classes of permissions on a page level:
- Show page
Displaying and copying pages and contents.
- Edit content
Editing, adding to, deleting and moving contents.
- Edit page
Editing pages and page properties, moving pages.
- Delete page
Deleting pages and page contents.
- New pages
Creating new pages under the current ones.
The first two permissions are required to allow the user to view and edit the page contents. The “edit page” permissions should be disabled to meet the requirements stated in the question: “[…] edit the contents of a page but not the page itself.” Answer 4 is also correct.
A file mount (as suggested in answer 3) is required to allow backend users to work with files – for example to upload images. The question does not ask for this permission which makes this answer wrong.
The correct answers are 2, 4, and 6.
How do you restrict the permissions to edit a page and its contents to users with administrator permissions?
Answers
-
By activating the “Admin Lock” toggle switch in the site configuration
-
By creating the file
typo3conf/LOCK_BACKEND -
By activating the “Lock” option under “System → Access” for the appropriate page
-
By adding the following option to the User TSconfig:
config.restrictEditingForNonAdmins = 1 -
By activating the “Restrict editing by non-Admins” toggle switch in the “Access” tab of the page properties
Number of correct answers: 2
Explanation
It often occurs that websites consist of pages that may only be edited by users with administrator permissions. Normal editors are prohibited from changing the content of these pages. One option to configure the access permissions to meet the requirement is to explicitly exclude these pages by removing all allocated users and groups under System → Access. However, there is an easier way to achieve this.
The site configuration does not feature a toggle switch named “Admin Lock”, which makes the first answer wrong. Creating a file LOCK_BACKEND and storing it in the typo3conf/ folder has no effect either, so answer 2 is also wrong.
If you go to the System → Access module, you find an icon on the far right of the “Lock” column12. If this option is activated (the padlock closed), only administrators can edit the page. You can achieve the same result by using the “Access” tab in the page properties. It contains the toggle switch Restrict editing by non-Admins.
The TypoScript option suggested in answer 4 does not exist. Furthermore, a User TSconfig setting does not cover page configuration unless so-called “conditions” are used. I will go into more details about this topic in the chapter “TypoScript”.
The correct answers are 3 and 5.
What is the best way to test/check if the permissions of a backend user work as expected?
Answers
-
By logging-in using the user’s credentials
-
By using the “Switch to user” function in the “Backend Users” module
-
By installing the third-party extension “Simulate user” (
EXT:simulate_user) -
By adding the user ID to the following global configuration:
$GLOBALS['TYPO3_CONF_VARS']['BE']['simulateBackendUser'] -
By configuring the ID of the user you want to simulate in the Admin Panel
-
By selecting the user in the “User Settings → Simulate backend user” module
Number of correct answers: 1
Explanation
Once you created a new backend user account and you configured the access permissions, you possibly want to make sure that all the settings are correct. TYPO3 is a comprehensive system and you should allow for appropriate time to test changes and user permissions.
Although the first answer is the most obvious method, the disadvantage is that you need to know the password to log-in. This is not a problem if you just created the user account but if the user has already changed the password, things become unnecessarily complicated. It is far more practical if you switch to that user as described in answer 2. Once your tests are complete, you can easily switch back to your standard user.
The third-party extension mentioned in answer 3 does not exist and the global configuration suggested in answer 4 either. You could simulate a group in the Admin Panel but this is only possible for frontend user groups, not backend users. This makes answer 5 also wrong.
The backend module User Settings actually had a function Simulate backend user in older TYPO3 versions. However, this function was removed in TYPO3 v9 and served a different purpose. By choosing a user from the dropdown box, you simulated the user only concerning the user settings. You could not switch to the user role as such.
The correct answer is 2.
Which steps are required to list all backend users including their email addresses and full names in the “Web -> List” module?
Answers
-
Open the “System → Backend Users” module to list all backend users
-
Activate the checkbox “Extended view”
-
Go to the “Web → List” module and choose the root page (page ID:
0) -
Select “Full search” from the dropdown box
-
Go to “System → Reports” and select “Backend users” from the dropdown box at the top
-
Select the appropriate columns in the table “Backend users” and click “Update”
-
Open the “Single Table View” of the table “Backend users”
Number of correct answers: 3
Explanation
This type of question is challenging as the combination of multiple answers build the solution. A few steps are required to achieve the goal stated in the question. Also keep in mind that the order of the given answers typically does not match the order how you execute the steps.
Let’s gather the facts we have. We want to output a list of all backend users with additional details in three single steps. For this, the backend module Web → List should be used.
The first answer suggests to use the standard user list under System → Backend Users. This list does indeed display all users but does not offer the possibility to show additional fields. Also, if you open this module, you automatically act against the requirement stated in the question that. You should use the Web → List backend module. The same logic applies to answer 5. In addition, an item “Backend users” does not exist under System → Reports. The answers 1 and 5 seem to be distractors.
Backend users are standard records in the database, stored against the root page. You can list various records in the Web → List module. Answer 3 describes this step and could be the first correct answer. From there, you can click the button “Show Columns” and enable the fields “Email” and “Name”. The additional information are shown once you click “Update”. Answer 6 sounds like the logical second step.
Hold on! Why are these two steps (answer 3, then answer 6) not sufficient? Why does the question indicate that three answers are correct? You defintely have to review the remaining three answers and check them against the question13.
The remaining answers are 2, 4, and 7. The function to let backend users select additional columns to show in the table was introduced in TYPO3 v11.3 (released in July 2021). Older TYPO3 versions featured the checkbox “Extended view”. Answer 2 is obviously wrong as this checkbox does not exist in the Web → List module anymore. You find a function called “Full search” in a dropdown box in the backend module System → DB Check. This has nothing to do with backend user records, so answer 4 is also a distractor. This means that answer 7 must be correct – but why?
The simple list view only shows a maximum of 25 entries per table. This is not a problem if your TYPO3 instance has only a handful of backend users. If your installation has 100, 500, or more users, you have to either click on the “Expand table” button at the bottom of the table or to open the “Single Table View” of the table to access all user recods. After all, the question clearly contains the keyword “all”.
As a reminder: the order of the correct answers does not necessarily match the order how you execute the steps. The steps in the right order are 3 (go to the Web → List module), then 7 (open the Single Table View), and then 6 (select the desired table columns).
The correct answers are 3, 6, and 7.
What is a “DB Mount” and how can you set one up?
Answers
-
A DB Mount allows TYPO3 to connect to external databases (to “mount” them)
-
A DB Mount connects the database used by TYPO3 with the core system
-
You can use a DB Mount to restrict database access for users and groups
-
You can use a DB Mount to restrict page tree access for users
-
You can set up a DB Mount in the backend group configuration
-
You can set up a DB Mount in the backend user configuration
-
You can set up a DB Mount under “Admin Tools → Maintenance → Analyze Database Structure”
-
You can set up a DB Mount under “System → DB Check”
Number of correct answers: 3
Explanation
There are two main challenges to this question. The first challenge is the number of answers. You need some time to read and understand them in order to decide if they are right or wrong. The second challenge is the term DB Mount itself which is in fact misleading. The term may imply that this is a technology that has something to do with database servers. This is not true though.
The first three answers refer to database systems and are therefore wrong.
Instead, you would use a DB Mount to specify sections in the page tree that a user should be able to access. You can set up a DB Mount in the backend user and user group configuration. Open System → Backend Users and select a backend user that does not have administrator privileges. Switch to the tab “Mounts and Workspaces”. You find a section “DB Mount” that lets you select one or multiple pages. Once you saved the user record, this user can only access this part of the page tree. User permissions control whether the user can actually see or modify the sub-tree. The rest of the tree is not accessible by this backend user.
You could claim that Tree Mount would be a more accurate name for this function. Nevertheless, answer 4 is a correct answer. As DB Mounts can be defined for users and user groups, the subsequent answers 5 and 6 are also correct.
The function “Analyze Database Structure” in the Admin Tools (answer 7) has nothing to do with DB Mounts. The same applies to the backend module System → DB Check. This makes the last two answers wrong too.
The correct answers are 4, 5, and 6.
You have correctly set up the DB Mount for a user but the user cannot see any pages. What could cause this issue?
Answers
-
You have to set the “admin” flag in the user settings, as only administrators may access DB Mounts
-
You have to create a user group and assign the user to this group
-
You have to activate the function in the User TSconfig
-
You first need to configure the visibility in
excludeLists -
You have to configure at least read permissions for the respective pages in the “System → Access” module
Number of correct answers: 1
Explanation
DB Mounts define access to certain areas of the page tree. Users can only see and access branches defined as DB Mounts – and no other pages. In addition to the DB Mounts, TYPO3 features a sophisticated permissions concept. By default, only the user who creates a new page has read and write permissions to it, and/or the user’s default user group (which can be empty).
If, for example, the user “administrator” created a page, other users are initially unable to access it. You can change this setting by configuring the page with appropriate permissions in the Web → Access module, followed by allocating these permissions to the owner and the group of each page. You can make this allocation for any user who does not require any admin permissions for this purpose. This is what answer 5 describes.
A group (as suggested in answer 2) is not necessary but groups are often useful and therefore recommended. All other answers are incorrect.
The correct answer is 5.
You want to limit read/write access to the folder “fileadmin/members/” in the Filelist backend module to a certain group of backend users. How do you achieve this?
Answers
-
By right-clicking the folder in “Files → Filelist” and configuring the backend users under “Access permissions”
-
By setting the access permissions of the folder “
fileadmin/members/” to “755” on the file system level, and all other directories to “600” -
By selecting the folder “
fileadmin/members/” instead of “fileadmin/” in the default file storage in TYPO3 backend -
By configuring a file mount in the TYPO3 backend
-
By configuring a DB Mount in the TYPO3 backend
Number of correct answers: 1
Explanation
You can eliminate the first answer as the correct option pretty easily. The Files → Filelist backend module does not contain a function “Access permissions” that would let you configure read/write access to backend users or groups.
The second answer also seems a bit odd. Setting access permissions on the file system level affects the entire TYPO3 installation and can’t be limited to a specific group of backend users. More importantly, the permission “600” would configure directories in a way that TYPO3 can’t access the content of these directories. This can’t be right and you can therefore classify answer 2 as wrong.
Answer 3 suggests to change the folder of the default file storage from fileadmin/ to fileadmin/members/. Although this is technically possible, the change would mean that no other subfolders besides member/ in the fileadmin/ folder can be accessed. This is not what we expect, given that the question asks for limiting the read/write access to a certain group of backend users, not all backend users.
Now we are down to just two possible answers that are remaining. If you know the difference between a file mount and a DB Mount in TYPO3, you should be able to answer the question easily. I provided some example questions about TYPO3’s File Abstraction Layer (FAL) earlier in this chapter. Apart from drivers and storages, the FAL also features file mounts. With file mounts, you can grant backend users or user groups access to specific directories of a file storage. Let’s use the folder fileadmin/members/ as an example:
Go to Web → List and open the root page (ID: 0) in the page tree. Click the plus icon at the top of the page and select “Filemount” from the “Backend Access” category. Enter an arbitrary name (e.g. “Members”) and select “fileadmin” as the storage from the dropdown box. Choose the folder member/ and click the save icon at the top. You can now assign this file mount to a backend user group to limit the read/write access to this particular group.
DB Mount are something different in TYPO3: they define access to certain areas of the page tree, not specific folders in the Filelist module.
The correct answer is 4.
How can you create a list of selected or all backend users to compare their file mounts?
Answers
-
In the “Web → Info” backend module
-
In the “Admin Tools → User Admin” backend module
-
In the “System → Backend Users” backend module
-
In the “Web → List” backend module
-
By using the “User comparison” system extension
Number of correct answers: 2
Explanation
Let’s work through the answers from the back to the front. A system extension “User comparison” that provides an overview of backend users does not exist. You can mark answer 5 as wrong straight away.
The TYPO3 Core offers several ways to provide this function. One option is the Web → List backend module. Open the module, navigate to the root page, and click on the button “Show Columns”. Select the “File Mounts” column and optionally further fields you would like to compare. Once you confirmed your selection by clicking on the “Update” button, the table shows the additional columns which let you compare the file mounts that are configured for each user.
Although answer 4 is correct, keep in mind that this approach limits the result to the file mounts configured against the user record. The file mounts which may have been configured for the user groups, do not appear in this list, of course.
You can also open the backend module System → Backend Users (answer 3) and select all users you would like to compare by clicking the “Compare” button at the right. Every user you select appears in the list at the top. A click on the button “Compare user list” opens a new view that lists all selected users side-by-side. One row represents the file mounts. Answer 3 is the second correct answer.
The same caveat as above applies here though. The view only shows the file mounts configured against the user. Any file mounts configured for the user group that the user possibly belongs to are not shown in the list.
A backend module Admin Tools → User Admin does not exist which makes the answer 2 wrong. Although the module Web → Info exists, it does not provide a function to create a list of backend users.
The correct answers are 3 and 4.
What is the “Link Validator” in TYPO3?
Answers
-
A TYPO3 Core function that validates the syntax of links while backend users enter them in the RTE
-
A third-party extension that obfuscates email addresses in
mailto:-links to prevent spam -
A system extension that checks your TYPO3 website for broken links
-
A Scheduler task that automatically removes redirects if the destination URL becomes invalid
Number of correct answers: 1
Explanation
This is clearly another warm-up question. The Link Validator has existed in TYPO3 for a very long time. In fact, it was already introduced in version 4.5. The Link Validator reads various records from the database, such as pages and content elements, searches for links, and checks if the targets of these links are valid. If broken links are detected, these issues are reported.
You can trigger the link validation process either manually in the TYPO3 backend, or automatically by a Scheduler task. The Link Validator does not run at real-time while a backend user enters a link, and it does not validate the syntax of links either. The first answer is wrong.
Although TYPO3 has a basic function to obfuscate email addresses in mailto:-links to prevent spam, this function has nothing to do with the Link Validator. This makes answer 2 also wrong.
Answer 3 sounds more like a correct answer. The Link Validator is indeed a system extension that checks your TYPO3 website for broken links.
The last answer is only partly correct. You can create a Scheduler task to automatically execute the validation process but the Link Validator does not remove or update redirects.
The correct answer is 3.
Which types of links can the Link Validator check in TYPO3?
Answers
-
Email addresses in
mailto:-links -
External links
-
Internal links
-
Targets entered in “Site Management → Redirects”
-
File links
Number of correct answers: 3
Explanation
The Link Validator is known to many members of the TYPO3 community only for checking standard links such as example.com. However, this is not true. In fact, the Link Validator features a range of link types – but email addresses in mailto:-links are not part of this.
Internal as well as external links are supported though. These are links to pages in the same TYPO3 instance for example, but also files such as PDF documents. External links are http:// and https:// links to foreign websites. This makes answers 2, 3, and 5 correct.
Redirects (as suggested in answer 4) are not part of the checks conducted by the Link Validator. The answers 1 and 4 are wrong.
The correct answers are 2, 3, and 5.
How can you trigger/execute the Link Validator?
Answers
-
Manually from the dropdown menu item “Linkvalidator” under “Web → Info”
-
Manually from the context menu of a page in the page tree under “More options… → Validate links”
-
Manually from the “Admin Tools → Maintenance → Link Validator” function
-
Automatically as a Scheduler task, class “Linkvalidator”
-
Automatically by the following CLI command in a Composer-based installation:
typo3 linkvalidator:checkauto
Number of correct answers: 2
Explanation
In general, we distinguish between two methods of executing the Link Validator: manually and automatically. Let’s focus on the automatic way first as only two possible answers deal with this method.
In the TYPO3 backend, go to System → Scheduler and create a new Scheduler task. Open the dropdown box Class and review the available functions. You will find a class named “LinkValidator”. This is what answer 4 suggests, so this answer seems to be correct.
The second answer that deals with automatic executions of the Link Validator is answer 5. Open the command line and access the help of the TYPO3 command line tool, for example14.
Since the command suggested in answer 5 does not exit, you can exclude this answer. This leaves us with the three remaining answers that all deal with the manual execution of the Link Validator. Which of these options exist?
You don’t find a function “Link Validator” under Admin Tools → Maintenance. You don’t find an option to call the Link Validator in the context menu of a page in the page tree either.
The correct answers are 1 and 4.
How do you extend the list of fields the Link Validator should check for broken links?
Answers
-
By configuring a comma-separated list of table/fields in the following Page TSconfig:
mod.linkvalidator.searchFields -
By adding the fields to the text area “Searchfields” under “System → Configuration → Link Validator”
-
By adding the fields to the YAML file
typo3conf/ext/linkvalidator/fields.yaml -
Engage a TYPO3 developer as this requires a TYPO3 extension and PHP programming
Number of correct answers: 1
Explanation
The default field configuration that Link Validator in TYPO3 uses meets the requirements of most users. Under certain circumstances, however, you need to extend the existing list and add different or custom fields to it – for example a table and field that is provided by a third-party extension. As you can achieve this without any PHP programming skills, you don’t need to engage a TYPO3 developer. This means that the last answer is wrong.
Although YAML files are used in various components in modern TYPO3 versions (such as the site configuration and Form Framework), they are not used to configure the Link Validator. In addition, the path and file name suggested in answer 3 should raise your suspicion anyway. The Link Validator is a system extension but the path typo3conf/ext/ only stores third-party extensions. A file named fields.yaml located in the root folder of the extension is also extremely unlikely. Answer 3 is clearly wrong.
If you check the module System → Configuration in the backend, you will realize that no function “Link Validator” exists. The second answer is made up and therefore also wrong.
The first answer is the only correct option. The following Page TSconfig reflects a typical setup:
These lines instruct the Link Validator to search for broken links in the fields media and url of the database table pages, and in the fields bodytext, header_link, and records of the table tt_content.
The correct answer is 1.
What should you consider if you plan to use the Link Validator for a large TYPO3 instance with thousands of pages?
Answers
-
The Link Validator only checks up to 100 external
https://-links -
When the Link Validator is triggered by a Scheduler task, the backend is disabled while the process runs
-
Set the page depth to a reasonable level instead of “infinite”
-
Use the TYPO3 Scheduler instead of the “Check Links” tab in the backend module
-
The Link Validator possibly generates a large number of emails for every invalid link it detects
Number of correct answers: 2
Explanation
It is not uncommon for an enterprise-level CMS like TYPO3 to power large websites with hundreds, thousands, or even more pages. It is important for an integrator to thoroughly plan such an instance and to be aware of possible pitfalls. What should you consider in such a situation in regards to the Link Validator?
The number of links to check is not limited at all. Neither internal links nor external links. It also does not matter if the link is http:// or https://. This makes the first answer wrong.
The Link Validator can be triggered by a Scheduler task to automatically generate reports once a day, once week, once a momth, or whatever frequency you require. Especially with large sites, this process can take some time. If the backend were temporarily unavailable during the operation, the work of editors would be interrupted. Such a situation would not be acceptable. Answer 2 is also wrong.
You can, however, limit the number of levels the Link Validator should scan in the page tree. If the page tree has thousands of pages several levels deep, you should consider setting the page depth to a reasonable level to prevent a timeout. The setting “infinite” removes this restriction and increases the risk of exceeding the time limit which may result in errors. Answer 3 is therefore correct.
Speaking of timeouts: in a properly configured system, PHP has different timeout settings for PHP processes running in the web server, compared with processes running on the command line. Processes executed in the command line often consume less system resources and usually may run longer. Therefore, it makes sense to trigger link validations through the TYPO3 Scheduler instead of executing the checks in the backend module. Answer 4 is the second correct answer.
Last but not least, let’s check answer 5. It’s true that the Link Validator generates emails but not for every invalid link it detects.
The correct answers are 3 and 4.
How do you update the sender address of the report emails generated by the Link Validator?
Answers
-
This can not be updated as the Link Validator always uses the email address of the first backend administrator user
-
In the “Admin Tools → Settings → Link Validator” configuration
-
By the following Page TSconfig option:
mod.linkvalidator.mail.fromemail -
By the following Page TSconfig option:
mod.linkvalidator.linktypesConfig.external.httpAgentEmail
Number of correct answers: 1
Explanation
When the Link Validator is triggered by a Scheduler task, you define one or multiple email addresses TYPO3 should send the report to. The question, however, does not deal with the recipient address but with the sender address. Answer 1 is nonsense of course. TYPO3 offers a configuration to customize the sender address of the report emails.
However, you will search in vain for such a setting in the Admin Tools. This makes answer 2 wrong.
This means that either answer 3 or answer 4 must be correct – and both deal with Page TSconfig options. You may be surprised to learn that both options really exist.
The Page TSconfig option mod.linkvalidator.linktypesConfig.external.httpAgentEmail is a descriptive email address used by the Linked Validator in the User-Agent HTTP header when crawling external links. If this option is not explicitly set, TYPO3 uses the email address configured in$GLOBALS['TYPO3_CONF_VARS']['MAIL']['defaultMailFromAddress'].
The Page TSconfig option mod.linkvalidator.mail.fromemail indeed stores the email address that the Link Validator should use as the sender address of the report emails.
The correct answer is 3.
Your client requires a highly customized HTML email for the mails that the Link Validator sends out to report broken/invalid links. How can you achieve this?
Answers
-
This is not possible as the Link Validator always uses the template files from the TYPO3 Core
-
Set the template name in the Scheduler Task and add the path to your custom template files to the global configuration:
$GLOBALS['TYPO3_CONF_VARS']['MAIL']['templateRootPaths'] -
Edit the following file of the Link Validator system extension:
typo3/sysext/linkvalidator/Resources/Private/Templates/Email/ValidatorTask.html -
Override the path to the template files in “Web → Template → System Mails”
-
Override the path to the template files in “System → Configuration → Global Configuration → MAIL”
Number of correct answers: 1
Explanation
When the Link Validator runs as a Scheduler task, TYPO3 generates an email that contains the report. This is a nicely designed TYPO3-branded email that looks great for general purposes. Sometimes, however, you need a custom look and feel that meets your company’s styling guidelines. Specific colours or a company logo are two typical examples for a custom design. TYPO3 lets you override the default system emails. This means that the first answer is wrong.
TYPO3 supports template-based HTML and text emails by using the Fluid templating engine since version 10.3 (released in February 2020). The Link Validator received significant improvements in TYPO3 v10 and v11. One of these improvements are Fluid-based email templates which you can customize to your individual needs. The original email templates are located in the system extension:
Editing these files is out of question though. The Link Validator is a system extension and this means that the file suggested in answer 3 is part of the TYPO3 Core. This answer is therefore wrong. So is answer 4. The backend module Web → Template lets you manage TypoScript templates to configure the system. You can’t use this module to edit the template files of system emails. In addition, a submodule “System Mails” does not exist.
Three steps are required to set up custom email templates for the Link Validator:
- Step 1: Prepare template files
Create your HTML and/or text email templates (e.g.
FoobarTest.htmlandFoobarTest.txt). You can use the aforementioned template files from the system extension as a foundation. Store these files in the file system. I recommend to use a TYPO3 extension (for example a site package) but you can also store the files in the following path for testing purposes:fileadmin/Resources/Private/Templates/Email/
- Step 2: Add the path to the global configuration
Edit the file
AdditionalConfiguration.phpand register the path to the template files in the global configuration array. Use an index that is greater than100and that has not been used yet (see note below), for example:$GLOBALS['TYPO3_CONF_VARS']['MAIL']['templateRootPaths'][123] ='fileadmin/Resources/Private/Templates/Email/';
- Step 3: Configure the template name in the Scheduler task
Go to System → Scheduler in the TYPO3 backend and open the “LinkValidator” task (or create a new task). Enter the email template name in the input field at the bottom. If your file names read
FoobarTest.*the template name is “FoobarTest”. Save your new settings.
Note: You can look up an available index number for the global configuration in the backend module System → Configuration. Open the “$GLOBALS[‘TYPO3_CONF_VARS’] (Global Configuration)” and locate the section “MAIL”. Existing indexes are listed under “templateRootPaths”. Answer 5 is wrong as you can access the existing paths to the template files in the backend module but you can’t override them at this spot.
The correct answer is 2.
Which backend module lets you copy and move data records?
Answers
-
The backend module “Web → List”
-
The backend module “Web → Recycler”
-
The backend module “File → Filelist”
-
The backend module “System → Log”
Number of correct answers: 1
Explanation
This question looks very simple at first glance. However, be careful: there could be a trap!
Data records in TYPO3 are arbitrary records stored in the database. They can represent pages, content elements, and also frontend and backend users, file mounts, dashboards, etc. Records, that third-party extensions let you store and process are also data records: news articles, blog posts, categories, etc.
Although log entries under System → Log are in fact records stored in the database, you can neither copy nor move them. This makes answer 4 wrong. The same applies to answer 2. The Recycler lets you review and restore deleted records but there is no option (and no need) to copy or move them.
The remaining two answers may be challenging and confuse you. Only one answer is correct. You can of course copy files in the backend module Filelist from one folder to another. You can also move files. However, these are files and not data records.
The only correct option is the first answer. The backend module Web → List lets you copy and move data records. You can also update multiple records with one action. For example, open a page with subpages in the list module, then select two of the subpages, and click the “edit” button. The view that appears now lets you update the fields of all selected pages in one go.
The correct answer is 1.
Which steps are required to move multiple data records from one page to another in an effective way in the TYPO3 backend?
Answers
-
Open the backend module “Web → Recycler” and select the target page from the page tree
-
Switch to clipboard #2 (multi-selection mode) and click the button “Transfer to clipboard”
-
Open the target page in the list view and click button “Paste in clipboard content” at the top
-
Go to the backend module “Web → List” and select the page that contains the records from the page tree
-
Switch to the “normal” clipboard (single record mode) and click the button “Transfer to clipboard”
-
Click the button “Edit”
-
Select the relevant records by ticking the checkboxes at the left
-
Transfer the records from the clipboard to the target page by clicking the button “Remove all”
-
Repeat the process for every single data record
Number of correct answers: 4
Explanation
This is another example question that requires you to select multiple answers which – in combination – describe the solution.
Let’s focus on the keywords in the question. You are required to work with data records. The question does not say which type of records, so the backend module Web → List is a good fit. It lets you list, copy, move, delete, hide/unhide, and download any type of data records. The question also states that you should move the records to another page. The keywords “multiple” and “effective” should also ring a bell. Suppose you have to move hundreds of records, it would not be effective to move them one by one. Therefore, your solution must allow for moving multiple records in one go if possible. The question also indicates that four answers are correct. This means, the solution requires four steps to achieve the goal.
Before you read through the answers: how would you move multiple data records in the Web → List backend module from one page to another in one go?
Open the backend module and select the page that contains the records from the page tree. The content area now shows one or multiple tables. One of these tables contains the records that you want to move. If you want to move all records that are currently stored in this table you would select “Check all”. Otherwise you can only select the relevant records by ticking the checkboxes at the left. As a side note: It is not feasible to drag and drop records from the content area to pages in the page tree.
Make sure that the clipboard is visible (see toggle switch “Show clipboard” at the bottom). TYPO3 lists four clipboards by default. The “normal” clipboard plus three additional clipboards numbered 1, 2, and 3. The difference between the normal and the other clipboards is that you can only store one item in the normal one (single record mode). The other clipboards support multiple records (multi-selection mode). This is important because you have to switch to clipboard #1, #2, or #3 to leverage the multi-selection mode when you transfer the records to the clipboard. Before you transfer the selected records, you can choose between copying and moving.
Once the records are listed in the clipboard, open the target page in the page tree (but stay in the Web → List backend module of course). TYPO3 shows a button “Paste in clipboard content” at the top. After you confirm the action in the dialog, TYPO3 moves all records that you previously selected on the source page and transferred to the clipboard, to the target page.
These steps let you move multiple data records from one page to another. Now, read every answer thoroughly and check if there is a match with the process outlined above. Using the backend module Web → Recycler is nonsense. This module lets you restore deleted records but not move records between pages. The first answer is wrong. Answer 2 sounds quite right. This is one step of the process, although not the first one. Answer 3 is also correct. Opening the target page and clicking the button at the top of the page is the last step of the process. Answer 4 suggests to go to the backend module Web → List which is obviously the first steps and therefore also a correct answer. As explained above, to the normal clipboard only supports the single record mode and does not let you copy/move multiple records at once. This makes answer 5 wrong. Editing records is irrelevant and not required to move them. Answer 6 is clearly wrong. However, answer 7 indeed describes a valid step: you have to select the relevant records by ticking their checkboxes. The two final answers are both wrong. Although TYPO3’s clipboard has a button “Remove all”, this button does not transfer records but it removes them from the clipboard. Answer 9 suggests to repeat the process for every single data record. Do you remember the example of moving a few hundred records? Repeat a process (whatever this process is) for every single record can’t be effective.
The steps in the right order are 4 (open the Web → List module), then 7 (Select the records), then 2 (transfer records to the clipboard #2), followed by 3 (Paste clipboard content to the target page).
The correct answers are 2, 3, 4, and 7.
You want to download a CSV file that contains a list of all subpages of a specific page. How can you achieve this?
Answers
-
Open the context menu of the parent page in the page tree and choose “More options > Export”
-
Open the parent page under “Web → Page” and select the “Export” functionality from the “Share” actions
-
Open the parent page under “Web → List” and click the “Download” button of the table “Page”
-
Open the parent page under “Web → List”, transfer all pages to the clipboard, and click the “Export elements” button in the clipboard
-
Install the “Import/Export” system extension and use the function under Admin Tools → Import/Export
Number of correct answers: 1
Explanation
The functionality described in the question sounds pretty much like a data export. Three of the five possible answers indeed mention some kind of export functionality. Be careful though! These answers could be distractors.
Answer 2 suggests that you execute the function in the Web → Page backend module. Let’s check this out. Open the module, select a standard page from the page tree, and locate the “Share” button. A symbol that shows three small circles, two of them are connected by a line, visualizes “sharing”. The possible actions that you can execute are creating a bookmark and copying the URL of this page. You don’t find a function to export or download data in this selection.
The “Import/Export” system extension suggested in answer 5 exists. If installed and activated, you can execute the appropriate functions from the context menu in the page tree: “More options > Export” and “More options > Import”. The export functionality, however, lets you create a data dump of pages, tables, relations, etc. but not a CSV file that contains a list of subpages of a specific page. The first answer is related to answer 5 as it refers to the same option in the page tree. Both answers, 1 and 5, are wrong.
The two remaining answers refer to the Web → List backend module. If you open the parent page of the subpages you want to download as a CSV file, TYPO3 shows these pages in a table “Pages” in the content area. The list module features a button “Download” in the header of each table. Once clicked, a dialog box lets users configure the file name and the format (CSV or JSON), along with other settings, to create an export of the table. To download a CSV file that contains a list of all subpages, you simply need to make sure that only the page title is shown in the table (use the “Show columns” button to adjust the current setting if required), before you instruct TYPO3 to generate the CSV file of that table.
By the way: The feature to generate and download the contents of database tables as CSV files has long been part of the TYPO3 Core. The button to execute the function directly from the table header and the flexibility provided by the dialog box to configure the download was introduced in TYPO3 version 11.3 (released in July 2021).
The clipboard function that the Web → List backend module offers does not include a function to export elements as suggested in aswer 4.
The correct answer is 3.
How can you change the page titles of all subpages of the current page in one go?
Answers
-
This is not possible in TYPO3; you have to edit each page individually
-
You can use TypoScript to create a script that performs the change at once
-
You can open the context menu in the page tree and select the “mass update” function
-
You can use the Single Table View to change page titles of multiple pages
Number of correct answers: 1
Explanation
As a TYPO3 integrator, you sometimes want to change specific information on multiple pages in one go. This information could be meta tag information or page titles, for example. If you really had to click each page individually, the work on larger websites would take far too long. Therefore, the first answer is wrong, and in fact, TYPO3 provides a simpler method for such tasks.
TypoScript cannot take you where you want to go: TypoScript is used to configure the system and it is executed at runtime.
Answer 3, on the other hand, sounds plausible. You select a page from the page tree, open the context menu, and execute the “mass update” function to change the page titles of all subpages. But wait a minute! Does such a function really exist?
Although a “mass update” function in the context menu of the page tree would be useful, such a function does not exist by default.
This leaves us with answer 4 as the only remaining answer. Go to Web → List and click on a page in the page tree that contains subpages. TYPO3 shows at least one table: Page (x) (x represents the number of subpages). Open the Single Table View16 by clicking on the table name or the “>” character right of the title. A tooltip “List only this table” indicates what function is behind the link.
The table shows several columns, typically Pagetitle, Localization, Description, etc. You can add or remove columns by clicking on the “Show Columns” button. If you want to add subtitles, for example, activate the field and click the button “Update”. The table now also shows the subtitles of all pages.
To change the titles of all pages listed, click the edit icon next to the label Pagetitle. The following page lists all titles and lets you edit them. Finally, save your changes by clicking the Save button at the top.
The correct answer is 4.
What is the Single Table View?
Answers
-
The display of a table in the “phpMyAdmin” extension
-
The table output of a frontend plugin
-
A page preview under “Web → View” with a specific width and height
-
The display of a single table in the “Web → List” module
-
The display of the content element “Tables” in the “Web → Page” module
Number of correct answers: 1
Explanation
Many TYPO3 integrators and editors use the Single Table View during their daily work. However, some of them haven’t heard of the term yet.
This type of view has naturally nothing to do with the phpMyAdmin extension. Neither the output of an extension (frontend plugin) nor the page preview under Web → View are Single Table Views either. The first three answers are wrong. As the name suggests, the Single Table View lets you access a specific single table in the backend of TYPO3.
Answer 4 describes the Single Table View correctly. If you select a page from the Web → List module, you access a list of data records. These are separated into individual tables, for example subpages of the current page (table “Page”), content elements (table “Page Content”), and other records stored against this page. If you click on the table header (table name with the “>” character), you access the Single Table View. This view is the detailed display of a single table.
Let’s also check the last answer to ensure that answer 4 is the only correct answer. Although a content element “Table” exists, the term Single Table View is not used for this element.
The correct answer is 4.
Which of these statements about TypoScript is true?
Answers
-
TypoScript is a programming language like ActionScript or JavaScript
-
TypoScript is an extension for TYPO3
-
TypoScript can be used to configure how the output of a website should appear in the frontend
-
PHP programming skills are required to write TypoScript code
Number of correct answers: 1
Explanation
Answer 1 addresses the common prejudice that TypoScript is not, strictly speaking, a programming language. The TYPO3 source code contains numerous queries that interpret a section of TypoScript code. TYPO3 as a system reacts to the values defined in this section in a specific way. TypoScript can therefore be described as a configuration language.
TypoScript plays such a central role in the TYPO3 Core that it cannot be an extension. After all, all third-party extensions and most system extensions can be deactivated or removed, and this is not the case for TypoScript. Answer 2 is wrong. Due to the fact that by using TypoScript you do not come into contact with the underlying PHP code, you do not require PHP programming knowledge – so answer 4 is also wrong.
As TypoScript is mainly used to control the output of the website in the frontend (with the exception of TypoScript config, or TSconfig, where TypoScript is also used in the backend), only one option remains as the correct answer.
The correct answer is 3.
The size and complexity of a TypoScript setup template that is maintained through the backend is growing rapidly and becomes confusing. What can you do to simplify working with it?
Answers
-
Divide the TypoScript template into several files and include/import them into your master template
-
Divide the TypoScript template into several templates and include them in the “Include basis template” section
-
Remove all line breaks in the TypoScript code to reduce the amount of data
-
Use the “Optimize TypoScript” function to remove redundant and unused TypoScript code
-
Move the TypoScript setup template to the TypoScript constants field to save space
Number of correct answers: 2
Explanation
Large websites quickly accumulate several hundred lines of TypoScript code. The more complex the code gets, the more challenging it becomes to maintain. As a TYPO3 integrator you should follow at least some best practices in implementing your TypoScript code, for example1:
- Keep the code clean (remove unused configuration).
- Make sure that the code is easily readable (e.g. use proper line indenting).
- Add short comments in particular for complex functions (to helps others to understand the purpose).
- Don’t let a TypoScript code fragment become too long and big.
The question refers to the last point. Modularisation is the method of choice to deal with this problem. You can create multiple TypoScript templates as template data records and include them in the Web → Templates module by using the Include basis template function. You can then allocate templates to different areas, such as menus, contents, extension A, extension B, and so on.
Today, we recommend to store TypoScript code in extensions, typically a site package extension, rather than in the database. This way you can manage the files, for example, in a version control system such as Git, and thus revert to older versions at any time as required. Furthermore, you can use your own editor for editing TypoScript code. The downside of storing TypoScript code in a site package extension is that you can not edit the code using the backend. However, importing/including the TypoScript template files into your system is easy. This typically goes into the master template. Answer 1 and 2 provide the correct solutions.
The suggestion in answer 3 is, of course, nonsense. Apart from the fact that this procedure may work with CSS, JavaScript, and other formats, it is not possible to merge TypoScript lines. This would also make the files even more confusing. The feature mentioned in answer 4 does not exist, and answer 5 does not make sense either.
The correct answers are 1 and 2.
The error message “No TypoScript template found!” comes up when you access the frontend of a TYPO3 site. What causes this issue?
Answers
-
No HTML template was specified
-
The TypoScript template is not stored on the root page ID 0
-
The path to the HTML template is not correct
-
No TypoScript rootlevel template was specified
Number of correct answers: 1
Explanation
In older TYPO3 versions, the error message was slightly different and often caused confusion. The keyword “TypoScript” was missing which resulted in the message “No template found!” Many TYPO3 integrators assumed that this issue originated from a problem with the HTML templates. These are files that contain HTML code, possibly inline CSS, variables, etc. Today, the error message is more clear and points to a problem with the TypoScript template. Answers 1 and 3 are therefore wrong as they refer to HTML templates.
Did you ever try to add a TypoScript template to the root page ID 0 as suggested in answer 2? This is not possible. When you click on Web → Template and select the root page, TYPO3 shows an overview of the pages that contain template records. You can not add TypoScript templates to the root though.
This leaves us with the answer 4 as the only correct answer. If you access a page that does not have any rootlevel TypoScript templates defined, the following error message appears:
The page did not exist or was inaccessible. Reason: No TypoScript template found!
To solve this issue, make sure that a valid TypoScript configuration exists and that the respective toggle switch under Web → Template → Info/Modify is enabled:
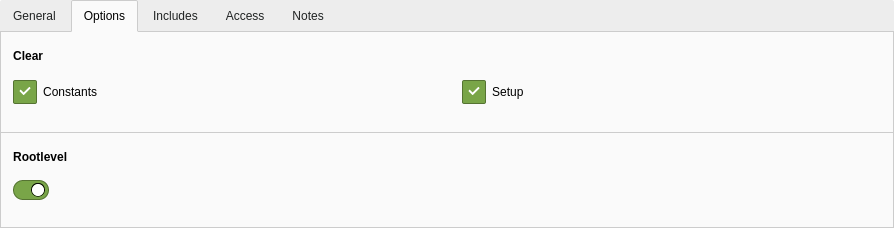
The correct answer is 4.
The error message “The page is not configured!” comes up when you access the frontend of a TYPO3 site. What causes this issue?
Answers
-
No HTML template was specified
-
The “rootlevel” toggle switch in the root template is not enabled
-
No valid
PAGEobject is defined -
The page you accessed does not contain any content elements
-
The site configuration is missing
Number of correct answers: 1
Explanation
The complete error message provides some additional details:
The page did not exist or was inaccessible. Reason: The page is not configured! [type=0][].
The information [type=0] points to the right solution but let’s discuss all given answers. A missing page configuration doesn’t have anything to do with HTML templates, so you can exclude the first answer straight away. The error message is different if the rootlevel toggle switch of the template is not enabled. I explained this case in the previous question. This makes the answer 2 also wrong. So is answer 4 as pages in TYPO3 don’t need to contain content elements necessarily. The last answer is also wrong. If the site configuration is missing, the error message would not refer to the page but to the site.
This means that all answers are wrong, except for answer 3 (“No valid PAGE object is defined”). Let’s have a closer look at this answer, as your exam possibly contains a question that deals with this object and/or related error messages. A page in TYPO3 requires not only a root template but also a valid PAGE object. You can define one or multiple PAGE objects which are differentiated by unique types. These types are defined by the TypoScript option typeNum, for example:
Each PAGE object can feature a unique page configuration. You could, for example, implement a page type that outputs the content as a HTML page and another page type that outputs the same content as plain text. You could also implement two different layouts for the same page. To access a specific page type, add the parameter type to the URL, for example example.com. If you don’t pass the page type in the request, TYPO3 falls back to the default type, which is type=0.
TYPO3 shows the error message “The page is not configured!” if the page you access does not have a valid PAGE object with the appropriate type.
The correct answer is 3.
How do you import/include a TypoScript configuration file in your TypoScript setup?
Answers
-
By a right mouse-click on the file in the backend module “File → Filelist” and selecting “include template”
-
By using the following TypoScript instruction to include the file (one line):
@INCLUDE_TYPOSCRIPT FILE='EXT:site/Configuration/TypoScript/setup.typoscript' -
By using the following TypoScript instruction to include the file (one line):
<INCLUDE_TYPOSCRIPT:source="FILE:EXT:site/Configuration/TypoScript/setup.typoscript"> -
By using the following TypoScript instruction to include the file (one line):
@import 'EXT:site/Configuration/TypoScript/setup.typoscript'
Number of correct answers: 2
Explanation
Although TYPO3 lets you enter your TypoScript code directly into the TYPO3 backend, it is good practice for a TYPO3 integrator to store and maintain TypoScript code in external files. These files are usually provided by extensions, for example a site package extension. Assuming that a TypoScript configuration file Configuration/TypoScript/setup.typoscript exists. How do import/include this file into your system?
The first answer sounds reasonable, given that the backend indeed contains several functions that read “Include static…”. However, these functions don’t let you select files. Also, they are located in either the backend module Web → Templates or in the page properties, not in the Filelist module. This means that the first answer is wrong.
All the remaining answers deal with import/include-instruction in TypoScript. Only the syntax varies and TYPO3 v11 LTS supports both, the old and the new syntax.
The following example shows the old syntax for including files:
It starts with the keyword “INCLUDE_TYPOSCRIPT:”, followed by the term source="...", and wrapped in angle brackets “<” and “>”. It is required that the instruction is to be written in its own line. The “source” parameter points to the path and file name of the file that should be included. You can reference the file provided by an extension by using “FILE:EXT:extensionkey/...”.
When using the old syntax you can also add conditions2 such as the application context:
The new syntax was introduced in TYPO3 v9 and is the recommended way to import/include TypoScript configuration files into the system today. The following examples show (in this order) how to import a specific file, multiple files based on a specific file extension, and all files with the extension .typoscript included in a specific directory:
The correct answers are 3 and 4.
What are possible ways to include all TypoScript configuration files, that are stored in a directory, into your system?
Answers
-
Use the following statement to include the directory (e.g. extension “sitepackage”):
<INCLUDE_TYPOSCRIPT: directory="EXT:sitepackage/Configuration/Typoscript/"> -
Use the following statement to include the directory (e.g. extension “sitepackage”):
<INCLUDE_TYPOSCRIPT: source="DIR:EXT:sitepackage/Configuration/Typoscript/"> -
Use the following statement to include the directory (e.g. extension “sitepackage”):
@include 'EXT:sitepackage/Configuration/TypoScript/' -
Use the following statement to include the directory (e.g. extension “foobar”):
@import 'EXT:foobar/Configuration/TypoScript/' -
Use the following statement to include the directory (e.g. extension “foobar”):
@require 'EXT:foobar/Configuration/TypoScript/'
Number of correct answers: 2
Explanation
Sometimes you have several TypoScript configuration files stored in a directory. One option to import/include them into your system is, of course, to use the @import instruction for each file. The more files you have, the more instruction lines you require. If you add another file into the directory, you also have to add another instruction to import/include the new file. This method is cumbersome and unnecessary. There is a better and more efficient way: You can directly include the directory instead of each single file.
All five answer options sound plausible. There is an obvious difference between the first two and the remain three answers. The answers 1 and 2 suggest to use the old syntax to import/include the directory and the answers 3, 4, and 5 suggest to use the new syntax. The main questions are: do both methods support directories and what exactly is the correct syntax?
The option to import/include directories was introduced in TYPO3 v6.2 LTS. Keep in mind that the old syntax <INCLUDE_TYPOSCRIPT:...> always requires the “source” parameter, no matter if you include files or directories. To include files, the term “FILE:” comes into play. To include directories, you have to use the term “DIR:”. A parameter “directory” as suggested in answer 1 does not exist. Answer 1 is therefore wrong and answer 2 is correct.
The keywords suggested in answers 3 and 5 try to mislead you. Neither @include nor @require exist. The correct instruction to import files and directories using the new syntax is @import. When you refer to a directory (as shown in answer 4), keep in mind that TYPO3 only loads files that have the file extension .typoscript. The loading order is based on the file name in alphabetical order.
The correct answers are 2 and 4.
Consider the following two instructions to import/include TypoScript configuration files. Which statements are correct?
Answers
-
You can not use both, the old “
<INCLUDE_TYPOSCRIPT>” and the new “@import” syntax at the same time -
Multiple files are imported in alphabetical order
-
Files included by the instruction “
@import” can also contain further “@import” instructions -
The instruction “
@import” lets you import files and directories -
The instruction “
<INCLUDE_TYPOSCRIPT>” supports relative paths if the instruction is used in a file -
The instruction “
@import” scans recursively through all subdirectories of a given directory
Number of correct answers: 4
Explanation
The given answers are obviously a wild mix of various statements about the old and the new syntax of importing/including TypoScript configuration files. Admittedly, distinguishing the right from the wrong answers to this question is sometimes not easy even for experts with substantial TYPO3 knowledge.
The statement in the first answer looks suspicious straight away. Both syntax are supported by TYPO3 v11 LTS. When the TypoScript template parser comes across one of the two expressions, they are processed. Why should it not be possible to use both instructions in one template at the same time?
Answer 2 is correct. When TYPO3 reads the TypoScript configuration files from a directory, they are processed in alphabetical order. This lets you control which instructions come first and which TypoScript configuration options are possibly overridden by other template files.
Answer 3 is a challenge for many TYPO3 integrators and is often answered incorrectly. You can in fact cascade TypoScript configuration files. Let’s assume that you import a TypoScript configuration file into your TypoScript setup:
This file (setup.typoscript) can include another “@import” instruction, and so on. This works perfectly fine with the old and the new syntax. Although this is possible from a technical perspective (and sometimes useful), think twice if it really makes sense in your project. The more files you include by nesting, the harder it becomes for someone to understand which files are imported/included where.
The next answer shouldn’t be a problem. The line above shows an example of how to import files. Directories can be imported by the following line:
Answer 5 is also a challenge for some TYPO3 integrators. Both, the old and the new syntax allow integrators to use paths, relative to the including file. For example:
The last answer is wrong. When you import a directory, the instruction “@import” only loads files in the given folder. If this folder contains subdirectories, they are not taken into account.
The correct answers are 2, 3, 4, and 5.
The following @import instruction in TypoScript does not work. What causes the problem?
Answers
-
The keyword “
FILE:” is missing. The line shoud read:@import FILE:fileadmin/Configuration/TypoScript/setup.typoscript -
The
@importinstruction was removed in TYPO3 v11 LTS and can’t be used anymore -
You can not store TypoScript configuration files in the
fileadmin/path. You must use an extension, for example:@import EXT:sitepackage/Configuration/TypoScript/setup.typoscript -
Single or double quotes are missing. The line should read:
@import "fileadmin/Configuration/TypoScript/setup.typoscript"
Number of correct answers: 1
Explanation
The line, as stated in the question, does not do anything. It neither imports/includes the TypoScript configuration file nor it produces a warning or an error. This makes it difficult for a TYPO3 integrator to debug the problem as TYPO3 does not provide any information why this is not working as expected. Let’s quickly go through each answer to locate the root cause of the problem.
The “@import” instruction does not support keywords such as “FILE:” or “DIR:”. These keywords are used in the old syntax “<INCLUDE_TYPOSCRIPT>”. This makes the first answer wrong.
Answer 2 is nonsense as the “@import” instruction is in fact the new syntax that was introduced in TYPO3 v9. It is less error-prone, self-explanatory, and simpler to use compared to the old syntax.
The next answer is also wrong. Of course, you can store TypoScript configuration files in the fileadmin/ path. Having said that, this approach is considered bad practice. Directories such as uploads/ and in particular fileadmin/ are known as the user space. This means that end users (e.g. editors) are working with them. Configuration files should be stored outside of the fileadmin/ path. However, from a technical perspective, this does not cause the problem.
The reason why the @import instruction does not work are the missing single or double quotes.
The correct answer is 4.
Replace “???” in the TypoScript code below with a content object (cObject) to display the current time on the website.
Answers
-
USER -
USER_INT -
COA -
COA_INT -
TIME -
TEXT -
TEXT_INT
Number of correct answers: 1
Explanation
TYPO3 has a differentiated caching mechanism that saves pages after rendering in order to read them from the cache when they are called up and thereby increase output performance.
However, caching is not useful for information that needs to be up-to-date when it is returned. For example, the website should display the current time, and not the time when the page was first called (which is what a cached page would return). TYPO3 provides two TypoScript content objects (cObject) to which caching is not applied, COA_INT and USER_INT, while their counterparts COA and USER are subject to caching. This means that both answers 1 and 3 are wrong.
The three lines inside the curly brackets { and } start with the number 10. which is an index of an array. The cObject TEXT does not support this construct and the object TEXT_INT and TIME do not exist in TypoScript, which make the answers 5, 6, and 7 also wrong.
The remaining answers are 2 and 4. The USER_INT object is mainly responsible for calling PHP functions and is therefore of no use here. The correct object is COA_INT which is an object type (“complex data type”) to be precise and makes sure that the resulting data is not cached by TYPO3. The TypoScript code outputs the server’s current date and time.
The correct answer is 4.
You changed a setting in the TypoScript Object Browser. Where is the new value stored?
Answers
-
At the start of the TypoScript “setup” template
-
At the end of the TypoScript “setup” template
-
At the start of the TypoScript “constant” template
-
At the end of the TypoScript “constant” template
-
In the
LocalConfiguration.phpfile
Number of correct answers: 2
Explanation
Go to Web → Template in the TYPO3 backend. Then, click on the root page in the page tree and select TypoScript Object Browser from the dropdown menu at the top. The TypoScript Object Browser (TSOB) features the following functions:
- Display the entire TypoScript as a hierarchical tree
- Switch between TypoScript setup and constants
- Search (full-text search and regular expressions)
- Simulate conditions
- Edit, add, and delete object properties
- Adjust the way how constants are displayed
Whenever you make a change in the TSOB, a new line is added to either the TypoScript “setup” or the TypoScript “constant” template. The TSOB basically offers three options. You can edit an object/property value, add an object property, or clear (delete or unset) an object. Even if you clear/delete an object, a line is actually added, for example:
I will cover the operator > together with other operators later in this chapter.
As TypoScript code is parsed line-by-line, it only makes sense to add new lines to the end. Therefore, the answers 1 and 2 can’t be correct. The TSOB does not write anything to the LocalConfiguration.php file which makes the last answer also wrong.
The correct answers are 2 and 4.
Your TypoScript code contains a syntax error. Which backend utility helps you to locate the cause of the issue?
Answers
-
The TypoScript Object Browser (TSOB)
-
The Constant Editor
-
The Template Analyzer
-
The Admin Panel
-
The backend module “Admin Tools → Environment”
Number of correct answers: 1
Explanation
Searching for errors in TypoScript is often a complex task in TYPO3. Due to the way how the TypoScript parser was implemented, a potential error is not registered as such. If, for example, you write page = BAGE instead of PAGE, you will not receive an error message. After all, it is possible that you are trying to allocate a custom object called BAGE. However, if you write page. 10 = TEXT (accidentally added a space between the dot and the 10), the parser detects this typo because a dot must not be followed by a space. The TYPO3 Core comes with some handy tools that can help you to locate such syntax errors.
The first three answers suggest functions that you find in the Web → Template module. Answer 4 suggests the Admin Panel and the last answer suggests a function from the backend module Admin Tools.
The Admin Panel is not helpful in finding TypoScript syntax errors. You can use this tool in the frontend to display the TypoScript that the parser understood and processed. A syntax error such as page. 10 = TEXT prevents TYPO3 from successfully parsing the TypoScript code. As a consequence, the error is not displayed in the Admin Panel at all. This makes answer 4 wrong. The backend module Admin Tools → Environment does not show any TypoScript errors either which makes the last answer also wrong.
The Template Analyzer indeed displayed TypoScript errors in TYPO3 versions up to v10 LTS. This feature has been removed in TYPO3 v11 LTS though. Errors are now only shown in the TypoScript Object Browser (TSOB):

To investigate the faulty code line, following the link, which opens the Template Analyzer and shows the TypoScript code with the line in question highlighted.
The correct answer is 1.
What is the effect of the following two lines of TypoScript code in the constants area?
Answers
-
TYPO3 ignores the first line because of the comment character
# -
The constant
mytextcoloris set to red -
The value
redis assigned to the variablefoobar.ctext.a -
The Constant Editor shows a selection field that allows backend users to pick a colour
-
This code has no effect
Number of correct answers: 2
Explanation
In principle, the “constants” section of a TypoScript template is designed to receive constant values and/or to group them. However, it is possible for many different TypoScript templates to exist on different pages, so it may take a long time to analyze all constants that are of interest. It would therefore be useful if there were a method that provides an overview of all these constants (or at least of those that are often required). TYPO3 has the Constant Editor for this purpose. You can open this utility in the Web → Template module. Besides the display of constants, the Constant Editor also provides input options which are simple and easy to use.
If you want to make a constant visible and editable in the Constant Editor, you have to define a category, a type, and a label. The character # usually serves to mark comment lines. TypoScript code in the constants area, however, use this character to introduce a line that specifies the aforementioned items. The first answer is therefore wrong. The given code example sets assigns the value red to the constant mytextcolor and instructs the Constant Editor to display a colour-picker labelled “text color”:
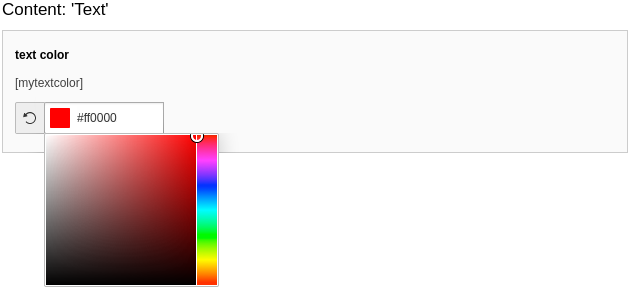
The first element is the category and not a variable: foobar/ctext/a. This makes answer 3 wrong. As the code clearly has an effect, the last answer is also wrong.
The correct answers are 2 and 4.
You use the Constant Editor to change a value of a TypoScript constant. Where is the new value stored?
Answers
-
In the TypoScript “setup” template of the parent page
-
In the TypoScript “setup” template of the current page
-
In the TypoScript “constant” template of the parent page
-
In the TypoScript “constant” template of the current page
-
In the
LocalConfiguration.phpfile
Number of correct answers: 1
Explanation
In a similar question I explained how the TypoScript Object Browser (TSOB) stores data when it is updated. This question now deals with the Constant Editor. Does this tool work different to the TSOB?
The Constant Editor is in fact an interface that lets you enter/select values in a very convenient way. It’s a good solution for backend users who are not very tech-savvy but should be able to edit/add TypoScript constants. At the end of the day, the Constant Editor simply stores the new value to the constant template. Provided you have the appropriate access rights, you can open the template and review, edit, or remove the constant and its value by hand.
As the name suggests, the focus of the Constant Editor are constants. This eliminates the first two answers as the “setup” template is out of question. The Constant Editor also does not write anything to the LocalConfiguration.php file either. This makes the last answer also wrong. At this point you have to decide if the new value is stored in the TypoScript “constant” template of the parent or current page.
Suppose you have a page “foo” and a page “bar”. The page “bar” is a subpage of page “foo”:
If you use the Constant Editor to change a value of a TypoScript constant on page “bar”, you don’t want this value to be applied on the parent page “foo”. Although the constant would be available on the page “bar” too (subpages inherit TypoScript from parent pages), you would possibly mess up your configuration on the wrong page. The correct answer is that the constant and its value are written into the TypoScript “constant” template of the current page.
The correct answer is 4.
The following TypoScript setup is given. What is the correct line in the constants area to set the page cache timeout to 3600 seconds?
Answers
-
$foobar = 3600 -
{$foobar = 3600} -
foobar = 3600 -
%foobar% = 3600 -
FOOBAR = 3600
Number of correct answers: 1
Explanation
This question clearly deals with the page cache in TYPO3. Are you familiar with the cache configuration? This is a tricky topic and contains some pitfalls! And why is this question in chapter “TypoScript Setup and Constants” at all?
Let’s read the question again. It shows a TypoScript code snippet that obviously uses a constant to set the page cache timeout. All given answers try to set the value 3600 but in different ways. The question has actually nothing to do with configuring the page cache. It’s more about the correct assignment of constants. You could also read the question as: “What is the correct syntax to set a constant?”
The syntax shown in answer 2 is used in the TypoScript setup (see code snippet in the question). You don’t use the $-character when you define a constant. This also makes the first answer wrong. Answer 4 looks suspicious too. The percentage sign before and after the constant name is nonsense and therefore answer 4 is also wrong.
This leaves us with the answers 3 and 5. They both look similar but use a different upper/lowercase spelling. Keep in mind that the name of a constant is case-sensitive. This means that foobar is not FOOBAR and that answer 5 is wrong.
The correct answer is 3.
What is the result of the following TypoScript code?
Answers
-
The value of the field “
description” is set as the HTML meta tag “description” -
If the field “
description” contains no value, the respective constant is used as the HTML meta tag “description” -
The HTML meta tag “description” always contains the respective constant, no matter which value the field “
description” contains -
The HTML meta tag “description” always contains the field “
description”, no matter which value is assigned to the respective constant
Number of correct answers: 1
Explanation
The first challenge with this question is the length of each answer. You need some time and concentration to read through and understand them. On the positive side, there are only four possible answers, not five or six.
Let’s start with a closer look at the two TypoScript lines. The first line assigns a constant to the HTML meta tag “description”. This could possibly result in the following HTML code in the frontend:
<meta name="description" content="Lorem ipsum..." />
The second line, however, instructs TYPO3 to use the value stored in the field “description” and to overwrite the previously assigned value. If the field “description” is empty, TYPO3 falls back and uses the constant. All answers except answer 2 are therefore wrong.
The scenario described above is actually a common use case. You set a default value as a constant in TypoScript which TYPO3 uses if an editor does not enter a specific value in the backend.
The correct answer is 2.
The Fluid template of the page.10 object contains a variable {emailaddress}. This needs to be replaced by the value foo. How can you achieve this?
Answers
-
You enter the following code in the TypoScript constant area:
page.10.templates.placeholder.emailaddress = TEXTpage.10.templates.placeholder.emailaddress.value = foo -
You enter the following code in the TypoScript setup area:
page.10.templates.placeholder.emailaddress = TEXTpage.10.templates.placeholder.emailaddress.value = foo -
You enter the following code in the TypoScript setup area:
page.10.templates.variables = EMAILpage.10.templates.variables.address = foo -
You enter the following code in the TypoScript constant area:
page.10.variables.emailaddress = TEXTpage.10.variables.emailaddress.value = foo -
You enter the following code in the TypoScript setup area:
page.10.variables.emailaddress = TEXTpage.10.variables.emailaddress.value = foo
Number of correct answers: 1
Explanation
The value foo obviously appears in all answers, so this approach does not allow you to exclude some answers straight away. To solve this task, you should know how variables are assigned using TypoScript, which are then replaced in Fluid templates.
It makes no sense to just enter the code in the TypoScript constant area, so answers 1 and 4 can not be right. A content object named EMAIL does not exist, which makes answer 3 wrong too.
If you configure page.10 to use the content object FLUIDTEMPLATE, variables are assigned by using the property variables. You can set value foo as variable emailaddress by using the following TypoScript code:
The solution in answer 5 is simply a short version of that.
The correct answer is 5.
Given the following TypoScript code, what is the output at the frontend?
Answers
-
ABCD -
DBACBAC -
BACD -
DCBA -
ABCABC -
BACBACD
Number of correct answers: 1
Explanation
This is a warm-up question to test if you are familiar with operators in TypoScript. Operators are specific characters that let you assign or modify values, open or close a code block, copy objects, etc.
This question deals with a few important characteristics of TypoScript. First of all, TYPO3 processes TypoScript code from top to bottom. However, there are some exceptions to this. The Content Object Array (COA) is one of these exceptions. Content Object Arrays are processed in ascending order by their numeric values. Looking at the given TypoScript code, this means that 20 is executed first, then 30, and then 40, independent of the order in which the individual elements are stated.
Another important characteristics of TypoScript is shown in the line 20 < .30. The effect is that a copy of the content of the object 30 on the same level is assigned to the object 20. The line page.10.20 < page.10.30 would have the same effect.
Let’s go through the code step-by-step. The lowest numeric value is 20 which receives a copy of the object 30. We have to work out what comes out of 30. The value A is assigned to the object and then wrapped by B and C. This results in BAC for both objects: 20 and 30. The last element is the object 40 which is simply the character D. This results in the final output BACBACD.
The correct answer is 6.
Given the following TypoScript code, what is the output at the frontend?
Answers
-
ABCCBA -
ABCABCCBA -
ABCABCABC -
ABCABC -
AABCC
Number of correct answers: 1
Explanation
This question looks quite simple at first glance. We have three objects joined together as a Content Object Array (COA). The first object is a TEXT content object (cObject) that outputs the string ABC. The second object is a copy of the first one. The value B is assigned to third object – which is a HTML cObject – and then wrapped by C and A. The final result should be ABCABCCBA, right? Wait a minute! Are you sure?
We are dealing with two content objects: TEXT and HTML. The first cObject exists in TYPO3 v10 but HTML was removed in TYPO3 v6. You will learn more about cObjects in the chapter “Content Objects”. The important question at this point is: What happens if you assign cObjects that don’t exist?
TYPO3 does not report an error if you use a cObject that does not exist. The consequence of using HTML is that the key 30 is invalid and has no effect. The keys 10 and 20, however, are valid TEXT content objects. The output in the frontend is ABCABC.
The correct answer is 4.
Given the following TypoScript code, what is the output at the frontend?
Answers
-
ABCD -
DCBA -
BDCAAB -
ABCADB -
BDCAB -
DBCAB
Number of correct answers: 1
Explanation
In this exercise, you can sort the content object array to get a clearer overview: 10, 20, 30, and 40. The challenge are the stdWrap functions though. The property prepend adds a value/object in front of the current value and append adds it after the current value.
Note that append in the object 20 is stated as a stdWrap property. This demonstrates that you can use stdWrap functions recursively. It does not make a difference if you write .stdWrap.append or .append (without the .stdWrap) in the TypoScript code above.
Let’s go through the code and determine the output:
- In object
10, the valueDis assigned and the content of object40prepended, which isB. The preliminary result isBD. - In object
20, the valueCis assigned and the content of object30appended, which isA. The preliminary result isBDCA. - In object
30, the valueAis assigned. The preliminary result isBDCAA. - In object
40, the valueBis assigned. The final result isBDCAAB.
The correct answer is 3.
Given the following TypoScript code, what is the output at the frontend?
Answers
-
ACCC -
ABCC -
ABBC -
A|CC -
The TypoScript code does not produce any output
Number of correct answers: 1
Explanation
Besides the “<” operator, which lets you copy an object path to another, TYPO3 features the “=<” operator. The equal-smaller operator is used to create references from one object to another. This means that a code change of the original object (in the code snippet above: foobar) affects all references.
Let me explain the function of the TypoScript. The first two lines define a new cObject of type TEXT under the name foobar. Lines 3 to 6 define a PAGE and a COA cObject. The content of foobar is referenced by the line page.10.10 =< foobar and then wrapped by A and C in line 6. The line that follows next sets the value of foobar to C. The last line copies the content of foobar to page.10.20.
The question now is: what is the effect of copying an object (“<”) compared to creating a reference (“=<”)?
If you read the TypoScript code sequentially from top to bottom, you’d assume that foobar has the value B, is assigned to the content object array, and then wrapped (A|C). This would result in ABC. Then, foobar is set to C and appended to the string. Therefore, answer 2 seems to be the correct option: ABCC. However, this is wrong!
As the value C is assigned to the cObject foobar in the line before the last line, this affects all references. This means that the final result is ACCC (answer 1). If you’d use the copy-operator instead of the reference-operator (page.10.10 < foobar), answer 2 would be correct.
The correct answer is 1.
Given the following TypoScript code, what is the output at the frontend?
Answers
-
A -
AB -
ABC -
BA|C -
The TypoScript code does not produce any output
Number of correct answers: 1
Explanation
This is a slightly modified version of the previous question. It is a little shorter, but again deals with the reference-operator (“=<”).
The code first creates a TEXT object and then assigns the value B to it. After that it creates a PAGE cObject with a content object array, copies the temp.foobar object through referencing, and then wraps the string with A and C. Answer 3 seems to be a plausible option. Be careful: this is wrong!
The trap is the combination of the reference-operator and the top-level object (TLO) as temp is a reserved name. You can choose nearly any name, but temp, styles, and a few other names may cause side effects. The reason for this is that their data is not internally stored at run-time. The consequence of this behaviour is that you can not use them as a source of references as shown in the code.
To generate the output ABC, you can for example use the copy-operator: page.10.10 < temp.foobar. Another option is to change the object name from temp.foobar to foobar (remove the temp-TLO).
Back to the question now. As the TLO temp can’t be used for referencing objects, the TypoScript code does not produce any output.
The correct answer is 5.
Given the following TypoScript code, what is the output at the frontend?
Answers
-
foo -
-foo -
bar- -
foo-foo -
foo-bar -
bar-foo
Number of correct answers: 1
Explanation
This is another question that deals with a mix of operators in TypoScript. The code first defines object1 as a TEXT object and assigns the value foo to it. Then, a PAGE object is created and the object object1 is assigned to it – once as a reference (index 10) and once as a copy (index 15). After that, the value at index 15 is overwritten with a dash (-), and the object object1 copied as index 20. Finally, the value of object1.value is changed, which directly affects all references. So the output should be bar-foo, correct?
Here is the mistake: the operator for referencing objects is not <= but =<. As a result of this typo, the wrong operator has no effect and the output is -foo.
You may ask about the last line: Shouldn’t be the output -bar then, given that this value is stored in object1.value at the end? Well, firstly, this option is not given as a possible answer. Secondly, the PAGE object does not change when you update the content of object1.value after it was assigned to the PAGE object.
The correct answer is 2.
Replace “???” in the TypoScript code below so that the code outputs AB in the frontend.
Answers
-
10.10.value = B -
10.20.value = B -
10.10.20.value = B -
10.10.20.10.value = B -
10.10.10.20.value = B
Number of correct answers: 1
Explanation
This question tests if you can deal with the nesting of multiple Content Object Arrays (COA). Although the TypoScript code is not too complicated, the answer options might be challenging. They all look similar and you have to work out which numeric key represents which depth in the array.
The code creates an auxiliary object named lib.obj which is later referenced by the operator =<. First, focus on the lib.obj object. The object creates a COA. At the index 10, another array is created and at its first level (which also has the numeric value 10), the character A is stored as a TEXT content object. This value is then duplicated and stored at the index 20 of the inner COA. The result of lib.obj is therefore AA.
Now focus on the second block: the PAGE object. At its index 10, another COA is created. Then, the previously built object lib.obj is referenced by using the =< operator at the index 10 of the array.
Without the replacement of ???, the output at the frontend is AA. But which answer generates the output AB? Most candidates select either the answer 3 or the answer 5. However, both answers are wrong.
The pitfall is the line with the copy operator in the lib.obj object: 10.20 < .10.
This operation copies the COA and not the TEXT object. Answer 3 would be the correct answer if the line would read 10.20 < .10.10. However, this is not the case and, therefore, the path to the value consists of four elements (x.x.x.x.value) when addressed in the PAGE object.
This also means that the answers 1 and 2 are out of question as their path shows two elements x.x.value. At this point, two possible answer options remain: answers 4 and answer 5.
Answer 5 can’t be correct, as the copy operation outlined above copies the COA which contains the TEXT object at the index 10 as the last element of the path: x.x.x.10.value.
To change the output at the frontend from AA to AB, you have to replace the “???” with 10.10.20.10.value = B.
The correct answer is 4.
You want to assign a multi-line value. Which of the following code sections are syntactically correct as replacements for the question marks?
Answers
-
Answer
page.10.value (Hello World ) -
Answer
page.10.value ( Hello World ) -
Answer
page.10.value = ( HelloWorld ) -
Answer
page.10.value = (Hello
  World)
Number of correct answers: 1
Explanation
It is sometimes useful to assign values in multiple lines, for instance to make the code less cluttered. Occasionally you even have to do this for syntax reasons.
As a matter of fact you can enter values in multiple lines. You simply have to use round brackets as delimiters in order to indicate to TYPO3 which lines belong to the instruction. If you want to use round brackets in the instruction itself, you have to follow the following syntax rules:
- A multi-line instruction is begun with an opening round bracket.
- The assigning operator (
=) is not necessary in this case. - Any characters entered in the line behind the opening bracket are ignored, so contents can only be entered in the next line.
- A closing round bracket has to be the first character in the next line in order to complete and close a multi-line instruction.
The correct answer is 2.
It is possible to comment out lines in TypoScript. Which characters can be used as comment characters?
Answers
-
// -
/* ... */ -
# -
/ -
<!-- ... --> -
{ ... }
Number of correct answers: 3
Explanation
As with other programming languages, it is usual to comment out existing code when working with TypoScript (e.g. for debugging or to test a specific function) or add explaining comments to the code.
There are different methods of doing this: you can use the double slash // or you can use the hash # to comment out individual lines. The single slash / was possible in older versions of TYPO3, but is no longer supported since TYPO3 v8.
If you want to comment out multiple lines, you do not need to indicate this at the start of every line. Instead, you can begin the commented-out area with /* and end it with */. This means all answers above are correct except for the last two. Answer 5 shows an HTML comment. The following example code illustrates commenting in TypoScript.
The correct answers are 1, 2, and 3.
Given the following TypoScript code, what is the output at the frontend?
Answers
-
4,3,2,6,5 -
1,3,4,5,6 -
6,5,4,1,3,2 -
1,2,3,4,5,6
Number of correct answers: 1
Explanation
The := operator in TypoScript lets you execute predefine functions. These functions modify existing values that are stored against the object path. In the TypoScript code above, the numbers 4, 1, 3, and 2 are given as a comma-separated list. Three functions are then executed. The first function adds the two numbers 6 and 5 to the end of the list (the text string now becomes 4,1,3,2,6,5). The second function removes the value 2 from the list (the text string is now 4,1,3,6,5). The third and final function sorts the list in ascending order. The resulting output is 1,3,4,5,6 as shown in answer 2.
TYPO3 v11 LTS supports the following functions out of the box:
| String operations: | List operations: |
|---|---|
prependString() |
addToList() |
appendString() |
removeFromList() |
removeString() |
uniqueList() |
replaceString() |
reverseList() |
sortList() |
TYPO3 developers can build custom functions and extend the list as required.
The correct answer is 2.
Which statements about operators in TypoScript are correct?
Answers
-
The “
<” operator moves the content of an object into another -
The “
<” operator copies an object path to another -
The “
->” operator assigns a value to an object -
The “
:=” operator can be used to reverse the order of entries in a comma-separated list -
The “
=<” operator does not exist -
Lines starting with a square bracket “
[” introduce TypoScript conditions
Number of correct answers: 3
Explanation
This question tests your knowledge of TypoScript operators that are available in TYPO3 v11 LTS. Let’s go through the six answers and check if you’re familiar with them.
The first answer claims that the “<” operator moves the content of an object into another. This is not true as the content is copied from the object path on the right side to the path on the left. Answer 1 is therefore wrong. The correct function of the “<” operator is stated in answer 2. This is the first correct answer.
The arrow-right operator “->” is typically used in the PHP programming language (and in other languages as well) to access the properties and methods of a class. However, a dash and a greater-than sign does not exist as an operator in TypoScript. This makes answer 3 wrong.
The next answer suggests that you can use the “:=” operator to reverse the order of entries in a comma-separated list. This is correct. The operator in TypoScript lets you add and remove elements to/from a list, and also sort and reverse lists. TYPO3 v11 LTS provides several other predefine functions that you can call with the “:=” operator. This makes answer 4 correct.
Does an operator that consists of an equal and a less-than sign exist? Yes, it does. The operator “=<” is used for referencing objects. Note that this operator in TypoScript is not “<=”. Unfortunately, numerous sources on the Internet such as blog and forum posts suggest the wrong notation. The answer 5 claims that the “=<” operator does not exist. However, this operator is a valid operator in TypoScript which makes this answer wrong.
The last answer deals with conditions in TypoScript. As lines starting with a square bracket “[” indeed introduce TypoScript conditions, answer 6 is correct.
The correct answers are 2, 4, and 6.
Which of the following objects are top-level objects in TypoScript?
Answers
-
config -
TEXT -
TMENU -
styles -
plugin -
FILE
Number of correct answers: 3
Explanation
TYPO3 converts TypoScript templates into a multidimensional PHP array. As the name suggests, top-level objects (TLOs) are located at the first (top) level of that array. Other objects depend on TLOs and are located in levels below the top level. A key characteristic of TLOs is the fact that you can configure them directly.
The config top-level object always exists as TYPO3 creates such an array internally. This TLO is crucial during the content rendering process, for example. The first answer is correct.
The TEXT object, however, is a so-called content object (cObject) which depends on the PAGE top-level object. Answer 2 is wrong as TEXT is not a TLO. The next answer is also wrong. The TMENU object is a menu object that depends on the HMENU cObject. TMENU is not a TLO either.
As a side note. You probably find some old resources on the Internet that mention the GMENU object. This object was used to create a graphical navigation where links are represented as GIF images. The GMENU object was removed in TYPO3 v10. You can achieve similar results by using DataProcessors and Fluid Styled Content today.
Answer 4 claims that styles is a top-level object. This is correct. Although this object isn’t typically used in an integrator’s day-to-day work, you can use styles to copy objects and data at run time. Similar to the temp object, which is also a TLO by the way, the object’s data is not cached. These top-level objects can only be used to store temporary data.
The object plugin is also a top-level object. You can use this object to configure frontend plugins. This makes the answer 5 correct.
The last answer claims that FILE is a top-level object. This object does not exist which means that answer 6 is wrong.
The correct answers are 1, 4, and 5.
Which statements about the TypoScript top-level object config are correct?
Answers
-
TYPO3 creates this object by default
-
This object and all sub-objects and properties are read-only
-
You can only modify the configuration of this object on the root page (ID: 0)
-
Subpages don’t inherit configurations of this object from their parent pages
-
This object has properties such as
baseURL,disableAllHeaderCode, andcache_period -
This object needs to be initialized on the root page (ID: 0) before it can be used on subpages
Number of correct answers: 2
Explanation
Many of the available answers indicate that the top-level object config has some special characteristics. This is, however, not true. The only feature that is important – but not unique to this object – is the fact that TYPO3 creates this object by default. The first answer is correct.
With very few exceptions, TypoScript objects and properties are not read-only. Answer 2 is wrong. The same applies to the next answer 3. You can modify the configuration of the object config on any page, not only on the root page. If not explicitly denied, subpages always inherit configurations of objects from their parent pages. This makes answer 4 wrong too.
You don’t need to learn all available properties of the object config by heart, but as this is an important top level object in TypoScript, you should be familiar with the standard and often used properties. Review the list at the TypoScript Reference (TSref). The properties mentioned in answer 5 are clearly part of this list. This makes answer 5 correct.
The last answer is incorrect. You definitely don’t need to initialize the object config on the root page.
The correct answers are 1 and 5.
Where can you easily access an overview of all TypoScript code entered as Page TSconfig?
Answers
-
You have to open the page properties for each individual page
-
In the TypoScript Object Browser (TSOB)
-
In the “System → Configuration” backend module
-
In the “Admin Tools → TypoScript Overview” backend module
-
In the “Web → Info” backend module
Number of correct answers: 1
Explanation
If many Page TSconfig scripts are stored on different pages, you quickly lose track of them. Furthermore, extensions can also add configurations to the system, which makes it even harder to find and review them.
The first answer is technically not wrong but overly complicated and not an easy approach. TYPO3 only shows the Page TSconfig of the current page in the page properties. The question, however, asks for an overview. The TSOB suggested as a solution in the second answer shows TypoScript setup and constants. This is TypoScript used in the frontend, whereas the question refers to Page TSconfig which is used in the TYPO3 backend. Answer 1 and answer 2 are wrong.
The remaining three answers all refer to backend modules. The name Admin Tools → TypoScript Overview sounds most promising but is nonsense because it does not exist. The System → Configuration module exists but has no function to generate an overview of Page TSconfig. The last remaining answer must be correct.
The Web → Info module indeed lets you select the item “Page TSconfig” from the dropdown menu at the top. This tool provides a wide range of filter and sorting functions to view all existing TypoScript code entered as Page TSconfig.
The correct answer is 5.
Which statements about User and Page TSconfig are correct?
Answers
-
Properties set in Page TSconfig are automatically also available on subpages
-
Properties set for administrator backend users in User TSconfig are automatically applied to all backend users created by this administrator
-
Constants entered in the “constants” textarea can be used in Page TSconfig
-
User TSconfig is stored in the page properties on the root page (ID: 0)
-
User TSconfig of the currently logged-in backend user can be reviewed in “System → Configuration”
Number of correct answers: 2
Explanation
Although each answer has quite long texts to read, you should not be intimidated by this. The right answers are relatively easy to determine.
When you configure a property in Page TSconfig on a page, the configuration is also available on all subpages of this page – if not overridden or explicitly deleted by another configuration with the same TypoScript path. The first answer is correct.
The second answer does not make sense. When an administrator user creates a backend user, this new user does not automatically inherit the administrator’s User TSconfig. You can, however, store User TSconfig against a backend user group. By assigning multiple backend users to the same group you can share User TSconfig across multiple accounts and maintain the code in a central place. However, this is not what answer 2 suggests.
Answer 3 is nonsense of course. Neither User nor Page TSconfig support constants and the “constants” textarea is part of TypoScript that is used in the frontend.
As the root page (ID: 0) does not have page properties you could edit, you can not store User TSconfig on this page. This makes answer 4 wrong too.
When you work with User and Page TSconfig, read the documentation. To prepare for the exam, and test and improve your TYPO3 skills of course, you likely want to review the User TSconfig of the currently logged-in backend user. Go to System → Configuration and select $GLOBALS['BE_USER']->getTSConfig() (User TSconfig) from the dropdown box at the top. You can now easily browse through your settings and search for specific keywords.
The correct answers are 1 and 5.
Which TypoScript code can you use to hide the table “pages” in the “Web -> List” module?
Answers
-
The following code in the Page TSconfig:
mod.web_list.hideTables = pages -
The following code in the Page TSconfig:
mod.hide.tables = pages -
The following code in the Page TSconfig:
RTE.config.pages.disabled = true -
The following code in the User TSconfig:
config.tables.hide = pages -
This is not possible, as the database table “pages” is a system table
Number of correct answers: 1
Explanation
When you open the Web → List module in the TYPO3 backend, and you navigate to a specific page in the page tree, all database tables with records assigned to this page are shown (if you have the appropriate access permissions of course). Sometimes, several tables are listed on a page, which makes it difficult to quickly locate the tables that are relevant.
Since TYPO3 version 7.x, backend users can fold/unfold the table listing but removing less important tables from the view by hiding them is much more elegant. You can actually make this configuration on a user-by-user basis or on a page-by-page basis which allows you to limit the configuration to a specific branch in the page tree for example. As this configuration works on all database tables (including the table pages), answer 5 is wrong. However, you should either know the correct syntax of the TSconfig to determine the right answer, or you answer this question based on logic.
Let’s look at the first element. The answers 1 and 2 suggest a TypoScript path starting with mod. Answer 3 claims you should use RTE, and the path suggested in answer 4 starts with config. You can eliminate answer 3 straight away as the RTE prefix key is used to configure the Rich Text Editor. Answer 4 is also wrong as config is a TypoScript option that exists neither in User nor in Page TSconfig. You can indeed use the key mod to configure backend modules.
Now turn to the second element. The syntax shown in answer 1 specifies the main module first (Web) and the submodule second (List). This results in the keyword web_list which actually makes sense. Answer 2 suggests the path mod.hide.tables which does not contain any information about the backend module.
The first answer is therefore correct. You can hide tables in the list view by entering the Page TSconfig mod.web_list.hideTables = followed by a comma-separated list of table names, e.g. pages. Further typical configuration options besides hiding tables from the list view are allowedNewTables and deniedNewTables (these options affect the “Create new record” content element wizard), tableDisplayOrder (this affects the order how tables are shown), itemsLimitPerTable (this affects how many records are shown), etc.
The correct answer is 1.
You deactivated the clipboard in the list view by the following Page TSconfig. How can you re-enable it for a specific backend user?
Answers
-
This is not possible, as Page TSconfig has a higher priority than User TSconfig
-
By storing the following User TSconfig against the user record:
page.mod.web_list.enableClipBoard = selectable -
By storing the following User TSconfig against the user record:
mod.web_list.enableClipBoard > -
By storing the following User TSconfig on the root page (ID: 0):
mod.web_list.enableClipBoard = selectable
Number of correct answers: 1
Explanation
This question is actually not about the TypoScript code that is stated in the question. The main purpose of this question is to test if you understand how to properly override Page TSconfig. All properties from Page TSconfig can be overridden in User TSconfig. This means that User TSconfig (if applied correctly) has a higher priority than Page TSconfig – which makes the first answer wrong.
The Page TSconfig code stated in the question deactivates the clipboard in the list view:
If you add this code to a page, backend users can’t use the clipboard on this page and on all subpages of this page. You can re-enable the clipboard only for a specific backend user or user group by adding User TSconfig that overrides the Page TSconfig. The operator “>” used in answer 3 usually deletes the configuration. Although this approach sounds reasonable (as this would reset the configuration), this does not work.
The code suggested in answer 4 seems to explicitly set the clipboard to be “selectable” but you can not store User TSconfig on the root page (ID: 0).
Answer 2 is the only answer left. Therefore, this answer must be correct. Keep in mind that you can override all properties from Page TSconfig in User TSconfig. It does not matter if you store the User TSconfig against a user record or user group. The following code re-enables the clipboard in Web → List:
The point is that this approach works for all Page TSconfig properties. The example uses the clipboard but it is important to understand that you can override any Page TSconfig property by prepending the property name with the key page. in User TSconfig.
The correct answer is 2.
Which top-level key lets you pre-configure settings in the “User Settings” module by using User TSconfig?
Answers
-
The key
admPanel -
The key
options -
The key
auth -
The key
setup -
The key
mod -
The key
user
Number of correct answers: 1
Explanation
Backend users can configure their profile and default settings in the User Settings backend module. This includes, for example, if thumbnails and/or hidden files should be displayed under File → Filelist by default. As a TYPO3 integrator, you can apply User TSconfig to define custom default values that TYPO3 uses when new users are created.
The admPanel key lets you configure the Admin Panel, which is not what we are looking for in this question. The options key provides various options for users at a core level, for example if the user can clear caches and which menu items should be visible in the context menu. The auth key is used to configure authentication services. This is a rarely used option and has nothing to do with pre-configuring settings in the User Settings module. The first three answers are wrong.
Answer 4 suggests to use the key setup. The key is named this way due to a long history. The respective module was known as Setup until TYPO3 version 4.2. At this point the module was renamed to User Settings. The following User TSconfig example enables the function to notify backend users by email whenever somebody logs-in to their accounts:
Let’s review the two remaining answers regardless, just to be sure that answer 4 is the only correct answer. You can use the mod key as Page TSconfig to configure backend modules. A typical and often used configuration are backend layouts under the mod.web_layout.BackendLayouts sub-key. The last answer suggests to use an object user which simply does not exist.
The correct answer is 4.
Which of the following User and Page TSconfig top-level keys exist?
Answers
-
The key
modin User TSconfig -
The key
RTEin Page TSconfig -
The key
webin Page TSconfig -
The key
pagein User TSconfig -
The key
userin Page TSconfig -
The key
TCEMAINin Page TSconfig -
The key
configin User TSconfig
Number of correct answers: 3
Explanation
This question is easy to answer if you have some experience with Page TSconfig and User TSconfig. Just stay focused and don’t let these two variations confuse you. A possible approach could be to focus on the answers that deal with Page TSconfig first (ignore answers with User TSconfig for the time being), then focus on User TSconfig only.
The answers 2, 3, 5, and 6 are Page TSconfig answers. They claim that the following top-level keys exist: RTE, web, user, and TCEMAIN. The first and the last key exist, the two in the middle don’t. This makes the answers 2 6 correct and the answer 3 and 5 wrong.
Now focus on User TSconfig. The answers 1, 4, and 7 deal with User TSconfig and suggest the following keys: mod, page, and config. The first key (mod) only exists in Page TSconfig which makes answer 1 wrong. The key page can be used in User TSconfig to override a Page TSconfig, so answer 4 is correct. Last but not least, config neither exists in User nor Page TSconfig. Answer 7 is also wrong.
The correct answers are 2, 4, and 6.
You created a page that received the page ID 42. You assigned the page title “Test” and left the navigation title empty. What is the output of the following TypoScript?
Answers
-
The output is:
Certification -
The output is:
Certification76Test -
The output is:
42 -
The output is:
Test76Test
Number of correct answers: 1
Explanation
The first line defines the top-level object PAGE. The second line defines the cObject TEXT. The third line sets the value Certification. Without the last line, the TypoScript code would output the text Certification.
However, the fourth line with the property data comes into play now. This line overwrites or manipulates previously defined values. The double slash “//” has a special meaning here. This operator defines alternatives. TypoScript uses the first element (from left to right) if this element has a value. If the first element is not set or empty, the second element is used. If the second element is not set or empty, the next element is used, and so on.
The question states that the navigation title (first element) is empty. Therefore, the second element is used: the page ID (uid). As the page ID can’t be empty (every page automatically receives an ID), the string Certification is overwritten by the value 42. The third element (field:title) never comes into play.
The correct answer is 3.
Which TypoScript code can you use to determine the user name of the frontend user who is currently logged in?
Answers
-
The TypoScript code:
{field:username} -
The TypoScript code:
${fe_user->username} -
The TypoScript code:
TSFE:fe_user|user|username -
The TypoScript code:
$TSFE->fe_user->user->username -
The TypoScript code:
getIndpEnv:username -
The TypoScript code:
TSFE[fe_user][user][username] -
The TypoScript code:
$GLOBALS['TSFE']->fe_user->user['username']
Number of correct answers: 1
Explanation
The TSFE object3 contains comprehensive information about the frontend. You can use the getText data type to read out the properties of this object which lets you determine the name of the frontend user who is currently logged in.
The object fe_user holds all information about the user stored in the user record. This includes, for example, personal data such as first and last name, company, email address, etc. The user name is also part of the object. You can use the following TypoScript code to access the user name:
Further properties of the sub-object user are company, title, name, email, etc. This makes answer 3 correct.
With all the other methods it is not possible to access the TSFE. There is only one small exception, which is shown in the last answer. This code line lets you access the user name in a TYPO3 extension – for example in a frontend plugin. However, the question explicitly asks for the TypoScript and not for the PHP syntax.
The correct answer is 3.
Given the following TypoScript code, what is the output at the frontend?
Answers
-
This TypoScript code does not generate any output
-
The output is the text
DB:pages:23:title -
The output is the page title of the page with the ID
23 -
The output is a list of up to 23 page titles
-
The output is the site name, limited to 23 characters
Number of correct answers: 1
Explanation
This example demonstrates another use case of the getText data type. Four values are separated by colons and they obviously represent a path.
The first element DB instructs TYPO3 to read a record from the database. The second element specifies the database table pages. The third element represents the UID 23 and the last elements the field title. This results in a database query that returns the page title of page ID 23.
You can use this type of query for all available tables in the database of the TYPO3 installation. However, if the page is access-protected and the current user is either not authenticated or does not have the appropriate access privileges, the output is empty. This also applies to hidden pages.
The correct answer is 3.
Replace “???” in the TypoScript code below to output the sentence and the page title of the current page in the frontend.
Answers
-
10.wrap = $|$ -
10.dataWrap = {field:title} -
10.insertData = 1 -
10.dataWrap = 1
Number of correct answers: 1
Explanation
If you enter the TypoScript code without the missing line, TYPO3 displays the following text in the frontend:
The page title of the current page is: {page:title}
In the given code, {page:title} should be replaced with the current page title but the property value cannot replace data dynamically.
The first answer is wrong. As the name suggests, the property wrap wraps the text. The code suggested in answer 1 simply adds one $ in front of the sentence and another $ at the end.
Using the dataWrap property is a possible approach. However, neither answer 2 nor answer 4 is correct. The code suggested in answer 2 adds the page title to the start of the sentence but does not replace the keyword {page:title}. Answer 4 adds the number 1 to the sentence. You could get the correct result with the following two lines:
Unfortunately, the code shows a different text string assigned to the value and therefore, both answers 2 and 4 are wrong.
The TypoScript option insertData = 1 comes to the rescue. If this option is set, the value is processed like the dataWrap. As a result, TYPO3 converts a text defined by value into a dataWrap value and therefore replaces {page:title} by the title of the current page.
The correct answer is 3.
Replace “???” in the TypoScript code below to output the current URL in the frontend.
Answers
-
TYPO3_REQUEST_URL -
{$TYPO3_REQUEST_URL} -
TSFE:TYPO3|REQUEST_URL -
{getIndpEnv:TYPO3_REQUEST_URL} -
getIndpEnv:TYPO3_REQUEST_URL
Number of correct answers: 1
Explanation
The data property lets you dynamically retrieve data in combination with, for example, the getText data type. As all five answers deal (more or less) with the TYPO3_REQUEST_URL environment variable, you could also read the question as: What is the correct syntax of the data property to access the environment variable?
Simply stating the variable name as suggested in answer 1 does not work. The syntax shown in answer 2 can be used to access the TypoScript constant named TYPO3_REQUEST_URL but not the environment variable. This makes the fist two answers wrong.
The key TSFE lets you retrieve values from the TypoScript Frontend Controller but not environment variables either. Answer 3 is therefore also wrong.
The answer 4 and 5 suggest to use the key getIndpEnv which is a promising approach. It lets you access system environment variables regardless of the server’s operating system and other system-dependent characteristics. Only selected environment variables are available. You find a complete list
in the TypoScript Reference (TSref). The TYPO3 documentation also reveals that the notation is written without curly brackets.
The correct answer is 5.
Replace “???” in the TypoScript code below to output some basic properties of the current page and parent pages in the frontend.
Answers
-
data = debug : rootLine -
data = debug : -1 -
data = debug : page -
data.debug = rootLine -
debugData = rootline
Number of correct answers: 1
Explanation
The first challenge of this question is that all the answers are similar. It is best to proceed with concentration and due diligence. But first, let us discuss the purpose of the TypoScript code. You sometimes require an overview of all available properties of a page. TYPO3 offers several debugging functions to achieve this. From a technical point of view, the data property shown in four of the five answers reads out the $cObj->data array.
The question asks for an output of properties of the current page and parent pages. Therefore, all answers that do not contain the keyword rootLine cannot be correct. Answer 2 does not output anything and answer 3 outputs the page properties of the current page only (not the parent pages).
As the spelling of rootLine is important, you should remember what the correct version is. The spelling in answer 5, for example, is incorrect. You don’t need to think about the debugData too much as you can exclude answer 5 straight away. This leaves us with only two possible options: answer 1 or answer 4.
The data property does not have a debug property which makes answer 4 wrong.
The only correct answer is the first answer. The line data = debug : <keyword> returns an HTML-formatted output. The available keywords are: rootLine, fullRootLine, data, register, and page. You can use rootLine to output some basic properties of the current page and parent pages.
The correct answer is 1.
Replace “???” in the TypoScript code below to output the current page title as a headline in the frontend.
Answers
-
data -
wrap -
innerWrap -
wrap3 -
stdWrap
Number of correct answers: 1
Explanation
A question like this aims to test your knowledge of the execution sequence of TypoScript commands, in particular of the various wrap-functions. Let’s take a closer look at the TypoScript code to understand what exactly happens or is supposed to happen.
The dataWrap function creates the query to access a title from the database table pages. The expression {TSFE:id} represents the current page ID. This is the first replacement that takes place. The second replacement that is required is obviously a wrap. To output a headline, the page title should be wrapped in opening and closing <h1>-tags.
The challenge at this point is the sequence of stdWrap commands as dataWrap is executed at a very late stage. The wrap and innerWrap functions would do the job but not at the right stage. The only wrap-function that is executed even later is wrap3. The insertData option is required to replace {|} with the result from the first replacement. If this were not set, the output would be <h1>{DB:pages:42:title}</h1> for page ID 42.
The correct answer is 4.
The following TypoScript code outputs a page title in the frontend. From which page exactly?
Answers
-
The output is always the page title of the current page
-
The output is always the page title of the parent page
-
The output is always the page title of the root page
-
The TypoScript code does not produce any output
Number of correct answers: 1
Explanation
The keyword fullRootLine is a key of the getText data type and can be used to retrieve values from above the current page’s root. The syntax for this key is as follows (note the three comma-separated values):
The optional pointer lets you specify a page along the root line. The number 0 points to the root page. This is the page where the root template is stored. A positive number represents the respective level below the root level: 1 is the first subpage of the root page, 2 one level deeper, etc.
As pages with a root template can also have parent pages, negative numbers are possible as pointers too. The number -1 represents one page above the root page, for example, -2 two levels up, etc.
The second element of the comma-separated list specifies the field name: title. This outputs the page title of the root page.
The correct answer is 3.
The following TypoScript code outputs the navigation title of a page. From which page exactly?
Answers
-
The output is the navigation title of the current page
-
The output is the navigation title of the parent page (if this page exists)
-
The output is the navigation title of the root page (if this page exists)
-
The output is the navigation title of the page two levels up (if this page exists)
-
If the page does not have a navigation title, TYPO3 searches upwards along the root line until it finds a page with a navigation title
-
If the page does not have a navigation title, TYPO3 falls back to the root page and uses its navigation title (if it exists)
Number of correct answers: 2
Explanation
TYPO3 has five level*-related getText functions: level, leveltitle, leveluid, levelmedia, and levelfield. The first function level is simple: It returns the depth of the current page from the root page as a numeric value. If the current page is the first subpage of the root page, level returns 1. A page one level further down the root line would return 2 and so on. The function level does not require any extra parameters.
The next three functions share the same syntax: leveltitle, leveluid, and levelmedia. You can write leveltitle : 0 to determine the page title of the root page, for example, or leveltitle : 1 for the title of the first subpage of the root page. A negative number changes the logic completely. The value leveltitle : -1 instructs TYPO3 to look up the page title of the current page. The number -2 goes up the page tree and returns the parent page of the current page and so on.
You can set the keyword “slide” as an optional second parameter for the three functions listed above. This parameter instructs TYPO3 to search up the page tree and along the root line until it finds a value (page title, page ID, or page media element). As every page has a unique ID and the page title is mandatory, the “slide” parameters only makes sense when levelmedia is used. Keep in mind that the first parameter (the positive or negativ number) may affect the starting point of the search.
Now, let’s turn to the levelfield function that is the focus of this question. This function has the same characteristics as the functions listed above but offers more flexibility in terms of the field from which a piece of data should be read. The comma-separated list accepts up to three parameters:
The second element specifies the field name. In our case, this field is the navigation title of a page (nav_title) as stated in the question. The pointer -2 refers to the parent page of the current page (-1 would be the current page and 0 would be the root page). Therefore, the output is the navigation title of the current page. If this page does not have a navigation title, TYPO3 would search for the next available value up the page tree and along the root line. This is controlled by the “slide” parameter.
You likely already noted that this question deals with two different aspects. The first part (the first four answers) deals with the levelfield key of the getText function. The second part (the last two answers) relate to the slide option.
The correct answers are 2 and 5.
The following TypoScript code outputs a link in the frontend. Which page is the link target?
Answers
-
The link target is the current page
-
The link target is the parent page
-
The link target is the first subpage of the current page
-
The link target is the root page
Number of correct answers: 1
Explanation
The TypoScript code defines a Content Object Array (COA) that only contains one element at the index 10. This element is a TEXT cObject which obviously outputs a page title. TYPO3 determines the title by executing the leveltitle function. The insertData = 1 property ensures that the value of the TEXT cObject is dynamic. The next line creates a link and uses the text string (the page title) as the link label. The link target is defined by the function leveluid which returns a page ID.
Once you understand the functionality of the TypoScript code, the actual question becomes clear: which page is referenced by the negative number -1 used in both functions leveltitle and leveluid?
The number is known as the pointer. If the pointer is zero or a positive number, TYPO3 goes down the root line starting at the root page. The root page is referenced by the zero (0). If, however, the pointer is negative (like in our example), TYPO3 goes up the root line to the root page, starting at the current page. The current page is has the value -1.
The correct answer is 1.
Which statements about stdWrap TypoScript functions are correct?
Answers
-
stdWrapfunctions process values based on properties -
TYPO3 can execute up to 64
stdWrapfunctions per request -
TYPO3 does not cache the result of a
stdWrapfunction by default -
You can use
stdWrapto manipulate a text string, e.g. convert lower case letters to upper case letters -
The system extension
EXT:ts_stdwrapis required to executestdWrapTypoScript functions -
stdWrapproperties can be used as conditions, e.g.ifNull,ifEmpty, andifBlank
Number of correct answers: 3
Explanation
This question is a great introduction into TYPO3’s stdWrap functionality. Let’s find out if you know the basics. Have a look at the following TypoScript code, analyze it, and explain what the code does before you read on.
Right after defining the PAGE top-level object, the second line sets the TEXT cObject at the index 10. The third line assigns the value foobar (in lower-case letters!), and the last line shows a stdWrap function. The function case is a property of stdWrap which converts the input (the text foobar) into upper-case letters. The output of this snippet is FOOBAR. Based on this explanation, you can mark two answers as correct: the answers 1 and 4.
The claim that TYPO3 can only execute up to 64 stdWrap functions per request is nonsense. The number of stdWrap functions is not limited at all. The second answer is therefore wrong. The third answer does not make sense either. stdWrap functions return data that is often part of a page content in the frontend. This data is cached by default, so answer 3 is wrong.
Two answers are left, one of them is right and the other answer is wrong. stdWrap is a part of TypoScript which is part of the TYPO3 Core. A system extension EXT:ts_stdwrap does not exist and is not required. Answer 5 is therefore also wrong.
You can look up all functions/properties of stdWrap in the TYPO3 documentation. The section “Override and conditions” list ifNull, ifEmpty, and ifBlank among others.
The correct answers are 1, 4, and 6.
Given the following TypoScript code, what is the output at the frontend?
Answers
-
The output is always “foo” on all pages
-
The output is “foo” on all pages whose subtitle is “bar”.
-
The output is “bar” on all pages whose subtitle is “foo”.
-
The output is “foo” on all subpages of pages whose subtitle is “bar”.
-
The output is “foo” by default and “bar” on all pages whose subtitle is “bar”.
Number of correct answers: 1
Explanation
The first three lines of the TypoScript code are simple. The output would always be “foo” if it were not for the lines following them, which restrict the output under certain circumstances.
The 4th lines shows the stdWrap-function if which introduces a condition. The output is foo on all pages whose field subtitle has the value “bar”. In other words: The output is set to the value foo if the page subtitle is bar.
If the value of the field subtitle is not bar, no output is set.
The correct answer is 2.
Replace “???” in the TypoScript code below to output the author’s name of the current page as a link to the author’s email address in the frontend.
Answers
-
value = author -
value = {$page:$author} -
value = {page:author} -
value = {$author} -
value = page:author -
value = $author
Number of correct answers: 1
Explanation
The TypoScript code uses the function typolink to generate a mailto:-link to an email address. To be more precise, a value (the page author’s name) should be wrapped in a link using an HTML <a>-tag. Its href-attribute should be the author’s email address. The code assumes that the author’s name and email address are stored in the page properties.
Although as a certified TYPO3 integrator you should be familiar with the typolink-function, this is not the focus of this question. The question tests if you know the correct syntax to access a field from a database table by using the insertData property.
You can exclude a few answers by logic. The syntax in answer 1 would simply output the word “author”. Something similar would happen with the answer 5 (“page:author”). Answer 4 shows the syntax for accessing the constant named author (for example author = Fred) but not to dynamically read data from the database.
The correct syntax is shown in answer 3. To access the page author’s name, you specify the table pages and the field name, for example author, separated by a colon and wrapped in curly brackets. This makes the syntax {page:author}.
There are other options available to retrieve a value of a specific field. Let’s assume that you want to use the subtitle of a page as the link label. The field name is subtitle. You can either apply the syntax described above ({page:subtitle}) or access the data through the TypoScript Frontend Controller: {TSFE:page|subtitle}.
The correct answer is 3.
What is the output of the following TypoScript code?
Answers
-
The output is
foobarif both fieldssubtitleandnav_titleare empty -
The output is
foobarif both fieldssubtitleandnav_titlecontain values -
The output is
foobarif the fieldsubtitleis empty andnav_titlecontains a value -
The output is
foobarif the fieldsubtitlecontains a value andnav_titleis empty -
The subtitle is shown if the field
subtitlecontains a value andnav_titleis empty -
The navigation title is shown if both fields
subtitleandnav_titlecontain values
Number of correct answers: 2
Explanation
The TypoScript code assigns the value foobar to the cObject TEXT. This is followed by the override function which overwrites the value if the data property returns a value. This is enforced by the property required. Therefore, you have to find out under which circumstances data has a value and what this value actually is.
The double slashes // between two fields have a special meaning. TYPO3 checks the first field. If this field is not empty, the first field is used. If, however, the first field is empty, TYPO3 checks the next field. If this field also empty, the next field is used, and so on. TYPO3 goes through the list of fields until it finds a value or no further fields exist. What does this mean for the TypoScript code stated in the question?
To determine which of the first four answers are correct, you only have to figure out if the output is “foobar” or not. You don’t need to work out what the output actually is.
If both fields, subtitle and nav_title are empty, the property data is empty too. In this case, the default value “foobar” is not overwritten and is used as the output. The first answer is therefore correct.
If both fields, subtitle and nav_title contain values, the property data returns the first field subtitle. Therefore, the default value “foobar” is overwritten and the output is definitely not “foobar”. The second answer is wrong.
The same happens if the field subtitle is empty and nav_title contains a value. In this case, data returns the second field nav_title. This makes answer 3 wrong too, as the output is not “foobar”.
If you swap the content of the fields subtitle and nav_title, you end up at the same situation as described above. The data property returns the subtitle of the page and the output is not “foobar” anymore. Answer 4 is wrong too.
To determine which of the last two answers is correct (remember: two answers have to be correct and you already figured out that answer 1 is correct and the answers 2, 3, and 4 are incorrect), you have to work out what the output is.
If the field subtitle contains a value, the property data returns it – no matter if the field nav_title is empty, has a value, or what the value is. If the property data has a value, this value overwrites the default value “foobar”. This means that answer 4 is correct: the output is the subtitle.
This automatically explains why the last answer must be wrong. If both fields have values, the data property returns the subtitle which overwrites the default value. The only combination that would output the navigation title would be an empty subtitle and a given navigation title.
The correct answers are 1 and 5.
Replace “???” in the TypoScript code below to meet the requirements as outlined.
Your TypoScript code contains a default image in the temp.stdimage object.
Backend users can upload an custom image which is saved in the temp.userimage object.
TYPO3 should display the default image if the user has not uploaded a custom image.
Answers
-
Answer
10 < temp.stdimage20 < temp.userimage -
Answer
10 < temp.userimage20 < temp.stdimage -
Answer
10 < temp.userimage20.stdWrap.ifEmpty.cObject < temp.stdimage -
Answer
10 < temp.userimage10.stdWrap.ifEmpty.cObject < temp.stdimage -
Answer
10 < temp.stdimage10.stdWrap.ifEmpty.cObject < temp.userimage
Number of correct answers: 1
Explanation
The question describes a scenario that is a typical use-case in a real world environment. Backend users can upload a custom image which TYPO3 displays in the frontend. If users don’t upload an image or delete a previously uploaded image, TYPO3 falls back to a default image and displays this instead. This approach prevents empty spaces and broken layouts in the frontend.
The given TypoScript code is straight forward and does not require any explanations. The five possible answers suggest various combinations in terms of the order (which object comes first), the index of the Content Object Array (COA) (10, 20, etc.), and a variety of stdWrap properties (ifEmpty, if, isTrue, etc.).
The first challenge of this question is that we don’t know how the objects temp.stdimage and temp.userimage look like. However, as pointed out above, this does not really matter. Let’s ignore that the requirement is about images, and use the following simple text-based objects:
If you add these four lines above the given TypoScript code, it’s obvious that the output of answer 1 is foobar and answer 2 is barfoo. This does not meet the requirement. The output should be the content of the custom object temp.userimage (in this case: “bar”), or the default object temp.stdimage (in this case: “foo”) if the custom object is empty. Simply remove the value from the last line to test the outcome of each answer:
The two lines suggested in answer 3 are more promising. The first line copies the custom object to the COA index 10 and the second line copies the default object to the index 20 if the content is empty. But wait a minute! The index 20 never received any content. The TypoScript code would only output the content of the temp.userimage object (“bar”) and never anything else. Answer 3 is wrong.
Answer 4 shows exactly the same two lines as answer 3, except for the COA index. The second line now copies the default object to the index 10 of the COA if the content is empty. In other words: If the user has not uploaded a custom image, the object temp.userimage is empty. In this case, the second line copies the default object temp.stdimage to the same index. This is what we are after.
Let’s check what the code from answer 5 outputs, just to be sure that anwer 4 is the only correct answer. The two lines show the same stdWrap properties as answer 4 but temp.userimage and temp.stdimage are swapped. This can’t work as the default object is always set and is therefore never empty. The output would always be foo, no matter if the custom object temp.userimage has a value or not.
The correct answer is 4.
Replace “???” in the TypoScript code below to output the text “foobar” in the frontend whenever the website is accessed with the GET-parameter print=1.
Answers
-
Answer
if.isTrue.data = GET : print -
Answer
if.isPositive = GP : print -
Answer
if.value.data = GP : printif.equals = 1 -
Answer
if.value.data = GET : printif.equals = 1
Number of correct answers: 1
Explanation
The text “foobar” should be displayed in the frontend if the request to the TYPO3 instance contains the GET-parameter print=1. Without any replacement of “???”, TYPO3 would always output the text. This means that we have to select the right solution that limits the assignment of the value. All four answers suggest to use the if function of the stdWrap.
If you don’t know which answer is correct, you can identify and eliminate the answers that will definitely not lead to the result you are looking for. Let’s summarize what options the answers offer. All four answers try to access the GET-parameters of a request, three of them by using the data property. Three different properties of the if function are used: isTrue, isPositive, and equals. Two of the four answers show the keyword GET, the other two answers show GP. This is a good point to start with.
You can read in the TYPO3 documentation that only a getText key GP exists. The acronym stands for “GET/POST” and lets you access arguments passed in both request types. A specific key GET or POST does not exist. This means that answer 1 and answer 4 can be excluded.
The elimination strategy works perfectly fine with this question as it lets you easily identify another wrong question. The data property of the stdWrap function is absolutely necessary if you want to access an argument passed in the request when using the getText key GP. Answer 3 has the data property but answer 2 does not. At this point you know that answer 3 must be the only correct answer as we already excluded answer 1 and answer 4.
Nevertheless, let’s double-check and discuss why answer 3 is correct. The code fragment looks like the following.
The TypoScript code initially assigns the value “foobar” to the TEXT cObject. However, the if function introduces a condition. The assignment is only carried out if the GET or POST request contains an argument print and the value of this argument is 1.
What about the first answer? Would this condition return true and output “foobar” at the frontend, if the getText key would be GP and a request with the argument print=1 would come in? Yes, because the property isTrue checks against any content. If the argument exists, is not an empty string, and is not zero, isTrue returns true.
And the second answer? What would happen if we add the missing data property to the line, so that it becomes “if.isPositive.data = GP : print”? This would result in a similar outcome. If the argument print has a numeric positive value, for example 1, 2, 3, etc., isPositive returns true. It would return false if the value is 0, negative, or not a number.
Answer 4 is the same as the right answer 3 but has an invalid getText key GET.
The correct answer is 3.
Replace “???” in the TypoScript code below to output a link with a link text and a CSS class in the frontend.
Answers
-
Answer
typolink = example.comtypolink.ATagParams = class='linkclass' -
Answer
typolink.parameter = example.comtypolink.parameter.ATagParams = class='linkclass' -
Answer
typolink.parameter = example.comtypolink.ATagParams = class='linkclass' -
Answer
typolink.parameter = example.com - linkclass -
Answer
typolink = example.com - linkclass
Number of correct answers: 2
Explanation
You can use the stdWrap function typolink to generate a link (the HTML tag <a>...</a>) in TypoScript. The typolink function is a very powerful TypoScript function. It offers a wide range of options and therefore the documentation is also quite extensive.
The parameter property plays a crucial role as it specifies the link target. A typolink function without the parameter property is invalid and results in the output of the link text only. This is the case in the first answer which makes this answer wrong straight away.
The second answer has the parameter property which points to the external URL example.com. So far so good, but the second line uses ATagParams as a sub-property of the property parameter. This does not work. The CSS class "linkclass" is not set properly. Answer 2 is also wrong.
The two lines suggested in answer 3 seem to be the correct solution. A link is generated, a link text is set (“linktext”), and the CSS class “linkclass” is added by the ATagParams property of the typolink function. Don’t stop here as the number in brackets at the end of the question indicates that two answers are correct.
The following answers 4 and 5 suggest solutions with only one line each: a target URL, a dash (-), and obviously a CSS class name (“linkclass”). This alternative syntax can be used in the parameter property:
All resources are optional except the first one: <link>. This can be one of t3:// (an internal TYPO3 resource), http:// or https:// (an external link), or mailto: (an email address). For example “example.com”.
The second resource is <target> which is an alternative to the properties extTarget, fileTarget, and target. Typical targets are “_top” and “_blank”. A dash (-) instructs TYPO3 not to set the target attribute at all. I will go into more details about the <popup> option in a separate question.
The next resource is the name of a CSS class. Same as above: A dash (-) instructs TYPO3 not to set a CSS class.
You can set a link text by adding a fourth resource. Please note that you have to wrap the title in double quotes if it contains spaces.
Answer 4 shows the correct line as it contains the parameter property. This is not the case in answer 5 which is therefore wrong.
The correct answers are 3 and 4.
Replace “???” in the TypoScript code below to output a link to the page ID 42. The target page should be opened in a 250x250 pixel window.
Answers
-
Answer
typolink.parameter = t3://page?uid=42 250x250 -
Answer
typolink.popup = t3://page?uid=42 250x250 -
Answer
typolink.parameter = 250x250 page=42 -
Answer
typolink.parameter = 42typolink.popup = width=250,height=250 -
Answer
typolink.parameter = t3://page?uid=42typolink.onclick = popup:250x250
Number of correct answers: 1
Explanation
The “popup” window functionality in TypoScript is quite old. It allows you to generate a link that, when clicked by a user, opens a new browser window or browser tab which then opens the link target. This solution is nowadays seen as a bad practice for several reasons. Today, more modern approaches are common. For example the lightbox effect that displays images, videos, or even external websites in a modal window and dims out the rest of the page. Nevertheless, the popup function still exists in TYPO3 v11 LTS which means that you should be familiar with that as it could be part of a question in your TCCI exam.
Let’s check the answers backwards. The first line of answer 5 is perfectly fine. It creates a link to the page ID 42 by using the t3:// syntax namespace and the page resource handler key. Unfortunately, the typolink function does not have a property onclick, which makes answer 5 wrong.
Although specifying the page ID as a numeric value rather than using the t3:// syntax namespace is not state-of-the-art best practice, it is still valid and not marked as deprecated in TYPO3 v11 LTS. The first line of answer 4 is therefore ok. However, you don’t find a property named popup which makes the second line invalid and answer 4 wrong. The same also applies to answer 2 which doesn’t even have the mandatory parameter property.
At this point, only two answers are left: the answers 1 and 3. As the first resource of the parameter property always specifies the link target, and answer 3 suggests to use the popup dimensions first, this answer can’t be right. The correct syntax is shown in the first answer. TYPO3 creates the following HTML code in TYPO3 v10 LTS, assuming that the URL of the page ID 42 is “/foobar”:

The HTML output looks a little different in TYPO3 v11 LTS but also results in a popup window:

The onclick JavaScript event is handled by the following function:
function(evt) {
  evt.preventDefault();
  var dataset = evt.currentTarget.dataset;
  var url = dataset.windowUrl;
  var target = dataset.windowTarget || null;
  var features = dataset.windowFeatures || null;
  windowOpen(url, target, features);
}
The correct answer is 1.
Replace “???” in the TypoScript code below to output the image as a link.
Answers
-
typolink.parameter = t3://page?uid=42 -
stdWrap.typolink.parameter = t3://page?uid=42 -
wrap.typolink.parameter = t3://page?uid=42 -
file.typolink.parameter = t3://page?uid=42
Number of correct answers: 1
Explanation
Most candidates assume that this is a simple question and, without further thinking, choose the first answer as the correct option. Did you do that too? Unfortunately, answer 1 is wrong.
The typolink function is a stdWrap property and stdWrap is not always available. In TEXT cObjects, for example, stdWrap properties are available if you use the value property:
The property file of an IMAGE cObject, however, does not feature stdWrap. You have to explicitly introduce it as shown in answer 2.
The answers 3 and 4 are distractors: both suggested solutions don’t work.
The correct answer is 2.
Replace “???” in the TypoScript code below to output a human-readable format of the given UNIX time stamp.
Answers
-
strftime -
date -
mktime -
time
Number of correct answers: 1
Explanation
The TypoScript code should convert a UNIX time stamp into a human-readable format. Truth is that, if you don’t know the answer, your only option is to make a guess. The given answers all make sense – more or less – and it’s almost impossible to exclude wrong answers.
TYPO3 utilizes a PHP function internally to transform a UNIX time stamp. As a TYPO3 integrator, you do not need to be proficient in PHP but you should know which PHP functions are used for often used TypoScript properties. You also don’t need to know what the codes %A, %d, %B and %Y stand for to answer the question correctly (a question in the exam could have different placeholders). In this case: first comes the weekday, followed by a two-digit number for the day, the full name of the month, and a four-digit year.
The PHP function that lets you do such a conversion is strftime(). You can look up all supported options at https://www.php.net/manual/function.strftime.php. This function allows you to convert a UNIX time stamp4 into a human-readable date and time. Although the PHP function has been marked as deprecated in PHP v8.1, the stdWrap function in TypoScript will likely continue to work, even in further TYPO3 versions in the future.
The correct answer is 1.
Replace “???” in the TypoScript code below to output the number of days that have elapsed since the TYPO3 certification program started (UNIX time stamp: 1226923200).
Answers
-
calc = intval -
prioriCalc = 1 -
prioriCalc = intval -
priori = calc
Number of correct answers: 1
Explanation
This question and TypoScript code is without doubt one of the advanced ones. Although there may be occasions when a date calculation needs to be performed in a practical use case, you won’t often see such code in your TYPO3 projects. As a reminder: Don’t be put off by the apparent complexity.
The TypoScript code first creates a COA_INT object. This object ensures that TYPO3 does not cache the data and output an outdated result. The TEXT cObject then receives the current date (getText key date) as seconds since the epoch (U). The next line substracts the time stamp 1226923200 from the current date and divides the result of this calculation by 86,400 (the number of seconds per day).
Having said that, the truth is that no calculations have really happened yet. The TEXT cObject only contains the formula for the calculation as a text string. A function is required to execute the calculation – and that function is the stdWrap property prioriCalc. The answers 1 and 4 are therefore wrong.
If you set the property to 1, as suggested in answer 2, TYPO3 outputs the result as a doublevalue. To output the result is an integer, you have to set prioriCalc = intval.
By the way: the time stamp 1226923200 represents the 17 November 2008. On this date, the first TYPO3 CMS Certified Integrator exam took place5.
The correct answer is 3.
Which TypoScript objects are required to process and output contents from the tt_content database table?
Answers
-
PAGE -
FLUIDTEMPLATE -
CONTENT -
CONFIG -
TEXT -
USER
Number of correct answers: 2
Explanation
All six TypoScript objects exist but only two of them are required to process and output contents from the tt_content database table.
The top-level object CONFIG is used to fine-tune the frontend configuration. The object lets you adjust settings for the cache, add or disable HTTP headers, configure the format of email addresses to make them harder to extract for spam bots, etc. All this is often useful but not critical if you use TYPO3’s default settings. Answer 4 is therefore wrong.
An object that you always have to specify if you want to output anything in the frontend is PAGE. Even though PAGE is often used with a template, the FLUIDTEMPLATE object is not necessarily required. This makes the first answer correct and the second answer wrong.
The two content objects TEXT and USER typically don’t access data in the tt_content database table. You can use the object TEXT to output static text or HTML. The USER object (as well as USER_INT) is a user-defined cObject. You can use this object to execute a function or PHP method that is in your control. The answers 5 and 6 are also wrong.
The last object in the list of answers is CONTENT. This is an object type (complex data type) to be precise. An object that has this content type is designed to generate content that is stored in the tt_content table by default.
The correct answers are 1 and 3.
Replace ??? in the TypoScript code below to output Title: followed by the title of the current page in the frontend.
Answers
-
10 = RECORDS -
10 = REGISTER -
10 = SAVE_REGISTER -
10 = LOAD_REGISTER -
10 = RESTORE_REGISTER
Number of correct answers: 1
Explanation
TYPO3 features a global TSFE6 register: $GLOBALS['TSFE']->register[]. This register acts like a stack. You can add items to the register and access them later. This question obviously deals with the register.
The TYPO3 Core used registers in several places but with the introduction and advance of the Fluid template engine less often today.
Let’s have a closer look at the TypoScript code. A line is missing (???) at index 10. Following the missing line, the TypoScript code defines a TEXT object and accesses the title field of the current page. The index 20 simply outputs the text Title: as stated in the question. The interesting part is the index 30. These lines access a register named foobar and output its content. This means that the missing line we are looking for has to add the page title to the register, so the output becomes “Title:” followed by the page title.
Although a cObject RECORDS exists, you can not use it to copy data to the register. The RECORDS object displays lists of records from various database tables. Answer 1 is wrong. The next two answers are distractors that don’t achieve the goal either. Neither an object REGISTER nor SAVE_REGISTER exists in TYPO3.
The next two cObjects exist: LOAD_REGISTER and RESTORE_REGISTER. You can deduce from the terminology which answer is correct. The missing line loads the register with data. You can choose any key name, for example “foobar”. The TypoScript code copies the page title into the register (index 10), outputs the text “Title:” (index 20), and reads the data from the register again (index 30).
The correct answer is 4.
Which options can you use to replace ??? to read the content of the register foobar in the following TypoScript code?
Answers
-
20.register = foobar -
20.data = register:foobar -
20.foobar = data:register -
20.wrap = register:foobar -
20.dataWrap = {register:foobar} -
20.data = {register:foobar}
Number of correct answers: 2
Explanation
The TypoScript code obviously stores the title of the current page in the register named foobar. Index 20 should access the register so that the page title appears in the frontend. Which of the six options can you use to make this work? Note that two answers are correct.
I have used one of the options in the previous question. You can use the getText property data and the key register to read from TYPO3’s register. This makes the code line 20.data = register:foobar in answer 2 correct. But what is the second possible syntax?
The answer 1 and 3 are nonsense of course. Neither 20.register nor 20.foobar are valid properties of the TEXT cObject. These answers are distractors. If you use the code line from answer 4 in your TYPO3 test instance, the output in the frontend would be register:foobar rather than the page title. This answer is also wrong.
Answer 5, however, shows a valid solution. The dataWrap property of the stdWrap function parses the content between the curly brackets. TYPO3 replaces the content with the result of the getText data type and register is a possible key. Answer 5 is therefore the second correct answer.
The format from answer 5 can’t be used with the getText property data though, which makes the last answer wrong.
The correct answers are 2 and 5.
Replace ??? in the TypoScript code below to output the path of the processed image file as the background image in the frontend.
Answers
-
IMG -
IMAGE -
IMG_RESOURCE -
IMAGE_RESOURCE -
GIFBUILDER
Number of correct answers: 1
Explanation
The TypoSript code references an image file from the fileadmin/user_upload/ directory. It resizes the original image to 100px width and 100px height. The processed image is used as a background image in a <div> container.
You can eliminate two of the answers straight away, as no cObjects named IMG or IMAGE_RESOURCE exist in TYPO3. The suggestion in answer 5 sounds plausible but GIFBUILDER must be used as a sub-object of the IMAGE cObject. This is not the case in the given TypoScript code and this answer is therefore wrong.
The cObject IMAGE also appears reasonable but IMAGE returns a complete HTML <img...>-tag. This would result in an invalid HTML code in the frontend. We need the path of the processed image and this is provided by the IMG_RESOURCE cObject.
The correct answer is 3.
Replace ??? in the TypoScript code below to output a content element in the frontend.
Answers
-
select.table = pages -
select.table = tt_content -
table = pages -
table = tt_content -
template = tt_content
Number of correct answers: 1
Explanation
CONTENT is a specific cObject data type that generates content that is stored in database tables. You can build custom queries to read the data from the database. TYPO3 offers exceptional flexibility in this respect.
The TypoScript code as it stands (without the missing line) would result in the following error message:
ConnectionPool->getConnectionForTable()requires a table name to be provided.
The line we are looking for is clearly the reference to the database table and not the template. You can mark the last answer as wrong.
The remaining answers offer two different database table names: pages and tt_content. As the name suggests, the pages tables stores pages. Every page that you can see in the page tree in the TYPO3 backend is stored in this table. However, we are looking for content elements. These records are stored in the table tt_content, so either answer 2 or answer 4 is the right answer.
The select object generates a SQL statement to select records from the database. You find the complete list of supported properties in the TYPO3 documentation. The select object does not have a property table, which makes answer 2 wrong. The table name is stated as a property of the CONTENT cObject.
The correct answer is 4.
What is the output of the following TypoScript code in the frontend?
Answers
-
It displays the second, third, and fourth record from the table
tt_content -
It displays the content elements with the IDs
2,3, and4from the tablett_content -
It displays the content elements of the pages with the page IDs
2,3, and4 -
It displays the titles of the pages with the IDs
2,3, and4
Number of correct answers: 1
Explanation
The TypoScript code uses the CONTENT cObject to access records from the database. The line table = tt_content selects the table tt_content as the data source. The following lines build a SQL SELECT query by using the select property of the cObject. The only relevant keyword for this question is pidInList.
The pidInList property accepts a comma-separated list of PIDs of records. The abbreviation stands for page ID. This means that the database query reads records from the tt_content table but only return those that are stored against the page IDs 2, 3, and 4. The comma-separated list does not reflect the IDs of the records as suggested in answer 2 (this would be the property uidInList).
In theory the records could be indeed the second, third, and fourth record stored in the table tt_content but this is not the function of the TypoScript code, which makes the first answer wrong.
Note that pidInList is a commonly used property that also accepts a few special keywords instead of numeric values:
pidInList = thisThis is the default configuration. The keyword
thisrefers to the current page.
pidInList = rootThis keyword addresses records from the root-page level.
pidInList = -1This keyword enables you to select versioned records in workspaces directly.
pidInList = 0This keyword completely disables the PID constraint. This configuration requires you to set the
uidInList.
The special keywords (more precisely the default value this) also explain which page TYPO3 uses if you omit the pidInList property: the current page.
The correct answer is 3.
Replace ??? in the TypoScript code below to output records with the IDs 2 and 3 from the tt_content database table in the frontend.
Answers
-
TEXT -
HTML -
COA -
RECORDS -
DATA -
CONTENT
Number of correct answers: 1
Explanation
Many candidates choose option 6 as the correct answer to this question as this is the most obvious. The question mentions the tt_content table and this table is also included in the TypoScript. However, this answer can’t be right. The CONTENT cObject supports neither a property source nor dontCheckPid. Even the keyword tables (plural) is not a valid property of the CONTENT cObject. You can also eliminate the answers 2 and 5 as these objects don’t exist.
Although COA exists (which stands for Content Object Array), this type lets you join and organize multiple other cObjects by using numbers as indexes. Answer 3 is therefore also wrong.
You can use TEXT cObjects to output static text or HTML code but not to read data from a database table directly. Same as for the excluded options above, the properties tables, source, and dontCheckPid are not supported by TEXT cObjects. This means that the first answer is also wrong and only one answer is left.
The cObject CONTENT is usually used to read and display content from database tables. The cObject RECORDS can be used to display individual data records. A typical use-case is to store arbitrary content elements in a central place, for example a separate folder, and to use TypoScript and the cObject RECORDS to display them on various standard pages. The main benefit of this approach is that backend users only need to maintain the content elements in one place and don’t even need access to the pages where TYPO3 displays them.
The correct answer is 4.
Which cObjects in TypoScript can you use to execute custom PHP functions or methods in PHP classes?
Answers
-
TypoScript can not execute custom PHP functions or methods in PHP classes
-
The
FILESandFILES_INTcObjects -
The
PHPandPHP_EXECUTEcObjects -
The
COAandCOA_INTcObjects -
The
USERandUSER_INTcObjects
Number of correct answers: 1
Explanation
Under certain circumstances, TypoScript reaches its limits. After all, it is not a programming language and not comparable to PHP or JavaScript. For some use-cases, it might be appropriate to implement some logic as PHP functions or methods in PHP classes, and execute them in TypoScript. This is possible, so the first answer is wrong straight away.
Answer 2 suggests to use the FILES and FILES_INT cObjects. While FILES exists (this cObject can be used to integrate with TYPO3’s File Abstraction Layer, FAL), a cObject FILES_INT does not. This makes answer 2 wrong. You can also exclude answer 3 as neither a cObject PHP nor PHP_EXECUTE exist in TYPO3.
The next answer is also questionable. Although the cObjects COA and COA_INT exist (which stands for Content Object Array), these types let you join and organize multiple other cObjects by using numbers as indexes. Executing PHP functions or methods is not part of their functional scope, which makes answer 4 also wrong.
The last option delivers the correct answer. Both cObjects, USER and USER_INT, are user-defined cObjects. You can use them to execute a PHP function or method that is in your full control. The main difference between these two cObjects is caching. If you create a USER_INT cObject, TYPO3 does not store the output in its caches. You will find detailed example questions about this topic in the chapter “Performance”.
The correct answer is 5.
What is the output of the following TypoScript code in the frontend if the frontend layout of the current page is set to “Layout 1 [1]” in the page properties?
Answers
-
The output is the text “
Alice” -
The output is the text “
Bob” -
The output is the text “
Fred” -
The output is the text “
BobFred” -
The output is the text “
AliceBobFred” -
The output is empty
Number of correct answers: 1
Explanation
Backend users can select a layout for most pages in TYPO3 (for example pages when using the standard page type). This configuration may affect the visual appearance in the frontend if the frontend templates make use of the setting. A numeric value represents the selected layout in the database table field layout. Go to Web → Page, select a standard page from the page tree, and open the page properties. You find the dropdown box “Frontend Layout” in the tab “Appearance”. The default value is “Default [0]” which represents the number 0 in the field layout in the database table pages. Backend users can select a different layout, for example “Layout 1 [1]” or “Layout 2 [2]”, etc.
The first part of the TypoScript code (temp.foobar) introduces the CASE cObject. This is a specific data type that lets you compare the same variable with many different values, and use a certain piece of TypoScript depending on which value it equals to. The principle is similar to that of PHP’s switch statement.
The property key defines which field should be used as the variable. In the current case, this is the field layout. The following lines (starting with default) are executed if the comparison does not result in a match: the text “Alice” would be returned. The other lines (starting with 1 and 2 respectively) represent the TypoScript that TYPO3 should execute if there is a match. The variable 1 would return the text “Bob” and 2 would return the text “Fred”.
The question states that the frontend layout of the current page is set to “Layout 1 [1]” which means that the variable is 1. This variable is a clear match: “Bob”.
The correct answer is 2.
A condition in TypoScript starts with square brackets. Which of the following items end a condition block?
Answers
-
[GLOBAL] -
[global] -
{global} -
[END] -
[end] -
[End] -
[]
Number of correct answers: 5
Explanation
Conditions in TypoScript are used to check for certain events, statuses, or values. This could be, for example, a TYPO3-internal value (such as the ID of the current page) or environment-specific parameters (such as the IP address of the user who accesses the website).
A condition starts with square brackets7, for example:
TypoScript code within a condition are only executed if the condition is met. Let’s use the line above as an example. All lines following this expression are only executed, if the current application context is set to “Production”. This means that you have to explicitly mark the end of a condition block. TYPO3 offers three ways to achieve this. You can either use the keywords global or end in square brackets – or you can start a new condition. The latter automatically ends previous condition blocks.
Let’s look at the two keywords a little closer. Although the spelling does not matter (you could use [gLoBaL] if you want), capital letters are the recommended format for better clarity. Both keywords [GLOBAL] and [END] have the same result. They end the condition block.
However, there is a small but significant difference between the two keywods from a technical point of view. The expression [GLOBAL] is a condition that is always true. This instructs TYPO3 to reset the scope if integrators indent the code due to curly brackets. Resetting the scope means that even if you forget to add the closing curly bracket, a condition further down your TypoScript code would work.
The following code snippet illustrates the scenario:
A closing bracket is missing after the line HELLO WORLD!. Without the condition [GLOBAL] (or if [END] would be used instead), the condition block below would not be executed. However, the condition [GLOBAL] resets the scope and if the current page ID is 1, the text “Page ID 1” appears in addition to HELLO WORLD!.
It goes without saying that writing clean and correct TypoScript code (and not forgetting to add required curly brackets for example) is always the best option. It might be good to know the difference between the keywords [GLOBAL] and [END] if you want to debug a problem (e.g. if a condition is not executed at all). It might also be good to know this for the TCCI exam – you never know.
Let’s get back to the possible answers and exclude the two wrong answers. All options contain the two valid keywords in various upper/lower-case spelling, except answer 7. This is the first incorrect answer. The second wrong answer is answer 3 of course, as it shows curly rather than square brackets.
The correct answers are 1, 2, 4, 5, and 6.
Replace ??? in the TypoScript code below to turn the word “monster” into “unicorn” in the frontend if the constant princess is set to a value greater than 10.
Answers
-
[{$princess} > 10] -
[TSFE:princess > 10] -
[intval("{princess}") > 10] -
[globalVar = LIT:10=princess] -
[if(princess > 10) then monster = unicorn]
Number of correct answers: 1
Explanation
Sometimes the simplest solutions are the right ones. Don’t be put off by complicated answer options. This question is a good example for such a scenario. The TypoScript code clearly shows a missing condition. The further you read through the possible answers, the more complex the conditions become. The question indicates that you deal with a constant named princess. If this constant has a value greater than 10, the TypoScript code of the condition should be used, which overrides the default output. Therefore, the only requirement is to check the value of the constant. For that, you only need to know how to access a constant in a TypoScript condition. That’s it.
Neither TypoScript nor TypoScript conditions support “if-then“-statements as shown in the last answer. Moreover, this expression makes no sense at all (apart from the fact that it is easy to read and easy for humans to understand).
Answer 4 does not provide a valid solution either. This is not the way how you access constants, and the expression does not even test if a value is greater than something.
The intval() function suggested in answer 3 possibly sounds familiar. The PHP function with the same name returns the integer value of a variable. However, this is not a valid function in TypoScript conditions and this is not the right approach to access a constant named princess either. Answer 3 is therefore wrong.
The condition [TSFE:princess > 10] could be a valid solution, couldn’t it? Can you access constants through the TypoScript Frontend object (TSFE)? The answer is not only that you can’t, but also that TSFE: is not a valid expression in TypoScript conditions. To access properties of the TSFE object, you have to use the getTSFE() function. The following example demonstrates how to output the word “fairy” in the frontend if the page type is 123.
This leaves us with the first answer. The simplest, easiest, and most logical solution. Accessing a constant in a TypoScript condition works the same way as you would normally access constants. You state the constant name with a $ sign at the front and wrap it in curly brackets, for example {$princess}.
The correct answer is 1.
How can you check if the backend_layout field is set to home in User and Page TSconfig?
Answers
-
[globalVar = TSFE:current|backend_layout = "home"] -
[globalVar = TSFE:page|backend_layout = "home"] -
[current|backend_layout = "home"] -
[page|backend_layout = "home"] -
[page["backend_layout"] == "home"]
Number of correct answers: 1
Explanation
You can use conditions in User and Page TSconfig since TYPO3 version 4.3. This allows you to, for example, modify the backend user interface depending on certain criteria.
The first important point to remember is that User and Page TSconfig apply to the backend. The first two answers don’t make sense because the conditions access the TypoScript Frontend (TSFE) object, whereas the question refers to the backend.
The page variable in TypoScript conditions was introduced in TYPO3 version 4.5 LTS. It provides access to the current page record as an array. A variable named current, however, does not exist. This makes answer 3 wrong.
This leaves you with only two possible answers: answer 4 and answer 5. In fact, both solutions were possible in TYPO3 up to version 9. The old condition syntax (shown in answer 4) has been deprecated in TYPO3 v9 and removed in v10. Answer 5 shows the new syntax. Have a look at the following TypoScript example code:
If you open the page properties you see that the default label for the page title input field is “Page Title”. The TypoScript condition entered as Page TSconfig sets the label to “foobar” if the backend layout is set to “home”. This way, you can easily change a label (or many other aspects of the backend user interface) depending on a specific setting made by backend users.
Note that the backend layout is an identifier, which can be a text string or a numeric ID.
The correct answer is 5.
Which TypoScript condition can you use to check if a frontend user is currently logged in?
Answers
-
[login = true] -
[loginUser('*')] -
[loginUser = *] -
[user = login] -
[loginUser = true] -
[login = *]
Number of correct answers: 1
Explanation
It is often a requirement for integrators to make specific areas or functions only available to users who are currently logged in at the frontend. A welcome message showing the user’s name or a logout button are typical examples.
You can use a TypoScript condition to determine whether a user is logged in or not. However, it is neither the login nor the user function as suggested in answers 1, 4, and 6. These answers are all wrong. The correct variable is loginUser. This condition lets you check for a certain user name or user ID which enables you to output a text to a specific user for example. You can also use the wildcard character “*” to check if the current user is authenticated, independenent of their user account. However, the value true, as suggested in answer 5, is not valid.
Answer 3 shows the old condition syntax which is has been deprecated in TYPO3 v9 and removed in v10. Since the introduction of the Symfony ExpressionLanguage in TYPO3 v9, the syntax [loginUser('*')] is valid and the only possible expression for TypoScript conditions.
The following TypoScript example code illustrates the usage8.
The top-level object PAGE is defined in the first line. The second line assigns the content object TEXT to the index 10. The following condition checks whether the current website visitor is an authenticated user. If this is the case, the string “User is logged in” is assigned to the text object. Otherwise ([ELSE]), the string is “Please log in”.
The correct answer is 2.
Which TypoScript conditions can you use to check in the frontend if the current website visitor is logged in as backend user?
Answers
-
[globalVar = TSFE:beUserLogin = 1] -
[globalVar = backend.user.login.true] -
[backend.user.isLoggedIn] -
[frontend.user.isLoggedIn] -
[backend.user.userId > 0]
Number of correct answers: 2
Explanation
In some cases you want to check if the current website visitor is logged in as a backend user. This is useful, for example, to provide the user with additional information shown in the frontend that a normal visitor to your site shouldn’t see.
The condition shown in the first answer was a valid and working solution in older TYPO3 versions. By using this syntax, you accessed the TSFE variable beUserLogin. With the introduction of the Symfony ExpressionLanguage, however, this has changed.
Although answer 3 seems a bit strange and unusual if you have never used the construct before, this is a correct syntax since TYPO3 v10. The backend.user object contains details about the currently logged in backend user (if logged in). Often used variables are, for example:
backend.user.isAdminThis variable is
trueif the current backend user is an administrator.
backend.user.isLoggedInThis variable is
trueif the current user is logged in at the backend.
backend.user.userIdThis variable contains the UID of the current user.
backend.user.userGroupListThis variable contains a comma-separated list of group UIDs the currently logged in backend user is a member of.
This list reveals the second correct answer. You can also check if the user ID is greater than 0 to check in the frontend if the current website visitor is logged in at the backend.
The condition suggested in answer 2 is invalid and answer 4 checks if the current user is logged in at the frontend. The question, however, asks for the backend.
The correct answers are 3 and 5.
Which TypoScript condition can you use to check if the current time is 6pm or later?
Answers
-
[time >= 18] -
[time() > 18] -
[time("18")] -
[date("G") >= 18] -
[hour >= 18]
Number of correct answers: 1
Explanation
You can also use conditions to implement time-dependent configurations. You could, for example, display a greeting appropriate for the time of the day or show a page layout or style that changes depending on the current time.
A function called time doesn’t exist though, so the first three answers can’t be correct.
The function hour sounds plausible at first glance. However, this syntax is the old TypoScript condition syntax, which is replaced by the new Symfony ExpressionLanguage. This makes answer 5 wrong and leaves us with only one answer.
Answer 4 shows the correct condition syntax in TYPO3 v10 and v11. The function date() reminds you of the PHP function date() which features a wide range of date and time information. Ultimately, this is the right solution. The parameter “G” specifies the current time in the 24-hours format without a leading zero.
The following example shows a possible solution:
TYPO3 outputs the text string “Good day” between 0:00 and 17:59. From 18:00, the condition becomes valid and the output becomes “Good evening”.
It is important to remember that this function uses the current date/time of the server. This means that if, for example, your server time is set to “CEST” (Central European Summer Time), visitors from other time zones will receive a “Good evening” if it is still noon (e.g. “PDT”, Pacific Daylight Time).
The correct answer is 4.
Which TypoScript conditions can you use to check if the user’s IP address is not 123.44.55.66?
Answers
-
[IP = 123.44.55.66] -
[ip("123.44.55.66")] -
[getenv("REMOTE_ADDR") != "123.44.55.66"] -
[not (getenv("REMOTE_ADDR") matches "/123\.44\.55\.66/")] -
[getTSFE().remote["address"] != "123.44.55.66"] -
[is("REMOTE_ADDR") != "123.44.55.66"]
Number of correct answers: 2
Explanation
This question is a good example of how a single word can decide which answers are wrong or right. If you only skim the question hastily, it can easily happen that you overlook the word not. The question without this word changes the answers significantly of course.
Six possible answers are given, two of them are correct, and the other four are wrong. Pay special attention to the negation!
The condition syntax in the first answer was valid a long time ago. TYPO3 v8 was the last version that supported the keyword IP in conditions in this format. Since TYPO3 v9, the new format reads ip() which lets you use a value, wildcard (e.g. ip("123.44.*")), or a regular expression. The correct syntax is shown in answer 2 but this condition returns true if the IP addresses match. The question, however, asks for a condition if the user’s IP address is not 123.44.55.66. Therefore, the first two answers are wrong.
Answer 3 suggests to use the function getenv() in the condition. The function calls the PHP function of the same name which returns a specific environment variable. In this case the IP address of the remote client: REMOTE_ADDR. The operator != checks if the values are not equal, which makes this answer correct. The following table lists all valid comparison operators supported by the Symfony ExpressionLanguage.
| Operator | Comparison |
|---|---|
== |
equal |
=== |
identical |
!= |
not equal |
!== |
not identical |
< |
less than |
> |
greater than |
<= |
less than or equal to |
>= |
greater than or equal to |
matches |
regular expression match |
Answer 4 shows another valid solution. The expression combines the logical not-operator as the function not() and the regular expression matches(). You can also read this condition as: does the environment variable REMOTE_ADDR match the regular expression of 123.44.55.66? Then, negate the outcome of the check.
Answer 5 suggests to use the function getTSFE() which lets you access the TypoScript Frontend object (TSFE). Although this object provides a wide range of information about the current frontend context such as page details, the language, the frontend user, etc. the remote address (the current user’s IP address) is not part of it.
The last answer is also wrong. Although the condition reads well (is REMOTE_ADDR not equal to 123.44.55.66, then…), a function is() simply does not exist for TypoScript conditions.
The correct answers are 3 and 4.
Replace ??? in the TypoScript code below to output “foobar” in the frontend only if the TYPO3 version 11.5.20 is used and the request originates from the IP address 123.45.67.89.
Answers
-
[typo3.version == "11.5.20"] AND [ip("123.45.67.89")] -
[typo3.version == "11.5.20" and ip("123.45.67.89")] -
[typo3.version == "11.5.20" || ip("123.45.67.89")] -
[typo3.branch == "11.5.20" && ip("123.45.67.89")] -
[typo3.branch == "11.5.20"] && [ip("123.45.67.89")]
Number of correct answers: 1
Explanation
This question tests your knowledge in two aspects. First, whether you are familiar with logical operators. Secondly, whether you know the difference between typo3.version and typo3.branch. Both aspects are not very difficult. Let’s look at the logical operators first. The following table lists the available operators of the Symfony ExpressionLanguage which you should know by heart.
| Operator | Meaning |
|---|---|
not or !
|
not |
and or &&
|
and |
or or ||
|
or |
The first answer combines two conditions and links them with the keyword AND (“[condition 1] AND [condition 2]”). Although an operator “and” exists, its spelling is lower-case and you must not separate both conditions with their own square brackets. This is similar to the last answer where the operator “&&” is used. This operator is valid but the entire expression should go into one opening and one closing bracket. The answers 2, 3, and 4 show the correct syntax – and answers 1 and 5 are wrong.
You can exclude answer 3 as the “||” sign is a logical “or”. The question, however, asks for an output only if the TYPO3 version and the IP address are matches.
This leaves us with the answer 2 or answer 4 as the correct solution. The only difference between these two options is the keyword typo3.version vs. typo3.branch. A TYPO3 version always consists of three numbers separated by dots9, for example: 11.5.20. A TYPO3 branch consists of only two numbers, for example: 11.5.
This means that the condition suggested in answer 4 will never match, as a TYPO3 branch 11.5.20 does not (and will never) exist. For a comparison with an exact version number, you always have to use typo3.version.
The correct answer is 2.
Which functions can you use in a TypoScript condition to access the host name requested by the client?
Answers
-
getFrontend().getHostname() -
getRequest().getParams().getHostname() -
request.getRemoteAddr() -
request.getNormalizedParams().getHttpHost() -
getenv('HTTP_HOST') -
getenv('REMOTE_ADDR')
Number of correct answers: 2
Explanation
Candidates who have experience of using TypoScript conditions and especially the Symfony ExpressionLanguage can usually answer this question quickly and correctly.
If you struggle to identify the two correct answers, you should read the chapter “Conditions” of the TypoScript Template Reference thoroughly again (with a focus on the request function).
Neither a function getFrontend() nor getRequest() exist. You don’t even need to worry about the parts right of the invalid function names to determine that the first two answers can’t be right.
The request function suggested in the answers 3 and 4 is more promising. However, the remote address always refers to an IP address whereas the question explicitly asks for the host name (also known as the HTTP host). The function name getRemoteAddr() makes no sense, nor is it a valid function below the request function. Having said that, getRemoteAddr() and getHttpHost() are both valid methods of the NormalizedParams object. This makes answer 4 correct.
The last two answers suggest to access the environment variables through the getenv() functions. I already pointed out above that the variable REMOTE_ADDR does not make sense as this is the IP address of the client. The variable HTTP_HOST, however, contains the host name requested by the client.
The correct answers are 4 and 5.
Which TypoScript configuration does TYPO3 provide by default to render content?
Answers
-
The top-level object
page -
The top-level object
core -
The top-level object
styles -
The top-level object
content -
The top-level object
tt_content
Number of correct answers: 1
Explanation
The frontend component of TYPO3 provides a basic TypoScript configuration by default. The TypoScript code is stored in the file typo3/sysext/frontend/ext_localconf.php and loaded by the function call ExtensionManagementUtility::addTypoScriptSetup(). It is based on the static template “content (default)” that has a long history in TYPO3.
In a fresh and clean TYPO3 instance, create an initial standard page in the backend, add a template for a new site to this page, and review the TypoScript settings as follows. Open Web → Template and select the “TypoScript ObjectBrowser” from the dropdown box at the top. You can browse the constants and setup of the page by switching between them using the “Browse”-dropdown box). When you choose “Setup”, you will find top-level objects such as config, styles, tt_content, module, plugin, etc. (the exact list depends on your individual site configuration).
Provided that you have not yet installed any extensions (e.g. a site package) and you have not defined any custom TypoScript, a TLO named page only exists if the setup contains the basic TypoScript to output “HELLO WORLD!”. Nevertheless, this TLO does not render content, which makes the first answer wrong.
The TLOs named core and content don’t exist. The answers 2 and 4 are therefore also wrong. The top-level object styles is a reserved name and used for code-libraries. Rendering content is not part of this TLO’s tasks either, so answer 3 also wrong.
Answer 5 shows the correct solution. If you open (unfold) the object tt_content you find the note # Content element rendering if comments are enabled (toggle switch above the box). This top-level object is provided by the TYPO3 Core by default.
The correct answer is 5.
Replace ??? in the TypoScript code below to output “HELLO FOO!” in the frontend.
Answers
-
tt_content.search.WORLD.replace = FOO -
tt_content.parseFunc.replace.WORLD = FOO -
page.stdWrap.parseFunc.short.WORLD = FOO -
page.parseFunc.replace = WORLD:FOO -
page.HTMLparser.replace.WORLD = FOO
Number of correct answers: 1
Explanation
When TYPO3 displays content (e.g. text elements) in the frontend, the content is first retrieved from the database, then processed, and finally displayed on the website. The technical term for this is transformation. To replace a specific string before displaying the content in the frontend, you have to hook into the transformation process.
The first answer is made up and the TypoScript function does not exist.
The stdWrap function HTMLparser determines how HTML contents are processed (especially in regard to tags and attributes), and it is usually used as a subsidiary function of parseFunc. However, the HTMLparser can not replace strings as such – and definitely not with the syntax suggested in answer 5 – which means this answer is also wrong.
The function parseFunc is in fact responsible for the transformation. This function is primarily designed to parse content and change it as required. But what is the correct syntax: answer 2, 3, or 4? The TypoScript code suggested in answer 2 looks promising as standard content is stored in the tt_content database table. However, this is not mandatory. You can also render content that does not necessarily originate from the database (as the given TypoScript code demonstrates).
While the keyword replace, stated in several of the answers (including answer 4), sounds plausible and may tempt you to consider this answer correct, parseFunc is a stdWrap function and this is only given in answer 3.
The correct answer is 3.
Which TypoScript code element can you use to output email addresses in the frontend in a way that makes it difficult for bots to extract them for spam purposes?
Answers
-
config.spam.email = 0 -
config.spamProtectEmailAddresses = 1 -
config.email.usePicture = 1 -
config.protectEmailAdresses = 0
Number of correct answers: 1
Explanation
If you output email addresses on a website in plain text, you risk that automated programs (so called spam bots) read them out and misuse the address for spam purposes. It is therefore recommended to obfuscate email addresses and not to display them in plain text. TYPO3 provides an effective function for this.
The top-level object responsible for this function is obviously config and the related property reads spamProtectEmailAddresses as stated in answer 2. You can use this function to encrypt the email address noreply@example.com as shown in the following TypoScript code snippet:
The last line turns the email link into the following HTML code:
<p>
  <a href="#" data-mailto-token="nbjmup+opsfqmzAfybnqmf/dpn" data-mailto-vector="1">
    noreply(at)example.com
  </a>
</p>
If you set a numeric value between -10 and 10, a TYPO3-internal JavaScript function converts the “mailto-token” value back into a valid email address on click. The keyword ascii converts every character to its unicode HTML notation. This means that no JavaScript is required.
Other notable TypoScript configuration options you should know in this context are the spamProtectEmailAddresses_atSubst and the spamProtectEmailAddresses_lastDotSubst properties that influence the link text. The first property lets you replace the @-character with a different sequence of characters (the default is (at)). You can use the second property to substitute the last dot in the email address.
The correct answer is 2.
Which standard TypoScript objects can you use to create, manipulate, and/or output images in TYPO3?
Answers
-
The cObject
IMAGE -
The cObject
IMAGEMAGICK -
The object type
PNGBUILDER -
The object type
GIFBUILDER -
The top-level objects
GIF,PNG, andJPG -
The top-level object
IMGMAP
Number of correct answers: 2
Explanation
TYPO3 offers two standard objects (respectively object types) by default that you can use to create and/or manipulate images in TypoScript. Both methods are powerful if you know how to use them. One of them is rather old and not used very often anymore today due to modern web technologies. The other method mainly returns a HTML <img>-tag with the image file defined in the property file. This lets you process/manipulate images dependening on the sub-properties.
Although the well-known free software ImageMagick is often used with TYPO3, a cObject under the name IMAGEMAGICK does not exist. Keep in mind that you can also use alternative image libraries such as GraphicsMagick. Answer 2 is therefore wrong. So is answer 5 as the three top-level objects don’t exist either.
I am sure that you have already heard of, or worked with, the Gifbuilder in TYPO3. The Gifbuilder was and still is very popular. Even though modern web technologies have reduced its application in the last few years, there are still cases in which the Gifbuilder is an indispensable tool. The GIFBUILDER object type can be used to create image files. Although the name suggests otherwise, not only the GIF format is supported, but also PNG and JPG. This makes answer 4 correct.
An object type named PNGBUILDER is, of course, nonsense. Answer 3 is a distractor and wrong.
What about the top-level object IMGMAP? An object IMGMAP indeed exists. It is used by the Gifbuilder object TEXT to create an image map. The idea behind image maps is that you offer your users links to different targets when they click on different areas of an image. This is in contrast of making the entire image a link to a specific target URL. However, IMGMAP is not a top-level object and can’t be used to create, manipulate, and/or output images in TYPO3. The last answer is therefore wrong.
The cObject IMAGE is the second correct answer. It is often used in combination with the file property and the imgResource data type to read and process/manipulate an existing image file.
The correct answers are 1 and 4.
Which statements about the usage of fonts are correct if you use TYPO3’s Gifbuilder?
Answers
-
You can only select one of the 20 fonts supplied along with the TYPO3 Core
-
You can use a font from any font file with the TTF format (TrueType fonts)
-
You can use a font from any font file with the OTF format (OpenType fonts)
-
You can use a font from any font file with the CTF format (ClearType fonts)
-
You can use a font from any font file with the PFM/PFB format (Type 1 fonts)
-
Due to TYPO3’s open-source license, the font you use in the Gifbuilder must be free and open-source too
Number of correct answers: 2
Explanation
You may be surprised to learn that the TYPO3 Core does indeed include some font files. The system extension backend, for example, contains the “Source Sans Pro” font and the well-known Font Awesome icon set. The Install Tool comes with Bitstream’s “Vera Sans” (a “verdana”-look-alike font). Having said that, these fonts are not meant to complete the Gifbuilder’s font library and the TYPO3 Core does not come with 20 fonts as suggested in answer 1. Also, it would be more than absurd if you could only select one font family for images created by TYPO3’s Gifbuilder.
The next four answers deal with different font formats: TrueType, OpenType, ClearType, and the Type 1 font. Let’s look at the last answer first. It is correct that TYPO3 uses the GNU General Public License. However, this does not mean that you can’t use a commercial font in your images generated by TYPO3’s Gifbuilder. You are responsible for complying with the licence of the font you use for your website. TYPO3 does not limit you in this regard.
This means that it comes down to technical limitations which font formats you can use. The TYPO3 Core can handle almost any font with the TrueType font and OpenType font formats. As all common font types and formats can be converted to either one or the other (if not both), you can say that you should be able to make any font available in TYPO3’s Gifbuilder.
The correct answers are 2 and 3.
What does the character c in the width and height specification stand for in the following TypoScript code?
Answers
-
Calculated
-
Crop
-
Constant
-
Clear
-
Continuous
Number of correct answers: 1
Explanation
You can control the dimensions of images using the TypoScript parameters width and height of the file property when you use the IMAGE cObject. However, the resulting image can become useless (distorted) if you specify both parameters at the same time. This can happen if the width-to-height ratio of the image is not taken into account.
To prevent his from happening, you can add the character m after one of the parameters, for example width = 100m. TYPO3 then considers this value as the maximum and the other value will be calculated proportionally.
Another option is to add the character c, for example width = 100c. This activates cropscaling that determines a rectangle with the proportions of the specified height and width, and then continues to increase this rectangle until it only just fits into the original image. This part is then cut out and its size reduced to the specified values.
The syntax 100c+100 of the image width is a peculiarity: you can define how much the cropping will be moved off the center to the border by stating a percentage value (-100 to +100) after the c. Bottom line: the letter c stands for crop.
The correct answer is 2.
What does [20.h] stand for in the following TypoScript code?
Answers
-
A width of 20 pixels
-
A height of 20 pixels
-
The value of the constant called
h -
The height of the text field, which is defined at the index
20 -
An offset of 20 pixels in height
-
A font height of 20 pixels
Number of correct answers: 1
Explanation
Unless you work with TYPO3’s Gifbuilder on a regular basis, the TypoScript code may scare you at first glance. Don’t let this put you off! Most of the lines look complicated but are not relevant to answer the question.
The above script creates a multi-line image where the page title is used as the text. If the title contains the | pipe symbol, the text after this separator is written into the second line. The width is specified as 400 pixels but the height of the image depends on whether there is a second line or not.
In the example above, the GIFBUILDER object’s index 10 and 20 are used to achieve this. If only one line exists, the index 20 is empty and this information can be used to determine the height of the image. This is what [20.h] stands for in this example. This value represents the height of the second line if one exists, so it can simply be added to the height of the first line (which is determined in [10.h]).
The correct answer is 4.
Which statements about TypoScript menus are correct?
Answers
-
HMENUis a content object (cObject) -
Access-restricted pages can’t be listed in a
TMENU -
CURRENTandCURIFare properties of common menu item states -
NO,ACT, andSPCare properties of common menu item states -
TYPO3 only supports hierarchical menus up to 16 levels depth
-
The MenuProcessor utilizes
HMENUto generate a menu that can be used in Fluid
Number of correct answers: 3
Explanation
As a certified TYPO3 integrator, you should be familiar with the following terms: MENU, HMENU, TMENU, data processors (in particluar the menu processor), common menu properties, and common menu item states.
Older TYPO3 versions featured a wide range of MENU object types. This includes TMENU (typical text-based menus), GMENU (typical graphic-based menus), IMGMENU (image maps), and JSMENU (menus implemented in JavaScript). The JSMENU was removed in TYPO3 v9 as the underlying JavaScript code was outdated and more modern web solutions exist today. This was followed by the removal of the graphical menus GMENU and IMGMENU in TYPO3 v10. The TMENU is the only menu object type left today. A TMENU always requires a parent hierarchical menu object. This is the HMENU content object (cObject). Although a page tree more than 16 levels deep is rather unusual, hierarchical menus are technically not limited in TYPO3. This means that answer 1 is correct and answer 5 is wrong.
All menu objects typically have some properties in common. You can, for example, choose an alternative sorting field, limit the maximum number of items in a menu, and specify a starting point so that the first x items are skipped. You can use the property showAccessRestrictedPages to instruct TYPO3 to also generate links to pages that are access-restricted. By specifying a numeric page ID as the value of this property, this page is used as the link target. This lets you link to a page that shows a login form, for example. Answer 2 is therefore also wrong. The two remaining answers both deal with common menu item states.
Apart from the normal state “NO”, TYPO3 also features IFSUB, ACT, ACTIFSUB, CUR, CURIFSUB, USR, SPC, USERDEF1, and USERDEF2. This makes answer 3 wrong (as neither CURRENT nor CURIF exist) and answer 4 correct. The property NO is the default normal state, ACT stands for menu items which are found along the root line, and SPC reflects so-called “spacer pages” (pages with the doktype “Spacer”).
The MenuProcessor is a data processor that indeed utilizes the HMENU. You will also find example questions about data processors in the chapter “Templating and Other Outputs”.
The correct answers are 1, 4, and 6.
Which state can you use to format the menu item of the current page if this page contains at least one subpage?
Answers
-
The menu item state “
NO” -
The menu item state “
CUR” -
The menu item state “
CURIFSUB” -
The menu item state “
ACT” -
The menu item state “
ACTIFSUB”
Number of correct answers: 1
Explanation
The “NO” state refers to the normal state and is therefore not suitable for this purpose at all. The “CUR” state lets you identify the current page but not if this page contains subpages. The first two answers are wrong.
The “CURIFSUB” state suggested in answer 3 solves the problem. You can use this state to format menu items of the current page if this page contains subpages.
What’s about the last two answers? Both states exist. The state “ACT” stands for menu items which are found along the root line. The state “ACTIFSUB” is similar but only becomes active on pages along the root line if these pages contain subpages. Answer 4 and answer 5 are therefore wrong.
The correct answer is 3.
Which state can you use to format all menu items including the current page and its parent pages regardless of whether they have subpages or not?
Answers
-
The menu item state “
NO” -
The menu item state “
CUR” -
The menu item state “
CURIFSUB” -
The menu item state “
ACT” -
The menu item state “
ACTIFSUB”
Number of correct answers: 1
Explanation
The “NO” state refers to the normal state and is therefore not suitable for this purpose at all. The “CUR” state lets you identify the current page regardless of whether it contains subpages or not. The “CURIFSUB” menu state becomes active on the current page if it contains subpages. However, neither “CUR” nor “CURIFSUB” meet the requirement as these two states don’t let you identify parent pages. The first three answers are wrong.
The “ACT” menu state looks more promising as it becomes active on the current page and all parent pages along the root line. In other words, you can use this state to format all menu items including the current page and its parent pages regardless of whether they have subpages or not. Answer 4 shows the correct menu item state.
The “ACTIFSUB” state suggested in answer 5 becomes active on pages along the root line if these pages have subpages. However, the question specifically excludes this option which makes the last answer wrong.
The correct answer is 4.
Which menu state can you use to format menu links to pages if they are access-restricted to user groups where the group name starts with the letters A-K?
Answers
-
The menu item state “
NO” -
The menu item state “
USERDEF1” -
The menu item state “
CUR” -
The menu item state “
CURIFSUB” -
The menu item state “
ACT” -
The menu item state “
ACTIFSUB”
Number of correct answers: 1
Explanation
The requirement stated in the question is a special case and can’t be achieved with TYPO3’s out of the box features. Neither the menu item state “NO” nor any other of the answers meet this specific requirement except for “USERDEF1”.
TYPO3’s functionality to format links in menus goes far beyond simple scenarios such as the current page, current page with subpages, or pages along the root line. You can implement your own custom logic to process the menu item array and assign it to the “USERDEF1” and “USERDEF2” states. These states are user defined states.
Read more about this feature and the property itemArrayProcFunc in the TYPO3 documentation, section “TMENU properties”.
The correct answer is 2.
Your TypoScript menu should include the current page as a menu item but should not generate a link to it. How can you achieve this?
Answers
-
By using the
NOLINKmenu item state -
By using the
doNotLinkItproperty of theTMENUITEMobject type -
By implementing a TypoScript condition
-
By activating the
NoLinkToCurrentPageoption in the Install Tool -
By modifying the TYPO3 Core file
typo3/sysext/core/pages/current/links.php
Number of correct answers: 1
Explanation
Let’s assume you have a TYPO3 website that contains several pages. The frontend features a simple menu that lets website visitors navigate through the site. All menu items are therefore links to pages. The current page is of course one of the items in the menu. However, it makes little sense to have this item as a link, as the link target is the current page. The Web Content Accessibility Guidelines (WCAG) 2.0 (published by the W3C) even recommends to avoid such as setup for accessibility reasons. With this background from the real world, the question now legitimately arises as to how you can prevent certain items from being generated as links in TypoScript menus.
A menu state named NOLINK does not exist. You can scratch the first answer from the list of possible options straight away. Modifying TYPO3 Core files is also out of the question. This makes the last answer also wrong.
The Install Tool offers a large number of options but it does not feature a setting to configure menu items in the frontend. Answer 4 can’t be correct either.
You can implement a condition in TypoScript that accesses the details of the current page. However, checking if a link target of a menu item is the current page is very complicated, if not impossible.
The simplest and best way is to use the doNotLinkIt property of the TMENUITEM object type. The following TypoScript code demonstrates how to use it:
An hierarchical menu is generated as a text-based menu. The HTML output is an unordered list (<ul>...</ul>) and each menu item is displayed as a single <li>...</li> list row. The menu item state “CUR” (current page) is enabled and all settings of the normal state (“NO”) copied. By setting the property doNotLinkIt to 1, TYPO3 outputs the link text (the page title) but does not generate a link.
The correct answer is 2.
Your TYPO3 site contains the pages “A” (page ID: 179) and “B” (page ID: 178). What is the output of the following TypoScript menu?
Answers
-
A-B -
B-A -
-A-B -
-B-A -
AB -
BA -
B-A-
Number of correct answers: 1
Explanation
The TypoScript code generates an hierarchical menu as a text-based menu. The properties “special = list” and “special.value” limit the menu to only two pages: ID 178 and ID 179. You could also say that the menu is created based on the comma-separated page IDs contained in the list.
Pay extra attention to the order. As ID 178 is the first value in the list, this page is processed first (page.10.special.value = 178,179). The page name is “B” which means that “B” appears before page “A” in any resulting sequence. This makes the answers 1, 3, and 5 wrong as they all show the “A” (the page name) as the first character.
Now, the after property is evaluated which means that one or more characters are added to the end of each page name. The optionSplit syntax (which I will explain in detail a little later) has the effect of applying this function to each element. This adds the dash to all page names.
The correct answer is 7.
Replace ??? in the TypoScript code below to make the variable “mainnavigation” available in the Fluid template to output the menu.
Answers
-
object = mainnavigation -
objName = mainnavigation -
value = mainnavigation -
as = mainnavigation
Number of correct answers: 1
Explanation
In general, data processors are a very powerful tool to generate, process, and manipulate data and content in TYPO3. Data processor for menus were introduced in TYPO3 v8 and the given TypoScript code uses one of them: MenuProcessor. The MenuProcessor utilizes the HMENU content object to generate a menu that can be assigned to a FLUIDTEMPLATE object as a variable. The question now is what the correct syntax is.
You do not need to learn all available options of all available data processors by heart but as a certified TYPO3 integrator, you should be familiar with the basics at least. The MenuProcessor supports, for example, the following options:
levelsNumber of levels of the menu.
expandAllIf set to
false, TYPO3 only renders submenus if the parent page is active.
includeSpacerIf set to
true, TYPO3 includes the doctypeSpacerin the menu.
titleFieldThe field that TYPO3 should use as the link title.
asThe variable name that TYPO3 should use in the Fluid template.
The last option is therefore the correct syntax to make the variable “mainnavigation” available in the Fluid template.
The correct answer is 4.
The following page tree and TypoScript code is given. Replace ??? in the TypoScript code below to only include the subpages in the menu but not the current page?
Answers
-
Value
2 -
Value
1 -
Value
0 -
Value
-1 -
Value
-2
Number of correct answers: 1
Explanation
The entryLevel property of the HMENU cObject determines from which page in the page tree the navigation in a menu should start. The root page has the value 0. The pages “Home”, “A”, “B”, and “C” have value 1. All pages below this level (e.g. “AA”, “AB”, etc.) have the value 2, etc.
If you use positive values, TYPO3 starts to count from the root page and counting is absolute. If you want to count relative to the current page, you have to use negative values.
Now, imagine you are on page “A” and you want to display subpages “AA” and “AB” only. To achieve this, you use the current page as the entryLevel. When calculated relatively, this page has value -1 and the parent page (“Root”) has value -2.
The correct answer is 4.
How can you prevent a page from being displayed in a menu?
Answers
-
You set the page type to “Not in menu”
-
You use the “Page enabled in menus” option in the page properties
-
You use the TypoScript property
excludeUidList -
You use the TypoScript property
hideInMenu -
You use the TypoScript property
includeNotInMenu
Number of correct answers: 2
Explanation
Sometimes you do not want to show a page in the menu. This requirement can be applicable for many reasons. The page could act as a container for other pages only, or you want to allow users to access the page through a direct link but not from the menu.
There are different methods to solve this challenge. You can open the page properties and use the Page enabled in menus toggle switch in the “Access” tab to prevent the page from being displayed in the menu. The Not in menu page type is long gone. It existed in TYPO3 prior version 4.2.
You can also use the excludeUidList option in TypoScript to enter a comma-separated list of page IDs that should not appear in the menu. However, the hideInMenu option is made up. The includeNotInMenu option achieves exactly the opposite of what is required to hide a page in the menu. This option means that pages are displayed in the menu, even if the Page enabled in menus setting is disabled in the page properties.
The correct answers are 2 and 3.
Which values does the property special of the HMENU content object support in TypoScript menus?
Answers
-
special = files -
special = list -
special = pages -
special = updated -
special = users -
special = categories -
special = versions
Number of correct answers: 3
Explanation
Navigation menus of websites typically contain links to pages. However, this is not always the case. Sometimes you need a menu of categories or available languages for example. The property special of the HMENU cObject lets you create menus that don’t reflect the page structure of your website necessarily but cover special cases.
The following overview shows which values the property special supports and for which typical use-case they stand for:
special = directoryCreates a menu of subpages of one or more pages.
special = listCreates a menu of specific pages as listed in the
special.valuesub-property (as a comma-separated list).
special = updatedCreates a menu of the most recently updated pages. You can configure which field should be used as the timestamp field by using the
special.modesub-property.
special = rootlineCreates a menu of the pages from the current page to the root page of the page tree in hierarchical order. This menu type is typically used for a breadcrumb menu.
special = browseCreates a menu that lets users browse through items such as the previous and next page, sections, etc.
special = keywordsCreates a menu of pages that contain one or more keywords. See the TYPO3 documentation for further details.
special = categoriesCreates a menu of pages that belong to one or more categories.
special = languageCreates a language selector menu. This menu type is used on multi-language websites.
special = userfunctionCreates a menu of pages that a user function (or method in a PHP class) determines.
Only three of the seven available answers are correct. The values “files”, “pages”, “users”, and “versions” are made up. This means that the answers 1, 3, 5, and 7 are wrong. The values “list”, “updated”, and “categories” are supported by the property special of the HMENU cObject as listed and explained above.
The correct answers are 2, 4, and 6.
Replace ??? in the TypoScript code below to output a breadcrumb menu that shows the page path without the root page (page ID: 1) and without the current page.
<p>|</p>
special = rootline
???
1 = TMENU
1.NO.allWrap = |*|/
}
Answers
-
special.range = -1|0 -
special.range = 0|-1 -
special.range = 1|-2 -
special.range = 1|0 -
special.range = 2|-1
Number of correct answers: 1
Explanation
Websites sometimes feature a breadcrumb navigation to let users quickly navigate through pages along the root line. These are all pages from the root page of the page tree down to the current page in an hierarchical structure. For example:
/ Root Page / Products / Computers / Storage / SSD Drives / 2 Terra Bytes
You can build this menu type by setting the property special of the HMENU cObject to “rootline” as shown in the TypoScript code. The line that is missing in the code obviously limits the range as the root page and the current page should be excluded from the menu. In this regards, you should know how the special.range property works and also (in general) what the allWrap option produces. This option uses the optionSplit functionality that I cover in subsequent question in more detail. Let’s have a closer look at the special.range property.
The special.range property accepts exactly two parameters separated by the pipe symbol |. The first parameter specifies the start level. The second parameter specifies the end level. These values are practically the offsets.
The value 0 as the start level would include the root page (“Root Page” in the breadcrumb example above). The remove the root page from the path, you have to shift one step forward, so the start level must be 1. The value 2 would, by the way, result in a menu that starts two levels down. This would be the page “Computers” in the example above).
Now, let’s focus on the second parameter which controls the end level. The requirement is to remove the current page. The value -1 would include the page, so you have to decrease the number in order to shift one step up the root line. Therefore, the second parameter becomes -2.
Answer 3 shows the right solution. The configuration special.range = 1|-2 outputs the path without the root page and without the current page:
/ Products / Computers / Storage / SSD Drives
The special.range property works the same way as the entryLevel property of an HMENU.
The correct answer is 3.
What is the output of the TypoScript code below if your website contains five pages “A”, “B”, “C”, “D”, and “E”?
Answers
-
XAX XBX XCX YDY ZEZ -
XAX YBY YCY YDY ZEZ -
XA XB XC YD ZE -
XA YB ZC ZD ZE -
XA YB YC YD ZE
Number of correct answers: 1
Explanation
The TypoScript code uses linkWrap to generate the links to pages in a menu. This data type lets you use an optionSplit construct to specify multiple wraps rather than just one.
An optionSplit has up to three elements (the first, the middle, and the last). These elements are separated by |*|. The elements are also referred to as parts. The parts are processed as follows. First, TYPO3 determines the last element (and positions this element at the end). This is followed by the first element (and positioned at the start). TYPO3 then repeats the middle part until are elements have been processed.
This means that, for a website with five pages “A”, “B”, “C”, “D”, and “E”, the page “E” is placed at the end of the result. As the |*|-symbol is a separator, not a placeholder, TYPO3 adds the letter “Z” in front of the page name: ZE. Now, the first element is placed at the start. This is the page “A”. Same as before, the letter “X” appears in front of the page name: XA. Then the pages in the middle are repeated. These are the pages “B”, “C”, and “D”, with the letter “Y” prepended: YB YC YD. The final output is: XA YB YC YD ZE.
The last line of the TypoScript code makes sure that every link has a non-breaking space at the end. The HTML output at the frontend reads, for example:
<p>
X<a href="/a">A</a>
Y<a href="/b">B</a>
Y<a href="/c">C</a>
Y<a href="/d">D</a>
Z<a href="/e">E</a>
</p>
The correct answer is 5.
What is the output of the TypoScript code below if your website contains only one page “A”?
Answers
-
1A -
2A -
3A -
1A 2A 3A -
3A 1A 2A
Number of correct answers: 1
Explanation
The TypoScript code is almost identical to that of the previous question. The only difference is that the line with the linkWrap now uses the numbers 1, 2, and 3 instead of the letters X, Y, and Z. The question also states that your website contains only one page. Having said that, the explanation of how the optionSplit is put together is the same.
TYPO3 first determines the last element, then the first, and then the middle part. As we only have one page, this page is automatically the last element. This results in 3A. At this point, TYPO3 stops the process as there are no further pages available.
If there were two pages “A” and “B”, the result would be: 1A 3B. Three pages “A”, “B”, and “C” would result in the output: 1A 2B 3C.
The correct answer is 3.
What is the output of the TypoScript code below if your website contains five pages “A”, “B”, “C”, “D”, and “E”?
Answers
-
1A 2B 3C 2D 4E -
4A 2B 2C 3D 1E -
1A 2B 2C 3D 4E -
1A 2B 3C 3D 4E
Number of correct answers: 1
Explanation
The double pipe symbols || in optionSplit introduces subparts. You can use subparts in each of the three elements (also known as main parts). The TypoScript code of this question shows three parts:
- Part 1: “
1” - Part 2: “
2 || 3” - Part 3: “
4”
Part 2 (the middle part) has two subparts, 2 and 3, separated by the double pipe symbol. The special characteristic of subparts is that TYPO3 goes through the list from left to right, and if more pages have to be processed as subparts are available, TYPO3 starts over at the first subpage at the left again.
What does this mean from a practical perspective if your website has five pages in total? TYPO3 first determines the three main parts as listed above. Page “E” (as the last part) appears at the end of the result and page “A” (as the first part) at the start. The middle part consists of the remaining three pages “B”, “C”, and “D”. Therefore, the page “B” comes next (prepended with the number 2), then “C” (prepended with the number 3), and then “D” (prepended with the number 2 again as TYPO3 starts over).
The first answer shows the correct output: 1A 2B 3C 2D 4E.
As an exercise, you could ask yourself what the output would be if you have seven instead of five pages: “A” to “G”. Then, implement the TypoScript code in your test TYPO3 instance, add these seven pages, and check if you get the same result. After that, update the TypoScript code and use “linkWrap = 1 |*| 2 || 3 || 4 |*| 5”. What is the output now?
The correct answer is 1.
What is the output of the TypoScript code below if your website contains five pages “A”, “B”, “C”, “D”, and “E”?
Answers
-
1A 2B 1C 2D 1E -
1A 1B 1C 1D 2E -
1A 2B 2C 2D 2E -
1A 2B 1C 2D 2E
Number of correct answers: 1
Explanation
Note that the value of the linkWrap in the TypoScript code of this question does not have a space between the two separators |*|. If there were, the output would be different. The middle part (the pages “B”, “C”, and “D”) would not have a number prepended but the first and the last parts. The result would be 1A B C D 2E. Having said that, without a space between the separators, the outcome of the TypoScript code is different as the processing order changes.
As always, TYPO3 first determines the three parts. Page “E” (as the last part) appears at the end of the result and page “A” (as the first part) at the start. So we can expect an output of 1A...2E. The middle part is yet to be determined.
However, as the middle part has no rendering instructions (there is no content between the two separators |*|), TYPO3 repeats the first part for all remaining pages. The output is: 1A 1B 1C 1D 2E.
The correct answer is 2.
What is the output of the TypoScript code below if your website contains five pages “A”, “B”, “C”, “D”, and “E”?
Answers
-
XA YB XC XD ZE -
XA YB ZC XD YE -
XA YB YC YD ZE -
XA YB ZC ZD ZE -
YA YB YC YD ZE
Number of correct answers: 1
Explanation
The TypoScript code of this question demonstrates another speciality of the optionSplit function. The value of the linkWrap property shows two separators |*| without a space between them. In addition, the first part features the subparts X and Y.
TYPO3 first determines the last and then the first part. A middle part does not exist. In this case, the last subpart of the first part is repeated for all remaining pages.
Let’s go through the process step-by-step for a website that contains five pages, “A” to “E”. The last part is the page “E”. This page receives the letter Z prepended. The first part is the page “A” with the letter X (first subpart) prepended. The answers 2 and 5 are, by the way, out of the question straight away. Now, all remaining pages “B”, “C”, and “D” build the second subpart. All of these pages receive the letter Y prepended. The output is: XA YB YC YD ZE.
The correct answer is 3.
What is the output of the TypoScript code below if your website contains five pages “A”, “B”, “C”, “D”, and “E”?
Answers
-
1A 2B 1C 3D 4E -
1A 2B 3C 3D 4E -
1A 2B 1C 2D 3E -
1A 2B 2C 3D 4E
Number of correct answers: 1
Explanation
The TypoScript code of this question shows the following optionSplit construct. The linkWrap property contains a value that features three main parts. These parts are separated by the |*|-symbol. The first main part has two subparts. This is defined by the double pipe symbol ||.
TYPO3 generates the menu for a website that contains five pages as follows. The last main part is the page “E”. The page name receives the number 4 prepended. Then, the first main part is determined and this part contains subparts (construct: 1 || 2). As there are only two subparts, the first two pages build the first main part. The output at this point is something like 1A 2B...4E. Last but not least, the remaining pages build the middle main part, each page name with the number 3 prepended. The final output is: 1A 2B 3C 3D 4E.
As an exercise, you could find out what the output looks like if the first main part would consist of more than two subparts. Let’s say “1 || 2 || 3”, for example.
The correct answer is 2.
What is the output of the TypoScript code below if your website contains five pages “A”, “B”, “C”, “D”, and “E”?
Answers
-
XA YB ZC XD YE -
XA YB ZC ZD ZE -
XA XB XC YD ZE -
XA YB XC YD ZE
Number of correct answers: 1
Explanation
Another edge case when it comes to the advanced usage of the optionSplit function is shown in the TypoScript code of this question. The linkWrap property contains a construct that neither features a first nor a middle main part. On top of that, the last main part has three subparts.
TYPO3 first determines the last main part. This is the part with the three subparts: “X || Y || Z”. Therefore, the last three pages build the end of the output: XC YD ZE. As the linkWrap construct does not contain a first main part and no middle main part either, TYPO3 takes the first subpart of the last main part (X) and repeats this for as long as pages remain. Three of the five pages already build the output, so two pages remain: page “A” and “B”. This results in XA XB and the final output of: XA XB XC YD ZE.
The correct answer is 3.
What are important actions and elements to improve the performance of a TYPO3 website?
Answers
-
Proper configuration and usage of caches
-
Limit the number of backend users
-
Run the Scheduler task “Clear temporary files” regularily
-
Avoid using the Composer setup when installing TYPO3
-
Choose an appropriate configuration preset, e.g. “Live” once the site was launched
Number of correct answers: 2
Explanation
The first correct answer to this question is easy to guess. There is no doubt that the usage of caches improves the performance of a TYPO3 website if configured correctly. Answer 1 is without doubt correct.
Limiting the number of backend users has no impact on the performance. It does not matter if your TYPO3 installation contains just one user or a few thousands. If a few thousands users would log-in at the same time, this would have an impact on the system though. However, none of the answers deals with this scenario. The second answer is wrong.
Have you seen the task “Clear temporary files” in the TYPO3 Scheduler? That’s right: such a task does not exist. This makes answer 3 also wrong. Having said that, you should review the available Scheduler tasks. There is one that is related to TYPO3’s caching framework. This task will not only be the focus of another question in this chapter but it might be also a question in your exam!
Given that the officially recommended installation method of TYPO3 is using Composer (also see the chapter “Installation”), answer 4 is of course nonsense. This means that the last answer must be correct.
Configuration presets optimize several settings to best fit your environment. The “Debug” preset, for example, enables most debug and error messages. The “Live” preset suppresses these messages and configures your TYPO3 installation for maximum performance.
The correct answers are 1 and 5.
What is cached by TYPO3 if not explicitly disabled?
Answers
-
Compressed versions of
.docxand.xlsxfiles -
The HTML output of pages that are generated for the website frontend
-
The thumbnails of images that are shown in the backend module “File → Fileslist”
-
External media elements that are used in the content element “Text & Media” if referenced as URLs
-
Certain PHP code of TYPO3 extensions
Number of correct answers: 3
Explanation
TYPO3 tries to cache as much content as possible, mainly for performance reasons, and lets administrators and integrators to configure the caching behavior of the system in great granularity. However, not everything should always be cached necessarily.
For example, files such as .docx and .xlsx documents uploaded by backend users through the module Files → Filelist are not cached in TYPO3. This makes the first answer wrong. Thumbnails of images, however, are automatically generated (if enabled) and stored in the fileadmin/_processed_/ directory. Answer 3 is therefore correct.
Generating the output for the frontend (typically HTML documents) can be a time consuming task for the system. After all, TYPO3 has to retrieve the various contents and data from the database, take into account start and stop dates/times, merge various templates and much more. Caching the result makes perfect sense and improves the performance of the website significantly. Answer 2 suggests exactly this approach which is correct.
TYPO3 lets backend users embed media elements such as videos by using the content element “Text & Media”. These elements can be uploaded to the server beforehand in the module Files → Filelist. Alternatively, external media can be referenced by entering their URL. TYPO3 supports YouTube and Vimeo by default. Answer 4 claims that these media elements are cached. It certainly doesn’t require much explanation that this can’t be right. Especially with videos, which often have a large file size, this would not make any sense.
Every TYPO3 developer has almost certainly stumbled across the caching in TYPO3. With an activated cache, certain code changes are not immediately visible. This is partially due to the fact that TYPO3 (and the Extbase framework) inspects the PHP code of extensions and adapts the logic. The resulting new program code is not only optimized but also stored temporarily until the caches are cleared. As a TYPO3 integrator, you don’t need to know all the internals of this feature but you should be aware of the fact that certain PHP code of extensions are cached. The last answer is also correct.
The correct answers are 2, 3, and 5.
At which possible locations does TYPO3 cache pages?
Answers
-
In the
typo3temp/directory, if thepageCacheToExternalFilesoption is set -
In the
typo3conf/directory -
In the
cf_cache_pagestables in the database -
In the
cache_pagestables in the database -
At the location configured by the following key (to override the default):
['SYS']['caching']['cacheConfigurations']['pages']
Number of correct answers: 2
Explanation
TYPO3 supports in wide range of caching systems and locations. You can, for example, configure the system to cache some objects in the database and others in the file system.
Let’s dive a little into the history of TYPO3. The option$GLOBALS['TYPO3_CONF_VARS']['FE']['pageCacheToExternalFiles'] was available in TYPO3 version 4.2. With this option enabled, it was possible to move the cache for rendered pages to the file system or, to be more precise, into the directory typo3temp/cache_pages/ab/. This configuration is long gone though. It was marked as deprecated in TYPO3 version 4.6 and deleted in version 6.0.
Also a very long time ago, the typo3conf/ directory contained cache files of ext_localconf.php and ext_tables.php files from extensions. The names of these files typically read temp_CACHED_*_ext_tables.php. Luckily, this is history now. In modern TYPO3 versions, the caching concept has been improved fundamentally.
Today, TYPO3 uses multiple caching strategies to ensure best possible system performance.
If you choose to configure TYPO3 to use the database as the cache storage for pages, the content is stored in the table cache_pages since TYPO3 v10. This is, by the way, the default configuration and suggested in answer 4 which makes this answer correct. TYPO3 v9 and older versions used the table name cf_cache_pages1 as suggested in answer 3.
Given that TYPO3 lets you configure other caches, the exact location depends on the configuration. This makes the last answer also correct.
The correct answers are 4 and 5.
What are reasonable actions to improve the performance of a TYPO3 installation?
Answers
-
Enable, configure, and optimize page caches
-
Limit the number of pages in the page tree to a maximum of 1024
-
Limit the number of backend users to a maximum of 64
-
Limit the number of third-party extensions to a maximum of 8
-
Remove (uninstall) the system extension “Lowlevel” on a production system
-
Enable and configure gzip compression of CSS and JS files
Number of correct answers: 2
Explanation
Caching is without doubt a key feature to optimize the performance of a TYPO3 website – but this is not the only aspect. The first answer is correct. There is no question about it. Does limiting the pages, number of backend users, or extensions have an impact on the system performance? The short answer is no. The answers 2, 3, and 4 are wrong.
The system extension “Lowlevel2” provides a technical analysis of the system. Once installed, the backend contains the two modules System → DB Check and System → Configuration. The functions within these modules are not always required in a production system. However, it does not make a difference from a performance perspective if the system extension is installed or not. This makes answer 5 wrong.
By using gzip compression for CSS and JS files, you can significantly reduce the file sizes of these files. This reduces loading times of the website and improves the overall performance. You find further questions and explanations about compression options later in this chapter.
The correct answers are 1 and 6.
Where do you find important page cache configurations in your TYPO3 installation?
Answers
-
In the “Admin Tools” under “Maintenance → Persistent Database Tables”
-
In the “Admin Tools” under “Settings → Configuration Presets → Cache Settings”
-
In the “Workspaces” backend module
-
In the page properties of a specific page
-
In the “Site Management → Sites” backend module
Number of correct answers: 2
Explanation
Page caches reduce the load time of the frontent output significantly and improve the overall site performance. They should never be switched off unless there is a good reason such as during the development of a website for example. It does not make sense to have page caches disabled in a production environment at all.
Sometimes you have to check if the page caching is enabled and how the current configuration looks like. Two of the five answers are functions or modules in TYPO3 that contain page cache configurations. The other three answers are wrong.
The first two answers suggest submodules of the Admin Tools module. Although you find the function “Flush TYPO3 and PHP Cache” under Admin Tools → Maintenance (which lets you clear all registered caches including the opcode and the dependency injection cache), the “Persistent Database Tables” function is not related to caching. The first answer is wrong. The second answer makes more sense. The “Configuration Presets” under Admin Tools → Settings contains a section “Cache settings” which lets you configure the cache backend that should be used for, for example, the page cache (SYS/caching/cacheConfigurations/pages/backend). This makes answer 2 correct.
The “Workspaces” module has nothing to do with caches at all. Keep in mind that workspaces are an optional feature in TYPO3. You don’t have to install the workspaces system extension necessarily. Does this mean that pages can’t be cached if your TYPO3 installation does not have workspaces? That’s nonsense and you can scratch answer 3 as a possibility.
The next answer, however, is correct. If you open the page properties of a page in the TYPO3 backend, and switch to the tab Behaviour, you find two settings that are cache-related: cache lifetime and cache tags.
A search in the backend module “Site Management → Sites” for any configuration that has something to do with page caching is guaranteed to be unsuccessful. This means that answer 5 is also wrong.
The correct answers are 2 and 4.
What is the purpose of the following TypoScript code in the User TSconfig?
Answers
-
All caches are cleared every time a page is called
-
It enables an administrator user to delete all page caches
-
It enables a non-admin user to clear frontend and page-related caches
-
This configuration has no effect
Number of correct answers: 1
Explanation
Read the question again! It contains an important keyword that can help you eliminating one of the answers straight away.
When a setting is stored in the User TSconfig, it applies to a specific user or a user group. It can’t be a global configuration. Answer 1, however, refers to something that is not user-related. In addition, if page caches were cleared every time a page is called, the concept of caching would become pointless. The first answer is clearly wrong.
A backend user with administrator privileges can always clear caches. This does not require any specific configuration and makes answer 2 also wrong.
The configuration has a purpose though. “Normal” backend users can’t clear caches by default. In large TYPO3 installations, for example, where the rendering of many pages takes some time and compute power due to their complexity, clearing all caches can impact the operation of the site. You usually don’t want to allow editors to execute this function. Under certain circumstances, however, it may make sense to explicitly enable this setting for specific users. That’s why you can add this to the User TSconfig.
If you set options.clearCache.pages = 1, the appropriate user(s) will be able to clear frontend and page-related caches. The setting options.clearCache.all = 1 enabled non-admin users to clear frontend caches, page-related caches, and some backend-related caches.
The correct answer is 3.
Which of the following statements in regards to page caches in TYPO3 are correct?
Answers
-
Pages larger than 64k bytes can’t be cached due to database restrictions
-
The default page cache expiry time is 60 minutes starting at midnight
-
The default page cache expiry time is 24 hours starting at caching time
-
Various storage types can be configured for the page cache (e.g. database or a Redis server)
-
Integrators can only disable all caches but not specific caches
-
The TYPO3 CLI features a command to clear frontend caches
Number of correct answers: 3
Explanation
The first answer has a technical background, whereas the answers 2 and 3 relate to cache expiry times. The answers 4 and 5 require some basic knowledge of cache configuration options, and the last answer covers the command line interface (CLI). This question clearly tests your general knowledge.
Many HTML documents produced by websites today exceed 64k bytes in size. The first answer is wrong as TYPO3 does not have any database restrictions for page caches. The answer does not make sense anyway, as page caches can be stored in other locations/systems. Answer 4, however, is correct. Go to Admin Tools → Settings → Configuration Presets → Cache settings. The default cache backend for the page cache is TYPO3\CMS\Core\Cache\Backend\Typo3DatabaseBackend (the database) but you can also configure other options. In theory you can also select the “Null Backend”: TYPO3\CMS\Core\Cache\Backend\NullBackend. This is a dummy backend which doesn’t store any data and basically disables a cache. As you can configure this cache type for a specific cache (for example the page cache), answer 5 is wrong.
Now let’s look at the two answers that deal with the default page cache expiry time. The configuration for this is the TypoScript setting config.cache_period which reflects the number of seconds a page remains in the page cache. The default value is 86400 which is the equivalent of 24 hours. This makes answer 3 correct.
The following CLI command clears the frontend caches, which means that the last answer is also correct:
The correct answers are 3, 4, and 6.
You want to cache the contents of a specific page for exactly seven days. How can you achieve this?
Answers
-
TYPO3 only supports cache expiration globally but not for specific pages
-
A third-party extension is required and available in the TER to meet this requirement
-
The cache lifetime can be configured in the page properties
-
By adding the following line to the Page TSconfig (the time is stated in minutes):
page.cacheExpires = 7*24*60 -
By adding the following line to the TypoScript setup (the time is stated in seconds):
config.cache_period = 604800 -
By setting up the Scheduler task “Caching framework garbage collection” with a seven days frequency
Number of correct answers: 2
Explanation
Imagine you want to show information on a specific page that is only valid for a certain period of time. After the time has passed the page cache should be recreated in order to show up-to-date information on the page in case they have changed.
You do not need a reminder function in your calendar that reminds you to manually clear the page cache every seven days. TYPO3 features two simple methods to configure the cache period of pages. The configuration can be applied on a page-by-page basis and you don’t need a third-party extension to achieve this. The feature is available out of the box. The first two answers are therefore wrong.
Open the page properties of the page you want to configure and switch to the tab Behaviour. The section “Caching” features a dropdown box that lets you select the cache lifetime for this page. Selected the new setting, for example “7 days”, and save your changes.
The other option to configure the cache period is by using a TypoScript configuration. Although answer 4 sounds plausible at first glance, this answer is wrong for several reasons. Time-based configurations in TYPO3 are usually done in seconds. Secondly, the cache configuration should not go into Page TSconfig. Finally, the page top-level object does not have a property named cacheExpires.
Answer 5, however, is correct. The TypoScript configuration config.cache_period can be used to set the number of seconds for how long a page may remain in the cache. Note that the aforementioned page property configuration overrides the TypoScript value (if greater than zero). Another fact is that TypoScript configurations are inherited by subpages. This means that you can apply a cache period configuration to a page (or the root page of a website) and all subpages automatically use this setting.
Let’s turn to the last answer now. The Scheduler task Caching framework garbage collection indeed exists. However, the purpose is not to clear a specific page cache. The task executes the garbage collection of one of multiple cache types, for example the TYPO3\CMS\Core\Cache\Backend\Typo3DatabaseBackend cache backend. This makes answer 6 also wrong.
The correct answers are 3 and 5.
You want to allow a normal backend user without administrator privileges to clear the frontend cache. How can you achieve this?
Answers
-
This is not possible as only administrators can clear the frontend cache for performance reasons
-
By adding the following line to the Page TSconfig:
config.no_cache = 0 -
By enabling the checkbox “allow frontend cache clear” in the user’s profile
-
By adding the following line to the User TSconfig of this user:
options.clearCache.all = 1 -
By assigning the user as the owner of all pages under “System → Access → Permissions”
Number of correct answers: 1
Explanation
Although this configuration might have a negative impact on the system performance (e.g. if a backend users clears the frontend caches too often or unnecessarily), you can let a normal backend user without administrator privileges to clear the frontend cache. This means that the first answer is wrong.
So is the last answer. Making the user the owner of pages under System → Access → Permissions does not enable them to clear the caches. Also, what if you want to allow multiple backend users to clear the frontend cache if the same pages? Answer 5 does not make sense and is wrong.
Let’s have a look at a user profile in the backend. Open the backend module System → Backend User, select a non-admin user, and review the settings. You won’t find a checkbox named “allow frontend cache clear”. Answer 3 is made up.
Now you are left with only two possible answers and only one of them is correct: answer 2 or answer 4.
If the property no_cache of the top-level object config sounds familiar, you’re not mistaken. Having said that, this is a TypoScript setup configuration and does not go into Page TSconfig. Also, this configuration does not make much sense in light of the question. A TypoScript configuration of this kind does not apply to a specific user or user group. Answer 2 can’t be correct.
The setting options.clearCache.all = 1 in the User TSconfig enables non-admin users to clear frontend caches, page-related caches, and some backend-related caches.
The correct answer is 4.
What is a potential negative implication of the additional argument &no_cache=1 in GET-requests?
Answers
-
All pages that are currently cached are removed from the frontend cache
-
Passing this argument in a request reveals sensitive information of frontend users
-
Requests with this argument possibly cause an increased CPU load on the server
-
Frontend users possibly loose their sessions and are logged-out of the system
Number of correct answers: 1
Explanation
Some people call the additional argument &no_cache=1 in GET-requests infamous, notorious, or even dangerous. The truth is that this argument possibly impacts the performance of your site significantly. This is not only for the originator of these requests but for the entire system and all site visitors.
Answer 2 suggests a serious security problem as a potential negative impact. That is a little exaggerated and not correct. Answer 4 is also wrong as the argument does not terminate sessions for frontend users.
The parameter no_cache indicates that the correct answer must have something to do with caches. The first answer, which relates to caches, possibly attracts some exam candidates. However, answer 1 is also wrong. If such requests would instruct TYPO3 to remove all cached pages from the frontend cache, this would be quite a disaster.
But why is this argument so infamous? If requests with this argument hit the instance, TYPO3 does not try to store or retrieve anything from the cache. The system renders the output for the requested page from scratch and sends the result directly to the client. As this process can be time consuming and resource hungry, the CPU load and/or memory consumption on the server goes up. The fact is that answer 3 is absolutely right. Requests with this argument possibly cause an increased CPU load on the server which possibly results in a DoS (denial of service) attack. That is why many consider the argument to be dangerous.
What can you do about it? Go to Admin Tools → Settings in the TYPO3 backend and search for the keyword “disableNoCacheParameter”. If this flag is set, the no_cache request parameter becomes ineffective. In general, you should avoid using the argument &no_cache=1 at all costs.
The correct answer is 3.
Some conditions must be met in order to activate gzip compression for CSS and JS files. What are these conditions?
Answers
-
The Apache web server must be used as other web servers such as nginx don’t support this feature
-
TypoScript settings must be added to the setup
-
The compression level must be configured in the global configuration
-
The
zlibPHP module must be installed -
The
gzbinary must be installed and executable on the server -
The
zipbinary must be installed and executable on the server -
Special rewrite rules in the web server configuration, e.g. the file
.htaccessin Apache
Number of correct answers: 4
Explanation
Compressing files with gzip aims to reduce their file size and, therefore, contributes to a better website performance. Gzip uses the Lempel-Ziv algorithm (a variation of the LZW3 algorithm published in 1984) and typically achieves 60% to 70% lossless data reduction for text files. The actual amount of compression obtained depends on several factors such as size and type of the input, etc.
Three steps are required to enable and configure gzip compression for CSS and JS files in TYPO3. One of them are the TypoScript configurations config.compressCss and config.compressJs respectively. The compressCss function minifies and compresses all files that are referenced by the page.includeCSS configuration. In this instance, minifies means the removal of excess spaces. The compressJs function compresses files referenced by page.includeJS. Both options require the following global configuration:
$GLOBALS['TYPO3_CONF_VARS']['FE']['compressionLevel']$GLOBALS['TYPO3_CONF_VARS']['BE']['compressionLevel']
The first configuration controls the compression in the frontend (['FE']) and the second configuration the compression in the backend (['BE']). The value is a numeric value between 1 and 9 (1 is the least compression and 9 is the greatest compression) or the keyword true which uses the default value as configured in PHP (typically 5).
The next condition that must be met in order to activate gzip compression is the “zlib” PHP module. Without this module, the system generates a PHP error. The binaries suggested in the answer 5 and 6 are not required, so these two answers are wrong.
The fourth condition that is required is a properly configured web server. Apache, for example, requires the following special rewrite rules to instruct clients how to read/process the compressed CSS and JS files:
Although the lines above apply to Apache, this web server is not a mandatory requirement for the compression of CSS and JS files in TYPO3. One can also use alternatives such as Nginx.
The correct answers are 2, 3, 4, and 7.
Which of the following global configurations exist and are relevant for TYPO3’s gzip compression feature?
Answers
-
$GLOBALS['TYPO3_CONF_VARS']['FE']['compressCss'] -
$GLOBALS['TYPO3_CONF_VARS']['FE']['compressJs'] -
$GLOBALS['TYPO3_CONF_VARS']['BE']['compressionLevel'] -
$GLOBALS['TYPO3_CONF_VARS']['BE']['minifyJS'] -
$GLOBALS['TYPO3_CONF_VARS']['FE']['concatenateCss'] -
$GLOBALS['TYPO3_CONF_VARS']['FE']['jsCompressHandler']
Number of correct answers: 2
Explanation
That’s a tricky question because the answers are all similar and most of the keywords are used in other places. So they look right but possibly mislead you.
The keyword “minifyJS” in answer 4 does not exist. Neither in the global configuration, nor in TypoScript, nor anywhere else. Fun fact: if this keyword rings a bell, you have worked with TYPO3 for many, many years. The TypoScript configuration config.minifyJS existed in TYPO3 version 4.x and was removed in version 6. The keywords “compressCss” (answer 1) and “compressJs” (answer 2) should sound familiar though. They indeed exist but not in the global configuration. They are properties of the top-level object config in TypoScript. The first two answers are also wrong.
Now we are only left with three possible answers. Two of them are correct. If you still don’t know the right answers, one possible strategy is to choose the answer that sounds least likely. This usually works but in this case you could fall into a trap.
Many TCCI exam candidates have never heard of the “jsCompressHandler”. TYPO3 comes with a built-in compression handler for JavaScript files. Alternatively, you can register a custom handler that TYPO3 should use instead. This is done through the configuration $GLOBALS['TYPO3_CONF_VARS']['FE']['jsCompressHandler'] as suggested in answer 6. In fact, the keyword “concatenateCss” is also a property of the top-level object config in TypoScript. This makes answer 5 wrong.
The compressionLevel controls the compression of the output, ['BE'] for the backend and ['FE'] for the frontend. In most cases, the value 5 is the default.
The correct answers are 3 and 6.
You investigate a TYPO3 installation that takes a long time to generate a specific page. What are typical causes for this problem?
Answers
-
The encryption key exceeds the recommended length of 128 characters which causes a delay in the cryptographic functions of TYPO3
-
An extension intentionally or accidentally disables the page or other caches
-
The server has been running for a very long time and requires a restart so that PHP processes free up memory
-
The page that takes a long time to generate contains several
COA_INTelements -
The page that takes a long time to generate contains too many subpages which slows down the page generation
Number of correct answers: 2
Explanation
As a certified TYPO3 integrator, you should know the common causes for a system or page that shows degraded performance. Debugging a slow system is not an unusal task and if you know what issues you should look for, you will find the problems and will be able to fix them quickly.
The encryption key is used in several places. For example to calculate the cHash which is taken into account when data is securely stored in the database. The key is also used to generate hash-based message authentication codes (HMAC). Nevertheless, the length of the encryption key does not have a practical impact on the time that TYPO3 needs to generate pages. Also, a recommended length does not exist. The first answer is wrong.
TYPO3 extension developers sometimes disable certain caches on purpose. This is a valid approach during the development or test phase of a project to make sure that the output reflects the latest code changes. In production, this is a fatal glitch and must be avoided as the speed of the system decreases noticeably when TYPO3 needs to render some pages from scratch every time when a user accesses them. Answer 2 is the first correct answer.
A correctly and professionally configured server can run for several days, months, and years without the need to get restarted. Let’s leave security updates that require a restart aside for a moment. This makes answer 3 wrong.
The last two answers both deal with characteristics of the specific page that seems to be slow. However, subpages don’t slow down a page, no matter how many subpages exist. This means that answer 5 is also wrong.
The COA_INT elements require an explanation though. Sometimes it is important to exclude certain details from the page cache. Typical use cases are dynamic data such as a time, date, or the name of the currently logged-in user. If these elements would be stored in the cache, the page would still show them after they are not valid anymore. COA_INT objects4 come to the rescue here. These objects are explicitly excluded from the cache.
The downside is, however, that if a page contains a great number of such elements, the page generation possibly takes a long time. After all, the dynamic contents have to be generated all over again each time a user requests the page. The more COA_INT elements are assigned to a page, the slower the page generation becomes. Answer 4 states exactly this.
The correct answers are 2 and 4.
How can you measure the time that TYPO3 requires to generate a page in the frontend?
Answers
-
The backend module “Web → Info → Page Rendering” shows detailed statistics including page rendering times
-
TYPO3 outputs the page rendering time as an HTTP header if enabled by the following TypoScript configuration:
config.debug = 1 -
TYPO3 adds the page rendering time to the end of the HTML document if enabled by the following Page TSconfig configuration:
mod.debug = 1 -
The Admin Panel (if enabled) shows the rendering times of pages
-
Page rendering times are stored in the column
parse_timein the database tablepageswith every request -
TYPO3 writes the page rendering times into the deprecation log if enabled in the Admin Tool
-
TYPO3 outputs the page rendering time as an HTTP header if enabled by the following global configuration:
$GLOBALS['TYPO3_CONF_VARS']['FE']['debug']
Number of correct answers: 3
Explanation
Reviewing the performance of a TYPO3 instance often involves measuring the time it takes the system to generate a page in the frontend. This is also known as the page rendering time. TYPO3 offers several methods to gather and access this piece of information. Administrators and TYPO3 integrators have to explicitly enable this feature though.
You can eliminate a few of the given options as correct answers straight away. Logically, TYPO3 only renders pages when a request hits the system at the frontend. The Page TSconfig configuration suggested in answer 3 applies to the backend. This means that this answer can’t be correct. Answer 6 is also nonsense. The purpose of the deprecation log is to gather details about functions, classes, and components that are planned to be removed in future TYPO3 versions. You don’t find page rendering times in the deprecation log. Answer 1 suggests to access a feature in the backend that does not exist. The module Web → Info does exist but it does not offer a function “Page Rendering”. Another component that does not exist is a column named parse_time in the database table pages. This invalidates answer 5.
One valid option to enable the feature to gather and output the page rendering times is stated in answer 2. The TypoScript configuration config.debug = 1 instructs TYPO3 to generate an additional HTTP header:
Another configuration option that has the same effect is the global configuration suggested in the last answer. You can enable this through the Admin Tools → Settings → Configure Installation-Wide Options or simply by adding the following line to the file typo3conf/AdditionalConfiguration.php:
The answers 2 and 7 are correct. Let’s go back to answer 3 which we already identified as a false answer. This answer contains a statement that is important to remember: “TYPO3 adds the page rendering time to the end of the HTML document […]”. In TYPO3 installations prior version 9 this was indeed the case. With the TypoScript configuration config.debug = 1, the frontend output could look like the following snippet:
</body>
</html>
<!-- Parsetime: 128ms -->
This wasn’t a problem in normal HTML documents (as the HTML code is still valid with the comment) but could cause issues in other formats such as JSON. That’s why TYPO3 now outputs the parse time in the HTTP header rather than in the HTML body since TYPO3 version 9.
The Admin Panel (which we covered in the chapter “TYPO3 Handling” in detail) also shows the total parse time of the current page.
The correct answers are 2, 4, and 7.
Which of the following components are part of TYPO3’s system architecture and belong to the application layer (business logic?)
Answers
-
The container-based local and live development tools “DDEV”
-
System extensions
-
The TYPO3 Core framework
-
The database engine
-
System resources such as CPU and RAM
-
Remote file systems, e.g. NFS (network file system)
-
Third-party extensions and Composer packages
Number of correct answers: 3
Explanation
TYPO3 is a complex and well-architectured software. The entire system can be seen as a multi-layered application. From the top to bottom, the following four layers build the system:
- User Interface
Both the frontend and backend are web-based interfaces for users to interact with the system. The command line interface (CLI) is also a part of this layer.
- Application Layer
The business logic is located in the application layer. In TYPO3, everything is an extension including the TYPO3 Core. Several system extensions provide the basic functionality of the CMS. The basic functionality can be extended by third-party extensions and Composer packages. The TYPO3 Core and the extensions interact with each other through defined API and build as a single, unified system.
- Platform
TYPO3 depends on several components located in the layer below the application layer: the platform. These components are also software. PHP as the programming language (you can’t run TYPO3 without PHP installed on the server), a webserver such as Apache or Nginx, and a database server or engine such as MySQL, PostgreSQL, or SQLite. You can also run TYPO3 on virtual machines or Containers such as Docker.
- Infrastructure
The physical hardware1 represents the infrastructure and builds layer at the bottom. The infrastructure consists of the file system, network components, and resources such as CPU and RAM.
With these four layers in mind, you should be able to answer the question by allocating the individual parts to the appropriate layers. Container-based tools such as “DDEV” (which is often used for local TYPO3 developments) is part of the platform layer. The same applies to databases (servers and engines in general). System and third-party extensions belong to the application layer. Remote file systems, the CPU, and memory are components of the infrastructure. The TYPO3 core framework is also part of the application layer.
The correct answers are 2, 3, and 7.
TYPO3 features a database abstraction layer (DBAL). What does this mean?
Answers
-
Due to the DBAL used by TYPO3, the system is limited to a maximum of 100,000 records per database table
-
The DBAL acts as an interface between the TYPO3 Core and the database server or engine
-
TYPO3 uses the PHP-based “Doctrine” DBAL to abstract the access to the concrete database
-
The DBAL used by TYPO3 requires a Java SDK installed on the server
-
The abstraction layer implements the permission concept for backend users in TYPO3
Number of correct answers: 2
Explanation
Let’s first clarify what a database abstraction layer (DBAL) is. In order to read data from, and write data to a database, a system communicates through an interface with the database engine. Every database engine typically has its own programming interface. If an application such as TYPO3 wants to communicate with a database engine, it is up to the developers to implement the code that is supported by the interface/engine. If an application needs to support multiple database engines and their unique characteristics, the developers of that application have to develop and maintain multiple sets of the component that communicate with the database engine.
A DBAL offers a clever way to unify this by introducing another layer between the application and the database interface. The library exposes a consistent API for the application and hides everything that is database-specific. As a result of this, application developers can write their database queries in one simple, abstract format, and the DBAL translates these queries for the database engine that is currently configured. The developers usually don’t need to worry about which engine is used at the end of the day. This is stated in answer 2 which makes this answer correct.
Although there are some limitations due to the abstraction layer, a limit of 100,000 records per database table is none of them. As the DBAL has to ensure that all commands can be translated in a form that all supported database engines understand, some very database-specific queries can’t be implemented. The first answer is therefore wrong.
Some example questions in the chapter “Installation” deal with TYPO3’s system requirements and which database severs/engines are supported. The most obvious answer to this would be: All database vendors that are supported by the DBAL. However, this is not exactly right. TYPO3 has used the “Doctrine” DBAL since TYPO3 v8. Doctrine officially supports MySQL, Oracle, Microsoft SQL Server, PostgreSQL, and SQLite. TYPO3 v11 LTS officially supports MySQL, MariaDB, PostgreSQL, Microsoft SQL, and SQLite. The connection string for Microsoft SQL database servers must be manually configured though. TYPO3 has supported “SQLite” since version 9.4.
Doctrine is a PHP-based DBAL that does not require a Java SDK. This makes answer 3 wrong. So is the last answer. The DBAL has nothing to do with the user permissions concept in the backend of TYPO3.
The correct answers are 2 and 3.
Which database tables store which type of records in TYPO3 by default?
Answers
-
Backend users are stored in the table
be_users -
Backend users are stored in the table
admins -
Pages are stored in the table
page -
Pages are stored in the table
tt_pages -
Page content records are stored in the table
content -
Page content records are stored in the table
tt_content -
Fronted users are stored in the table
fe_users -
Fronted users are stored in the table
users
Number of correct answers: 3
Explanation
TYPO3 uses several database tables. Around 60 tables are created during a standard installation and some other tables are added later depending on your exact setup and on the extensions you use. As a certified TYPO3 integrator, you do not need to know every table and every field by heart. However, you should have at least some knowledge of where the most important information of a TYPO3 system is stored. This includes backend and frontend users and groups, pages, page content records, scheduler tasks, backend dashboard, and system tables in general, for example system log entries.
Backend user records are stored in the database table be_users. A table named admins sounds plausible first but keep in mind that backend users don’t need to be administrators in TYPO3 necessarily. The first answer is correct and the second answer is wrong.
Page records are stored in the database table pages. Pay attention to the spelling! It’s neither page (singular) nor tt_pages. This makes both the answers 3 and 4 wrong. The field doktype reflects the page type of each page record (e.g. standard page, folder, shortcut, etc.) as a numeric value.
Page content records are stored in the database table tt_content. Answer 5 is wrong but answer 6 is correct. As TYPO3 features various content element type out of the box (for example text and images, texts only, images only, tables, forms, sitemaps, plugins, etc.) they need to be somehow distinguished. The field CType reflects this information.
Apart from the table for backend user records mentioned above, there are three other tables that are important for the user management in general. A difference is made between frontend users (also called website users) and backend users. As already answers above, backend user records are stored in the table be_users. Backend user groups are stored in the table be_groups. Frontend users and their corresponding groups are stored in the tables fe_users and fe_groups. This lets you select the right option between the last two answers.
The correct answers are 1, 6, and 7.
Many default database tables in TYPO3 contain the fields uid and pid. What are their functions?
Answers
-
The
uidfield contains the user ID of the user who created the data record -
The
uidfield contains the user ID of the user who changed the data record -
The
uidfield contains the unique ID of the data record -
The
pidfield contains the page ID of the page the data record is stored against -
The
pidfield contains a checksum that ensures the consistency of the data record -
The
pidfield contains the ID of the page type the data record represents
Number of correct answers: 2
Explanation
You will often encounter the database fields uid and pid during your daily work as a TYPO3 integrator. This is in particular when you work with TypoScript to address data records of any type.
The abbreviation uid stands for unique identifier and means that the value that is stored in this field is assigned exactly once in a table. As a result, each record in a table can be uniquely identified and addressed. Answer 3 is therefore correct. The user ID of the backend user who created the data record can be stored in the field cruser_id. However, not every record is created by a backend user. Some records are created by the system for example. That’s why this field does not always contain a value or the value can be “0”.
The meaning of the field pid is also not difficult to work out if you think about one basic principle of TYPO3. Many records are stored against a page in some form or another. If enabled by the developers, you can access the records in the backend module Web → List. Given that you have to select a page from the page tree underlines this principle. The abbreviation pid is short for page identifier and reflects the page ID.
Some records, of course, don’t need a page. Scheduler tasks don’t have a relation to any pages for example. You don’t find a field pid in the tx_scheduler_task table.
The correct answers are 3 and 4.
What happens when a data record such as a content element or a page is deleted by a standard function in the backend?
Answers
-
The data record is deleted from the database table
-
The data record is deleted from the database table, but first a backup is created
-
The field
hiddenof the data record is set to the value “1” -
The field
deletedof the data record is set to the value “1” -
The data record is saved in a text file and then deleted from the database
Number of correct answers: 1
Explanation
When you delete a record in TYPO3, the system does not show it anywhere in the backend anymore. A deleted page, for example, appears neither in the frontend nor in the page tree or under Web → List. So it seems likely that the data record was removed from the database as suggested in the first answer. Having said that, TYPO3 features versioning which lets backend users restore a previous state, e.g. a deleted page. This makes the answers 2 and 5 more likely.
The truth is that all three answers (answer 1, 2, and 5) are incorrect. Instead, TYPO3 only marks the record as deleted but the record remains in the database table. When TYPO3 accesses the table later on, the database query automatically excludes all records that are marked this way.
The difference between hidden and deleted records is simple. Sometimes you want to disable a record only temporarily. For example a page or content element that should not appear in the frontend. But you don’t want to delete the record as you might re-enable it in the future. This is basically “hiding the record” that is controlled by the value in the field hidden.
When a record in the database is deleted – or marked as deleted to be precise – the field deleted is set to the value “1”.
The correct answer is 4.
What are some of the characteristics of an extension key?
Answers
-
The extension key encrypts the extension
-
The extension key is the unique identifier of an extension
-
You can look up the extension key of all extensions in your system in the Extension Manager
-
Extension keys can be purchased from the TYPO3 GmbH
Number of correct answers: 2
Explanation
Every TYPO3 developer can make up any extension keys. These keys must follow a specific format, e.g. only letters, numbers, and the underscore are allowed and the extension key must have a minimum of 3 characters, etc.
However, extension keys on https://extensions.typo3.org must be unique. You can not register a key that already exists (e.g. registered by someone else before). The key guarantees that public extensions can be clearly identified. Of course, there is no charge for the registration.
If you need to look up a key of any extension installed in your TYPO3 instance, you can open the Extension Manager in the backend under Admin Tools → Extensions. One of the columns shows the key of the extensions installed in your system, independent from the installation method (Composer or classic installation).
The correct answers are 2 and 3.
What does it mean if an extension has the “beta” state?
Answers
-
You must not use such extensions in production environments
-
By default, extensions whose state is not “stable” are not displayed in the extension list of the Extension Manager
-
Extensions with the “beta” state are automatically deactivated on a production server
-
The extension’s author indicates that the version is still under development and may not be fully tested and stable
-
Extensions with known bugs are automatically marked as in “beta” state
Number of correct answers: 1
Explanation
During development, the extension author can assign a state to an extension version. The following statuses are officially supported by the TYPO3 ecossystem, in addition to some extra statuses not listed here.
- Obsolete
You should no longer use an extension if the developer has assigned this state. The functions of this extension may be obsolete or faulty, or they may have been integrated in the core or into a different extension.
- Experimental
This state indicates the first stage of the development of an extension. The extension possibly provides rudimentary functions but has not yet been developed further. This state is often used for prototypes.
- Alpha
This extension is in a very early stage of development. It offers some functions but errors may still occur. The extension has not been tested yet.
- Beta
Extension authors often choose this state to indicate that functions operate but possibly contains occasional bugs.
- Stable
Extensions marked with this state have been fully developed, tested, and the author indicates the extension is stable.
The author can change the state from one version to the next. This means that states are not assigned to an extension as such but to specific versions of the extension. An extension could have multiple versions that are all marked as beta, for example, before the author releases a version that is stable.
Keep in mind that the state of an extension is an arbitrary label chosen by the extension author. In principle, the state of an extension has no effects from a technical point of view. Unfortunately, authors do not always assign the correct state to their extensions. This means that the “TYPO3 Extension Repository (TER)” contains extensions that have the stable state but possibly make your TYPO3 system unusable. At the same times, other extensions that have the beta state are fully mature and of a high quality. This makes the first answer wrong.
One column in the Extension Manager shows the state of the respective extension. Every extension is shown in this TYPO3 backend module under Admin Tools → Settings independent from its state. Answer 2 is therefore wrong. The fact that extensions with the beta state are automatically deactivated on a production server is nonsense too which makes answer 3 also wrong. As no process exists that could mark extensions with known bugs as in “beta” state, answer 5 is out of question.
The correct answer is 4.
Which statements about updating extensions using the Extension Manager (EM) in the TYPO3 backend are correct?
Answers
-
If TYPO3 is set to composer mode, the command line must be used instead of the EM
-
If TYPO3 is set to composer mode, the submodule “Update extensions” of the EM can be used
-
If TYPO3 was installed using the classic setup, the submodule “Installed extensions” of the EM can be used
-
If TYPO3 was installed using the classic setup, the submodule “Get extensions” of the EM can be used
-
If TYPO3 was installed using the classic setup, the submodule “Update extensions” of the EM can be used
-
Extensions can be updated using the Install Tool, independently from a composer or classic setup
Number of correct answers: 3
Explanation
The way how extensions can be installed and updated varies depending on how TYPO3 was set up. If TYPO3 was installed using Composer, the instance is set to the so-called “composer mode”. In this mode, some functions of the Extension Manager (EM) don’t exist, compared to the classic installation method. In this case, you have to use the command line to install, update, and remove extensions. This makes the first answer correct.
In composer mode, the EM does not offer the function “Update extensions” in the dropdown box at the top. Answer 2 is clearly wrong as backend users can not access this submodule. The last answer suggests to use the Install Tool to update extensions. However, the Install Tool does not provide any functions that let integrators install, remove, or update extensions, so this answer is also wrong.
Two of the remaining three answers have to be correct and they all deal with TYPO3 instances that have been installed using the classic setup. Let’s review the options.
When you open the EM in the backend of TYPO3, the first view is a list of extensions that are currently installed in your system. This includes system as well as third-party extensions. You can filter the list to only show third-party extensions (“local”) by clicking the button at the right-hand side. Assuming that the extension list is up-to-date and a new version of a locally installed extension is available, you can initiate the download and installation of the extension update by the icon on the left-hand side. Now look at the dropdown box at the top: the submodule “Installed extensions” is active. This makes the answer 3 correct.
Now switch to the submodule “Get extensions” by selecting this item from the dropdown box. We still assume that the extension list is up-to-date and a new version of a locally installed extension is available. Search for the extension you would like to update and click the download icon at the left-hand side. This downloads and installs the new version. Answer 4 is also correct.
This means that we identified all correct answers. Nevertheless, let’s double check if answer 5 is wrong just to be sure. Open the dropdown box at the top and review the possible functions. In a standard TYPO3 v11 LTS installation, you can access the following submodules:
- Installed Extensions
- Composer Support of Extensions
- Get Extensions
- Get preconfigured distributions
The last two modules are only available if the TYPO3 instance was installed using the classic installation method. A submodule “Update extensions” does not exist either way, which makes answer 5 definitely wrong.
The correct answers are 1, 3, and 4.
What does this mean in general, if the Extension Manager shows a note that the system is set to composer mode?
Answers
-
You require access to the command line interface (CLI) to execute certain actions
-
You’re running a development version of TYPO3 that should not be used in production
-
The TYPO3 instance automatically downloads and installs security updates if available
-
Your system requires the Node.js package manager “npm” to run properly
-
You can not download or delete TYPO3 extensions using the Extension Manager
Number of correct answers: 2
Explanation
Initially released in 2012, Composer is a dependency manager for PHP, developed by Nils Adermann and Jordi Boggiano. Today, Composer is well-known and established in the PHP community and across thousands of projects, for example Symfony, Laravel, CodeIgniter, Drupal, Magento, and of course TYPO3.
Composer runs through the command line and lets integrators download, install, update, downgrade, and remove the TYPO3 Core and TYPO3 extensions. Since Composer is a command line tool, you can not use Composer without access to the CLI. Therefore, answer 1 is correct. Answer 2, however, is wrong. The composer mode does not indicate that you’re running a development version of TYPO3. You can also use Composer in production-ready releases and LTS-releases (long-term support). As TYPO3 never automatically downloads and installs security updates by default, answer 3 can’t be correct either.
People often claim that Composer is a package manager. This is simply wrong. You find the following explanation on the Composer’s website:
Composer is not a package manager in the same sense as Yum or Apt are. Yes, it deals with “packages” or libraries, but it manages them on a per-project basis, installing them in a directory (e.g.
vendor/) inside your project. By default, it does not install anything globally. Thus, it is a dependency manager.
Besides, TYPO3 does not contain any Node.js packages that require “npm”. This makes answer 4 wrong. Having said that, Node.js possibly comes into play when you build a development version of TYPO3 from scratch. However, this has nothing to do with the composer mode that is shown in the Extension Manager.
If a TYPO3 instance has been set up using Composer, the Extension Manager can’t be used for downloading or deleting TYPO3 extensions. That’s what the note indicates. It is important to remember that you also can’t activate or deactivate extensions using the Extension Manager since TYPO3 v11 if the instance is in composer mode. This was, however, possible in older releases.
The correct answers are 1 and 5.
What exactly happens when you deactivate an extension using the Extension Manager in a classic TYPO3 installation?
Answers
-
The temporary data of the extension is deleted
-
The extension subdirectory of
typo3conf/ext/is deleted -
The extension key is removed from the file
typo3conf/LocalConfiguration.php -
The corresponding section is removed from the file
typo3conf/PackageStates.php -
The corresponding database tables are removed if the extension provides any tables
Number of correct answers: 1
Explanation
Please note that the question explicitly refers to TYPO3 instances using the classic installation method. The answers are different in TYPO3 instances using the composer mode.
In order to uninstall an extension, you have to click the icon with the minus sign in the Installed Extensions section of the Extension Manager.
It may come as a surprise to some readers that this action has almost nothing to do with a “removal” of an extension. The process simply deactivates the extension by removing the corresponding section from the file typo3conf/PackageStates.php.
The extension configuration stored in the file typo3conf/LocalConfiguration.php remains intact and the extension code remains in the system. Also, the database tables including the content stay in the database if the extension implements any database tables. To remove them from the system you have to use the “Database compare function” under Admin Tool → Maintenance → Analyze Database Structure or execute the related console command in the CLI.
The correct answer is 4.
How can you make sure that the Extension Manager in a classic TYPO3 installation installs the latest version of an extension from the TYPO3 Extension Repository (TER)?
Answers
-
You have to update the extension list before installing an extension
-
You download the current ZIP file from
extensions.typo3.org -
You have to enable the “Use latest version” check box in the settings of the Extension Manager
-
You have to select “Latest” during the installation of an extension
-
In the Install Tool, you have to make sure that the option
useLatestExtensionVersionsis set totrue
Number of correct answers: 2
Explanation
Unlike the TYPO3 core system, extensions are not subject to a review or an approval process. They can be updated by their authors at will and are available online as soon as the author uploads the new version to the TYPO3 Extension Repository (TER). In many cases, new versions fix bugs, add new features, or improve compatibility with other extensions. Therefore, it often makes sense to use the newest version.
In order to reinstall an extension, it is common practice to select Get Extensions in the Extension Manager. However, the search results are based on a local copy of the extension database for performance reasons. Therefore, you should click the Update now button to update the list before performing a search. This is especially important if the last update was several days in the past.
Of course you can also look for an extension on https://extensions.typo3.org (the online search always returns the latest version), download the ZIP or TX3 file, and install it in the Extension Manager. The options suggested in the answers 3, 4, and 5 do not exist.
The correct answers are 1 and 2.
Your TYPO3 instance runs in “composer mode”. How do you update extensions?
Answers
-
By using the Extension Manager to download and install the new version of an extension
-
By using the command line and executing the following command:
vendor/bin/typo3 --upgrade-extension <extensionkey> -
By using the command line and executing the following command in the project folder:
composer update <extension-composer-namespace> -
By executing the function “Admin Tools → Maintenance → Update Extensions”
Number of correct answers: 1
Explanation
As outlined before, Composer is a dependency manager for PHP, which runs on the command line and lets integrators install and uninstall extensions for TYPO3. When a TYPO3 instance has been set up using Composer, you can not use the Extension Manager to install, remove, update, activate, or deactivate extensions. This makes answer 1 wrong. You don’t find a function “Update Extensions” under Admin Tools → Maintenance either, so answer 4 is also wrong.
Due to the fact that Composer is a command line tool, the answers 2 and 3 sound plausible. So, let’s have a closer look what these commands do.
The PHP script vendor/bin/typo3 actually exists in a Composer setup. It is TYPO3’s “Command Line Interface module dispatcher” and executes TYPO3’s “Console” which is based on the Symfony Console application. A list of available sub-commands can be displayed with the following command:
The list of supported options and arguments (sub-commands) shows extension:list andextension:setup for example, but does not list an option to update an extension. Also, the options and arguments suggested in answer 2 are not supported. So, answer 2 is also wrong.
Given that only one answer is left and we already have ruled out that the other three answers can’t be correct, logic dictates that answer 3 must be the right one. Let’s clarify what composer update does regardless.
Composer supports a wide range of options and arguments. It uses the information stored in the file composer.json to resolve which packages (e.g. TYPO3 extensions) and which versions should be used in the current project. An entry like the following in the file composer.json defines a namespace and a version range:
If the extension with the Composer namespace “vendor/extension-name” is currently installed as version 1.2.1, for example, and a version 1.2.2 is available, the command composer update "vendor/extension-name" will download and then install the new version. Details about the packages and versions that are currently installed are stored in another file: composer.lock.
The correct answer is 3.
Which statements about the composer.json file of a TYPO3 extension are correct?
Answers
-
The property
typemust be set totypo3-cms-extension -
The property
typemust be set toplugin, if the extension provides a frontend plugin -
The extension version is required and must be set with the property
version -
PHP classes should be auto-loaded with the appropriate namespace and path information
Number of correct answers: 2
Explanation
A minimal composer.json file for a TYPO3 extension contains the following details:
{
  "name": "vendor/my-extension",
  "type": "typo3-cms-extension",
  "description": "This is an example extension",
  "require": {
    "typo3/cms-core": "^11.4"
  },
  "extra": {
    "typo3/cms": {
      "extension-key": "my_extension"
    }
  }
}
The property type must be set to typo3-cms-extension which means that the first answer is correct and the second answer is wrong. The properties name and description don’t require any further explanation, but version does. This property was used in earlier TYPO3 versions. Since TYPO3 version 7.6, you should not set the version in the file composer.json and therefore omit the version property. The extension version is set in the file ext_emconf.php though.
You also have to declare the dependencies to TYPO3 versions. The example above means that your extension is compatible with TYPO3 versions 11.4.x, but not compatible with version 12.0.0 for example.
If your extension contains PHP classes that should be auto-loaded, the namespace and path mapping information need to be added to the composer.json file too:
{
  ...
  "autoload": {
    "psr-4": {
      "Vendor\\MyExtension\\": "Classes/"
    }
  }
  ...
}
The correct answers are 1 and 4.
How do you install version 9.1.0 of the extension “News” as an additional extension in an existing TYPO3 instance using Composer, assuming that you have not added this package as a requirement yet?
Note: the Composer namespace of the extension reads “georgringer/news”.
Answers
-
composer install georgringer/news:9.1.0 -
composer install georgringer/news --version 9.1.0 -
composer require georgringer/news/9.1.0 -
composer require georgringer/news:9.1.0 -
composer require --version=9.1.0 --vendor=georgringer news
Number of correct answers: 1
Explanation
To answer the question correctly, you need to know the main differences between the commands install and require.
According to the Composer help page, the install command reads the composer.lock file from the current directory, processes it, and downloads and installs all the libraries and dependencies outlined in that file. If the file does not exist it will look for composer.json and do the same. The require command adds required packages to your composer.json file and installs them. If you do not specify a version constraint, Composer will choose a suitable version based on the available package versions.
This excludes the first two options as correct answers because the install command only downloads and installs packages that have been added to the composer.json file already.
The extra arguments --version and --vendor suggested in answer 5 are not applicable when executing the require command1.
So, either the answer 3 or 4 is the correct answer, given that only one answer is right. Truth is that Composer supports a number of formats how to define a specific version of a package, but using a slash (/) as suggested in answer 3 is definitely incorrect.
The correct answer is 4.
How do you make sure that a Composer package with a specific version does not get updated when you run the composer update command?
Answers
-
By adding a file
DO_NOT_UPDATEto the extension directory -
By adding the Composer namespace of the extension to the
update-lockproperty in thecomposer.jsonfile -
By specifying the exact version number with the
composer requirecommand -
This is not possible, because
composer updatealways forces updates
Number of correct answers: 1
Explanation
In some rare cases you possibly want to prevent extensions to get updated. They should stick to a very specific version. It is important to understand that this is not a good idea in most cases as this also excludes security updates. However, this is technically possible which makes the last answer wrong straight away.
Adding a file to the extension directory as suggested in answer 1 is not the right approach. This leaves us with two possible answers.
If you look up the composer.json schema in the Composer documentation you will find properties such as name, description, version, type, as well as package links (for example require, require-dev), auto-load information, and many more. However, a property update-lock does not exist.
Fact is that you can set a specific version when you add the package details to the composer.json file (or run a command such as composer require). For example:
"vendor/my-extension:1.2.3"
Even if the extension author releases a new version (e.g. 1.2.4), the composer update command would not install it.
The correct answer is 3.
A currently installed extension is obviously incompatible with your TYPO3 installation. How can you downgrade to a lower version in a TYPO3 installation that was installed using the classic installation method?
Answers
-
You have to migrate your TYPO3 instance to the Composer setup and then execute the relevant Composer commands
-
You can install all available versions of an extension in the “Get Extensions” submenu of the Extension Manager
-
You can download older versions on
typo3.organd upload them to the TYPO3 instance -
All old versions of an extension are archieved in the
typo3temp/extensions/directory
Number of correct answers: 2
Explanation
It is not uncommon that a version of an extension initially works without problems in the TYPO3 system but issues occur after an update of that extension. The issues could be incorrect behavior, error messages, instability, and other problems. The right approach in such an event is to investigate, troubleshoot, and hopefully fix the issue swiftly. However, sometimes this process takes longer and you have no choice but to return to the version you installed originally. There are two possile ways to do this.
The most common method of installing an earlier version of an extension is to open the Extension Manager (Admin Tools → Extensions), select “Get Extensions”, click on the extension title and then select the required version to complete the downgrade.
Alternatively, you can download any version of an extension from the TYPO3 Extension Repository (TER). For example search for the extension key news and click the title (here: “News system”) to access the detail view of the extension. The download button at the top always points to the current (latest) version of the extension. If you scroll down you find the “Version history” section which lists all versions ever published by the extension author. Each version can be downloaded as a ZIP archive by clicking the button right-hand side, except for versions, which contain security vulnerabilities and have been marked by the TYPO3 Security Team accordingly. The downloaded ZIP file can then be uploaded to your TYPO3 instance by using the appropriate function in the Extension Manager, which makes answer 3 correct.
Of course, both methods described above are only possible in instances that have been set up using the classic installation method. Although the Composer setup is the recommended way of installing and maintaining TYPO3 today, and an extension downgrade is very easy to do in such setups, you don’t have to migrate your existing TYPO3 installation to Composer.
The solution suggested in answer 4 is made up. Old versions of extensions are not cached in TYPO3’s typo3temp/ folder.
The correct answers are 2 and 3.
After updating a TYPO3 instance to a new version you encounter problems with an extension that is installed in this instance. What actions do you take first?
Answers
-
You update the extension that causes the problems if an update is available
-
You uninstall the extension and install it again in the same version
-
You clear all TYPO3 caches and the PHP cache
-
You activate the “compatibility” checkbox of the extension in the Extension Manager
-
You delete the extension’s configuration from the
LocalConfiguration.phpfile
Number of correct answers: 2
Explanation
When you update TYPO3 to a new version, you update the TYPO3 Core files (and possibly dependent packages). Depending on the method how you execute the update, extensions are likely not part of the update process. If an extension produces errors after you finished the TYPO3 update (see the chapter “Installation”), you should check if a new version of the extension is available. The author is possibly already aware of problems with the extension and the new TYPO3 version and released a new version that solves the issues. The first answer is therefore correct.
Simply uninstalling and then reinstalling the extension has no effect as this does not change the program code of the extension. The second answer is wrong. Having said that, there are a few exceptions to this statement. For example, someone could claim that a reinstallation updates the schema of database tables that an extension possibly provides. If missing tables or fields cause the issues, uninstalling and then reinstalling the extension would fix these. However, missing tables or fields would typically cause issues even before you update the TYPO3 Core version.
The TYPO3 Upgrade Guide explicitly states that you should clear all caches after a minor and a major version upgrade (post-upgrade tasks). Go to Admin Tools → Maintenance and click “Flush TYPO3 and PHP Cache”. This procedure removes outdated cache entries that could cause conflicts between extensions and the new TYPO3 version. Answer 3 can therefore be marked as correct.
Answer 4 is simply wrong as such a checkbox does not exist in the Extension Manager. So is the last answer. If you delete the extension’s configuration from the LocalConfiguration.php file, you only reset the configuration. This does not address possible issues with the program code of the extension.
The correct answers are 1 and 3.
Your TYPO3 instance stopped working properly after you installed or updated an extension. What actions do you take first?
Answers
-
Downgrading the extension to a lower version and check if this solves the problem
-
Use the “Database Analyzer” to check if the database schema is up-to-date
-
Delete the
composer.jsonfile from the extension directory -
Manually delete all files from the
typo3conf/directory -
Uninstalling the extension and re-installing the same version
-
Make sure that the following console command was executed:
typo3 extension:setup
Number of correct answers: 3
Explanation
Third-party extensions sometimes cause problems in a TYPO3 installation. The author of the extension possibly made programming mistakes or used a technology or method that is incompatible with your system. Even if the extension was developed correctly and carefully tested, side-effects on other installed extensions may cause issues.
In some cases, downgrading to an earlier version can help (answer 1). It is also a good idea to review the information about the changes that the author of the extension provided. Sometimes they contain details about compatibility.
Problems related to incorrect database fields can often be solved by opening the “Database Analyzer” under Admin Tools → Maintenance → Analyze Database Structure. Modern versions of TYPO3 have several mechanisms to ensure that the database schema is always correct but errors cannot be completely ruled out. If the new version of the extension tries to address database fields that do not exist, for example, this leads to errors that can be easily identified and corrected with the “Database Analyzer”.
You cannot solve the problem by deleting the composer.json file that possibly exists in the extension directory. Re-installing the extension does not fix the problem either. Just uninstalling the extension in question possibly solves the problem but this is not an available option for this question. In addition, this would require to find an alternative extension of course.
Answer 4 suggests to delete all files from the typo3conf/ directory. To put it plain and clear: do not do that! Some files in this folder are utterly necessary for TYPO3 to run. This includes the global configuration file LocalConfiguration.php for example.
The command suggested in answer 6 indeed exists. It is important to execute this command in particular in Composer-based installations. The command, however, is also available if you set up TYPO3 by using the classic installation method. As the call “typo3 extension:setup” instructs TYPO3 to run several tasks to set up one specific or all extensions, this action is a correct answer.
The correct answers are 1, 2, and 6.
Your TYPO3 installation shows a fatal PHP error in the frontend and backend after you installed or updated an extension. What do you do to regain access to your instance?
Answers
-
In a classic TYPO3 installation, use the Extension Manager to uninstall the extension
-
In a classic TYPO3 installation, delete the extension key from the file
PackageStates.php -
In a classic TYPO3 installation, delete the extension directory
typo3conf/ext/<extensionkey> -
In a Composer-based installation, remove the extension through the command line
-
In a Composer-based installation, delete the extension key from the file
LocalConfiguration.php
Number of correct answers: 2
Explanation
Losing access to the system due to a fatal PHP error is a highly critical situation for a TYPO3 integrator, and one that requires swift action, especially in a production environment.
As you can no longer access TYPO3, the solution in answer 1 makes no sense. Eventually, the question makes it clear that you have access neither to the frontend nor to the backend. The Extension Manager requires a working backend though.
In a TYPO3 instance, that was set up by using the classic installation method, all active extensions are listed in the file PackageStates.php. Once you remove the extension key from this file, TYPO3 does not load any code from this extension that possibly causes the fatal error. Answer 2 is correct. Keep in mind that this only applies to classic TYPO3 installations. The file PackageStates.php does not exist in a Composer-based TYPO3 v11 LTS installation.
You might think that answer 3 is also correct. After all, if the extension is simply deleted from the typo3conf/ext/ directory, there is no more PHP code that could cause the error. However, this is a thinking mistake. As the extension is still referenced in the PackageStates.php file, TYPO3 tries to load the program code which suddenly does not exist anymore. This causes another PHP error. The combination of the answers 2 and 3 would solve the problem but if you already disabled the extension by editing the file PackageStates.php, you don’t need to delete the directory. Answer 3 is wrong – no doubt.
Let’s turn to the last two answers. Both answers deal with Composer-based installations. Answer 4 suggests to remove the extension through the command line, and answer 5 suggests to delete the extension key from the file LocalConfiguration.php. The file LocalConfiguration.php contains extension configurations. It would not fix the problem if you delete these. Therefore, answer 5 can’t be correct.
Answer 4 describes the correct approach in a Composer-based installation. The command composer remove <extension> executes several actions. Most importantly, it updates the files composer.lock and composer.json, and it instructs TYPO3 not to load any code from the named extension. On top of that, the command removes the extension directory and clears the TYPO3 caches. This solves the problem in most cases and lets you access the frontend and backend again.
The correct answers are 2 and 4.
What are basic principles of a template engine?
Answers
-
Template engines always require end-users to have JavaScript enabled in their browsers
-
The output of a template engine is always HTML
-
Template engines read content from a source and merge it into a template file
-
Components of a template engine in TYPO3 are: version control (Git), search engine (e.g. Solr), and dependency management (e.g. Composer)
-
The default template engine in TYPO3 follows the separation of concerns principle
Number of correct answers: 2
Explanation
As a certified TYPO3 integrator, you should be able to explain what the basic concept of a template engine is. You should also be able to name all components that build a template engine. The focus is primarily on web-based template engines, of course.
Let’s clarify what a template engine is. A template engine in the web context is also known as a templating engine, template processor, or template parser. It is a piece of software that replaces variables or blocks in a template file with actual values or content. The engine reads the contents from a data source (typically a database) and one or multiple template file. It then merges these two inputs and generates a resulting output document. The following diagram illustrates the general function of a template engine:
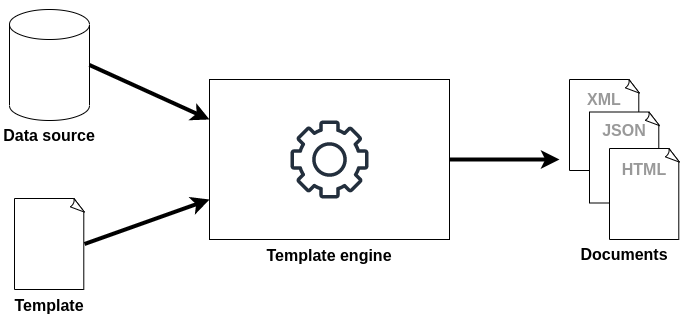
In practical terms, template files in TYPO3 are usually HTML files (but not necessarily). The content stored in the database or file system can be simple text for example, but also images, tables, lists, etc. If you think about a typical TYPO3 website that features several pages, the contents of these pages often vary. The overall visual appearance, however, is the same across most pages. This means that the layout can be implemented once and reused on many pages. Only the content changes between pages.
By separating the business logic from the presentation logic, a website built in TYPO3 becomes easily maintainable. The visual appearance can be updated or even completely reworked, without the need to also change the content. It is also possible to divide responsibilities. An editor can focus on the content, while a designer can work on the visual aspects of a website. This principle is called separation of concerns.
The first answer is wrong as template engines can operate in the user’s web browser context but don’t have to. A few examples of template engines written in JavaScript are: Mustache, Handlebars, EJS, and whiskers. Many other template engines operate at the server-side though.
Template engines are not limited to the HTML format. Some engines support other output formats such as XML, DocBook, etc. Answer 2 is therefore also wrong.
The components listed in answer 4 have nothing directly to do with template engines as such. Template engines typically consist of at least these four parts: the data model (or data source), one or more template files, the processor or template engine itself, and the generated output (resulting document).
Answer 5 confirms the exlanation above. The default template engine in TYPO3 follows the separation of concerns principle.
The correct answers are 3 and 5.
Is it possible to build a website without any HTML template files in TYPO3? Why or why not?
Answers
-
No, this is not possible as every website requires at least one HTML template
-
Yes, you can output HTML without any template files by using TypoScript
-
No, you can only generate XML or JSON output without any template files but not HTML
-
Yes, but only if you install the “Themes” or “Grid Elements” extension
-
No, ever since the
HTMLcontent object was removed in TYPO3 v6, this is no longer possible
Number of correct answers: 1
Explanation
In general, TYPO3 offers two basic ways to generate frontend output. You can use template files and replace sections of them with your own content. You can apply several technologies to achieve this result. Incorporating markers and subparts in these templates, and then replacing them with TypoScript, is one of them. This approach was typically used in older TYPO3 versions. Today, a template engine is the commonly used solution. The second way to generate frontend output is to omit a complex mechanism that processes template files and generate the output directly by using only TypoScript. This approach can be useful when you don’t require a sophisticated visual appearance in the frontend.
The statement in answer 1 is wrong as you can build a website that generates output other than HTML. Answer 3 is also wrong as you can use TypoScript to build a website without template files. You can also exclude the last answer as the solution is independent from the content object HTML. Truth is that this cObject was indeed removed in TYPO3 v6. However, the object TEXT features the same capabilities.
The two remaining answers 2 and 3 are both “yes”-answers and one of them must be correct. TYPO3 extensions such as Themes or Grid Elements support developers and integrators in developing and configuring the visual appearance of a website. However, they are not necessarily required as you can build a simple site without any HTML template files using TypoScript:
By implementing further TypoScript configuration (e.g. read the content from the database), you can make the output dynamic and the visual appearance nicer. The more extensive and complex the TypoScript code becomes, the more sense it makes to use a proper template engine such as Fluid.
The correct answer is 2.
TYPO3 should output two different visual appearances of a website with the same content. How can you achieve this?
Answers
-
By setting up two TYPO3 installations
-
By configuring two sites in the “Site Management” module
-
By configuring two
PAGEobjects with differenttypeNumvalues and different Fluid templates for each -
By setting up two page tree branches in a TYPO3 installation that share one root template
Number of correct answers: 1
Explanation
As a general rule, you can define as many different output formats in one TYPO3 installation as needed. You can, for example, provide a standard HTML website with a print version available through a specific link. You can also implement two layouts that deliver two different visual appearances of the website, or even multiple different formats such as HTML, JSON, XML, and others.
It doesn’t make sense to set up multiple TYPO3 installations for each version – and this isn’t required either. Also, two installations would not share the same content. Answer 1 can be excluded as the correct answer.
The backend module Site Management → Sites lets you set up and configure multiple sites in one TYPO3 installation. This includes an entry point (the main URL of the frontend), the root page ID, languages, error handling, etc. Output formats and layouts/templates, however, are not part of the availale configuration option. The second answer is therefore also wrong.
Answer 3 provides the correct solution. You simply need to configure multiple PAGE objects that feature unique typeNum values.
The following example demonstrates how two different HTML template files can be used. The first section (typeNum = 0) defines the default layout. The second section represents an alternative variation. Users add the parameter &type=1 to the request in order to access the foobar configuration, for example: example.com.
The approach suggested in the last answer does not make sense. How could a setup of multiple page tree branches solve the problem? This would require you to maintain the same content redundantly on several pages or implement an unnecessary solution to store the content elements in one central place and include them in each subpage of the page tree branch.
The correct answer is 3.
What is TYPO3’s default template engine?
Answers
-
Smarty
-
Blade
-
Mustache
-
Fluid
-
Twig
Number of correct answers: 1
Explanation
It is unlikely that any reader answers this question incorrectly. You won’t encounter such a simple question in the TCCI exam but it does not harm if you know at least some template engines that are typically used in the PHP world. So let’s run through them:
- Smarty
The Smarty template engine for PHP has a long history. It follows a strict separation of presentation (HTML/CSS) from the application logic. Smarty stores the resulting output documents as PHP scripts. This aims to improve the overall performance. The template engine is used in a wide range of PHP projects. Further details at: https://www.smarty.net
- Blade
Blade is the template engine shipped with the PHP framework Laravel. Unlike other popular template engines, Blade lets you implement PHP code in the template files. This enables developers to easily influence the output but contradicts the principle to strictly separate logic from the visual presentation.
- Mustache
Mustache is a framework-agnostic solution to render logic-free views. In contrast to Blade, for example, it is impossible to add any application logic to the template files. This is frustrating for some developers but ensures a strict separation between business logic and visual presentation. Mustache is available in many programming languages. Among them Ruby, JavaScript, Python, PHP, and others. Further details at: https://mustache.github.io
- Twig
Twig is another popular template engine for PHP. The initial release by Armin Ronacher dates back to 2009. It’s an open source product and part of the Symfony suite today. Similar to Smarty, Twig also generates PHP files as the outcome of the rendering process. Further details at: https://twig.symfony.com
As you probably already know, none of these template engines are used by TYPO3 by default. TYPO3 is shipped with the template engine Fluid that successfully powers many modern TYPO3 sites. Fluid was mainly developed by Bastian Waidelich and Sebastian Kurfürst in 2008. Claus Due refactored the code base in 2016. Since then, Fluid can also be used as a standalone package.
The correct answer is 4.
What are key features and characteristics of TYPO3 Fluid?
Answers
-
TYPO3 Fluid requires a web server such as Apache or Nginx to render HTML templates
-
The three key features of Fluid are: security, extensibility, and XML/HTML conformity
-
TYPO3 Fluid is shipped with the PHP framework “Symfony”
-
As TYPO3 Fluid is independent from TYPO3 CMS, you can remove Fluid from the TYPO3 Core
-
The TYPO3 Fluid template engine is licensed under LGPL version 3.0
Number of correct answers: 2
Explanation
Although the enterprise content management system “TYPO3 CMS” is the main product of the TYPO3 family, several other products exist. One of these products is the template engine TYPO3 Fluid, which is also an essential part of the CMS. Having said that, Fluid is an independent product and runs as a standalone application, thanks to Claus Due who refactored the code base in 2016 and made this possible.
You can develop an application that uses Fluid as a template engine but is not web-based at all. This means that answer 1 is wrong as Fluid does not require a web server to render HTML templates.
The landing page for Fluid-related information on typo3.org predominantly summarizes the three key features of Fluid that are also stated in answer 2 (which makes this answer correct):
- Security
Anything that is added or extended is properly escaped by default to prevent common XSS (cross-site scripting) mistakes.
- Extensibility
Fluid’s power […] comes via variables and ViewHelpers to add custom logic within PHP ready to re-use in any template.
- XML/HTML conformity
(sic) Fluid has been built on top of XML. If you’re comfortable with HTML, you’ll notice that Fluid solely (acts) as a slim super-set on top of HTML, just some special XML tags in your templates.
The next answer is clearly wrong as TYPO3 Fluid is not shipped with the PHP framework “Symfony”. As the TYPO3 Core is shipped with Fluid, this might lead someone to assume that answer 4 is correct. It’s true that TYPO3 Fluid is independent from TYPO3 CMS but not vice versa. TYPO3 requires Fluid to generate the web-based administration interface – the backend. Therefore, Fluid is an integral part of the TYPO3 Core and can’t be removed. Both answers 3 and 4 are wrong.
The last answer deals with the license that is used by TYPO3 Fluid. You can find the license statement on the Fluid site and, of course, in the LICENSE.txt file on GitHub. TYPO3 Fluid is indeed licensed under LGPL version 3.0.
The correct answers are 2 and 5.
What is the name of the TypoScript content object that is required to use Fluid as the template engine?
Answers
-
TEMPLATE -
FLUID -
FLUIDTEMPLATE -
PAGETEMPLATE -
FLUID_TEMPLATE -
FLUID_ENGINE
Number of correct answers: 1
Explanation
Fluid was added to the TYPO3 Core in version 4.3. Since then, developers and integrators have been able to use the template engine to render pages. The following TypoScript code shows a simple usage example:
Although storing the template files under fileadmin/ is not considered best practice today, the example illustrates an important design concept of Fluid. The source templates are divided into layouts, partials, and templates. These files are typically stored in different locations in the file system.
The property templateName is used to set the name of the template file. In this case, Fluid reads the file fileadmin/Fluid/Templates/Main.html as the template.
The code example also shows the name of the cObject: FLUIDTEMPLATE.
The correct answer is 3.
How can you access the page property “layout” (frontend layout) in a Fluid template when the cObject FLUIDTEMPLATE is used?
Answers
-
By installing the third-party extension
EXT:fluid_page_properties -
By using the ViewHelper tag
<f:page property="layout" />in the template -
By using the variable
{property.layout}in the template -
By using the variable
{data.layout}in the template -
By using the PHP code
<?php echo $page['layout']; ?>in the template
Number of correct answers: 1
Explanation
TYPO3 passes the properties of the current page directly to the Fluid template. As a result, you can easily access them in the Fluid template files. A third-party extension as suggested in the first answer is not required, which means that this answer is wrong.
You will never find PHP code in Fluid templates. This would violate the principle to strictly separate logic from the visual presentation. The last answer is therefore also wrong. At this point you’re left with three possible answers.
Consider the following scenario. The frontend should look slightly different on pages where an editor switched the frontend layout from the default to “Layout 1” (access the page properties in the TYPO3 backend, open the tab Appearance, and locate the dropdown box “Frontend Layout”). You can easily check for this setting in a Fluid template as shown below.
<f:layout name="Default" />
<f:section name="Main">
  <f:if condition="{data.layout}==1">
    <p>layout 1</p>
  </f:if>
</f:section>
The page properties are available as the variable {data}. The frontend layout, for example, as {data.layout}.
The correct answer is 4.
What are characteristics of “partials” in TYPO3 Fluid?
Answers
-
Partials can contain PHP code that TYPO3 processes at runtime
-
Partials represent small units which can be reused in multiple places
-
Partials should be stored in the directory
Resources/Public/Partials/ -
Partials can only be used in HTML templates but not in other formats
-
Partials can be included with the following directive:
<f:render partial="Foobar" />
Number of correct answers: 2
Explanation
Partials are small template files that are perfect to fulfil recurring tasks. Typical use cases are a piece of information that you want to output in multiple places, or a table row that you want to output as part of a loop. You can include the partial file by using the Render-ViewHelper. Partial files feature the same functionality as normal Fluid template files, such as conditions, etc.
You must not implement PHP code in any Fluid template files, not even in partials. This makes the first answer wrong. The second answer is, without doubt, correct. It reflects exactly the explanation given in the first paragraph.
Be careful with answer 3! The path looks legitimate at first glance. However, partials are not static files that belong inside the Public/ directory. Answer 3 is wrong. So is answer 4. Although TYPO3 sets the default format for Fluid template files to HTML, which also applies to partials, you can change this easily. Partials can therefore also be used in other formats than HTML.
The directive <f:render partial="Foobar" /> (which is also known as the Render-ViewHelper) is used to include the partial named “Foobar”. The last answer is also correct.
The correct answers are 2 and 5.
What is the connection between layouts and templates in TYPO3 Fluid?
Answers
-
Layout files are referenced in template files, for example:
<f:layout name="Default" /> -
You can implement multiple sections in template files, for example:
<f:section name="Main">...</section>and<f:section name="Foobar">...</section> -
Fluid templates build the overall layout of the website
-
Fluid layouts are typically page-specific
-
Fluid layout files and template files should be stored in the directory
Resources/Private/Layouts/
Number of correct answers: 2
Explanation
The connection between layouts, templates, and in fact partials too, are sometimes confusing, especially for newcomers. The starting point is typically a template file (for example located in the directory Resources/Private/Templates/). The template contains at least one section but may contain several sections. The template file also references the layout, which builds the overall visual appearance of a website. The Fluid layout file specifies which sections in the template files should be rendered. Let’s look at a more practical use case to clarify these connections.
A website consists, for example, of an horizontal navigation at the top (the main menu), a content area below, and a footer at the bottom. The content area features a two columns layout on most pages but some pages are full width. Based on this description, you can assume that the main menu and the footer look the same on all pages across the entire website. This is the overall visual appearance of the site that goes into the Fluid layout. The layout of the content area varies between pages (one or two columns). The corresponding HTML/CSS code goes into the Fluid template. One option is to create one template file for each page type, for example OneColumn.html and TwoColumns.html.
As TYPO3 works on a page-by-page basis, you refer to one of the templates. Page A uses the one column template and page B the two columns template. The template files feature different HTML/CSS code but as they both use the same overall website layout (main menu and footer), the Fluid layout file is referenced in the template files. You achieve this by implementing the following code: <f:layout name="Default" />
This instructs Fluid to search for a file Default.html in the Resources/Private/Layouts/ directory. As mentioned above, a template file has at least one section. Optionally, you can add multiple sections. This means that the first two answers are correct.
Now read the answers 3 and 4 thoroughly. They are both wrong because the opposite is true. Fluid templates are typically page-specific (remember the examples above: OneColumn.html and TwoColumns.html), whereas Fluid layouts build the overall layout of the website (e.g. file Default.html).
The last answer is also wrong as Fluid layout files are expected in the directory Resources/Private/Layouts/ and template files in Resources/Private/Templates/ by default.
The correct answers are 1 and 2.
What can you do to prevent an error from occurring if the partial “Example”, that you try to include in a Fluid template files, does not exist?
Answers
-
Define the partial as optional in the Render-ViewHelper:
<f:render partial="Example" optional="true" /> -
Disable the requirement that the partial must exist in the Render-ViewHelper:
<f:render partial="Example" required="false" /> -
Use a condition to check if the partial exists:
<f:if condition="Example"><f:render partial="Example" /></f:if> -
Disable strict errors with the following line at the top of the template file:
<html data-strict-errors="false">
Number of correct answers: 1
Explanation
You can use the Render-ViewHelper to include partial files in your layout and in your template files:
<f:render partial="Example" />
This instructs Fluid to search for the file Example.html in the configured partial directory, for example Resources/Private/Partials/. If the file does not exist, TYPO3 generates an error:
The Fluid template files […] could not be loaded.
Under certain circumstances you want to prevent this error from occurring, for example if the partial is not mandatory. Using a condition to check if the partial exists (as suggested in answer 3) does not work as Fluid triggers the Render-ViewHelper regardless. The attribute data-strict-errors does not have any effect in the <html> tag at the top of the layout or template file, so the last answer is also wrong.
This means that either the answer 1 or 2 must be correct, and both answers suggest to add an extra attribute to the ViewHelper. The solution is, of course, the optional attribute that, if set to “true”, makes the referenced partial optional:
<f:render partial="Example" optional="true" />
The correct answer is 1.
An extension with the namespace “Vendor/Example” provides a ViewHelper named “Test”. How can you make the ViewHelper available in your Fluid template under the namespace “foo”?
<foo:test value="{data}" />
Answers
-
By using the Import-ViewHelper in the template file:
<f:import extension="Vendor/Example" namespace="foo" /> -
By using the Namespace-ViewHelper in the template file:
<f:namespace extension="Vendor/Example/ViewHelpers" as="foo" /> -
By defining the namespace with the following line at the top of the template file:
{html xmlns:foo="http://typo3.org/ns/Vendor/Example/ViewHelpers"} -
By defining the namespace with the following line at the top of the template file:
{namespace foo = Vendor\Example\ViewHelpers} -
By defining the namespace with the following line at the top of the template file:
<html path="Vendor\Example\ViewHelpers" data-namespace="foo"> -
By defining the namespace with the following line at the top of the template file:
<html xmlns:foo="http://typo3.org/ns/Vendor/Example/ViewHelpers">
Number of correct answers: 2
Explanation
ViewHelpers provided by the TYPO3 Core and by Fluid are available in Fluid templates out of the box. The reserved namespace for those built-in ViewHelpers is the letter f:. This explains why Fluid-specific HTML tags such as <f:layout>, <f:render>, <f:section>, etc. all start with the acronym f:.
TYPO3 developers can create custom ViewHelpers and package them in extensions. As a TYPO3 integrator, it is often your job to apply these ViewHelpers in Fluid template files. To be able to do this, you need to import their namespace.
Neither the first nor the second answer contains a ViewHelper that exists in TYPO3 v11 LTS. Apart from that, you don’t use a ViewHelper to import or set a namespace. At this point we are already down from six to four possible answers.
The answers 3 and 6 contain the xmlns attribute that specifies the XML namespace for a document. Wikipedia defines XML namespaces as follows:
This makes perfect sense as it is important to distinguish between ViewHelpers from different sources in the Fluid world too. Two extensions could both provide a ViewHelper named “Test”. By using different namespaces for each extension, you can selectively use one or the other ViewHelper without a name collision. You define the namespaces with the <html>-tag at the top of the template file, for example:
<html xmlns="http://www.w3.org/1999/xhtml"
  xmlns:foo="http://typo3.org/ns/Vendor/Example/ViewHelpers"
  xmlns:bar="http://typo3.org/ns/JohnSmith/Demo/ViewHelpers">
  ...
</html>
This makes the Test-ViewHelper of the extension with the namespace “Vendor/Example” available as <foo:test value="{data}" />. A ViewHelper with the same name but provided by a second extension “JohnSmith/Demo” could be called using the namespace <bar:test value="{data}" />. Curly brackets as suggested in answer 3 can’t be used. The attribute path as suggested in answer 4 is also wrong. Answer 6 shows the correct method to import the namespace.
The second correct answer is obviously answer 4. This is a special inline notation offered by TYPO3 Fluid and accomplishes the same goal:
The correct answers are 4 and 6.
Replace “???” in the TypoScript code below to make the text “foobar” available as the variable {content} in the Fluid template?
Answers
-
page.10.template.value = foobar -
page.10.content < temp -
page.10.variables.content = TEXT:foobar -
page.10.variables.content < temp.example -
page.10.variables.data < temp.example.value
Number of correct answers: 1
Explanation
Passing data from the TYPO3 Core to Fluid templates is a typical use case. You can easily pass small pieces of data – such as a simple text string like “foobar” – by setting a variable in your TypoScript FLUIDTEMPLATE object. For more complex and bigger data, you should use so-called Data Processors. I provide example questions about this topic later in this chapter. Let’s first look at how variables work.
The first two lines of the TypoScript code assign the text “foobar” to the TEXT object temp.example. The remaining lines configure the Fluid template as the output mechanism for the page. The missing piece that needs to be replaced is the last line.
A property template of the FLUIDTEMPLATE cObject indeed exists. However, its purpose is to define a content object which should be used as the template file. It has nothing to do with passing variables to templates. Also, assigning “foobar” to the subproperty value makes no sense at all. The first answer is wrong. The second answer makes no sense either as the FLUIDTEMPLATE cObject does not have a property content.
The remaining three answers all have the keyword variables in the solutions they suggest. Answer 5 copies the value “foobar” to the variable data. This is not a bad approach but has two issues. The variable name should read content rather than data. Additionally, the value has no meaning without the datatype TEXT.
The variable name is correct in the answers 3 and 4. The syntax shown in answer 3, however, is invalid. This leaves us with answer 4 as the only correct option. Consider the following simplified/shortened TypoScript code snippet:
This configuration assigns the text “foobar” to the variable content which is then available in the template files:
<p>{content}</p>
The correct answer is 4.
Which statements about ViewHelpers are correct?
Answers
-
ViewHelpers must be enabled in the Install Tool
-
ViewHelpers can be written using inline notation
-
You can implement up to eight ViewHelpers in a Fluid partial
-
Extensions can provide custom ViewHelpers
-
ViewHelpers add accessibility features for screen readers to the TYPO3 backend
Number of correct answers: 2
Explanation
The capability of a logic-less template engine is limited to reading a static source template and to replacing some of its variables with values. TYPO3 Fluid provides extra functionality such as conditions, loops, formatting, links, translations, etc. by ViewHelpers. These are PHP classes which support the view logic. In TYPO3 v11 LTS, Fluid comes with almost 80 ViewHelpers out of the box. The TYPO3 Core adds a few more. ViewHelpers do not need to be enabled, so answer 1 is wrong.
Although the built-in ViewHelpers already cover a wide range of use cases, sometimes you need a very specific function for your TYPO3 project. Fluid’s open and flexible architecture allows developers to create their own ViewHelpers. Custom ViewHelpers are typically provided by TYPO3 extensions which you can download and install. This means that answer 4 is correct. Only eight ViewHelpers in a Fluid partial would not be sufficient in many cases. Fact is that the number of ViewHelpers is not limited which makes answer 3 wrong.
In theory ViewHelpers could implement accessibility features for screen readers. However, this is not their main purpose and TYPO3 does not have any ViewHelpers for this purpose for the backend. The last answer is also wrong. A ViewHelper can be applied in Fluid template files by using an HTML tag, for example:
<f:ViewHelperName value="example" />
This is valid HTML. Let’s assume the output of a ViewHelper is a CSS class. In this case, you might be inclined to write the following invalid HTML code:
<p class="<f:ViewHelperName value="example" />">...</p>
The above would result in a syntax error as you can not nest an HTML tag into another. That’s where the inline notation comes into play. The following code is valid HTML and executes the same ViewHelper PHP code as called as an HTML tag:
<p class="{f:ViewHelperName(value: "example")}">...</p>
The correct answers are 2 and 4.
Which of the following ViewHelpers are shipped with Fluid or the TYPO3 Core by default?
Answers
-
The Output-ViewHelper:
<f:output> -
The Calculation-ViewHelper:
<f:calc> -
The Debug-ViewHelper:
<f:debug> -
The FormatRaw-ViewHelper:
<f:format.raw> -
The Flash-ViewHelper:
<f:flash> -
The Translate-ViewHelper:
<f:translate>
Number of correct answers: 3
Explanation
You don’t need to know each and every ViewHelper in detail that comes with TYPO3 and Fluid. However, we expect from a certified TYPO3 integrator that you know at least the most important and commonly used ViewHelpers. Three of the six given options are correct and it is highly likely that you have used them in your TYPO3 projects before.
- The Debug-ViewHelper
This ViewHelper generates an HTML dump of a variable. To prepare for the TCCI exam, you should familiarize yourself with the possible arguments such as
maxDepthandinline.Usage example:
<f:debug>{variable}</f:debug>
- The FormatRaw-ViewHelper
Fluid filters some special characters from the output of data through ViewHelpers for security reasons. This can be undesirable in some circumstances. The FormatRaw-ViewHelper outputs an argument or value without escaping any characters. Use this ViewHelper only with extreme caution as you might introduce a security vulnerability.
Usage example:
<f:format.raw>{data}</f:format.raw>
- The Translate-ViewHelper
If you have worked with multilingual websites before, you will certainly be familiar with the Translate-ViewHelper. You pass a key to the ViewHelper (e.g. “
myLabel”) and TYPO3 reads the corresponding label from a language file. Without any hard-coded labels and terms in the Fluid template files, your website can be easily translated into any language as required.Usage example:
<f:translate key="myLabel" extensionName="Example" />
The other three options are made up and therefore wrong. Neither an Output-ViewHelper nor a Calculation-ViewHelper or Flash-ViewHelper are shipped with Fluid or the TYPO3 Core by default.
The correct answers are 3, 4, and 6.
How can you access the following TypoScript TEXT object in your Fluid template?
Answers
-
By using the Text-ViewHelper:
<f:text object="lib.foobar" /> -
By using the cObject-ViewHelper:
<f:cObject typoscriptObjectPath="lib.foobar" /> -
By accessing the object through the
dataobject:{data.lib.foobar} -
By importing the object through the
<html>-tag as the first line of the template:<html importObjectPath="lib.foobar" >
Number of correct answers: 1
Explanation
Chapter TypoScript has already clearly shown how versatile and flexible this configuration method is. Therefore, it is not uncommon that you want to access these objects directly within a Fluid template. You can access the page properties through the variable {data} in the frontend. For example, the following line in a template file shows the name of the current page:
<h1>{data.title}</h1>
However, with this method you cannot access arbitrary TypoScript objects, as it is required in the question. The solution in answer 3 does not work. The attribute importObjectPath of the <html>-tag as the first line in template files unfortunately does not lead to the desired result either. This makes the last answer also wrong.
Looking at the two remaining answers, you obviously need a ViewHelper to achieve this. Both solutions sound plausible but the fact is that only the cObject-ViewHelper exists and can be used to access TypoScript objects in Fluid templates.
The correct answer is 2.
Which ViewHelper can you use to prevent the rendering of a specific HTML snippet in your Fluid template?
Answers
-
The Debug-ViewHelper:
<f:debug> -
The Hide-ViewHelper:
<f:hide> -
The Comment-ViewHelper:
<f:comment> -
The Partial-ViewHelper:
<f:partial>
Number of correct answers: 1
Explanation
The Debug-ViewHelper generates an HTML dump of a variable and outputs the data. It definitely does not prevent the rendering of specific HTML snippets. Answer 1 is therefore wrong.
The second answer suggests to use the Hide-ViewHelper. Although the name sounds promising, such a ViewHelper does not exist.
Answer 4 plays with the term partial. Of course, partials exist in Fluid but a Partial-ViewHelper does not.
Consider the following Fluid template:
<div class="container">
<f:comment>
<p>"Cats choose us; we don't own them." (Kristin Cast)</p>
</f:comment>
<p>"You can not look at a sleeping cat and feel tense." (Jane Pauley)</p>
</div>
Fluid ignores the sentence wrapped in the Comment-ViewHelper. Apart from the outer <div> container, the output of the Fluid template is only the quote from Jane Pauley.
The correct answer is 3.
Which ViewHelper do you use to iterate an array or object?
Answers
-
The Loop-ViewHelper with the following implementation:
<f:loop object="{array}" value="item"> -
The While-ViewHelper with the following implementation:
<f:while for="{array}" value="item"> -
The For-ViewHelper with the following implementation:
<f:for object="{array}" as="item"> -
The For-ViewHelper with the following implementation:
<f:for each="{array}" key="index" as="item"> -
The For-ViewHelper with the following implementation:
<f:for iterate="{item}" action="cycle">
Number of correct answers: 1
Explanation
You can exclude two of the given answers straight away, as the stated ViewHelpers do not exist. Neither a Loop-ViewHelper nor a While-ViewHelper are present in a standard TYPO3 v11 LTS installation. Answer 1 and answer 2 can’t be correct. The three remaining answers all suggest to use the For-ViewHelper that begins with <f:for...>.
Take a look at the following example code:
<ul>
  <f:for each="{foo}" key="bar" as="item">
    <li>{bar}: {item}</li>
  </f:for>
</ul>
Suppose the variable foo contains the array ["cat", "dog", "hamster", "fish"]. The For-ViewHelper iterates the array, assigns the index (0 to 3 for each element) to a new variable named bar, and each element to a variable named item. The resulting output is:
<ul>
  <li>0: cat</li>
  <li>1: dog</li>
  <li>2: hamster</li>
  <li>3: fish</li>
</ul>
The syntax of the For-ViewHelper suggested in the answers 3 and 5 are both invalid. The missing argument “each” and the invalid arguments “iterate” and “action” would result in a Fluid parse error.
The correct answer is 4.
Which statements about the following Fluid inline notation are correct?
Answers
-
It generates the same output as:
<f:format.raw>{string}</f:format.raw> -
It generates the same output as:
<f:content format="raw">{string}</f:string> -
It generates the same output as:
{f:format.raw(value: '{string}')} -
It generates the same output as:
{format.raw() -> string} -
It generates the same output as:
{f:format.raw(string)}
Number of correct answers: 2
Explanation
The option to write ViewHelpers using inline notation opens up a wide range of possibilities for developers and integrators. As a certified TYPO3 integrator, you should know how to write ViewHelpers in all variations. Typically, three ways exist to achieve this. The often used tag-based method and the inline notation with and without the arrow operator.
The question already shows one of the options: {string -> f:format.raw()}. The second valid option is shown in the first answer. This is the standard tag-based method. Don’t let the second answer distract you: The ViewHelper <f:content> does not exist. Answer 2 is clearly wrong. The answers 3 and 5 are both quite similar. If you are unsure if any of them show the right syntax, put them aside for now and focus on answer 4. This answer shows the inline notation with the arrow operator. However, in the wrong order. The variable name (here: string) comes first. This makes answer 4 also wrong.
Now, back to the answers 3 and 5. One of them must be right as the question indicates that two answers are correct. As the Fluid documentation of the FormatRaw-ViewHelper reveals, you can also pass the data to the ViewHelpers through the argument “value”. The inline notation shown in the answer 3 reflects this, which means that this answer is correct.
In fact, there is another, fourth option how to use the FormatRaw-ViewHelper:
<f:format.raw value="{string}" />
The correct answers are 1 and 3.
What is the correct inline notation of the Fluid code below?
<f:link.page pageUid="123" additionalParams="{foo: 'bar'}" />
Answers
-
{f:link(page.uid = '123', page.additionalParams = 'foo:bar')} -
{f:link.page({uid: '123', additionalParams: {foo: 'bar'})} -
{f:link.page(pageUid = '123', foo = 'bar')} -
{f:link.page(pageUid: '123', additionalParams: {foo: 'bar'})}
Number of correct answers: 1
Explanation
This question is another example of converting a ViewHelper between tag-based and inline notation. The main challenge with this question are the arguments. You should know how to pass arguments of various data types to a ViewHelper. Let’s break down the ViewHelper call that is given in the question:
<f:link.page pageUid="123" additionalParams="{foo: 'bar'}" />
- “
f:” is the ViewHelper namespace - “
link.page” is the name of the ViewHelper - “
pageUid” is the first argument that passes the “123” to the ViewHelper - “
additionalParams” is the second argument that passes an object to the ViewHelper
The correct inline notation must contain all these information. Answer 3, for example, does not have the name of the second argument (“additionalParams”) and, therefore, can’t be correct. In addition, the object is not passed to the ViewHelper as an object.
Answer 1 shows all information but the ViewHelper name is slightly incorrect. The name, including the namespace, should read “f:link.page” rather than “f:link”. On top of that, the argument should read “pageUid” rather than “uid”. The first answer is wrong.
The syntax suggested in answer 2 is also suspicious. Not only is the argument “uid” wrong but there is also something messed up with the opening and closing brackets.
Now, only one option is left: answer 4. This inline notation contains all information, the right names, and the correct data types:
The correct answer is 4.
A Fluid layout file has the following content. Which statement is correct?
<html xmlns:f="http://typo3.org/ns/TYPO3/CMS/Fluid/ViewHelpers">
  <div class="example">
    <f:render section="content" />
  </div>
</html>
Answers
-
Based on the content of the layout file, the file name of the layout file must read “Content.html”
-
Based on the content of the layout file, the file name of the template file must read “Example.html”
-
A section named “content” is required in the template file:
<f:section name="content">...</f:section> -
A closing Render-ViewHelper tag is missing:
</f:render>
Number of correct answers: 1
Explanation
The first and the last line are not relevant for this question (more precisely: not for the four given answers). These lines are only distractions that you can ignore: <html> ... </html>.
The Render-ViewHelper addresses the section named “content”, which (in this case) must exist in the Fluid template file. If it does not exist, the following error occurs:
Section “content” does not exist.
Neither the file name of the layout nor the template file are relevant. The file names are important but they are not defined by the content of the layout file. The answers 1 and 2 are therefore wrong.
The Render-ViewHelper – as it stands in the given code snippet – is stated as a non-container tag. This means that it neither contains any content nor child tags. According to the XHTML standard, all open tags must be closed. Therefore, non-container tags must end in “/>”. This is the case in the code snippet, which makes answer 4 wrong.
You could also write the following to avoid a non-container tag for the Render-ViewHelper:
<f:render section="content"></f:render>
The correct answer is 3.
What is the output of the following Fluid template code?
<f:for each='{coffee: "black", milk: "white", cocoa: "brown"}' key="drink" as="colour">
{drink} is {colour}.
</f:for>
Answers
-
drink is colour. -
colour is drink. -
coffee milk cocoa is black white brown. -
black is coffee. white is milk. brown is cocoa. -
coffee is black. milk is white. cocoa is brown.
Number of correct answers: 1
Explanation
Let’s analyze the code to determine which of the five answers shows the correct output. An array is passed to the For-ViewHelper. The array consists of three elements. Each element is a key-value-pair. While the ViewHelper iterates the array, the keys are assigned to the variable drink and the values to the variable colour. Fluid outputs both variables in each cycle.
The first two answers are out of question. They don’t even represent the three cycles of the loop. Answer 3 suggests that the output shows the three keys first (coffee, milk, cocoa), followed by the three values (black, white, brown). This can’t be correct either.
The output suggested in answer 4 looks more promising. However, the keys and values are mixed up. Answer 4 would be correct if the line inside the ViewHelper would read {colour} is {drink}. However, it’s the other way round.
The last answer shows the right output. The keys and values are correct and all three cycles are included.
The correct answer is 5.
Replace “???” in the Fluid template code, so that the output becomes “chat katze cat”.
<f:for each='{english: "cat", german: "katze", french: "chat"}' as="pet" ???>
{pet}
</f:for>
Answers
-
values="{3,2,1}" -
reverse="true" -
random="true" -
output="french,german,english" -
pet[3,2,1]
Number of correct answers: 1
Explanation
An array with three elements is passed as the input to the For-ViewHelper. The value of each element is assigned to the variable pet. Without any replacement and without the “???”, the ViewHelper would generate the following output:
cat katze chat
However, the question states that the requirement is to output the elements in reversed order: “chat katze cat”. Is the solution to this problem really so simple that only the attribute reverse="true" has to be added to the ViewHelper?
Let’s look at the other options. You possibly also want to check the documentation of the For-ViewHelper to find out which arguments are valid.
Neither the argument values nor random nor output are supported. Using any of them would result in a Fluid parse error. The solution suggested in answer 5 can’t be correct either as this is not even a valid attribut for an HTML tag.
The bottom line is: yes! To reverse the iteration of the For-ViewHelper you only need to set reverse="true".
The correct answer is 2.
What does the following code in a Fluid template output?
<f:for each="{0:1, 1:2, 2:3, 3:4, 4:5, 5:6}" as="foo">
<f:cycle values="{0: 'A', 1: 'B'}" as="bar">
{bar}:{foo}
</f:cycle>
</f:for>
Answers
-
1:A 2:B 3:A 4:B 5:A 6:B -
A:1 B:2 C:3 D:4 E:5 F:6 -
A:1 B:2 A:3 B:4 A:5 B:6 -
0:A 0:1 1:B 1:2 2:3 3:4 4:5 5:6 -
0:A 1:B
Number of correct answers: 1
Explanation
The code contains two ViewHelpers. The For-ViewHelper that iterates an array and the Cycle-ViewHelper that (as the name suggests) cycles through the elements passed in the argument values.
The output is obviously a loop. It can’t be more or less than the number of elements in the input object: “{0:1, 1:2, 2:3, 3:4, 4:5, 5:6}”. These are six elements. Answer 4 shows eight elements and answer 5 shows two. Therefore, these two answers are wrong straight away.
Without the Cycle-ViewHelper, the output would be each value of the array preceded by a colon: “:1 :2 :3 :4 :5 :6”. That’s because the argument as="foo" assigns each value of the array to the variable foo which is available inside the For-ViewHelper. Without the Cycle-ViewHelper, the variable bar is empty. Therefore, the construct “{bar}:{foo}” would output a colon and the value of the variable foo in each cycle.
The Cycle-ViewHelper introduces the variable bar. In every cycle of the loop, it assigns a value from the input array “{0: 'A', 1: 'B'}” to the variable bar. Once it reaches the end of the array, it restarts at the beginning.
Now, let’s look what happens when you combine both ViewHelpers. The For-ViewHelper iterates the array and creates six cycles. For each cycle, the values 1, 2, 3, etc. are assigned to the variable foo. The Cycle-ViewHelper assigns the values A and B to the variable bar in the first and second cycle. In the third cycle, it starts over. This toggles the variable bar between A and B. Answer 3 shows the correct output: “A:1 B:2 A:3 B:4 A:5 B:6”.
Answer 2 is nonsense as the variable bar never contains the values C, D, E, or F. Answer 1 is also wrong as the variables are mixed up. This answer would be correct, if the code would read “{foo}:{bar}”.
The correct answer is 3.
Which ViewHelpers can you use to make the value foo available as the variable bar?
Answers
-
The Variable-ViewHelper:
<f:variable name="bar">foo</f:variable> -
The Declare-ViewHelper:
<f:declare values="{bar: 'foo'}">{bar}</f:declare> -
The Map-ViewHelper:
<f:map alias="{bar: 'foo'}">{bar}</f:map> -
The Alias-ViewHelper:
<f:alias map="{bar: 'foo'}">{bar}</f:alias>
Number of correct answers: 2
Explanation
Believe it or not – this is in fact a very simple question. You have four options and the number in brackets in the questions indicate that only two of them are correct. We expect from TYPO3 integrators that they know which ViewHelpers exist in TYPO3. Two answers refer to ViewHelpers that are available in TYPO3 and the other two ViewHelper are made up. They simply don’t exist.
The first answer suggests the Variable-ViewHelper. This is indeed correct. The following example outputs the value “foo”:
<f:variable name="bar">foo</f:variable>
<p>{bar}</p>
Answer 2 suggests to use the Declare-ViewHelper and answer 3 the Map-ViewHelper. Neither of them exist. The answers 2 and 3 are therefore wrong.
The last answer suggests the Alias-ViewHelper, which is the second correct answer. The following code results in the same output as above:
<f:alias map="{bar: 'foo'}">
<p>{bar}</p>
</f:alias>
An interesting feature of Alias-ViewHelper is the fact that can also store arrays. However, you should note that using the Alias-ViewHelper could be a sign of weak architecture according to the TYPO3 documentation.
The correct answers are 1 and 4.
The following Fluid code does not output the status “cute” of your cat. What bug in the code causes this issue?
<f:alias map="{status: 'cute'}"></f:alias>
<p>My cat is {status}</p>
Answers
-
The argument of the Alias-ViewHelper should read
value="..."instead ofmap="..." -
The variable
{status}is only available inside the<f:alias>...</f:alias>tags -
The variable in the second line should read
{map.status} -
The variable in the second line should read
{status -> f:alias()}
Number of correct answers: 1
Explanation
This question assesses your ability to debug a faulty code snippet. The exam does not take this approach very often but as a certified TYPO3 integrator, you will occasionally face such a situation.
Assuming that you are familiar with the Alias-ViewHelper, you should know that the argument map="..." is correct to receive the input data. The claim in the first answer is wrong.
How do you access the value that is assigned to the variable status? Answer 3 suggests that this is a sub-key (map.status) and answer 4 shows a syntax that applies the Alias-ViewHelper a second time. Both answers are wrong.
Answer 2 provides that right solution. Variables that you map with the Alias-ViewHelper are only available inside the tags. You can fix the bug by moving the second line between the opening and closing tags:
<f:alias map="{status: 'cute'}">
<p>My cat is {status}</p>
</f:alias>
This change results in the output “<p>My cat is cute</p>”.
The correct answer is 2.
Replace “???” in the Fluid template code, so that the output becomes “Number of elements: 3”.
<f:alias map="{x: {0: 'muffy', 1: 'buffy', 2: 'fluffy'}}">
Number of elements: ???
</f:alias>
Answers
-
{f:count(x)} -
{subject -> f:count(x)} -
{x -> f:count()} -
<f:count subject="{x}" /> -
<f:count value="{x}" /> -
<f:count map="{x}" />
Number of correct answers: 2
Explanation
First of all, note that this question has two correct answers. This means that two options meet the requirements as stated in the question. As you can write almost all Fluid ViewHelper in two different notations – the tag and the inline notation – it is likely that one of the first three answers and one of the last three answers are correct.
The question/answers give you another hint. This question is obviously not about the Alias-ViewHelper but about the Count-ViewHelper. All six possible answers refer to it.
Focus on the answers 1, 2, and 3 first. Answer 1 looks plausible but the syntax is invalid. Answer 2 is also wrong as a variable subject does not exist. Answer 3, however, shows like a valid option. This inline notation of the Count-ViewHelper counts the elements of the array stored in the variable x and outputs the result.
Now, let’s turn to the tag notation that the answers 4, 5, and 6 state. The truth is that you have to know the right syntax of the Count-ViewHelper, or, to be more precise, which argument receives the input value. Neither the argument value="..." nor map="..." is correct.
Apart from the inline notation shown in the answer 3, the following code snippet provides the correct output:
<f:alias map="{x: {0: 'muffy', 1: 'buffy', 2: 'fluffy'}}">
Number of elements: <f:count subject="{x}" />
</f:alias>
The correct answers are 3 and 4.
Which statements about the following code in a Fluid template file are correct?
<f:variable name="cups" value="3" />
<f:if condition="{coffee} <= {cups}">
<f:then>
<p>I am still tired</p>
</f:then>
<f:else>
<p>I am full of energy</p>
</f:else>
</f:if>
Answers
-
The HTML tags
<f:then>and<f:else>are ViewHelpers -
The ViewHelper
<f:if>iterates the variable{coffee}three times -
If the value of the variable
{coffee}is greater than 3, no output is shown -
If the value of the variable
{coffee}is less than 0, boths texts are shown -
If the value of the variable
{coffee}is 3, the text “I am still tired” is shown -
The value
3is assigned to the variable{coffee}
Number of correct answers: 2
Explanation
The If-ViewHelper introduces if/then/else conditions into Fluid templates. This is a simple, yet powerful function. Apart from this ViewHelper, the code snippet also features the Variable-ViewHelper which merely assigns the value 3 to the variable cups. As this results in a hard-coded value, you can also read the condition as follows:
<f:if condition="{coffee} <= 3">
...
The If-ViewHelper has nothing to do with loops, and therefore, you can exclude answer 2. The sign “<=” is a comparator1 that is used to compare two arguments. It is not used to assign a value to a variable which makes the last answer also wrong.
Every HTML tag in Fluid that starts with a valid namespace (e.g. f: for the default Fluid namespace) is typically a ViewHelper. Take the code snippet as an example. It contains the Variable-ViewHelper, the If-ViewHelper as well as the Then-ViewHelper and Else-ViewHelper. The first answers is correct.
To determine which of the remaining three answers is correct, you have to check the condition:{coffee} <= {cups}
As the variable cups is the number 3 (see explanation above), the condition can be expressed in ordinary human terms as follows.
If the value of the variable
{coffee}is less than or equals 3, the first block comes into effect (“then”). Otherwise the second block comes into effect (“else”).
As a result you can be sure that TYPO3 always outputs something. Either “I am still tired” or “I am full of energy”. If the variable {coffee} is greater than 3 (answer 3), the “else”-block comes into effect and the text “I am full of energy” is shown. If the value of the variable {coffee} is less than 0 (answer 4), the “then”-block comes into effect and the text “I am still tired” is shown. Both answers 3 and 4 are wrong as they suggest different results.
If the value of the variable {coffee} is 3 (answer 5), the text “I am still tired” is shown. This is due to the equal-sign (=).
The correct answers are 1 and 5.
What does the following code in a Fluid template output if the variable number is the text string “foobar”?
<f:if condition="{number} < 42">
<p>Less than forty-two</p>
</f:if>
Answers
-
Nothing is shown as the variable
numberis not a numeric value -
An error is shown as the comparison fails due to the text string
-
The text “foobar” is shown
-
The text “Less than forty-two” is shown
Number of correct answers: 1
Explanation
The TYPO3 developer or integrator who wrote this Fluid template highly likely expects a numeric value as the variable number. The code shows the text “Less than forty-two” wrapped in the HTML tag <p>-tag if the value of the variable is less than 42. What happens if the variable is not a number but a text string such as “foobar”?
The If-ViewHelper compares the arguments but does not take their data types into account. PHP developers know this from the double equals (==) and tripple equals (===) signs. The double equals sign checks for value equality only. This is also called type coercion.
- The numeric representation of a text string is
1 - An empty string is equals the numeric value
0
If the variable number is the text string “foobar”, the expression reads:
If
1is less than42, the condition is met.
This is of course true and therefore the text “Less than forty-two” is shown, as suggested in answer 4.
The correct answer is 4.
What is the output of the following code in a Fluid template?
<f:variable name="number" value="5" />
<f:if condition="{number} % 2">foobar</f:if>
Answers
-
Nothing is shown
-
An error is shown
-
The text “foobar” is shown
-
The value
2.5is shown
Number of correct answers: 1
Explanation
The percentage sign (%) is a comparator with a special meaning: It executes a modulo operation. Wikipedia defines the modulo operation as follows:
As the result of “5 modulo 2” evaluate to 1, the condition is met, and the text “foobar” is shown. This means that answer 3 is correct. Don’t worry though. We do not expect you to solve difficult and complex mathematical problems in the exam. You should, however, know which comparators exist in conditions and what they do:
| Comparator | Meaning | Example |
|---|---|---|
== |
equals | If A is equal to B |
!= |
not equals | If A is not equal to B |
< |
less than | If A is less than B |
<= |
less than or equals | If A is less than or equal to B |
> |
greater than | If A is greater than B |
>= |
greater than or equals | If A is greater than or equal to B |
% |
modulo operation | A modulo B |
The modulo operation is by the way a great solution to determine odd/even numbers, for example to style a list with striped rows like a zebra.
The correct answer is 3.
What is the inline notation of the following code in a Fluid template?
<f:if condition="{foo}">
<f:then>
yes
</f:then>
<f:else>
no
</f:else>
</f:if>
Answers
-
{f:if(condition: '{foo}', then: 'yes', else: 'no')} -
{f:if(condition: '{foo}' ? 'yes' : 'no')} -
{f:if(condition="{foo}", then="yes"', else="no")} -
{f:if('{foo}') then {'yes'} else {'no')}}
Number of correct answers: 1
Explanation
TYPO3 developers and integrators sometimes find it difficult to read or write the inline notation of the If-ViewHelper. This is not unjustified, since they often have to deal with nested ViewHelpers due to the “then” and “else” statements. If you are unsure about the right answer, try to apply logic and first focus on the answers that can’t be correct.
The then and else blocks with curly brackets that the answer 4 shows is nonsense. The inline notation of Fluid ViewHelpers does not work this way. Answer 4 is wrong.
The equal signs shown in answer 3 are also highly suspicious. This could remind you of attributes in HTML tags such as <p class="small">. Answer 3 is a typical distractor that you can exclude too. At this point you are down to just to 2 possible answers. You are almost through.
Have you ever seen a condition construct with a question mark “?” and a colon “:” as suggested in answer 2? If your answer is “yes” you’re probably a programmer! This is a so-called ternary operator that exists in many programming languages. In PHP programming you could, for example, write the following:
$choice = $input ? 'yes' : 'no';
Having said that, the ternary operator doesn’t exist for the If-ViewHelper which makes answer 2 also wrong. The first answer shows the correct inline notation of the code.
The correct answer is 1.
How can you generate a link to the page with the ID 123 in a Fluid template?
Answers
-
By using the LinkPage-ViewHelper as follows:
<f:link.page id="123">page link</f:link.page> -
By using the LinkPage-ViewHelper as follows:
<f:link.page pageUid="123">page link</f:link.page> -
By using the Link-ViewHelper as follows:
<f:link additionalParams="{pageUid: '123'}">page link</f:link> -
By using the Page-ViewHelper as follows:
<f:page uid="123">page link</f:link.page>
Number of correct answers: 1
Explanation
The Link-ViewHelper does not exist as such. However, TYPO3 features several sub-ViewHelpers:
-
LinkAction-ViewHelper (
<f:link.action>) to create links for Extbase actions -
LinkEmail-ViewHelper (
<f:link.email>) to create links for email addresses -
LinkExternal-ViewHelper (
<f:link.external>) to create external link targets -
LinkFile-ViewHelper (
<f:link.file>) to create links to a file (FAL) -
LinkPage-ViewHelper (
<f:link.page>) to create links to pages in TYPO3 -
LinkTypolink-ViewHelper (
<f:link.typolink>) to create links from fields supported by the link wizard
Answer 3 is out of question but both, answer 1 and answer 2 are possible options. A ViewHelper named Page-ViewHelper as suggested in the last answer does not exist either. So let’s focus on the first two answers.
The only difference between the suggestion in answer 1 and answer 2 are the attributes id and pageUid. Although we usually refer to an “ID” when we talk about page identifiers, the technical term is page UID. This is due to the fact that the corresponding field in the database tables is defined as the unique identifier and is therefore named uid. The attribute pageUid as shown in answer 2 is the correct name to refer to a page ID.
Having said that, the attribute id as suggested in answer 1 also exists. You can use this attribute to add an id-attribute to the HTML link tag, for example:
<a id="foobar" href="https://example.com/page">page link</a>
To generate a link to a specific page in the TYPO3 system, the LinkPage-ViewHelper as shown in the second answer is a good choice.
The correct answer is 2.
What is the purpose of search engine optimization (SEO)?
Answers
-
Secure the website against denial of service attacks (DoS)
-
Translate a single to a multilingual website to reach a wider target audience
-
Improve the quality and quantity of traffic to the website
-
Distribute the load across multiple servers
-
Provide search engines with specific instructions not to crawl undesirable content
Number of correct answers: 2
Explanation
This is a warm-up question and a great introduction to the topic. It goes without saying that the abbreviation SEO stands for search engine optimization, but what exactly and formally are we trying to achieve with SEO?
Although protecting a website from various attacks (including denial of service attacks) is an important task, this has nothing to do with SEO. The first answer is wrong. The chapter “Security and Privacy” contains several example questions about this topic. If the content of a website is translated from one language into several languages, this expands the target audience, but has no direct effect on the “ranking” in search engines. The second answer is therefore also wrong.
If you distribute the traffic and load across multiple servers, you likely improve the performance of the website. This indeed influences the ranking of your TYPO3 site but is, formally speaking, not the purpose of SEO.
Wikipedia defines SEO as follows:
This makes answer 3 correct without doubt. The purpose of SEO is to improve the quality and quantity of traffic to the website.
Some readers will see answer 5 as wrong at first glance and may doubt that it is also a correct answer. For many, SEO seems to focus on promoting the content of websites, but not the opposite as suggested in answer 5. However, this assumption is wrong. SEO is also about instructing search engines which content they should not crawl.
The correct answers are 3 and 5.
Which method should you use to tell search engines that a page also exists in another language?
Answers
-
Make sure that the HTML output contains elements like the following:
<link rel="alternate" hreflang="..." href="..." /> -
Make sure that the
robots.txtfile contains a line like the following:Language: ... -
Make sure that the checkbox “promote language” is activated in the page properties (tab: “SEO”)
-
Deinstall the system extension “SEO” as this extension disables some multilanguage features
Number of correct answers: 1
Explanation
Google and other search engine vendors point users to the most appropriate version of your page by their language or region. Let’s take a TYPO3 website as an example. The default language is English. Most pages have been translated into German as the second and French as the third language respectively. A user from Germany who looks at the search engine’s results is likely most interested in the page that features German. A user whose browser or operating system is set to French, on the other hand, is more likely to want to access pages in French. By telling search engines that a page also exists in German and French, you help them to show the most appropriate language option to the users.
Even if you don’t know the correct answer how to configure this in TYPO3, you can easily eliminate the wrong answers. Answer 4 is nonsense as the system extension “SEO” does not disable any other features of the system. This would be counterproductive. Answer 3 is also wrong as the page properties don’t feature a checkbox “promote language”.
At this point you already eliminated half of the possible options and you are left with a 50% chance of choosing the right answer as only two answers are left. However, you don’t need to guess if you are familiar with the SEO basics and the robots.txt de facto standard.
The robots exclusion standard (robots.txt file) does not officially support an instruction “Language”. You should, however, make sure that the HTML output contains the so-called hreflang tag. Setting this tag is done automatically by the “SEO” system extension if the page is available in other languages and not explicitly disabled. As a side note, you should also keep in mind that localized versions of pages are only considered duplicates if the main content of the page remains untranslated.
The correct answer is 1.
Which statements about on-page and off-page SEO are correct?
Answers
-
As a TYPO3 integrator, you typically control on-page SEO factors
-
Setting page titles is considered as an off-page SEO technique
-
The performance of your website is considered neither as an on-page nor as an off-page SEO factor
-
An image “alt”-text is considered as an on-page SEO technique
-
You can either implement on-page SEO or off-page SEO but not both
-
Inbound links and social media campaigns are considered as off-page SEO techniques
Number of correct answers: 3
Explanation
This question also belongs to the category SEO basics. We expect you, as a certified TYPO3 integrator, not to be a SEO expert. However, you should know the differences and most important characteristics of on-page and off-page SEO.
In simplified terms, measures that are directly visible in the frontend are usually referred to as on-page SEO. In this context, “visible” means visible to search engines rather than humans of course. Some examples for on-page SEO measures are content structuring, headlines, keywords, meta description, title and alt tags, page navigation, URL structure, etc. On-page SEO also includes SSL/TLS (https-links), site performance, and mobile friendliness/responsiveness.
The first answer is obviously correct as all these measures can be controlled by you: a TYPO3 integrator. Answer 4 is also right as “alt”-texts of images are indeed considered as an on-page SEO technique.
Off-page SEO refers to actions taken outside of your website. For example social media marketing, blog articles that mention or refer to your website, external links that point to your website or mention the brand, influencer marketing, etc. These measures also aim to improve the ranking of your site on search engines. This makes answer 6 also correct.
Setting a page title (answer 2) is an on-page SEO measure rather than an off-page SEO technique. As the performance of your website impacts the SEO ranking, answer 3 is also wrong. Last but not least, both techniques – on-page and off-page SEO – should be implemented to achieve the best possible SEO outcome. This makes answer 5 wrong.
The correct answers are 1, 4, and 6.
How can you instruct search engines not to index a specific page that is publicly accessible?
Answers
-
The only option is to restrict access to this page to authenticated frontend users
-
By adding the following TypoScript configuration:
config.noindex = 1 -
By enabling the option “Do not index” in the “Access” tab of the page properties of this page
-
By disabling the option “Index this page” in the “SEO” tab of the page properties of this page
Number of correct answers: 1
Explanation
When search engines access your TYPO3 site and crawl through pages to index them, you can instruct them what to do and not to do. This is usually done by either a specific keyword in the HTTP header or by setting meta tags in the HTML document generated by TYPO3. Keep in mind that not all search engines respect all configuration options. You can only tell search engines your preferences and it is not guaranteed that every search engine follows your instructions.
If you restrict the access to certain pages (as suggested in the first answer) search engines are unable to index them. However, this can’t be the right approach as nobody will be able to access the page without authentication. The question explicitly stated publicly accessible page, so this answer is wrong.
The TypoScript configuration in answer 2 simply does not exist and therefore has no effect. The option “Do not index” does not exist in any page properties either. Answer 3 is also wrong. However, this answer is close to the solution. If you disable the option “Index this page” in the “SEO” tab, TYPO3 generates a meta tag that similar to the following in the frontend:
<meta name="robots" content="noindex,..." />
The correct answer is 4.
What is the purpose of the option “Follow this page” in the page properties?
Answers
-
If disabled, search engines do not follow a possible redirect to an HTTPS-version of this page
-
If enabled, search engines treat the content of this page as legitimate duplicate content
-
The option defines if search engines should index this page
-
The option defines if search engines should follow the links on this page
Number of correct answers: 1
Explanation
If you are unsure what the setting “Follow this page” in the tab “SEO” of the page properties does, I recommend you do a few things before you continue reading the explanation below. Check out the function in a simple TYPO3 test environment and analyze what happens in the frontend. Also, read the documentation of the SEO extension and have a look at the robots meta tag specification, for example in the Google Search documentation.
You find two toggle switches in the page proprties that let you instruct search engines what to do when they hit the page. The first option is “Index this page”, the second option is “Follow this page”. You find both options in the “SEO” tab under Robot instructions. If you configure TYPO3 to output the robots meta tag in the frontend, TYPO3 takes two fields from the database table pages into account: no_index and no_follow.
The question focuses on the “Follow this page” option (field: no_follow). If the toggle switch is enabled, the robots meta tag outputs “follow” as the content:
<meta name="robots" content="...,follow" />
If the toggle switch is disabled, the output becomes “nofollow”. This instructs search engines not to follow the links on this page. If you don’t specify this directive, search engines typically follow the links to discover, analyze, and index further pages.
The robots meta tag does not instruct search engines to follow (or not to follow) any redirects. It also has nothing to do with duplicate content which means that the first two answers are wrong. Although the third answer is related to the robots meta tag (it refers to the “index” or “noindex” directive), it’s not about the “Follow this page” option. Answer 3 is also wrong.
The correct answer is 4.
Backend users complain that they can’t find any SEO functions in the page properties other than the meta tag configuration. What could cause this issue?
Answers
-
SEO functions are not enabled in a standard TYPO3 installation by default
-
The backend users don’t have the required administator privileges in the TYPO3 backend
-
The system extension “SEO” is not installed or currently deactivated in the system
-
SEO measures can only be applied on pages in the first level of the page tree, not on subpages
-
You are using the free community edition of TYPO3 but SEO functions are only available in the enterprise edition
-
The backend user permissions are not set properly
Number of correct answers: 2
Explanation
In many cases, TYPO3 integrators are the point of contact for customers who need, for example, technical advice or help with problems on their website. This often includes questions about the usage of functions in the backend – or when features are missing. If certain functions are missing, you should know what could cause this issue, how to check/investigate the problem, and how to fix it. This does not only apply to SEO functions.
First of all, SEO functions are part of a standard TYPO3 installation by default. You don’t need to explicitly enable them. The page meta tag configuration options are provided by the TYPO3 Core but for the additional SEO fields the system extension “SEO” needs to be installed. In a non-Composer installation, this extension can be deactivated. Answer 1 is therefore wrong and answer 3 is correct. Checking if the SEO extension is available in the TYPO3 system is a good first step when you investigate the issue.
TYPO3 is of course open-source software and all core functions are available free of charge. There is no enterprise edition that provides more features. You can scratch answer 5 straight away.
Answer 2 suggests that only backend users with administator privileges can access SEO functions. This even seems plausible if you imagine a system where not all users should be allowed to edit SEO elements. You can, in theory, revoke access to SEO functions for standard backend users and only allow administators to use them. However, the important keyword in answer 2 is “required”. The truth is that administator privileges are not required necessarily to use SEO functions. You can restrict the access by configuring user permissions – and you can also allow access by configuring the same.
If you misconfigure the user permissions, you could end up in a situation where backend users can’t see any SEO functions in the page properties. This is described in the last answer. Therefore, this answer is also correct.
At this point only answer 4 is remaining, and we can assume that this answer is also wrong, given that we already determined the two correct answers. Indeed, SEO measures are not limited to pages in the first level of the page tree. Answer 4 is nonsense.
The correct answers are 3 and 6.
Search engines report that your TYPO3 site contains two pages with identical/duplicate content. How can you address this issue?
Answers
-
By setting different page titles for each page
-
By using the field “canonical link” in the page properties
-
By decreasing the frequency and priority of the sitemap indexing
-
Ignore this report as duplicate content improves the search engine ranking
Number of correct answers: 1
Explanation
Search engines don’t like duplicate content very much. Duplicate content is content, for example text, that exists under multiple URLs on the Internet. If more than one URL shows identical or very similar content, search engines can no longer decide which URL to list in the search result, or which of the URLs should be ranked higher. As a consequence, search engines often downgrade both URLs. Answer 4 is clearly wrong.
The Google Search documentation defines duplicate content as follows:
Having said that, duplicate content is not always malicious. There are valid reasons why your site shows the same content under different URLs, or why your site features pages with very similar contents. In these cases, it makes sense to indicate the preferred URL to search engines. This method is called canonicalization.
Setting different page titles for each page does not address the issue. This makes the first answer wrong. So is answer 3. Changing the frequency and/or priority settings of a page for the XML Sitemap makes no difference in regards to identical/duplicate content.
The correct solution is to leverage the canonical link in the tab “SEO” of the page properties. TYPO3 automatically generates a canonicalized URL to the current page in the current language if the field is empty. You can override the default behavior and explicitly set an alternative canonicalized URL if your page contains identical/duplicate content.
The correct answer is 2.
How do you output the author’s name “John Smith” as a meta tag of the page ID 123 in the frontend?
Answers
-
By setting the following TypoScript configuration only on the page ID
123:page.meta.author = John Smith -
By adding the following line to the Page TSconfig only on the page ID
123:page.meta.author = John Smith -
By adding the following line to the User TSconfig of the backend user “John Smith”:
page.meta.uid = 123 -
By creating a backend user “John Smith” and assigning the page ID
123to this user as the owner -
By setting the following TypoScript configuration and entering the author’s name in the page properties of page ID
123:page.meta.author.field = author
Number of correct answers: 2
Explanation
The number in round brackets next to the question indicates that two of the five given answers are correct. This typically means that TYPO3 offers at least two ways how to meet the requirement stated in the question.
Answer 4 is, however, a stupid idea if you think about it. If you had to create extra backend user accounts to be able to output a proper “author” meta tag in the frontend, this would be unnecessarily cumbersome. Answer 3 suggests a similar approach – at least this answer indirectly indicates that user accounts are required. The answers 3 and 4 are wrong.
The first two answers make more sense. The TypoScript configuration page.meta.author indeed exists, and it lets you set the author’s name as a meta tag. As the output is expected in the frontend, the configuration must go into the TypoScript setup rather than the Page TSconfig as suggested in answer 2. The Page TSconfig controls the behavior in the backend. Answer 1 is correct and answer 2 is wrong.
Having said that, the page properties offer two fields to enter the author’s details. The tab “Metadata” lets you define the author’s name and email address. You find these two fields in the database table pages: author and author_email. If you enter data into these fields, TYPO3 does not output the values by default. You have to tell the system which field(s) should be used. This is what answer 5 rightly suggests.
The correct answers are 1 and 5.
Which statements about human-readable URLs in TYPO3 are correct?
Answers
-
A third-party extension such as “RealURL” or “CoolURI” is required to generate human-readable URLs in TYPO3
-
The implementation of human-readable URLs in TYPO3 is based on the Symfony Routing Component
-
To generate human-readable URLs, TYPO3 requires a mapping file
typo3conf/Mapping.xml -
Backend users require administrator privileges to update the “slug” of pages
-
Page-based routing is supported by TYPO3 out of the box
Number of correct answers: 2
Explanation
Although I assume that most of the readers know what human-readable URLs are, we should first clarify the terminology to make sure that we are all on the same page. Human-readable URLs are also known as speaking URLs, pretty URLs, clean URLs, user-friendly URLs, or search engine-friendly URLs. They all mean the same: URLs that are easy to read and understand, typically (but not exclusively) by humans. A Wikipedia article provides the following description of clean URLs:
The following table shows some typical examples of technical URLs in the left column and their corresponding human-readable URLs (“clear URLs”) in the right column.
| Technical URL: | Human-readable URL: |
|---|---|
example.com |
example.com/about-us |
example.com/index.php |
example.com/news/football |
example.com |
example.com/foo/bar |
Third-party extensions such as “RealURL” or “CoolURI” were indeed required for older TYPO3 versions to generate human-readable URLs. The last versions supported by RealURL and CoolURI are TYPO3 v8 LTS and TYPO3 v9 LTS respectively. Since TYPO3 v9 LTS1, the core takes care of URL conversions from, for example, “index.php?id=123” to a human-readable URL. The first answer is therefore wrong.
When a client sends a request to a TYPO3 instance, TYPO3 analyzes the requested URL and maps the URL to a specific page or action. This process is called routing. TYPO3 features two types of URL routing in general: page-based routing (which is part of the Core functionality) and the processing/mapping of additional parameters through route enhancements and aspects. Some configuration is required for the second type. The entire routing concept in TYPO3 is based on the Symfony Routing Component. This means that the answers 2 and 5 are the correct answers.
Although we already identifier the two correct answers, let’s look at the two remaining answers regardless. A mapping file such as typo3conf/Mapping.xml is not required to generate human-readable URLs. Answer 3 is made up. If backend users needed administrator privileges to edit slugs, editors would not be able to customize page URLs to their needs.
Do you wonder what a “slug” is? A slug is a unique name for a specific resource such as a page. Let’s assume your TYPO3 instance contains a page named “Beer”. This page is a subpage of the page “Beverages” under “Food and drinks”. The human-readable URL of this path could be /food-and-drinks/beverages/beer. The last element (“beer”) is the slug of the page.
TYPO3 generates the slug based on the page title by default. However, backend users can adjust the automatically generated slug as required.
The correct answers are 2 and 5.
You created a new TYPO3 installation and installed your own site package. When you access the “Show” function in the backend, the frontend comes up but most of your pages show a URL such as example.com/autogenerated-1/pagename. Where does the segment autogenerated-1 typically originate from?
Answers
-
A slug in the page properties of the parent page(s)
-
The site name as configured under “Admin Tools → Settings → Global Configuration”
-
The default workspace named “autogenerated”
-
The entry point as configured in the site configuration
Number of correct answers: 2
Explanation
Three places exist in a TYPO3 installation that influence the generation of human-readable URLs. Extension authors can ship their custom route configuration with their extensions and leverage route enhancements and aspects. This is usually used to map parameters to actions, for example:
example.com → example.com/news/sports
The segment “news” could represent the page ID 123, and the segment “sports” could be mapped to the news category ID 42.
The page-based routing is part of the TYPO3 Core and maps a slug (e.g. “news”) to a specific page. For example:
example.com → example.com/news
The third place is the site configuration. Go to Site Management → Sites, open the site configuration, and have a look at the field “Entry Point”. This is the main URL that is used to access the frontend in the default language. You can configure language-specific suffixes for each language. For example:
Note that TYPO3 offers the best possible flexibility. You can use slashes (/) in page slugs as well as in site configuration entry points (main and language configuration). Therefore, it is hard to say where exactly the segment autogenerated-1 originates from. The name indicates that this is the entry point of the default site configuration that TYPO3 automatically creates if required. However, the segment could also be a page slug.
TYPO3 does not take the site name, that you can configure under Admin Tools → Settings → Global Configuration, into account when URLs are generated. It can’t be a workspace name either.
The correct answers are 1 and 4.
Where and how do you enable and configure TYPO3’s URL routing functionality?
Answers
-
Some routing configurations require settings in the site configuration
-
Page-based routing is disabled by default and can be enabled in Admin Tools → Environment
-
Routing can be configured in extensions and imported into TYPO3’s configuration
-
All routing options must be enabled in the file
AdditionalConfiguration.php -
Page-based routing can enabled/disabled on a page-by-page basis with Page TSconfig
options.routing.enable
Number of correct answers: 2
Explanation
Some routing functions are available out of the box in TYPO3. Some routing functions require custom configuration in the site configuration file config.yaml (for example the routing for extensions). The default global configuration array also contains a few specific settings that are related to TYPO3’s routing functions.
Open the TYPO3 backend and go to Site Management → Sites. Select a site and locate the tab Static Routes. TYPO3 stores the relevant configuration for every static route configured in this section in the site configuration file config.yaml. The first answer is without doubt correct.
TYPO3’s basic routing functionality is the page-based routing. This routing type lets you map pages to routes and is available by default. You only need to make sure that the rewrite functionality of the web server must be enabled and is properly configured. Read more about this topic in Apache’s “mod_rewrite” documentation, Nginx’ “Creating Rewrite Rules” blog post, or in the “URL Rewrite” module of Microsoft’s Internet Information Services (IIS).
You don’t need to enable page-based routing anywhere, which means that answer 2 is wrong.
TYPO3 lets you import YAML files from extensions. Instead of adding all routing configurations to the site configuration file, you can store them in extensions such as a site package extension. The keyword imports loads the configuration, for example:
imports:
- { resource: "EXT:sitepackage/Configuration/Routes/Default.yaml" }
Answer 3 is obviously the second correct answer.
Typically, you don’t need to add any configurations to the AdditionalConfiguration.php file in regards to TYPO3’s routing functionality. However, the PHP classes for route enhancers and aspects are defined in the global configuration array. I will provide more information about enhancers and aspects in later example questions in this book/eBook. For now, let’s agree that answer 4 is wrong, as routing options don’t need to be enabled in the AdditionalConfiguration.php file.
The last answer is also wrong. Page-based routing is a global configuration that can’t be enabled or disabled on a page-by-page basis. The Page TSconfig shown in answer 5 does not exist.
The correct answers are 1 and 3.
You have to configure a custom routing and want to map GET-parameters to routes by using enhancers and aspects. Where exactly can you do this?
Answers
-
In the TYPO3 backend under “Admin Tools → Settings → Routing”
-
In the TypoScript setup on the root page(s) of your site
-
In the site configuration in the TYPO3 backend under “Site Management → Sites”
-
In the site configuration YAML file stored as
config/sites/<identifier>/config.yaml
Number of correct answers: 1
Explanation
While page-based routing works out of the box in TYPO3, routes for extensions are too special to provide a standard configuration for them. Enhancers and aspects can be used to precisely control the system behavior with regard to URL routing. This includes in particular the mapping from GET-parameters to routes, which is important for extensions.
The Admin Tools don’t offer a function to configure routes though. Keep in mind that one TYPO3 installation is capable of serving multiple sites and you possibly want to have different routes for each site. Every configuration you do through the Admin Tools is always global. This means that answer 1 can’t be correct.
The solution suggested in answer 2 sounds plausible at first glance. You can apply TypoScript to each individual site and you can even implement different TypoScript configurations on different pages. However, TypoScript does not support routes and therefore, answer 2 is also wrong.
You can indeed set up enhancers and aspects in the site configuration. However, TYPO3 does not feature a web interface that lets you configure extended routing. Instead of using a backend module you have to edit the YAML file that represents the site configuration. This file is stored as config/sites/<identifier>/config.yaml. Thus it is obviously also possible to configure different routes for different sites.
The correct answer is 4.
Which statements about route enhancers and aspects are correct in TYPO3’s URL routing configuration?
Answers
-
Route enhancers must be configured in the site configuration and aspects under “Admin Tools → Settings”
-
As route enhancers and aspects are not set up by default, you have to configure them
-
You can either implement page-based routing or advanced routing with enhancers and aspects but not both
-
TYPO3 features several types of enhancers: simple, plugin, and Extbase plugin enhancers
-
Every enhancer must have at least one aspect to work
-
Aspects can be registered to modify specific placeholders of enhancers
Number of correct answers: 3
Explanation
Some candidates feel a bit overwhelmed by such a question at first. You have to select three out of six answers and all answers are reasonably long. Don’t let that scare you off. The solution is not that difficult.
Everything that relates to the configuration of URL routing in TYPO3 needs to be done in the site configuration YAML file. The only exception are the page slugs that let backend users (for example editors) to manipulate the value of human-readable URLs. Answer 1 suggests that you have to configure aspects through the Admin Tools which is clearly wrong.
While page-based routing works out of the box in TYPO3, route enhancers and aspect – mainly used to configure routes for extensions – need to be set up manually. This makes answer 2 correct.
The page-based routing defines the path to a page. As you can add extensions to pages, the advanced routing configuration with enhancers and aspects goes on top of the page-based routing. Of course you can have both, and, in fact, you usually have both routing configurations in place. Answer 3 is wrong.
TYPO3 provides the following route enhancers out of the box:
- Simple Enhancer
This is a basic enhancer that is simple to configure and easy to use. The TYPO3 documentation states: “The Simple Enhancer works with various route arguments to map them to an argument to be used later-on.”
- Plugin Enhancer
Pi-based plugins often use URL parameters such as
&tx_example_foobar[code]=1234. You can use the plugin enhancer to make these URLs more human-readable, for example:/code/1234.
- Extbase Plugin Enhancer
Extbase is a PHP-based framework that is often used by TYPO3 developers to build extensions. Frontend plugins usually have controller/action combinations that control the behavior of the extension when executed. The Extbase plugin enhancer lets you configure routes especially for frontend plugins developed in Extbase.
- PageType Decorator
This enhancer is better known as a so-called decorator. It adds a suffix to an existing route which lets you map a URL that, for example, ends in
.xmlor.jsonto a specific page type. You can set up this page type to output content in an alternative format. Typical use cases are RSS Feeds for example.
This matches answer 4 which is therefore a correct answer. Let’s turn to the last two answers. Only one of them is right and they both deal with aspects.
The most common practice of an aspect is to map a parameter to a value that is stored in a database table, for example the name of a product. Another example are static values such as months. You could use aspects to extend an existing route that you set up by using the Extbase plugin enhancer to map human-readable months’ names (January, February, March, etc.) to numeric values that are stored in the database.
Answer 5 is wrong as aspects are optional (you can configure enhancers without aspects). Answer 6 is correct as aspects can be registered to modify specific placeholders of enhancers, for example months’ names.
The correct answers are 2, 4, and 6.
Replace “???” in the following site configuration fragment to map a request /item/42 to &product=42.
...
routeEnhancers:
ExampleRoute:
type: Simple
???
requirements:
product_id: '[0-9]{1,3}'
_arguments:
product_id: 'product'
Answers
-
controller: 'Product::item' -
postVarSets: [item=product_id] -
routePath: '/item/{product_id}' -
limitToPages: [42]
Number of correct answers: 1
Explanation
For many TYPO3 integrators, route enhancers and aspects are not easy to understand and to set up. It takes some time and practical experience to get your head around this topic.
Let’s tackle the challenge that this question poses. You should first realize that the code fragment uses the simple enhancer (type: Simple). This is important as this basic enhancer is simple to configure and only supports a few options. Therefore, you should be able to identify unsupported options easily and eliminate wrong answers. That’s a great start!
The first answer suggests to use the option controller. However, only the Extbase plugin enhancer lets you configure controller/action combinations. The option has no effect on simple enhancers which means that this answer can’t be right.
If the keyword postVarSets sounds familiar to you, you have possibly worked with TYPO3 for a long time. This variable name was used in the third-party extension “Speaking URLs for TYPO3” (better known as “RealURL”). TYPO3’s built-in URL routing does not feature such an option, which makes answer 2 also wrong.
The next two options indeed exist: routePath and limitToPages. If you want to limit the execution of an enhancer to specific pages, you can list the IDs as limitToPages. However, this option is not a placeholder for the “???” in the code above. The missing line is stated in answer 3.
The simple enhancer takes the value of a request such as /item/42 and converts the last element (the {product_id}) to an argument named product. An incoming request becomes “&product=42”). The conversion only kicks in if the value (the product_id) matches the regular expression “[0-9]{1,3}” (numeric values 0 to 9 with a minimum length of 1 and a maximum length of 3, which makes the valid range from 0 to 999).
The correct answer is 3.
Which statements about TYPO3’s localization and language capabilities are correct?
Answers
-
TYPO3 can be configured to include a stage for page and content translations in a workflow with the backend module “Workspaces”
-
TYPO3 can show a “fallback” page if a page hasn’t been translated yet
-
Language packs to translate labels in the backend can be purchased at the TYPO3 GmbH’s online shop
-
The TYPO3 Translation Team can be hired to translate your website content into other languages
-
The TYPO3 Translation Team offers discounts for members of the TYPO3 Association to translate website content
-
TYPO3’s backend is multi-language capable but only one language is available at a time for all backend users
Number of correct answers: 2
Explanation
This is obviously a warm-up question. First of all, TYPO3’s capability to power multilingual websites is outstanding and one of its unique selling points. You, as a TYPO3 integrator, create or set up multilingual websites. Therefore, you should be familiar with the settings and configuration options in TYPO3. It’s important to understand that TYPO3 has a concept of frontend languages and backend languages. They are independent from each other.
The first two answers refer to the frontend. The same applies to the answers 4 and 5. The term language pack in answer 3 indicates that this answer refers to the TYPO3 backend, so does the last answer. Let’s scratch the answers from the list that are obviously wrong.
Although language packs indeed exist, answer 3 is not correct. You can’t purchase language packs from the TYPO3 GmbH – and you don’t need to. In the TYPO3 backend, you can manage language packs under Admin Tools → Maintenance. This includes the free download and update of language packs. You’ll find further example questions about this function later in this study guide.
The next two answers are also suspicious. A “TYPO3 Translation Team” does not exist. The Localization Team comes close but they don’t offer translation services at all. This fact automatically makes the answers 4 and 5 wrong.
I pointed out above that TYPO3’s localization and multi-language features are exceptional compared to other open-source content management systems.
You can configure the TYPO3 backend to support several languages. For example English, Danish, French, German, and Japanese, among other languages. Every backend user can then choose from the selection of available languages in which language the user interface should be displayed. However, this requires that they have the appropriate permissions. The last answer is therefore also wrong as it states that only one language is available for all backend users.
This leaves us with two remaining answers and both of them must be correct. The answers 1 and 2 relate to frontend languages and translations.
A typical workflow when creating content on a multi-language website contains a translation stage. First, an editor enters the content in the default language. This often follows a review stage. Once the content has been finalized and approved, one or multiple translators take care of the translations into other languages. The content eventually goes “live” in all languages. The Web → Workspaces backend module (also see example questions in the chapter “Backend Administration”) is great solution to coordinate the actions and to implement such a workflow.
TYPO3 also features a fallback mechanism for missing translations as outlined in answer 2. With multiple languages activated, TYPO3 integrators can configure a fallback chain (also known as “overlays in mixed mode”). This means that if a translation is not yet available, the system automatically falls back to another language.
I should point out though that this function is only available on a page basis in TYPO3 v11 LTS. TYPO3 supports the fallback mechanism on a content basis in TYPO3 v12 LTS and newer.
The correct answers are 1 and 2.
What is a typical responsibility of the TYPO3 Localization Team?
Answers
-
Develop and maintain the TYPO3 extension “Crowdin” (extension key:
crowdin) -
Provide services related to the localization of the TYPO3 Core
-
Provide free proof-reading services for extension developers for their translated labels
-
Provide technical support to extension developers to enable them to release their extensions in as many languages as possible
-
Review and approve the translated texts of TYPO3 language packs
Number of correct answers: 1
Explanation
The previous question already dealt with the TYPO3 Localization Team and clarified that this team doesn’t offer translation services. Therefore, answer 3 does not sound like a correct answer – and it isn’t.
However, TYPO3 language packs are an essential part of the TYPO3 Core. Does this mean that answer 5 is correct? Is the Localization Team responsible for reviewing and approving the translated texts that appear in the TYPO3 backend? No, they aren’t. Answer 5 is also wrong.
A TYPO3 extension “Crowdin” indeed exists. According to the author, Georg Ringer, this extension features (quote) “in-context localization of XLF files handled by Crowdin directly in the backend”1. Although, this extension is a useful tool for TYPO3 Core developers and extension developers alike, it’s neither developed nor maintained by the Localization Team. The first answer is another wrong answer.
One of the team’s goals is undoubtedly to make TYPO3 available in as many languages as possible. This related not only to the TYPO3 Core but also to third-party extensions. Wouldn’t it makes sense to help extension developers to build their extensions in the best possible way to make the code ready for localization? Yes, but providing technical support to extension developers is not the responsibility of the Localization Team either. Extension developers are encouraged to read the relevant parts of the TYPO3 documentation.
According to the team page on typo3.org, the TYPO3 Localization Team provides and maintains the required services that allow translators and developers to localize the TYPO3 Core and extensions.
The correct answer is 2.
Which is the recommended and default format of language files in TYPO3?
Answers
-
The YAML format
-
PHP files that provide a data array
-
The Markdown format
-
The XLIFF format
Number of correct answers: 1
Explanation
When TYPO3 outputs labels in the user interface, these texts should not be hard-coded, but stored in a language file[]. This applies to the frontend, as well as the backend. Each language file represents one specific language. File A, for example, contains the labels in English, file B in German, file C in French, etc. As TYPO3 integrators can configure which file should be used in which situations, all labels shown to a user are localized.
Let’s use the TYPO3 backend user interface as an example. The default language of the backend is always English. If you install an additional language, for example French, a backend user with the appropriate access can switch the user interface from English to French. From this point on, TYPO3 shows all backend labels in the selected language for this specific user. This is, for example, French.
The question refers to the format of these language files. Historically, language labels were indeed stored in a PHP file containing an array with the language information. However, storing labels in PHP files is deprecated a long time ago and is not supported since TYPO3 v9. Answer 2 is wrong.
Neither the YAML nor the Markdown formats are used for language files in TYPO3 either. The answers 1 and 3 are also wrong.
Today, TYPO3 uses a format based on XML: XLIFF. The abbreviation XLIFF stands for XML Localization Interchange File Format. Its specification is aimed at the localization industry and the first version appeared as XLIFF Version 1.2 in 2008. XLIFF is part of the Open Architecture for XML Authoring and Localization (OAXAL) reference architecture.
In fact, the XLIFF format support was initially added in TYPO3 version 4.6, dating back to October 2011.
The correct answer is 4.
In which file of a TYPO3 extension are language labels typically stored?
Answers
-
In the file
labels.php -
In the file
locallang.php -
In the file
labels.xlf -
In the file
language.xml -
In the file
locallang.xlf
Number of correct answers: 1
Explanation
Since TYPO3 extensions are actually created by developers, you could argue that such a question is irrelevant to integrators. After all, no programming knowledge is expected from TYPO3 integrators. However, this is an edge case. Integrators should be able to alter existing labels by overriding the original value. To achieve this, you need to know where to look up the label and – more importantly – the unique identifier of the label. Therefore, you should know which file name typically represents a language file, and where you find these files.
All language labels used by an extension should be stored in language files. The default file name reads locallang.xlf and is stored in the directory Resources/Private/Language/. Depending on its purpose, slight variations of the file name possibly exist. Labels for database columns could be stored in a file locallang_db.xlf, for example. The last answer is therefore the only correct answer.
Let me still talk you through the wrong answers regardless. As explained in the previous question, the default format of language files in TYPO3 is XLIFF, an XML-based format specifically developed for the localization industry. The first two answers are wrong, as they suggest PHP files.
The file name suggested in answer 3 sounds logical but is wrong: labels.xlf is a distractor. The same applies to the file name language.xml as suggested in answer 4.
Do you wonder where the term locallang comes from? The exact origin of the term “locallang” is not known, but rumors say that in Danish, “lokale sprog” is a turn of phrase used to describe “the language they speak in that place”. The literal translation and abbreviation of lokale sprog is then “Local Lang”2. As a side note, Kasper Skårhøj (the “inventor” of TYPO3) was born in Denmark. Don’t worry – this background knowledge is not a question in any TYPO3 exam.
I should also point out that extension authors are encouraged to follow certain standards of file names and paths for language file. However, these standards can be ignored or bypassed. The example questions in this book, as well as the questions in the certification exam, always assume the standard.
The correct answer is 5.
Which backend language is available and set by default after a new TYPO3 installation?
Answers
-
German
-
Danish
-
English
-
The language must be selected during the installation
Number of correct answers: 1
Explanation
You have to set/select several options during the TYPO3 installation process. The access credentials to the database server3, for example, as well as the database engine type. You also have to provide some details of the initial admin user and the site name. Selecting the backend language, however, is not part of the installation. Answer 4 is wrong.
Although the “inventor” of TYPO3, Kasper Skårhøj, was born in Denmark, Danish is not the default language of the TYPO3 backend. You could assume that it’s German, as suggested in answer 1. Germany has indeed a huge community of TYPO3 enthusiasts, developers, and integrators. However, this answer is also wrong.
By default, TYPO3’s backend is set to English with no additional languages available.
The correct answer is 3.
Which is the official localization/translation management platform that TYPO3 integrates with?
Answers
-
Google Translate (by Google LLC)
-
ChatGPT (by OpenAI)
-
DeepL (by DeepL SE)
-
Crowdin (by OÜ Crowdin)
-
Linguee (by DeepL GmbH, formerly Linguee GmbH)
Number of correct answers: 1
Explanation
TYPO3 is famous for its multi language capabilities. This applies to content that is visible at the frontend, but also to labels used in the backend user interface. Not many content management systems on the market allow users to work in the administrator area in their native language, no matter which language this is – as long as a translation exists.
After a long history with Pootle, TYPO3 has used Crowdin (https://crowdin.com) since TYPO3 v10.3. Crowdin was founded by Serhiy Dmytryshyn in 2009. The modern SaaS solution is used as the localization/translation management platform by default and comes as the successor to Pootle.
With Crowdin you can do more than just translating the languages for the TYPO3 backend. Developers can use Crowdin to also translate user interface texts in their custom developed TYPO3 extensions. The TYPO3 documentation provides further details on this topic.
All other services mentioned in the answers exist. Google Translate, DeepL Translator, and Linguee are indeed translation/localization tools. ChatGTP, however, is an artificial intelligence chatbot.
The correct answer is 4.
How can you switch the language of the Admin Tools to a language other than English?
Answers
-
By installing the language pack through the backend
-
By manually copying the
locallang.xmlfile into theadmin/locallang/folder -
By entering the language code in the global configuration
$GLOBALS['TYPO3_CONF_VARS']['BE']['adminTools']['language'] -
The user interface of the Admin Tools is only available in English
Number of correct answers: 1
Explanation
Assuming that you often work as an administrator in the TYPO3 backend, and you’re used to a backend language other than English, you possibly wonder why the texts appear in English when you open a backend module such as Admin Tools → Maintenance.
The chapter “Installation” contains several example questions about the Install Tool, also known as the Admin Tools (in particular in the TYPO3 backend context). The Admin Tools are a stand-alone application that is decoupled from the TYPO3 backend (and frontend). After all, you still want to be able to access functions for analyzing and repairing the system, even if the backend is no longer accessible.
The strict logical separation of the Admin Tools from the TYPO3 backend has a side effect though: languages/translations are not supported.
A simple installation of a language pack wouldn’t provide any translations of the labels shown in the Admin Tools. Manually copying a file into the admin/locallang/ folder or entering a language code in the global configuration don’t let you switch the language either.
The user interface of the Admin Tools is only available in English.
The correct answer is 4.
Which steps are required to install/configure and activate a new backend language?
Answers
-
Download the language pack under Admin Tools → Maintenance → Manage Language Packs
-
Select the new language under Users → User Settings → Personal Data
-
Add the ISO language code of the new language to the global configuration array
$GLOBALS['TYPO3_CONF_VARS']['BE']['languages'] -
Configure the new language under Site Management → Sites (in the “Languages” tab)
-
Create a system record for the new language on the root page (ID: 0)
-
Enable the new language through the Page TSconfig statement
mod.SHARED.enableLanguages
Number of correct answers: 2
Explanation
The TYPO3 backend is set to English by default. To add a language, you instruct TYPO3 to download and install the relevant language pack. This process requires administrator privileges. Go to Admin Tools → Maintenance and click the button Manage languages. The next page provides an overview of the available languages. As English is always available and can’t be uninstalled, this language is not included in the list. At this point, you can add one or more languages. TYPO3 also shows the translation status for each installed extension to give you an idea what you can expect.
Neither an update of the global configuration nor a system record on the root page nor any settings in the Page TSconfig are required to add a new backend language. Therefore, the answers 3, 5, and 6 are wrong. The first answer is obviously correct.
The question also asks about the activation of the new language. An additional step is required to switch the backend user interface from one language to another. For this, we have to assume that the new language is available in the system. As the backend language can be selected on a per user basis, two methods exist:
- The backend user selects their new language.
- The administrator user sets the language of a specific backend user.
Answer 2 describes the first method. Backend users can set the language they prefer in their User Settings.
Sometimes it makes sense for an administrator to change the backend language on behalf of a user. A typical example for such a scenario are users who accidentally changed the language, don’t know how to switch it back, and can’t read the labels as they don’t understand the currently configured language. As an administrator, you can help out by opening the user record (System → Backend Users → …) and selecting a different language in the dropdown box User Interface Language.
The backend module Site Management → Sites does not offer any backend language configuration options, which makes answer 4 wrong.
The correct answers are 1 and 2.
What is required to install/configure and activate an additional frontend language?
Answers
-
Download the language pack under Admin Tools → Maintenance → Manage Language Packs
-
Enable the language through the backend module Web → Workspaces
-
Add the ISO language code to the global configuration array
$GLOBALS['TYPO3_CONF_VARS']['BE']['frontend'] -
Configure the language under Site Management → Sites (in the “Languages” tab)
-
Enable the new language through the Page TSconfig statement
mod.SHARED.enableLanguages
Number of correct answers: 1
Explanation
Be careful! Unlike the previous question, this question now refers to frontend languages. A frontend language is a language that users (visitors) of your website see. This is the language of the content. If your website supports more than one language, you typically have a default language and translations.
As I pointed out before, TYPO3’s frontend and backend languages are independent from each other. They also require different actions to install, configure, and activate them. This means that the correct answers are likely not the same as the answers for the previous backend language question.
Let’s start with answer 1. Frontend languages don’t come as language packs as nobody can produce a translation for the content of your site in advance. Answer 2, however, sounds more promising. A question early in this chapter dealt with a Workspaces’ stage specifically for translations. But this answer is also wrong. The backend module Web → Workspaces is not meant to manage (e.g. enable) frontend languages.
The global configuration $GLOBALS['TYPO3_CONF_VARS']['BE']['frontend'] suggested in answer 3 does not exist. This is another wrong answer.
The backend module Site Management → Sites offers a function to configure languages in the Languages tab. Each site configuration stores one or multiple language configurations. They include locales (to display dates and currencies in the correct formats for example), some frontend-related settings, the icon to visualize the language, etc. Answer 4 is therefore correct.
The Page TSconfig option mod.SHARED.enableLanguages does not exist. Although you find a few properties under the mod.SHARED option (for example: defaultLanguageFlag, defaultLanguageLabel, and disableLanguages), these properties have been superseded by the configuration in the site configuration. Answer 5 is also wrong.
The correct answer is 4.
Which statements about languages in site configurations are correct?
Answers
-
Each site configuration supports up to 16 languages
-
The default language English must be removed before any other language can be added
-
A fully qualified domain name can be configured as an entry point per language.
For example:example.fr -
A language specific suffix can be configured as an entry point per language.
For example:/fr/ -
The two letter ISO 639-1 code of the language must be configured as the entry point for each language.
For example:fr
Number of correct answers: 2
Explanation
TYPO3 has no limit on the number of languages you can add to the site configuration. At least no technical limitation. The first answer is therefore wrong straight away.
Removing the default language before you can add other languages does not make sense either. The keyword default indicates that this is the language that should stay no matter if you add further languages or not. The second answer is also wrong.
The next three answers all deal with entry points. Keep in mind that the entry point you can configure in the tab “General” stores the main URL of the frontend in the default language. The entry points for each language (in the tab “Languages”) can be different.
Entry points in both places store domains or parts of an URL. This can be a language specific suffix such as “/fr/” for French, “/de/” for German, or any arbitrary suffix such as “/foobar/” if you like. In theory you could also enter the two letter ISO 639-1 code of the language. However, this information should be configured under Locales and is neither mandatory nor makes sense as an entry point. This means that the last answer is wrong.
The correct answers are 3 and 4.
Which TypoScript syntax overrides the label ID more from the default XLIFF language file of the extension with the extension key foobar?
Answers
-
plugin.foobar._LOCALLANG.default.more = much more -
plugin.foobar._LOCALLANG.more.en = much more -
plugin.foobar._LOCAL_LANG.more.default = much more -
plugin.foobar.LOCAL_LANG.de.more = much more -
plugin.foobar._LOCAL_LANG.default.more = much more -
plugin.foobar.LOCALLANG.default.more = much more -
plugin.foobar.LOCALLANG.more = much more
Number of correct answers: 1
Explanation
You can override labels of third-party extensions with TypoScript. This requires that the extension author developed the extension in a correct and professional way, and the label is stored in the language file. If texts and labels are hard-coded in the source code, this option does not exist and texts can’t be customized.
Let’s approach the solution systematically: first, you notice that some answers contain the keyword default while others use en or de. As the question refers to the default language file, all answers that do not contain the keyword default are wrong straight away. This applies to the answers 2, 4, and 7.
Remember the correct spelling of the keyword _LOCAL_LANG. This helps you to eliminate two further answers (1 and 6) and leaves you with only the answers 3 and 5 as potentially correct answers. Logic helps you to make the correct decision which of the remaining answers is indeed correct.
Answer 3 selects the label more first, and then specifies the language. Now consider the complexity of a language definition that contains, for example, 200 language labels (which is quite possible in a large extension). Each of these labels has to be defined for all available languages. This would mean that the language labels for a specific language would be distributed among 200 definitions, instead of being collected in one branch. It therefore makes sense to take the opposite approach: the language first, the label second.
This results in _LOCAL_LANG as the keyword, default as the default language identifier, followed by the label ID more (answer 5). If you want to, override the same label for, for example, German (ISO code de), the TypoScript configuration would read: plugin.tt_news._LOCAL_LANG.de.more = much more.
The correct answer is 5.
You want to output the German translation of a text generated by the following TypoScript code, if the website language is German. Which additional line of TypoScript is required to achieve this?
Note: “Deutscher Text” is German (de) and means German text.
Answers
-
page.10._LOCAL_LANG.de = Deutscher Text -
page.10.lang.de = Deutscher Text -
page.10.value = Deutscher Text -
page.10.de = Deutscher Text -
This is not possible in TypoScript
Number of correct answers: 1
Explanation
As a certified TYPO3 integrator, you know that you can build TYPO3 sites in more than one language. TYPO3 supports content and page translations. Extension developers can also ship their extensions in multiple languages by adding language files. But what’s about texts generated by TypoScript as shown in the example code? This is, of course, possible, so the last answer is wrong.
The syntax in answer 1 likely looks familiar. However, the keyword _LOCAL_LANG is only used when you deal with translations of labels in extensions. This answer is also wrong.
Answer 3 obviously does not make sense either. The suggested solution would do nothing but override the original text, no matter which website language is used.
The TEXT content object supports the stdWrap property lang. You can use this property to define language-specific values by entering the language key (de for German, for example). This lets you output a translation of a default text value. In this case, “Deutscher Text” if the website language is German.
Without the lang property, however, the TypoScript line would not work. Answer 4 is wrong.
The correct answer is 2.
You discovered a security vulnerability in the TYPO3 Core. What should you do?
Answers
-
Contact Kasper Skårhøj by sending an email to
kasper@typo3.org -
Contact the TYPO3 Security Team by sending an email to
security@typo3.org -
Describe the security vulnerability in detail and publish a blog article about the issue
-
Don’t tell anyone about the vulnerability as this is the best option to keep TYPO3 safe
-
As TYPO3 is open-source, post the vulnerability to the “Full Disclosure” mailing list at seclists.org
Number of correct answers: 1
Explanation
Software security vulnerabilities have always been a hot topic and should be taken very seriously. It is in your own interest to make sure that an application such as TYPO3 remains secure and that possible vulnerabilities are professionally investigated and properly fixed.
If you discover a potential security issue in the TYPO3 Core and you would make it public as suggested in the answers 3 and 5, not only the “good guys” become aware of the vulnerability. A potential hacker could use this information to carry out attacks against TYPO3 sites before a fix becomes available and is published.
Does this mean that the approach in answer 4, not to tell anyone about the vulnerability, is the best solution to keep TYPO3 safe and secure? Of course not! In fact, addressing security issues is important and a high priority for the TYPO3 developers.
Having said that, dealing with the matter from end-to-end requires all stakeholder to follow a strict process. This starts with the person who discovers the security vulnerability. You should report the issue only to the TYPO3 Security Team by sending an email to security@typo3.org. The Security Team follows a policy of least disclosure and explicitly asks the community not to disclose any information about potential security issues in TYPO3 publicly.
Once the TYPO3 Security Team received your report, they start to investigate the issue and they work closely with the developers of the affected component. If the problem has been verified, a fix will be developed, carefully tested, and reviewed. At the same time when a new TYPO3 version that addresses the issue is released, the Security Team also publishes a security advisory.
The first answer is, without doubt, wrong. Kasper is technically no longer involved with the TYPO3 Core Team.
The correct answer is 2.
You discovered a security vulnerability in a third-party TYPO3 extension. What should you do?
Answers
-
Always contact the extension author directly and no-one else
-
Contact the TYPO3 Security Team by sending an email to
security@typo3.org -
Describe the security vulnerability in detail and publish a blog article about the issue
-
Don’t tell anyone about the vulnerability as this is the best option to keep TYPO3 safe
Number of correct answers: 1
Explanation
The previous question in this book dealt with the situation of what to do when you discover a security issue in the TYPO3 Core. This question focuses on TYPO3 extensions which are not part of the TYPO3 Core and were not developed or maintained by the TYPO3 Core Team.
It goes without saying that the answers 3 and 4 are out of question. A responsible disclosure of your findings is of course also important if you discover a security issue in a TYPO3 extension. Should you get in touch with the TYPO3 Security Team or is the extension author the better person to contact?
The best approach in this situation is to inform the TYPO3 Security Team by sending an email to security@typo3.org – even if it is your own extension! When it comes to security in the TYPO3 ecosystem, no matter if the vulnerability affects the TYPO3 Core or any publicly available third-party extension, there is no difference in the incident reporting and handling procedure. The Security Team receives the report, investigates the issue, and – if verified and confirmed – the team gets in touch with the extension author to discuss the next steps. Experienced team members also provide assistance to extension developers to solve the security issue as required.
Extension authors are asked not to release an updated version of their extension. The Security Team coordinates the process and will in most cases publish a security advisory at the same time when a new version of the extension will be released.
The correct answer is 2.
What are the main responsibilities of the TYPO3 Security Team?
Answers
-
Writing and publishing official security advisories
-
Analyzing and repairing compromised TYPO3 websites of TYPO3 Association members with “silver” or “gold” status
-
Fixing vulnerabilities in TYPO3 extensions and publishing new versions to the TYPO3 Extension Repository (TER)
-
Managing the incident handling process when vulnerabilities in the TYPO3 Core are reported
-
Supporting extension developers if vulnerabilities in their extensions were reported and confirmed
-
Storing backups of TYPO3 sites of TYPO3 Association members with “platinum” status for at least 5 days in case their sites get compromised
Number of correct answers: 3
Explanation
The TYPO3 Security Team was founded in 2004 and since then professionally takes care of all security-related issues around TYPO3. I already explained some of the team’s tasks in the last two questions in this book. Thus it should not be too difficult for you to identify the three correct answers to this question.
You can also find the following responsibilities on the official web page of the team:
- Handling of reported security issues for the TYPO3 Core and extensions.
- Coordinating security fixes with the TYPO3 Core team and extension developers
- Publishing security bulletins for TYPO3 Core and extension issues
- Providing assistance for extension developers in resolving security issues
- Providing TYPO3 security guidelines
- Help the TYPO3 server team keeping the typo3.org infrastructure secure
Analyzing and repairing compromised TYPO3 websites of TYPO3 Association members is not the responsibility of the Security Team. Neither do they store backups of TYPO3 sites for them. Although team members are happy to support extension developers, the Security Team does not publish new versions to the TYPO3 Extension Repository (TER) on their behalf.
The correct answers are 1, 4, and 5.
Are backend and frontend passwords stored encrypted in the database?
Answers
-
Yes. In a new and empty installation, backend and frontend passwords are saved in encrypted form by default
-
Yes, both, backend and frontend passwords are saved in encrypted form, but this requires the “Introduction Package”
-
Only the backend passwords are encrypted
-
Only the frontend passwords are encrypted
-
No, both backend and frontend passwords are stored unencrypted in the database because it must be possible to look up a password in plain text, e.g. if a user has forgotten it
Number of correct answers: 1
Explanation
From a technical point of view, the term encryption isn’t 100% accurate when we’re talking about passwords in TYPO3. Wikipedia defines encryption as follows:
In other words, the scrambled data can be converted back into a human-readable plaintext. This is not the case when it comes to passwords. Passwords are hashed and the hash value gets stored in the database. If a user re-enters the supposed password at a later time to log in to the system, TYPO3 generates a hash again and compares the result with the stored hash. At no time is a password restored (converted back from the scrambled data).
Although a hash is neither encryption nor encoding, passwords are often referred to as encrypted in this context – even in the TYPO3 documentation in some places.
Until TYPO3 version 4.6, TYPO3 converted every password for the backend into an MD5 hash and then stored this value in the database. Although MD5 was initially designed to be used as a cryptographic hash function, it has been found to suffer from extensive vulnerabilities and should not be used to protect passwords. For this reason, the extension EXT:saltedpasswords was developed for TYPO3. It adds a “salt”1 which is random data that is used as an additional input to a one-way function that hashes the password to make the hash more secure.
Even though the extension was available as a system extension since TYPO3 version 4.3, it was only activated by default in installations in version 4.6 and newer. Not only does it encrypt the backend passwords, it also ensures that frontend passwords are no longer saved as clear text. All functions of the EXT:saltedpasswords extension were transferred to the TYPO3 Core with version 9.x and are now an integral part of every TYPO3 instance.
Today, TYPO3 goes a step further and supports the PHP Password Hashing API which introduces Argon2i. This cryptographic algorithm is considered as one of the best hashing algorithms today.
The correct answer is 1.
How are passwords of backend users stored in TYPO3 by default?
Answers
-
Passwords are hashed by using the Argon2 hashing mechanism if available on the system
-
Backend passwords are not encrypted or hashed but stored in plain text, so that users can access and change them
-
Backend passwords are stored as MD5 hashes to ensure a best possible compatibility with other systems
-
According to the GPL license, passwords of open-source applications must not be stored in encrypted or hashed form
-
TYPO3 always uses “phpass” (the Portable PHP password hashing framework) for storing user passwords
Number of correct answers: 1
Explanation
You can scratch two of the five possible answers straight away as they claim that TYPO3 can not or must not store user passwords in encrypted or hashed form at all. The arguments for such a solution are, of course, nonsense. Storing passwords in plain text is the worst and most insecure method and definitely not supported by TYPO3. You have to do some complex configuration changes to bypass this restriction but this is nothing you want to do. This makes the answers 2 and 4 wrong.
Answer 3 suggests that passwords are stored as MD5 hashes. Strictly speaking, MD5 is not an encryption algorithm but the result is a simple hash value. This means a checksum of all characters of the password is calculated. The MD5 algorithm is not reversible which means the original password cannot be calculated or deduced by looking at the encrypted password. However, using MD5 hashes as passwords is deemed highly insecure today. The security of MD5 has been severely compromised, can be cracked by brute-force attacks, and suffers from extensive vulnerabilities. The support of MD5 hashed passwords was dropped in TYPO3 version 9.4. Answer 3 is therefore also wrong.
Have a look at the database table be_users. You will see that user passwords are indeed scrambled data. TYPO3 supports the PHP Password Hashing API since version 9.3. This solution means that you can leverage several algorithms, depending on the server’s PHP setup. The API also features Argon2. This password-hashing function summarizes the state-of-the-art in the design of memory-hard functions.
TYPO3 uses Argon2i by default if this function is available. You can also change the hashing function to Argon2id or Bcrypt. As fallback options, Pbkdf2 and phpass are also available but not recommended. Answer 5 is wrong as TYPO3 does not always use “phpass”.
The correct answer is 1.
What is the purpose of the encryption key in TYPO3?
Answers
-
TYPO3 uses the key to calculate the cHash value
-
The key is used to encrypt the passwords of backend users (“salted” password hash)
-
The encryption key is the superadmin password in case the administrator forgets the password to log-in at the backend
-
All pages in the cache are encrypted using the encryption key
-
Extbase uses the encryption key to protect arguments
-
The encryption key is used to encrypt the contents of the database for privacy reasons
Number of correct answers: 2
Explanation
The encryption key is used in several occasions. One example is to determine the file name of the deprecation log. The file name contains some characters, which look random, but in fact they are a shortened form of the encryption key.
It is also used to calculate the cHash, which is an MD5 hash made up of a combination of the GET-parameters transmitted during each request. During caching, for example, this value is saved in the database in addition to the GET-parameters. This ensures that the parameters cannot be manipulated when further requests arrive at the TYPO3 instance. An attacker would need to know the encryption key to successfully inject manipulated data. The first answer is therefore correct.
Besides the fact that extension developers possibly use the encryption key for their own purposes, the key is also used to generate keyed-hash message authentication codes (HMAC), which is used for protecting trusted arguments in Extbase (the programming framework used in TYPO3). Answer 5 is also correct.
Some password hashing functions indeed use a salt as mentioned in answer 2. In cryptography, a salt is random data that is added to a password before a hash value is calculated. This method significantly improves the strengths of the encryption. However, the encryption key is not used as a salt in any password hashing functions implemented in TYPO3. This means that the second answer is wrong.
So is answer 3. The encryption key can not be used as an alternative authentication token for any backend user and TYPO3 does not have a superadmin password.
As pages are not encrypted by default when TYPO3 stores them in caches (or in the database in general), the answers 4 and 6 are also wrong.
The correct answers are 1 and 5.
A backend user expresses suspicion that someone possibly logged-in to the system under their name. What actions should you take?
Answers
-
Check the backend module “System → Log” for logins from suspicious or unusual IP addresses
-
Set a new password for the affected backend user
-
Set new password for all frontend and backend users as a precaution
-
Change the encryption key
-
Report the incident to the TYPO3 Security Team
-
Consider to set up multi-factor authentication (MFA) if not already done
Number of correct answers: 3
Explanation
TYPO3 offers several solutions that can help you to analyze such a situation, possibly confirm that an unauthorized access occurred, and to take actions to implement counter measures. A closer look into the system log is a good start. The System → Log backend module lists all logins, whether successful or not, and from which IP address the login attempt was made. This module also shows which changes were made by which user. This information could be a useful detail if unauthorized backend logins are detected. You can consider the first answer as correct.
The second answer also makes sense. If the user name and password combination is the only authentication mechanism that lets a user log-in to the TYPO3 instance, changing the password locks out a potential malicious user.
Changing all passwords of all frontend and backend users is a little exaggerated. The impact of such an action is clearly too big if your instance contains hundreds, maybe thousands of users. Forcing them to log-in with new credentials is also unnecessary if only one backend user suspects that someone possibly abused the account. Answer 3 is wrong.
Let’s check if the next answer is right or wrong. Changing the encryption key does not impact any backend user authentication mechanisms. At least not in a standard TYPO3 installation. Therefore it would not make sense to change it. Therefore, answer 4 is also wrong.
The TYPO3 Security Team takes security very seriously. However, they can’t really help you if you report that one of your backend users suspects some irregularities with the account. Unless you suspect or discover a security vulnerability in the TYPO3 Core or in any TYPO3 extensions you use, the Security Team would most likely refer to the official TYPO3 Security Guidelines. Answer 5 is not an option either.
This leaves us with answer 6, which must be correct, as the number in brackets indicates that three answers are right. Multi-factor authentication (MFA) for the backend is available in TYPO3 out of the box since version 11.1. As your TCCI exam will possibly contain more specific questions about MFA, I will deal with this topic in separate questions in more detail.
TYPO3 offers another feature in addition to the aforementioned functions that can be useful in a situation such as described in the question. The backend user who is concerned about a possible abuse of his/her account can enable the “Notify me by email when somebody logs in from my account” checkbox in the user settings. This triggers an email every time the user (or someone else) logs-in.
The correct answers are 1, 2, and 6.
Which statements about the “reset password” functionality for backend users are correct?
Answers
-
A third-party extension is required to implement this functionality
-
The function can be disabled for admin users
-
The function can be completely disabled
-
A warning is shown if you enter a user name of a backend user who does not have an email address set
-
The function generates a new password and sends it to the user in an email
-
The link included in the email that TYPO3 sends to the user must be followed within 2 hours
Number of correct answers: 3
Explanation
Users have the option to reset their access password to the TYPO3 backend in case they have forgotten it. This function was introduced into the TYPO3 Core in version 10.4. Since then, no third-party extension is required anymore, which makes the first answer wrong.
In fact, the “reset password” functionality for backend users offers a wide range of security features. Integrators should know them, for example, to be able to provide best possible consultancy to their customers. Let’s go through the answers 2 to 6 step-by-step.
Backend users with administrator rights have extended access privileges. Therefore, it makes sense to add an extra level of security to protect these accounts in particular. Two global configuration options let you disable the function to hardening the security of your system:
$GLOBALS['TYPO3_CONF_VARS']['BE']['passwordResetForAdmins']If you set this option to
false, administrator users can not use the password reset functionality at all. The default, however, istrue, which means that all backend users have access to this function.
$GLOBALS['TYPO3_CONF_VARS']['BE']['passwordReset']By setting this option to
false, you disable the password reset functionality for all backend users. This is possibly a good choice for systems that only use LDAP or OAuth authentication. By default, the password reset functionality is enabled (valuetrue).
The second and third answers are therefore correct: you can disable the function altogether, or disable it for admin users only.
Answer 4 turns out to be complete nonsense if you have used the function before. You have to enter the email address that is stored in your backend user account – not your user name or anything else.
Now, let’s turn to answer 5 which sounds plausible if you want to reset a forgotten password. You enter your email address, click the submit button, and TYPO3 generates a new password for you. Hold on a second! Passwords should never appear in plain text and definitely not sent to users in an email. Answer 5 is also wrong.
In fact, TYPO3 generates a token that is stored in the database. Then, an email is sent to the user. This email contains a link that the user can follow to reset the password. However, the token (and therefore the link) automatically expires after 2 hours. This value is hard-coded in the TYPO3 Core and can not be changed.
The correct answers are 2, 3, and 6.
Two backend users have the same email address stored against the account. What is the impact on the “password reset” function?
Answers
-
The password reset function automatically becomes unavailable for all backend users for security reasons
-
TYPO3 shows a warning message but sends out an email with the link regardless
-
TYPO3 sends out an email to inform the recipient(s) that the function is not available
-
TYPO3 neither shows any warning messages nor sends out an email to the email address
-
This is not possible as TYPO3 prevents storing an email address that another user already uses
Number of correct answers: 1
Explanation
To answer this question correctly, you have to know how the password reset function works. You should also keep in mind that TYPO3 typically aims to implement a function in the best possible and most secure way.
As backend users can edit their own email addresses, the situation described in the question can easily occur. TYPO3 does not stop users from storing an email address that already exists. TYPO3 only checks if the email address is syntactically correct. The last answer is therefore wrong. TYPO3 also does not deactivate the password reset function automatically if two users use the same address. That would be a fatal system design flaw as malicious backend users could trigger this function with a dubious ulterior motive. This makes the first answer also wrong.
But what happens if two or more backend users share the same email address and one of them uses the password reset function?
You should know that TYPO3 does not disclose any information about backend users. This even includes the fact if a backend user exists or not. If you enter an email address that no backend user uses, TYPO3 generates the same message as if the address exists:
If a backend user with the email address “…” exists, an email has been sent to this address. Please check your inbox and spam folder.
If TYPO3 would produce a different message (for example “This email address does not exist!” or “This email address exists twice!”), this would reveal which email addresses are used by backend users and which are not. This means that answer 2 can’t be right either.
This leaves us with two possible answers. So, does TYPO3 send out an email or not? If a user requests a password reset by providing a valid email address but this email address is used more than once, TYPO3 can’t know for which user the token should be created. This sounds like answer 4 is correct from a logical perspective. This answer also highlights that no warning messages are shown which is in line with the statement above: TYPO3 should not disclose any information about backend users.
However, if you think about it more carefully: Suppose you are a backend user who forgot the access password but provided a valid email address. You use the password reset function and no warnings or errors are shown, just a success confirmation. You expect an email with the password reset link in your inbox but even after hours, no email arrives. This would be a pretty bad user experience.
At the same time, TYPO3 can’t generate a token due to the issues outlined above. However, TYPO3 could generate an email to inform the recipient(s) that the function is not available – and in fact, this is exactly the case:
Your email address was used to trigger a password reset. Unfortunately, we are unable to reset your password because your email address “…” is used for multiple backend user accounts at the TYPO3 instance “…”. Please ask your administrator to generate a new password for you.
To keep a long story short: When the password reset function was planned and developed, the TYPO3 Core developers implemented the best possible solution.
The correct answer is 3.
Your TYPO3 site sometimes consumes a significant amount of server resources which results in a DoS (denial of service). What could cause this issue?
Answers
-
The TYPO3 instance exceeds the maximum number of 999 pages
-
The TYPO3 instance contains too many third-party extensions
-
A misconfigured “trusted hosts pattern” often causes such issues
-
Your system accepts
GETrequests with the argument&no_cache=1that bypass frontend caches
Number of correct answers: 1
Explanation
If an application generates significant server load, for example high CPU utilisation or memory consumption, the system possibly becomes too slow to process new requests fast enough. This could result in a situation where too many processes are queued and the server becomes unresponsive. If a remote entity can trigger such an event, for example by flooding the server with too many requests at the same time, or by sending specially crafted requests that produce a high server load, this is called a denial of service attack (DoS).
Several factors can contribute to a server that can’t cope with the number or nature of incoming requests and becomes overwhelmed. Typical reasons are, for example, too less memory or CPU power, too strict resource restrictions, a wrong system design in general, etc. At the same time, several strategies exist that you can implement as counter measures. This includes, for example, to scale up the server (add system resources), distribute the traffic across multiple servers, use proxy servers or a content delivery network (CDN) in front of the server(s) that respond to as many requests as possible instead of routing the requests to the origin server.
Let’s focus on the four possible answers and identify which of them could cause a significant increase of server load. It’s definitely not the number of pages in TYPO3 as the first answer suggests. As an enterprise-level content management system, TYPO3 can contain thousands of pages without impacting the performance or consuming additional system resources. The same applies to third-party extensions. This means that the answers 1 and 2 are wrong.
The “trusted hosts pattern” is indeed a security feature. TYPO3 uses the configured value to verify if the Host-header of the HTTP request matches the configuration. The default configuration is the server name, which is secure and correct in most environments. However, the trusted hosts pattern has nothing to do with the server load or system resources as such. Answer 3 is also wrong.
We already discussed the argument &no_cache=1 in the chapter “Performance”. If requests with this parameter hit the instance, TYPO3 does not try to store or retrieve anything from the cache. The system renders the output for the requested page from scratch and sends the result directly to the client. As this process can be very time and resource hungry, the CPU load and/or memory consumption on the server go up. Therefore, the last answer is absolutely right. Requests with this argument bypass the caches which could result in a denial of service attack. To configure TYPO3 to respect or ignore this parameter, go to Admin Tools → Settings and search for the keyword “disableNoCacheParameter”.
The correct answer is 4.
You would like to edit the content of files such as fileadmin/filename.text directly the “File -> Filelist” module. Why is this not possible by default?
Answers
-
The file extension can only have two characters, e.g.
filename.ts -
You first have to alllow the use of
*.textfiles in the Admin Tools -
You first have to alllow the use of
*.textfiles in the Page TSconfig -
Only images, PDF, and DOCX files can be uploaded through the “File → Filelist” module
Number of correct answers: 1
Explanation
Backend users with appropriate access permissions can manage files and directories stored in the file system by using the backend module File → Filelist. The chapter “Backend Administration” contains several example questions and useful information about this module.
This module also lets backend users edit the content of some file types directly, for example text files, HTML documents, CSS files, etc. Files with a binary file format, however, can’t be edited. These are typically images, compressed files, PDF documents, and more. TYPO3 contains a list of valid file extensions that backend users can edit directly in the Filelist module.
To review and update the list, go to Admin Tools → Settings → Global Configuration and search for the configuration “textfile_ext”. In TYPO3 v6 and v7, the extensions txt, ts, html, htm, css, tmpl, js, sql, xml, csv, and xlf were allowed. The list was extended in TYPO3 v8 by typoscript, yaml, and yml. If you want to allow backend users to create and edit files with the extension text, you have to explicitly add this keyword to the list.
You can only access and edit the list through the Admin Tools (and the files LocalConfiguration.php and AdditionalConfiguration.php), but not through the Page TSconfig as suggested in answer 3. The first and the last answers are also wrong. TYPO3 does not impose a limit on the length of characters for file extensions. The file types that backend users can upload is not limited to only images, PDF, and DOCX files of course.
The correct answer is 2.
It is not possible to create, edit, or upload PHP files in the “File -> Filelist” module by default. Which of the following statements are correct?
Answers
-
To override the default behavior, you have to explicitly allow PHP files through the global option
$GLOBALS['TYPO3_CONF_VARS']['SYS']['textfile_ext'] -
To override the default behavior, you have to explicitly allow PHP files through the global option
$GLOBALS['TYPO3_CONF_VARS']['BE']['fileDenyPattern'] -
To override the default behavior, you have to explicitly allow PHP files by applying the TypoScript option
config.files.disableFileDenyPattern = true -
The only option to create, edit, or upload PHP files is by using a SSH or FTP access
-
This behavior is hard-coded into the TYPO3 Core and can’t be changed for security reasons
Number of correct answers: 2
Explanation
It would be a great security risk if every backend user could store or edit PHP files on the TYPO3 server. Let’s look at an example and assume that a backend user with limited privileges could upload files that have the file extension “.php”. These files are executed on the server by PHP. The user could write malicious code that, for example, elevates the user’s privileges to administrator level. From this point the user could take over the system, change user passwords, read and delete all contents, etc.
To prevent this from happening, TYPO3 features a hard-coded “file deny pattern”. Files that match this pattern are given special treatment, as they may pose a threat to the system if they could be edited arbitrarily. You find the regular expression that represents the pattern in the following file:typo3/sysext/core/Classes/Resource/Security/FileNameValidator.php:
public const DEFAULT_FILE_DENY_PATTERN =
'\\.(php[3-8]?|phpsh|phtml|pht|phar|shtml|cgi)(\\..*)?$|\\.pl$|^\\.htaccess$';
This explains why you can’t create, edit, or upload PHP files in the backend module File → Filelist by default. Having said that, you can configure TYPO3 to bypass this security restriction.
To work with PHP files, you have to update TYPO3’s file deny pattern and remove the file extension “.php” from the regular expression. You can achieve this by overriding the default pattern with the global variable $GLOBALS['TYPO3_CONF_VARS']['BE']['fileDenyPattern']. A second step is required to allow backend users to edit the content of PHP files. You have to add the file extension to the list of text files: $GLOBALS['TYPO3_CONF_VARS']['SYS']['textfile_ext'].
The correct answers are 1 and 2.
You want to restrict session cookies to a certain domain name for security reasons. How can you achieve this?
Answers
-
By configuring an appropriate route under “Site Management → Sites → Static Routes”
-
By adding the domain name to the file
config/security/cookies.yaml -
By configuring the domain name in the following global configuration:
$GLOBALS['TYPO3_CONF_VARS']['SYS']['trustedHostsPattern'] -
By configuring the domain name in the following global configuration:
$GLOBALS['TYPO3_CONF_VARS']['SYS']['cookieDomain']
Number of correct answers: 1
Explanation
TYPO3 only sets session cookies if required. This applies to the TYPO3 backend whenever a user logs in – and to the frontend, if the frontend login function is enabled and configured and/or if an extension explicitly requests a cookie. A typical use case would be a shopping cart.
Static routes, as suggested in the first answer, don’t let you customize any cookie-related configuration, and the path and file suggested in answer 2 does not exist. These two answers are wrong. The configuration trustedHostsPattern exists and is relevant for the security of your TYPO3 instance. However, this setting does not have anything to do with session cookies.
The TYPO3 Core features the following cookie-related configuration by default:
- Backend-related settings
cookieDomain,cookieName, andcookieSameSite.
- Frontend-related settings
cookieDomain,cookieName,cookieSameSite, andlifetime.
Older TYPO3 versions also contained the settings cookieHttpOnly and cookieSecure but these are no longer supported.
The following two settings restrict the session cookies of the frontend to the domain www.example.com, and the backend session cookies to the domain admin.example.com respectively:
$GLOBALS['TYPO3_CONF_VARS']['FE']['cookieDomain'] = 'www.example.com';
$GLOBALS['TYPO3_CONF_VARS']['BE']['cookieDomain'] = 'admin.example.com';
To restrict both, the frontend (FE) and the backend (BE) sessions, to a certain domain, you can use the ['SYS'] configuration as suggested in answer 4:
$GLOBALS['TYPO3_CONF_VARS']['SYS']['cookieDomain'] = '.example.com';
By stating the domain with the leading dot, you can share session cookies across subdomains. More complex configuration options are possibly with regular expressions. This includes multiple domains, for example: /\.(example1|example2)\.com$/.
The correct answer is 4.
What is the purpose of the (shortened) line jquery.integrity in the following TypoScript code?
Answers
-
The
integrityproperty contains the key to decode encrypted data provided by the jQuery library -
The
integrityproperty contains a base64-encoded version of the jQuery library -
The
integrityhash allows browsers to verify if the jQuery library has been retrieved without manipulation -
The
integrityhash reflects the Content Security Policy (CSP) for the jQuery library
Number of correct answers: 1
Explanation
The integrity property is a security feature that allows browsers to detect whether certain files may have been tampered with. The technology behind this feature is called Subresource Integrity (SRI) and aims to harden the security of, for example, CSS and JavaScript files. The corresponding specification was adopted by W3C2 in 2016.
Suppose your TYPO3 website loads the jQuery library from an external server (e.g. a CDN3 to improve performance). In this case you have no control over the said file. In case of compromise of the external server, it’s possible that the library has been infected with malicious code. The manipulated file will then be included in the frontend of your TYPO3 website and loaded by your visitors.
By specifying a cryptographic value (the integrity hash) a browser can check if the file is the expected resource or if the file might have been manipulated. Answer 3 is correct.
The first two answers are wrong, as the integrity property does contain neither a key to decrypt any data nor a base64-encoded version of the resource. The value is a cryptographic hash string.
Answer 4 is also wrong, but worth looking at a little more closely. The integrity hash has nothing to do with the Content Security Policy (CSP). This is a different security feature. The MDN Web Docs describe CSP as follows:
CSP aim to tackle security vulnerabilities that often occur due to the lack of proper encoding of user-submitted content. For example, the response to a client’s request can include an HTTP header with a policy that instructs which externally hosted JavaScript or CSS files are legitimate. Malicious references to resources that an attacker possibly managed to inject into the system will be blocked, because they don’t match the CSP.
CSP is a modern and effective security feature besides the Subresource Integrity (SRI) to harden the security of resources such as CSS and JavaScript files. Certified TYPO3 integrators should be familiar with both technologies.
The correct answer is 3.
Which statements about TYPO3’s multi-factor authentication are correct?
Answers
-
MFA is only available for sites hosted in the US, Canada, Europe, and Australia due to legal restrictions
-
Users need a YubiKey token generator or an Apple iPhone to use MFA
-
User can bypass MFA by following a link that TYPO3 sends to them in an email
-
MFA for the backend is provided by the TYPO3 Core out of the box since version 11
-
TYPO3’s MFA implementation can only be used with Google’s “Chrome” browser
-
TYPO3 developers can build their own MFA “providers” to extend the core functionality
Number of correct answers: 2
Explanation
By default, backend users have to provide their user name and their password to login to the TYPO3 backend. The user authentication workflow can be customized in many ways. TYPO3 offers so-called services for the authentication process. By leveraging the Services API, developers can extend the default workflow, build their own solutions, and control/manipulate the existing services. As part of this functionality, TYPO3 offers multi-factor authentication (MFA) for backend logins.
MFA adds a second4 or multiple factors to the login process. This makes it significantly more difficult for attackers to gain unauthorized access to the backend, as the combination of a user name and a password is not sufficient to authenticate. Another factor, for example a 6-digit code displayed on a mobile device that changes every 30 seconds, is required.
MFA has no legal constraints in regards the geolocation. This makes the first answer wrong. YubiKey hardware really exists, and these devices are indeed used for MFA purposes. Wikipedia has the following information about the YubiKey:
However, the MFA implementation in TYPO3 does not limit its usage to certain devices or manufacturers such as YubiKey (Yubico) or Apple’s iPhone. Also, if users could bypass the MFA protection by just following a link in an email, this would fundamentally weaken the security. The answers 2 and 3 are also wrong.
Although MFA solutions were available in versions before TYPO3 v11, these were provided by third-party extensions and not built into the TYPO3 Core. The current MFA implementation which is available out of the box was introduced in TYPO3 v11 (in TYPO3 version 11.1 released in February 2021 to be precise). This means that answer 4 is correct.
The functionality is browser-independent of course. Users can use all modern browsers such as Mozilla Firefox, Microsoft Edge, Apple Safari, Google Chrome, etc. MFA is not limited to only Chrome browsers as suggested in answer 5.
This automatically makes the last answer right as the question indicates that two answers are correct. The additional authentication factor can be any thing that the user knows (knowledge), has (possession), or is (inherence). The factor can be an additional password, a physical device such as a smartphone, or something unique to the person such as a biometric identification (fingerprint, iris, voice, etc.). TYPO3’s MFA implementation was designed with a maximum of flexibility in mind. It lets TYPO3 developers build their own MFA “providers” to extend the core functionality.
The correct answers are 4 and 6.
Which statements about MFA providers in the TYPO3 Core are correct?
Answers
-
TYPO3 features a time-based one-time password (TOTP) MFA provider by default
-
TYPO3 features a WebAuthn MFA provider by default
-
TYPO3 administrators/integrators can only activate one MFA provider at a time
-
Custom developed MFA providers need to be verified by the TYPO3 Association for security and legal reasons
-
The TYPO3 Association charges a small fee to use custom developed and verified MFA providers
-
You can allow specific MFA providers only for a certain backend user group
Number of correct answers: 2
Explanation
TYPO3 offers full flexibility in regards to the type, method, and technology of the second (or third, or fourth, etc.) factor. This is achieved by so-called MFA providers. As a TYPO3 integrator, you can add MFA providers that feature a specific authentication function to the system. You can also enable and disable single MFA providers.
TYPO3 v11 LTS is shipped with two default MFA providers. The first provider is a time-based one-time password (TOTP) function. Once set up by the backend users, they have to enter a 6-digit code after they entered the correct user name and password combination. The code is displayed on their smartphone5 or on a similar mobile device. Software solutions are also available, for example as an add-on6 for Mozilla Firefox browsers.
The second MFA provider that is shipped with the TYPO3 Core is called “recovery codes”. The first answer is therefore correct and second answer is wrong. TYPO3 administrators/integrators can activate more than one MFA provider at a time. This makes answer 3 wrong.
TYPO3 developers can build their own MFA providers as extensions. This leads straight to answer 4 and answer 5. Developers don’t need to register their custom developed MFA providers nor do site owners need to pay anything to use MFA providers in TYPO3. The TYPO3 Assocation offers neither a registration nor a verification platform nor do they make any money from MFA providers. Both answers are therefore wrong.
TYPO3’s sophisticated user permissions concept lets you configure who can use which MFA providers though. A possible approach to achieve this is by setting up multiple backend user groups. You can enable a specific MFA provider for group “A” and, for example, a different MFA provider for group “B”. This way, you can control which backend user has access to which MFA provider by assigning the users to the appropriate groups.
The correct answers are 1 and 6.
What is the purpose of the MFA provider “recovery codes” in TYPO3?
Answers
-
This provider can be used as a fallback solution to the primary provider
-
Users can enter these codes in the time-based one-time password (TOTP) provider to bypass its original codes
-
The recovery codes are required as an extra level of security to reset the backend user’s password
-
Backend users can use the recovery codes instead of their login passwords
Number of correct answers: 1
Explanation
TYPO3 v11 LTS is shipped with two default MFA providers. Besides the time-based one-time password (TOTP) provider, a “recovery codes” provider exists. This is a special provider that indeed acts as a fallback authentication option in case the user lost (or temporarily does not have access to) the credentials of the primary provider.
Suppose a user has a smartphone that calculates the TOTP codes. The user also activated the “recovery codes” provider which generates a list of codes that consists of 8-digits each. The user stored the list in a safe place. At one day, the user is on the road and left the smartphone in the office. In this situation the user can’t login at the backend as this requires access to the smartphone to look up the always changing TOTP code. However, the TYPO3 backend login form offers a link to the alternative provider as shown in the illustration below.
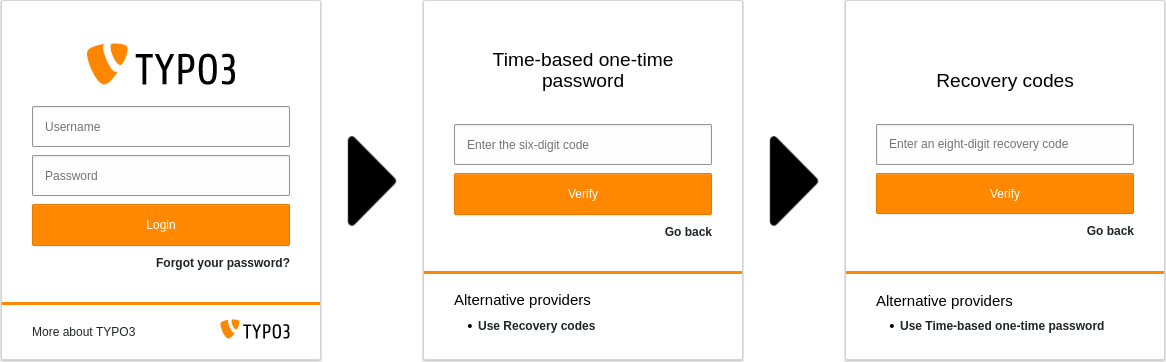
By applying one of the recovery codes from the list, the user can login at the backend without entering a TOTP code. It is important to know that every recovery code can only applied once. When all codes have been used, a new list must be created.
Users can not enter the recovery codes instead of the TOTP codes in the TOTP provider. Both MFA providers are independent from each other. The recovery codes don’t have anything to do with the users’ passwords either, as suggested in the answers 3 and 4. Keep in mind that this is about multi-factor authentication. The user name and password is the first step (the first factor of the authentication process) and can’t be left out.
The correct answer is 1.
Backend user accounts with administrator privileges should be specially secured. How can you achieve this without impacting standard users?
Answers
-
You have to set up MFA for all backend users
-
You can enforce MFA for admin users but not for standard users
-
You can create a list of backend users who are required to use MFA
-
You re-configure all backend users to administrators
Number of correct answers: 1
Explanation
Three of the four answers deal with multi-factor authentication (MFA). The last answer does not and is complete nonsense of course. TYPO3 features a very powerful user permissions concept and you would never grant administrator privileges to all users – except in your local, non-public development instance for example.
The question should read: How can you secure administrator accounts by using MFA? Answer 3 suggests to create a list of backend users who have to use MFA. This sounds plausible but has a significant downside. Whenever you create a new administrator user in the TYPO3 backend, and whenever you remove the administrator privileges from an existing account, you also have to update the list. This is cumbersome manual work and also error-prone. TYPO3 offers a more professional solution.
According to the first answer, you have to set up MFA for all backend users. However, this approach is explicitly excluded by the question text, which says “How can you achieve this without impacting standard users?” If you force all backend users to set up MFA, you clearly impact standard users. Having said that, its good to know that this is indeed an option in TYPO3. Go to Admin Tools → Settings → Global Configuration and search for the term “requireMfa”. This configuration option lets you define which users are required to set up multi-factor authentication:
- all users
- non-admin users
- admin users
- system maintainers
The fifth option does not force any users to use MFA. This is the default configuration.
The correct answer is 2.
A user lost the device that was used to look up the second factor for the backend authentication in a MFA setup. How can you, as an administrator, help the user to regain access to the system?
Answers
-
You have to create a new backend user account for this user
-
You deactivate the user’s MFA provider under “System → Backend Users”
-
You delete all files from the directory
var/cache/data/mfa/ -
You reset the user’s password under “System → Backend Users”
-
You execute the following command on the command line to reset the MFA:
vendor/bin/typo3 mfa:reset <username>
Number of correct answers: 1
Explanation
The second factor in a MFA setup can be anything that the user knows, has, or is. Typical examples are passwords or codes (a knowledge only the user has), a device such as a smartphone that calculates a code (this is a possession that the user has), or a biometric identification such as a fingerprint. Although it’s rather rare that a user loses a finger, loosing or replacing a smartphone or forgetting a password is not unusual. One of the five answers listed above is a possible approach you can take in TYPO3 to help out backend users in case they lost the access to look up the second factor.
Creating a new user account as suggested in the first answer is technically possible to regain access to the system. However, this is not the right approach in such a situation and you, as a certified TYPO3 integrator, should know better. Resetting the user’s password does not solve the problem. The user would have to log in with the new password, but the prompt for the second factor still occurs. Answer 1 and answer 4 are wrong.
A directory var/cache/data/ exists but it does not contain a subdirectory mfa/. Even if such a subdirectory existed, deleting all data would not only impact one user as the directory path is not limited to a specific user name or identifier. The solution suggestion in answer 3 is also wrong.
Which of the two remaining options does TYPO3 support (or does TYPO3 not support)? Can you deactivate a user’s MFA provider through the TYPO3 backend or can you execute a command on the command line? The TYPO3 console (see chapter “TYPO3 Handling”) only support one command that is related to backend users. You can trigger a password reset for a specific backend user based on an email address. The command mfa:reset suggested in answer 5 does not exist.
The correct answer is 2.
Which statements about TYPO3’s privacy stand are correct?
Answers
-
To use the backend of your TYPO3 instance, users have to accept the terms and conditions at typo3.org
-
TYPO3 automatically encrypts all backend user details, including the user name, email address, etc. by default
-
TYPO3’s build-in YouTube video media element uses the domain
www.youtube-nocookie.comby default -
TYPO3 automatically deletes internal system logs after 180 days by default
-
TYPO3 stores IP addresses during user interactions by default
-
The TYPO3 Core does not include any default content elements that initiate requests to the YouTube site
Number of correct answers: 2
Explanation
Both, security and privacy are high priorities in TYPO3. Due to the status as an enterprise-level content management system, TYPO3 cannot afford to consider these topics as unimportant and neglect them. TYPO3 offers everything that is required to comply with privacy laws such as the European GDPR7. Having said that, TYPO3 integrators possibly have to do some manual configuration to meet specific requirements.
Although TYPO3 automatically encrypts8 all backend user passwords, other user details such as user names, real names, residential addresses, email addresses, etc. are not stored encrypted in the database. This means that answer 2 is wrong.
The same is true with answer 4. TYPO3 does not automatically delete any system logs by default. However, backend users with appropriate access privileges to the Scheduler (e.g. administrators) can configure a task that anonymizes stored IP addresses after a certain time period.
This gives you a hint that answer 5 could be right. Many backend user actions are indeed written to the system log (database table sys_log): logins and logouts, page and content updates, creations and deletions of records, etc. Among other columns, the database table contains a column IP which stores the IP address of the backend user. This answer is therefore correct.
The first answer, of course, is wrong. Users don’t need to accept any terms and conditions at typo3.org before they can work with the backend of your TYPO3 instance.
The TYPO3 Core is equipped with a wide range of media elements. You can add a (remote) URL for two of the media types. The first one are videos hosted on YouTube and second one are videos hosted on Vimeo. The YouTube media renderer uses the domain www.youtube-nocookie.com by default. The holding company Google calls this alternative of its standard online video platform the privacy enhanced mode. This makes the answer 3 a correct answer. The last answer, however, is wrong. The “Text & Media” content element initiates a request to the YouTube site if a YouTube URL has been added.
The correct answers are 3 and 5.
Under which circumstances does TYPO3 set browser cookies by default?
Answers
-
TYPO3 always sets a cookie, whenever website visitors interact with the site
-
TYPO3 sets a cookie when frontend users log-in to the system
-
TYPO3 sets a cookie when backend users log-in to the system
-
TYPO3 never sets a cookie by default (for privacy reasons)
Number of correct answers: 2
Explanation
Many websites generate cookies and instruct web browsers to store these data blocks on the users’ computer or device for a certain period of time. Typical use cases are, for example, shopping carts, browsing activity, and details that a user previously entered into form fields. As browsers send the saved data to the website in subsequent requests, the information remains available during a session.
Cookies are often used as a method to authenticate that a user is logged in, which makes the technology essential for a CMS such as TYPO3. However, cookies can also be used to track a user’s activity and browsing history. This tracking may have an impact on the individuals’ privacy. As a consequence, European and other laws require that websites gain consent from users before the sites store non-essential cookies.
Since TYPO3 does not set a cookie in the frontend by default, many TYPO3 sites do not require a cookie compliance plugin to meet the requirements of GDPR. The first answer is therefore wrong. Instances that do not use TYPO3’s frontend login function do not set a cookie in the frontend by default.
However, this does not mean that TYPO3 never sets a cookie as suggested in answer 4. Authentication cookies are required if the TYPO3 site features frontend user logins for example. Third-party extensions possibly also set cookies to function properly. In many cases, a TYPO3 integrator is responsible for checking if a TYPO3 site generates cookies, and to consult with their clients on a technical level.
You should also know that whenever a user logs on to the backend, TYPO3 sets an authentication cookie.
The correct answers are 2 and 3.
What can you recommend to a client to strengthen the privacy of their website visitors in regards to cookies?
Answers
-
Disable all logging functionality of the TYPO3 Core when the site is in production
-
Consider a third-party extension that asks the users for their consent to generate and store cookies
-
Configure the system extension to operate in the cookie-free mode if frontend user logins are required
-
Enable multi-factor authentication (MFA) for backend users
-
Ensure that the cookie attribute “SameSite” is correctly configured
Number of correct answers: 2
Explanation
Note that the question explicitly points out cookies in TYPO3. Although it would indeed strengthen the privacy if you don’t generate any logs, the first answer is wrong. Logs may contain details about users and their activities. If you don’t generate any logs, you certainly improve the privacy of your users. However, this measure has nothing to do with cookies and is also an excessive and unnecessary solution. You can operate TYPO3 with logging turned on and meeting privacy requirements as defined, for example, in the European General Data Protection Regulations (GDPR) at the same time.
The user’s consent to generate and store cookies is typically required in many jurisdictions. Answer 2 sounds plausible straight away. As TYPO3 does not offer a “cookie consent” function out of the box, you should recommend to your client to consider a third-party extension to implement this functionality.
I explained that TYPO3 does not generate cookies by default if the frontend login function is not used. However, TYPO3 sets an authentication cookie if the site features frontend user logins. The answer 3 suggests that you can configure the system extension to operate in a cookie-free mode. This is nonsense and makes this answer wrong, of course.
Several other questions in the chapter of the study guide deals with TYPO3’s multi-factor authentication (MFA). No doubt that this essential feature has a significant positive impact on the security of the system. However, MFA has nothing to do with cookies. If you enable MFA for your backend users and force or encourage them to use it, you’re doing a good job. If your client asks about privacy options related to cookies, and you suggest to use MFA, then this does not show high professionalism. Answer 4 is wrong.
The last answer deals with the attribute SameSite. Cookies are sent by the web application or web server to the client in the Set-Cookie HTTP response header. The SameSite attribute is part of this header and accepts one of the following three values: Lax, Strict, or None. The attribute and its value allow you to declare if the cookie should be restricted to a first-party or same-site context. The Lax value, for example, instructs browsers not to share the cookie with other sites in subsequent requests.
All cookies sent by TYPO3 include the SameSite attribute since version 10.3. Frontend session cookies are set to SameSite=Lax and backend session cookies to SameSite=Strict which is even more restrictive9. The latter also applies to cookies when users work the Install Tool and Workspaces.
The correct answers are 2 and 5.
How can you anonymize IP addresses in the “sys_log” database table?
Answers
-
By executing the console command
bin/typo3 cleanup:anonymizerin the command line -
By removing all records from the database table using SQL (e.g. phpMyAdmin)
-
By executing the Admin Tools function “Maintenance → Flush IP addresses”
-
By setting up the Scheduler task “Anonymize IP addresses in database tables”
-
By installing a third-party extension that updates the records in this database table
Number of correct answers: 1
Explanation
Suppose your client expresses strict requirements in regards to GDPR and some custom privacy rules. These policies make it necessary to anonymize IP addresses that are stored in the database table sys_log after a certain period of time, for example 30 days.
TYPO3 offers this feature by default, so you don’t need a third-party extension. This makes the last answer wrong. As a console command as suggested in the first answer does not exist, you can also scratch the first answer. The second answer is nonsense too. Although you could truncate the whole table, that would not be an anonymization of data but a deletion that could destroy more data than necessary.
The right approach is, of course, the Scheduler task “Anonymize IP addresses in database tables”. This task lets you select the table (e.g. sys_log, index_stat_search, or other tables that are supported by this function), the number of minimum days of the entries that the task should anonymize, and the “mask level”. This level controls how much of the IP addresses should be masked (set to “0”):
- The last byte of IPv4 addresses and the interface ID of IPv6 addresses
(an IPv4 address1.2.3.4would become1.2.3.0) - The last two bytes of IPv4 addresses and the interface ID and SLA of IPv6 addresses
(an IPv4 address1.2.3.4would become1.2.0.0)
Answer 3 is wrong as you don’t find a function Admin Tools → Maintenance → Flush IP addresses in TYPO3.
The correct answer is 4.
Where can you find the official documentation about the TYPO3 project?
Answers
Number of correct answers: 1
Explanation
All these URLs may look suitable at first glance and most of them contain helpful content. However, only two of the websites are official resources and only one site contains the official documentation.
I recommend to review all sites listed above. This serves as helpful preparation for the exam as you will be able to distinguish community from official sites and easily determine the correct answer.
typo3.comThis is the website of the TYPO3 GmbH – the commercial branch founded by the TYPO3 Association. Visitors find information on TYPO3, its capabilities and features, case studies, and paid services. Although this is an official website, it does not contain any official documentation about TYPO3.
t3docs.orgThis domain/website doesn’t exist, and even if it would, it is not an official resource.
docs.typo3.orgThis website contains the official collection of all available documentation for TYPO3 CMS, TYPO3 extensions, tutorials, etc.
typo3.readthedocs.orgRead the Docs is a documentation hosting platform focused on technical documentation. It was created by Eric Holscher, Bobby Grace, and Charles Leifer in 2010. However, a subsection
typo3.readthedocs.orgdoes not exist, and even if it would, it is not an official resource.www.typo3.netIn spite of its name, this is not an official part of the TYPO3 project. A German service provider owns the domain and operates one of the largest forums on TYPO3 in German.
The correct answer is 3.
What is the official documentation about TypoScript?
Answers
-
The “TYPO3 Core API”
-
The “Inside TYPO3” (
doc_core_inside) -
The “TYPO3 Coding Guidelines”
-
The “TSref”
-
The “TypoScript API”
Number of correct answers: 1
Explanation
TypoScript is a complex configuration language, so you are unlikely to know all the numerous objects, options, and properties off by heart. On occasion, you will need to consult a reference that lists and explains all available elements.
The official TypoScript documentation is available in English. This version is maintained by the TYPO3 Documentation Team and the TYPO3 Core developers. They keep the documentation up-to-date if code changes are made.
Now to the answers 1 and 5: TypoScript is a configuration language and not a collection of functions or definitions providing an API (Application Programming Interface). You can eliminate these both answers straight away.
The TYPO3 Coding Guidelines document which programming style developers should use when developing extensions or contributing to the TYPO3 Core. “Inside TYPO3” is in fact a very old core documentation but not longer maintained and also not helpful in regards to TypoScript.
There is only one document that provides the right answer: the TypoScript Template Reference, most often abbreviated as “TSref”.
The correct answer is 4.
Which options does the TYPO3 documentation platform docs.typo3.org provide for extension developers?
Answers
-
The site only covers official TYPO3 Core documentation and does not feature any documentation of extensions
-
If configured by the extension author, the site contains documentation of TYPO3 extensions that the author published through the TYPO3 Extension Repository (TER)
-
Extension authors can publish their documentation on this site by paying an annual fee to the TYPO3 GmbH
-
Writing a documentation for
docs.typo3.orgis a requirement for publishing an extension at the TYPO3 Extension Repository (TER)
Number of correct answers: 1
Explanation
You possibly wonder why such a question, that mainly addresses extension developers, could be part of the TCCI exam for integrators. Extension documentation is as important as the TYPO3 Core documentation and extension developers are encouraged to provide one. TYPO3 integrators should know where to find the documentation of extensions. You should also be familiar with the tools and functions that the TYPO3 documentation platform provides.
TYPO3 extension developers have the option – but are not forced in any way – to write and publish a documentation at docs.typo3.org. The TYPO3 documentation platform does not only feature TYPO3 Core documentation, so the first answer is wrong.
You can also scratch the last answer, as developers can publish TYPO3 extensions through the TYPO3 Extension Repository (TER) without providing a documentation. The same applies vice versa. Extension authors can publish their documentation without publishing the extension in the TER.
If the author of an extension wants to create and publish a documentation for the extension, they should store the files in a folder named Documentation/ that is located in the root of the extension directory. If configured properly, the documentation gets rendered and published at docs.typo3.org. This service is offered free of charge which makes answer 3 also wrong.
You find available documentation of TYPO3 extensions at https://docs.typo3.org/Home/ExtensionManuals.html. The URL schema for third-party extensions reads:
docs.typo3.org/p/<vendor>/<extkey>/<version>/en-us.
The keywords <vendor> represents the vendor name, <extkey> the extension key, and <version> the version number. Version 9.2 of Georg Ringer’s “News System” extension is, for example, available as:
docs.typo3.org/p/georgringer/news/9.2/en-us/
Many TYPO3 extension developers, however, decide to neither publish their extensions in the TER nor to use TYPO3’s documentation platform for their documentation. You also often find instructions in the Git repositories of the extension.
The correct answer is 2.
Where can you find the official documentation about the TYPO3 backend?
Answers
-
In the
typo3/doc/directory -
In the backend module “TYPO3 Manual”
-
In the backend module “Documentation”
-
In the backend module “Admin Tools → Backend Documentation”
-
On the TYPO3 documentation platform
docs.typo3.org
Number of correct answers: 2
Explanation
Various TYPO3 tutorials, books, and eBooks describe and explain the TYPO3 backend in one way or another. You and your backend users find the official documentation in two places.
Answer 4 can’t be correct as not all backend users are administrators and therefore don’t have access to the Admin Tools. Apart from that, a submodule named “Backend Documentation” does not exist by default.
The backend function “Documentation” as suggested in answer 3 existed in older versions of TYPO3 but was removed in TYPO3 v9 (version 9.4 released in September 2018 to be precise). Therefore, this answer is also wrong.
The TYPO3 documentation platform https://docs.typo3.org provides a set of manuals and guides about the TYPO3 backend. This means that answer 5 is of course correct. You can also access a manual by means of the module Help → TYPO3 Manual in the backend. It contains a summary of all context-sensitive help texts (CSH) and always applies to the TYPO3 version you have installed as it is delivered along with the installation.
Technically, the texts are stored in XLF language files, located in the appropriate directories of the system extensions (e.g. typo3/sysext/core/Resources/Private/Language/locallang_csh_be_users.xlf when editing backend user records). A directory typo3/doc/ does not exist though.
The correct answers are 2 and 5.
Where can you activate or deactivated the context-sensitive help (CSH) for TYPO3 backend functions?
Answers
-
The CSH is already activated by default and can not be deactivated
-
This is only possible during the installation process
-
Under “Admin Tools → Settings → CSH”
-
By activating the Show secondary options (palettes) checkbox
-
In the user settings
Number of correct answers: 1
Explanation
The context sensitive help (CSH) is an important aid, especially for newcomers of TYPO3. In all areas equipped with CSH (e.g. almost all form fields and modules) backend users can move the mouse pointer over field labels and the mouse pointer becomes a question mark. A mouse click then opens a short description of the respective field.
In older versions of TYPO3, backend users could deactivate this function in their user settings. However, this function was removed a long time ago which makes answer 5 wrong.
There is hardly a function or option in TYPO3 that can only be set during installation and not changed later. Thus answer 2 is also wrong, as well as answer 3 as you don’t find a corresponding function under Admin Tools → Settings.
Now, only two answers remain and only one of them can be considered as the correct solution: either answer 1 or answer 4. The checkbox Show secondary options (palettes) existed in TYPO3 version 6.2 and earlier but was removed in TYPO3 v7. Apart from that, it had no effect on the CSH.
CSH is enabled in TYPO3 by default and can not be deactivated. CSH helps TYPO3 beginners to find their way through the backend and to understand the meaning of the functions and input fields. A system extension EXT:context_help was available in TYPO3 up to version 8 but removed in TYPO3 v9.
The correct answer is 1.
Where can you get information on new features in a TYPO3 version?
Answers
-
The main directory of the installation contains the “Changelog” file describing the changes
-
Release notes are published for each version on
get.typo3.org -
The “Info” backend module contains an information page on the current version with all new features
-
Subscribe and read the RSS feed on the website
typo3.org/news -
Monitor and read the Wiki pages on the website
news.typo3.org
Number of correct answers: 2
Explanation
When a new release of TYPO3 is published, it is indispensable that you as an integrator obtain extensive information on any new feature. As well as introducing new features, a new release can also contain modifications that could cause incompatibilities when an update is performed.
The website mentioned in answer 4 provides up-to-date news on TYPO3, so of course you can read it to find out whether a new TYPO3 version has been released. News are also available as an RSS feed, so answer 4 is definitely correct.
A news item announcing a new version also contains a link to the release notes of the new TYPO3 version, which you will then find on https://get.typo3.org1. This makes answer 2 correct too.
Detailed information on all the changes were documented in the Changelog file in the main directory of every installation in older versions of TYPO3. However, this is not longer the case due to the fact that the version control system Git stores much more details about every single change anyway.
There is no such a page as suggested in answer 3 nor such a website as stated in answer 5.
The correct answers are 2 and 4.
Where can you find documentation about a TypoScript option?
Answers
-
In the TSref on
docs.typo3.org -
In the Templating Guide on
docs.typo3.org -
In the backend module “System → Template tools”
-
In the backend module “Info → TypoScript Help”
Number of correct answers: 1
Explanation
Even if you work with TypoScript every day, you will occasionally require a reference where you can look up options, properties, data types, and so on. The most obvious correct answer is the “TSref” (the TypoScript Template Reference) as suggested in answer 1. Don’t let the other answers mislead you. This answer is the only correct option.
Although the URL stated in the second answer points to the TYPO3 documentation platform too, a “Template Guide” does not exist as such and the section “Templating” deals with templating with Fluid.
A backend module System → Template tools does not exist. Up until TYPO3 version 6.1 you could find information on TypoScript options in the “TypoScript help” backend module. However, this wasn’t available under the backend module Info and was removed in TYPO3 version 6.2 anyway.
The correct answer is 1.
You need to add the current page ID as an attribute to the HTML <body>-tag. Where do you look up the possible TypoScript configuation options?
Answers
-
In the TypoScript Template Reference (TSref) in the section “Content Objects (cObjects)”
-
In the TypoScript Template Reference (TSref) in the section “Top-level objects → PAGE”
-
In the TypoScript Template Reference (TSref) in the section “Functions”
-
In the TCA Reference in the section “Field Definitions (Columns)”
-
In the TYPO3 Explained documentation in the section “Constants”
-
In the TYPO3 Explained documentation in the section “Database (Doctrine DBAL)”
Number of correct answers: 1
Explanation
An integrator’s typical task often goes like this: you know that you can easily meet a requirement (such as adding the current page ID to the HTML <body>-tag) but you are not quite sure which TypoScript configuration options are available or how to best implement the solution. You can look up the options but if you don’t know where to search, a small task can easily become a time-consuming endeavor.
The question already contains an important hint that helps you to eliminate most of the wrong answers. You can expect that the documentation you’re looking for covers the TypoScript configuration. Let’s look at the last three answer from the bottom up. The section “Database (Doctrine DBAL)” in the TYPO3 Explained documentation does definitely not refer to TypoScript. Although constants also exist in TypoScript, the constants in the TYPO3 Explained documentation have a different purpose and meaning. The TCA Reference has nothing to do with TypoScript either. This means that the answers 4, 5, and 6 are all wrong.
The TypoScript Template Reference (TSref) is the right documentation to look up TypoScript configuation options. What section would you check? This is relatively easy to determine.
The HTML <body>-tag is an output that is generated by the top-level object PAGE. It is neither a function nor a cObject that renders the data in the frontend. If not explicitly disabled, the PAGE object generates the initial HTML document including the <body>-tag.
You find the information on which configuration option you can use to manipulate the <body>-tag in the TypoScript Template Reference (TSref) in the section “Top-level objects → PAGE”. A working solution could, for example, look like the following TypoScript snippet:
The correct answer is 2.
You want to better understand the internal processes of TYPO3. Which resource do you review?
Answers
-
Directly in the TYPO3 source code as there is no documentation available
-
In the “TYPO3 Explained” documentation
-
In the internal TYPO3 help provided by the “About” backend module
-
You have to purchase the eBook “Internal Processes of TYPO3 CMS”
-
In the “Getting Started” documentation
Number of correct answers: 1
Explanation
TYPO3 is a complex system that requires comprehensive documentation. As tasks get more complex and you work closer with the TYPO3 Core, the documentation has to become more specific. The “Getting Started” documentation mentioned in answer 5 is no longer of any use for understanding internal processes in TYPO3 as it only offers a basic overview on how to work with the backend.
A look at the source code as suggested in answer 1 may be helpful but it cannot be the obvious method as meta documentation is available for all the internal processes. In addition, reviewing the PHP source code requires programming knowledge and the TCCI certification focuses on integrators rather than developers.
The eBook suggested in answer 4 does not exist either and you will also not find any information about the internal processes in TYPO3 in the “About” backend module (answer 3).
In fact, the right resource is the “TYPO3 Explained” documentation which you find under “Reference Manuals” on https://docs.typo3.org. This manual contains details that are related to the TYPO3 Core architecture, such as access controls, configuration, versioning and workspaces, etc. It was named “Inside TYPO3 CMS” previously but merged into “TYPO3 Explained” in 2018.
The correct answer is 2.
You want to contact the author of an extension that is installed in your TYPO3 system. What are easy ways to look up any contact details if the extension author provided them?
Answers
-
You can request the details by writing an email to
admin@typo3.org -
In the Extension Manager under “Admin Tools → Extensions” if the TYPO3 instance was set up using Composer
-
In the backend module “Info → Extensions”
-
In the backend module “Help → About TYPO3 CMS”
-
In the TYPO3 Extension Repository (TER) if the extension was published through the TER
Number of correct answers: 2
Explanation
Sometimes, you possibly want to get in touch with an author of a TYPO3 extension. For example to report an issue, make a suggestion, or to ask for help. You should understand that most TYPO3 extensions are not of commercial nature. Many developers create their software voluntarily and unpaid in their spare time. Therefore, in many cases you can’t expect an immediate response or a time-consuming implementation of a new feature for free. Most developers are also happy to receive a “thank you!” message. This could be another reason to contact an author of an extension that is installed in your TYPO3 system.
However, you won’t get the contact details of extension authors if you send an email to the address suggested in the first answer. The team behind this email address is the TYPO3 Server Team which is in charge of the TYPO3 IT infrastructure.
The Extension Manager is the central place that shows information about the extensions that are available in your TYPO3 system. However, the function to access the contact details is a bit hidden. You can click on the version number of any third-party extension to access further details. The information possibly contain the contact details of the author. Unfortunately, this function is only available in TYPO3 systems that were set up by using the classic installation method. The column that shows the extension version does not feature a link in Composer-based installations. Therefore, the second answer is also wrong.
Answer 3 suggests to access the backend module Info followed by executing a function “Extension”. As this function does not exist, this answer is another wrong answer.
You’ll have more luck looking up the contact details of extension authors if you access the backend module Help → About TYPO3 CMS. The circled question mark at the top of the screen visualizes help functions. The page that follows lists all installed system extensions, external libraries, and – at the bottom of the page – extensions and their authors. If the developers provided their details such as names, company names, and/or email addresses, they are listed here.
The TYPO3 Extension Repository (TER) also contains some details about extension authors.
The correct answers are 4 and 5.